How to Make Easy DIY Tin Can Planters — Step-by-Step Guide
Transform ordinary tin cans into charming planters for your favorite herbs or small plants. This screen-free activity is fun for the whole family!
Quick answer
To make easy DIY tin can planters, you need clean tin cans, paint, brushes, and about 20 minutes. Start by cleaning and drying your cans. This beginner-friendly activity has 7 steps and is perfect for families with kids aged 6+.
What you need
Shop on Amazon · As an Amazon Associate we earn from qualifying purchases. Links above are affiliate links — we may earn a commission at no extra cost to you.
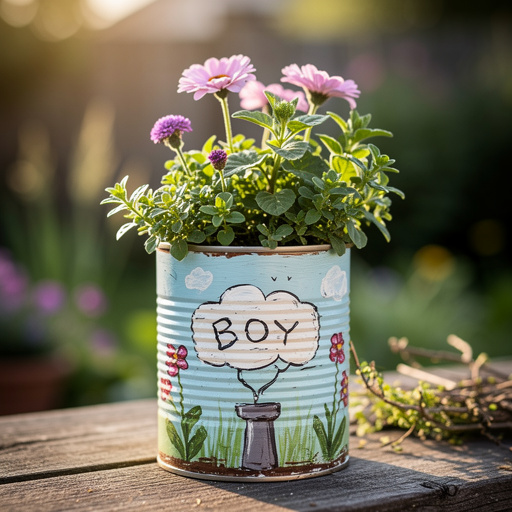
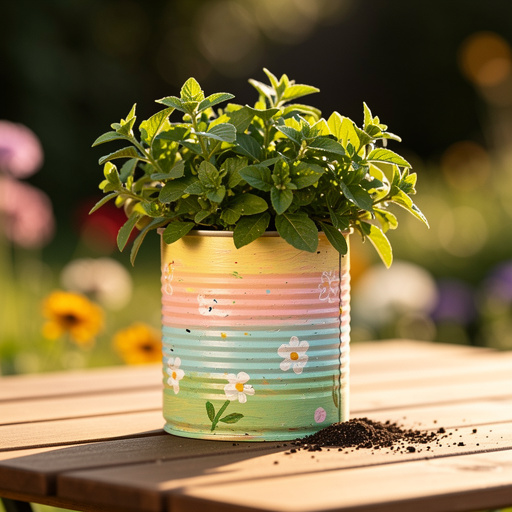
Looking for a simple, budget-friendly way to add a touch of green and handmade charm to your home or garden? These DIY tin can planters are the perfect solution! Repurposing everyday items into beautiful, functional decor is incredibly satisfying, and this project is exceptionally accessible. It’s a fantastic screen-free activity that encourages creativity and can be enjoyed by crafters of all ages, making it an ideal family project. Get ready to transform humble tin cans into vibrant homes for your favorite small plants and herbs!
On this page
Step-by-Step Instructions
- 1
Lay down newspaper or a drop cloth to protect your workspace. This step is crucial for preventing paint from getting onto your furniture or flooring, ensuring a clean crafting environment and easy cleanup.
- 2
Ensure your tin cans are thoroughly washed and dried. Remove any remaining adhesive from labels by soaking in warm, soapy water or using a Goo Gone product, then rinse and dry completely to prevent rust.
- 3
Inspect the rim of each can for any sharp edges. If present, carefully bend them inwards using pliers or the back of a sturdy spoon, always with adult supervision, to create a safe surface for handling.
- 4
If your cans have rust spots or you want extra paint adhesion, lightly sand the exterior surface with fine-grit sandpaper until smooth, then wipe clean with a damp cloth and allow to dry thoroughly. Alternatively, apply a thin coat of primer and let it dry completely.
- 5
Apply a base coat of paint to the outside of each tin can. Use a larger brush for even coverage, ensuring you get into any crevices and cover the entire exterior surface. Let the first coat dry completely before applying a second coat for better coverage and a more opaque finish.
- 6
Once the base coat is dry, begin decorating! Use different colors and brush strokes to create patterns, stripes, polka dots, or simple solid colors. Experiment with techniques like dabbing with a sponge for texture or using painter's tape to create sharp geometric designs.
- 7
Allow the painted cans to dry completely. This may take an hour or more depending on the paint thickness and humidity; ensure the paint is not tacky to the touch before proceeding to the next step.
- 8
If desired, spray a thin, even coat of clear sealant over the dried paint to protect it from moisture and wear. Hold the can about 8-10 inches away and use a sweeping motion, allowing it to dry according to the product instructions before handling.
- 9
Add a small layer of pebbles or gravel to the bottom of each can for drainage. This creates a reservoir for excess water, preventing the soil from becoming waterlogged and protecting your plant's roots from rot.
- 10
Fill the cans with your chosen potting soil, leaving about an inch of space at the top for watering. Gently pat the soil down to remove air pockets.
- 11
Carefully plant your small plants or seeds according to their specific needs, ensuring the roots are covered with soil.
- 12
Water your newly planted tin can planters gently, allowing the excess water to drain into the pebble layer. Place them in a location that receives the appropriate amount of sunlight for your chosen plants.
Tips & Troubleshooting
- 1If your tin cans have any rust spots, you can lightly sand them down before painting or use a rust-inhibiting primer. This will prevent the rust from bleeding through your paint and ensure a smoother, more durable finish.
- 2Get creative with your designs! You can use stencils, sponges, or even draw designs with permanent markers before painting to guide your brushwork and create intricate patterns. Experiment with different color combinations for a unique look.
- 3For a more rustic look, leave some of the original can texture visible or use textured paints. You can also distress the paint by lightly sanding areas after it has dried to reveal the metal underneath, giving it a vintage feel.
- 4Ensure the inside of the can is completely dry before adding soil to prevent rust from forming. Moisture trapped inside can accelerate the rusting process, especially if the paint coverage on the inside is not perfect.
- 5These planters are best for indoor use or in sheltered outdoor areas as prolonged exposure to rain can affect the paint over time. If using outdoors, consider applying multiple coats of sealant for added protection against the elements.
- 6Don't be afraid to mix and match paint finishes, such as matte and gloss, for added visual interest. You can also add embellishments like twine, ribbon, or small decorative charms glued around the rim or body of the can.
- 7When painting, work in thin, even coats rather than one thick coat. This will prevent drips and ensure a smoother, more professional-looking finish that is less prone to chipping.
- 8For a truly professional look, consider using spray paint specifically designed for metal as a primer and base coat. This can offer excellent adhesion and durability, especially if you plan to use them outdoors.
Related Activities You Might Enjoy
Frequently Asked Questions
How do I prepare tin cans for painting?
Thoroughly wash and dry your tin cans, removing all labels and residue. You can soak them in warm, soapy water to loosen stubborn labels, and use a gentle scrub brush or a plastic scraper to remove any remaining adhesive. Ensure there are no sharp edges on the rim; carefully bend them inwards if needed using pliers or the back of a spoon for safety. A clean, smooth, and dry surface is key for paint adhesion, so take your time with this preparatory step.
Can I use these planters outdoors?
Yes, but with caution and some extra steps for durability. For best results, use a water-based sealant spray to protect the paint from moisture and UV rays. They are ideal for sheltered outdoor spaces like covered porches, patios, or balconies, as prolonged direct rain and harsh sunlight might degrade the paint over time. Consider applying multiple thin coats of sealant for maximum protection, and be prepared to touch them up periodically if they are exposed to the elements.
What kind of paint is best for tin cans?
Acrylic craft paints work wonderfully for tin cans due to their versatility, ease of use, and wide color selection. They are water-based, making cleanup simple with soap and water, and dry relatively quickly. For best results and longevity, ensure you apply a good base coat, and consider using a primer first, especially if you're painting over a dark color or if the can has a slick surface. A final sealant spray will further protect the painted finish.
How do I ensure good drainage in these planters?
Tin cans don't naturally have drainage holes, which can lead to root rot. To ensure good drainage, add a layer of small pebbles, gravel, or even broken pottery shards at the bottom of each can before adding soil. This creates a reservoir for excess water to collect, keeping it away from the plant's roots. When watering, be mindful not to overwater, as the water has nowhere to escape except into this drainage layer.
What plants are suitable for tin can planters?
These planters are perfect for small plants that don't require extensive root systems. Excellent choices include herbs like basil, mint, parsley, chives, and thyme. Small succulents, cacti, and air plants also thrive in these containers. For flowering options, consider annuals like pansies, marigolds, petunias, or even small varieties of strawberries. Starting seeds for various vegetables or flowers is also a great use for these charming DIY planters.
How can I create different patterns or designs on my tin can planters?
The possibilities for designs are endless! For geometric patterns, use painter's tape to mask off sections before painting, creating crisp lines. Stencils are fantastic for repeating motifs like polka dots, stars, or floral designs. You can also use sponges to create textured effects by dabbing paint on, or even use fine-tipped permanent markers to draw intricate details before or after painting. For a more abstract look, try dripping paint or using a dry brush technique.
What if my tin cans have rust on them?
Don't let rust deter you! For minor rust spots, you can lightly sand them down with fine-grit sandpaper until the surface is smooth, then wipe clean and dry thoroughly. For more significant rust, it's best to use a rust-inhibiting primer specifically designed for metal before applying your base coat of acrylic paint. This will prevent the rust from spreading and ensure your painted finish lasts longer.
What Next?
With your charming tin can planters complete, you’re ready to bring a touch of handmade beauty into your living space. Arrange them on a windowsill to catch the sunlight, group them on a patio table for a pop of color, or gift them to friends and family. For a cohesive look, consider painting a set in complementary colors or a repeating pattern. If you enjoyed this project, explore other upcycling ideas like decorating glass jars or transforming old picture frames. Store any leftover paint and brushes in a cool, dry place, and your beautiful planters will bring joy for seasons to come.
Free: 10 Paper Crafts Anyone Can Make in 5 Minutes
Get our beginner guide + new craft ideas weekly.
No spam. Unsubscribe anytime.
Did you complete this activity?
Related
You might also like
Napkin Art Glassware Makeover
Mod Podge Painted Terra Cotta Pots
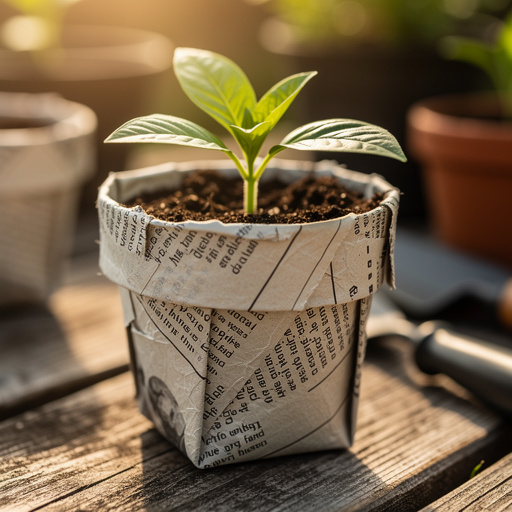
Newspaper Pot Seedling Starters

DIY Jigsaw Puzzle from Cardboard
Shrink Plastic Plant Markers