Sculptural Fabric Wall Art — Your Questions Answered (Step-by-Step Guide)
Transform fabric scraps into a unique, modern wall art piece. This detailed tutorial guides you through creating beautiful textures and patterns for your home.
Quick answer
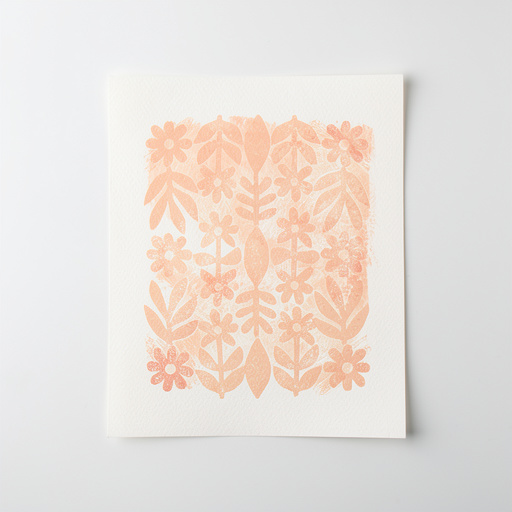
To make Sculptural Fabric Wall Art, you need a canvas or board, fabric scraps, yarn, white craft glue, and acrylic paints. This project takes about 3-4 hours, plus drying time, and is perfect for adding a personalized, textured touch to any room.
What you need
Shop on Amazon · As an Amazon Associate we earn from qualifying purchases. Links above are affiliate links — we may earn a commission at no extra cost to you.
Welcome to the most comprehensive guide available for creating stunning DIY wall art! If you're looking to add a unique, textured, and budget-friendly touch to your home decor, you've come to the right place. This article will walk you through crafting beautiful Sculptural Fabric Wall Art, answering every question you might have along the way. We'll cover detailed step-by-step instructions, material sourcing, troubleshooting, and tips for making this project your own. Get ready to unleash your inner artist!
On this page
Step-by-Step Instructions
- 1
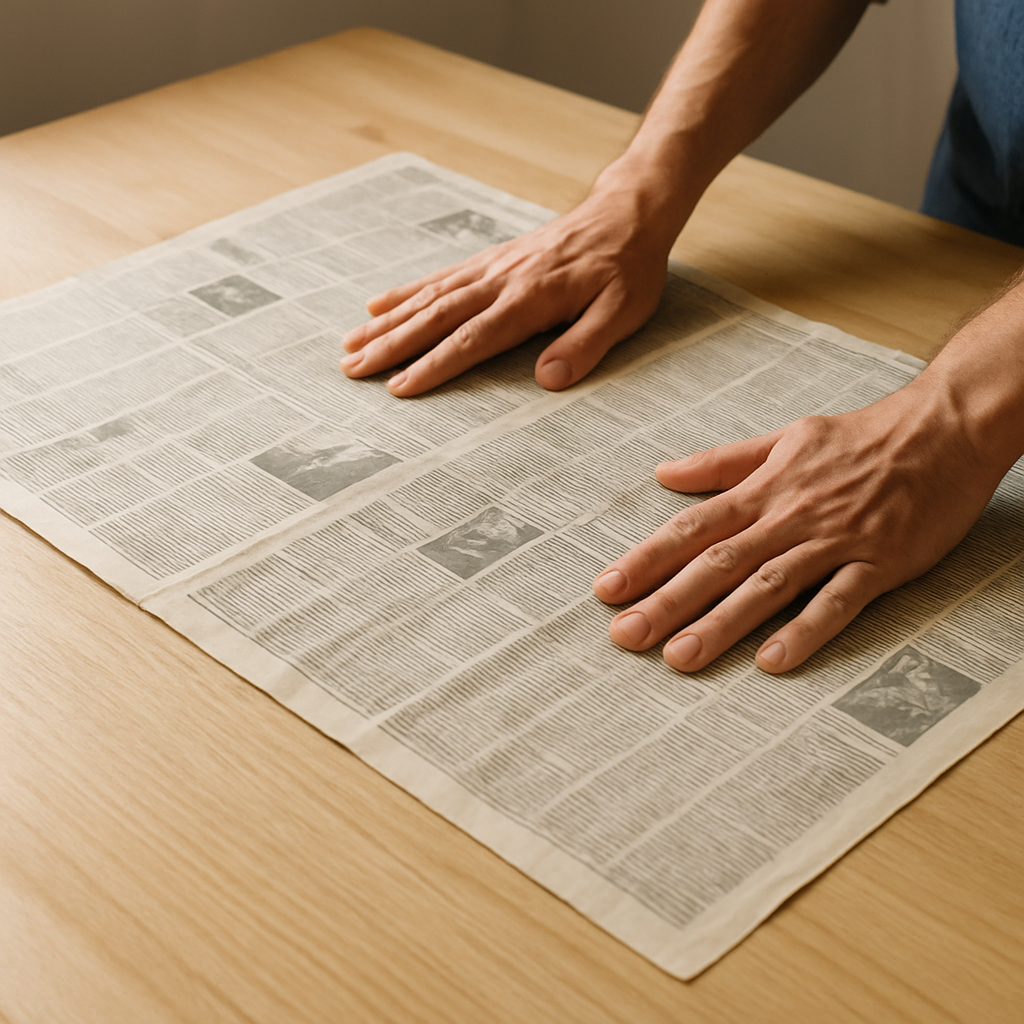
**1. Prepare Your Workspace:** Lay down old newspaper or a drop cloth over your work surface to protect it from glue and paint. Gather all your materials within easy reach. Ensure good ventilation, especially when painting.
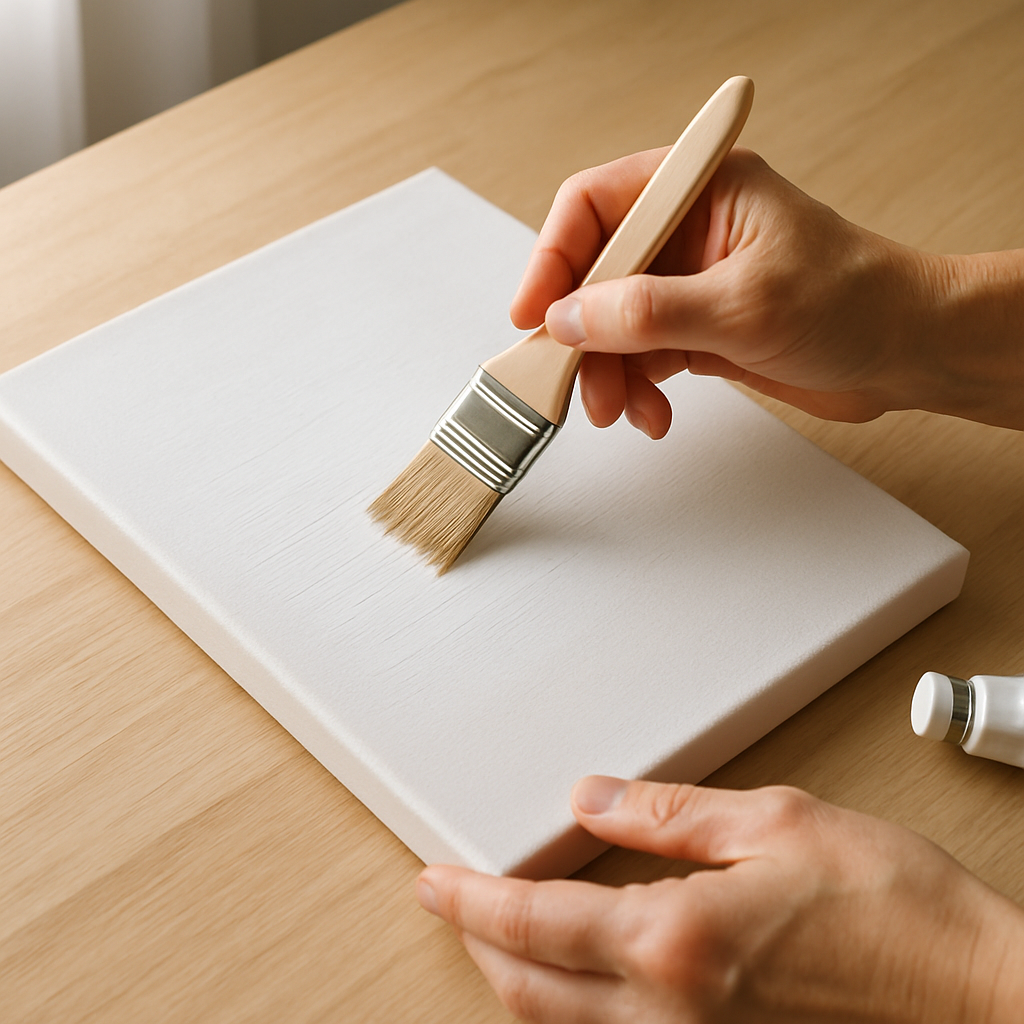
- 2
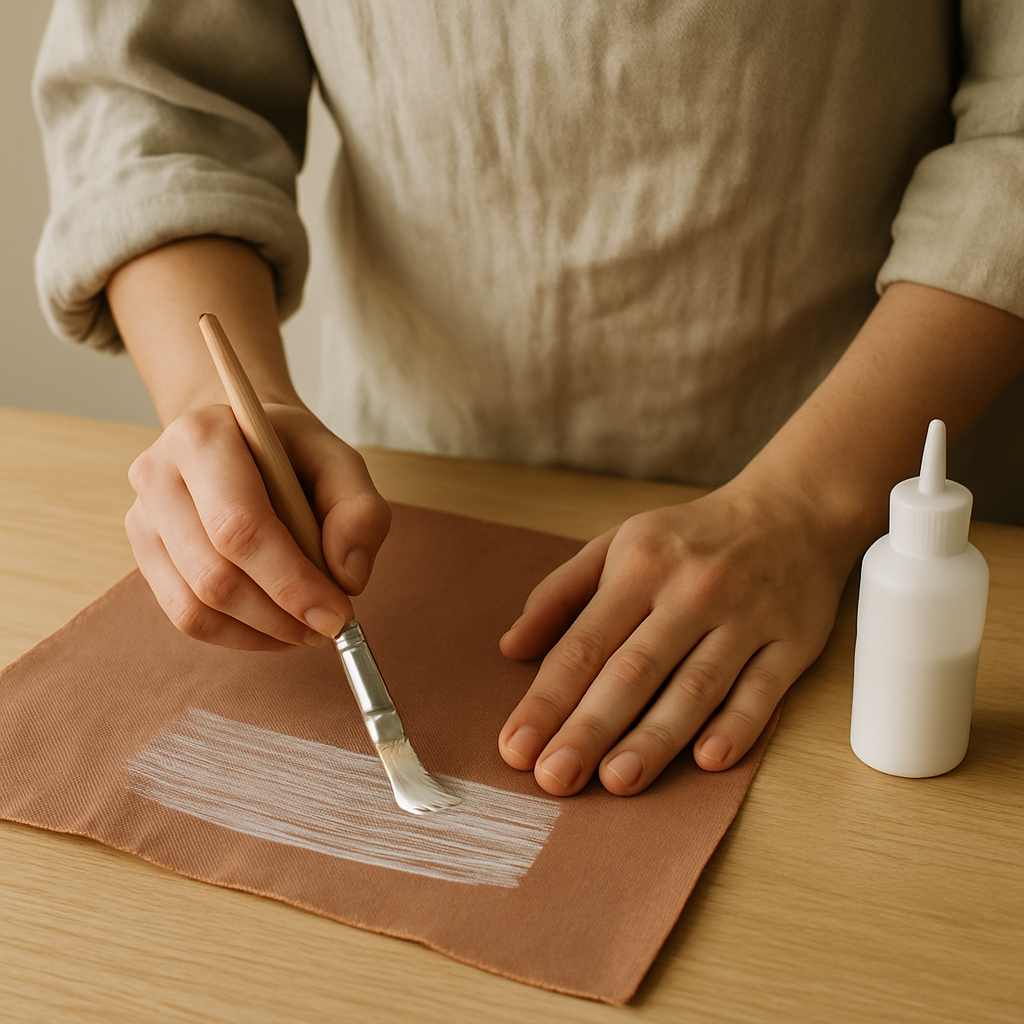
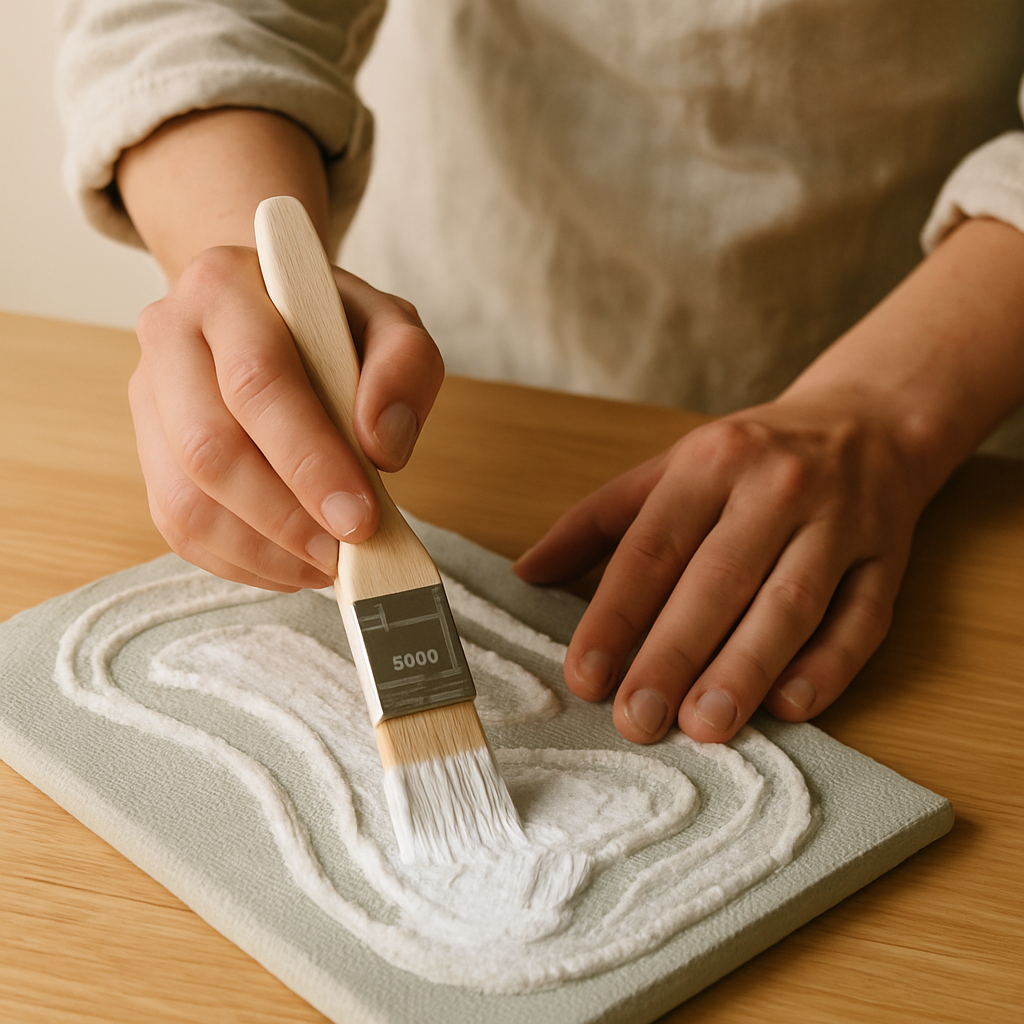
**2. Choose Your Base:** If using a raw canvas, apply one thin, even coat of white acrylic paint or gesso as a primer using your 2.5cm flat brush. If using foam board, ensure it's clean and dry. Let it dry for at least 30 minutes.
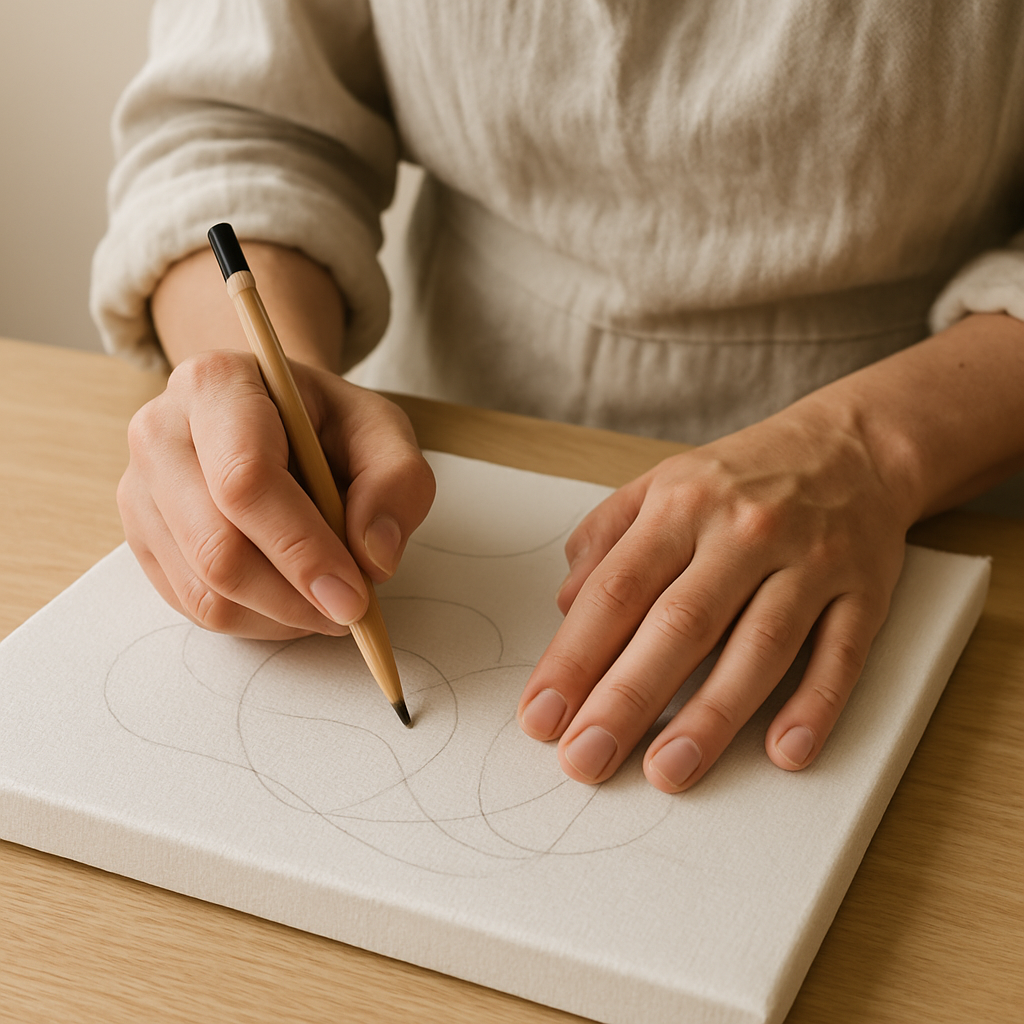
- 3
**3. Sketch Your Design:** Using a pencil, lightly sketch a basic abstract design onto your canvas or board. This could be geometric shapes, organic curves, or a grid. Don't press too hard; these lines are just guides.
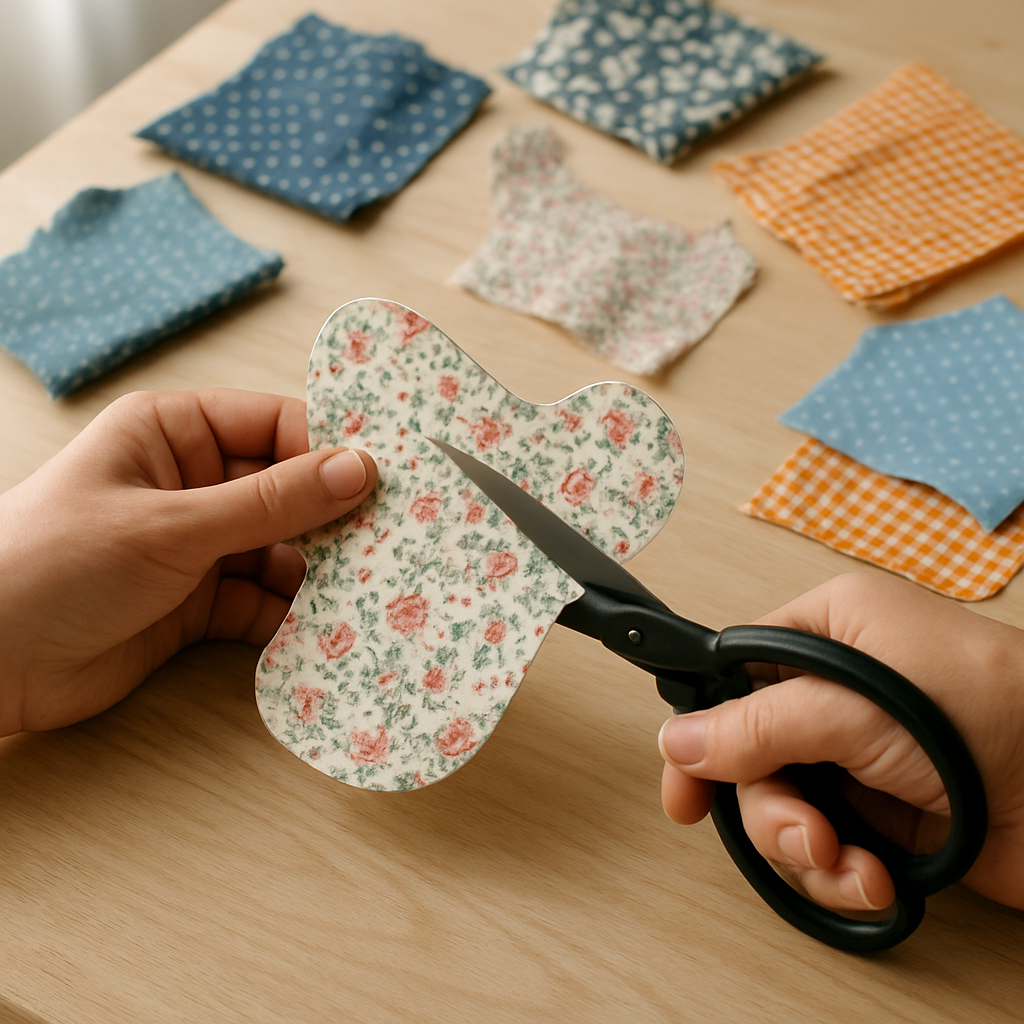
- 4
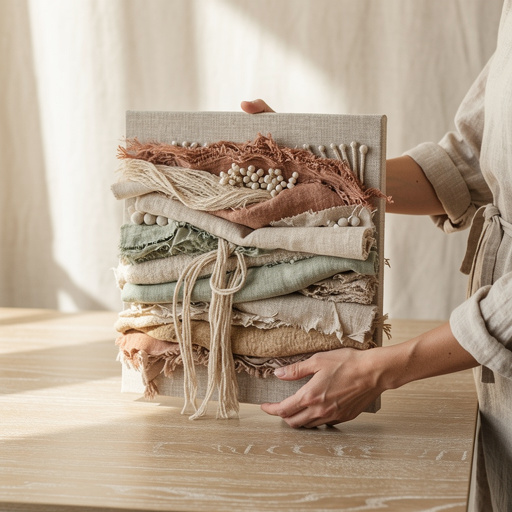
**4. Cut Fabric Pieces:** Select your fabric scraps and use your fabric scissors to cut them into various shapes and sizes that fit your sketched design. Aim for a mix of textures and patterns. For example, cut 5-7 large shapes (5-10cm wide) and 10-15 smaller accent pieces (1-3cm wide).
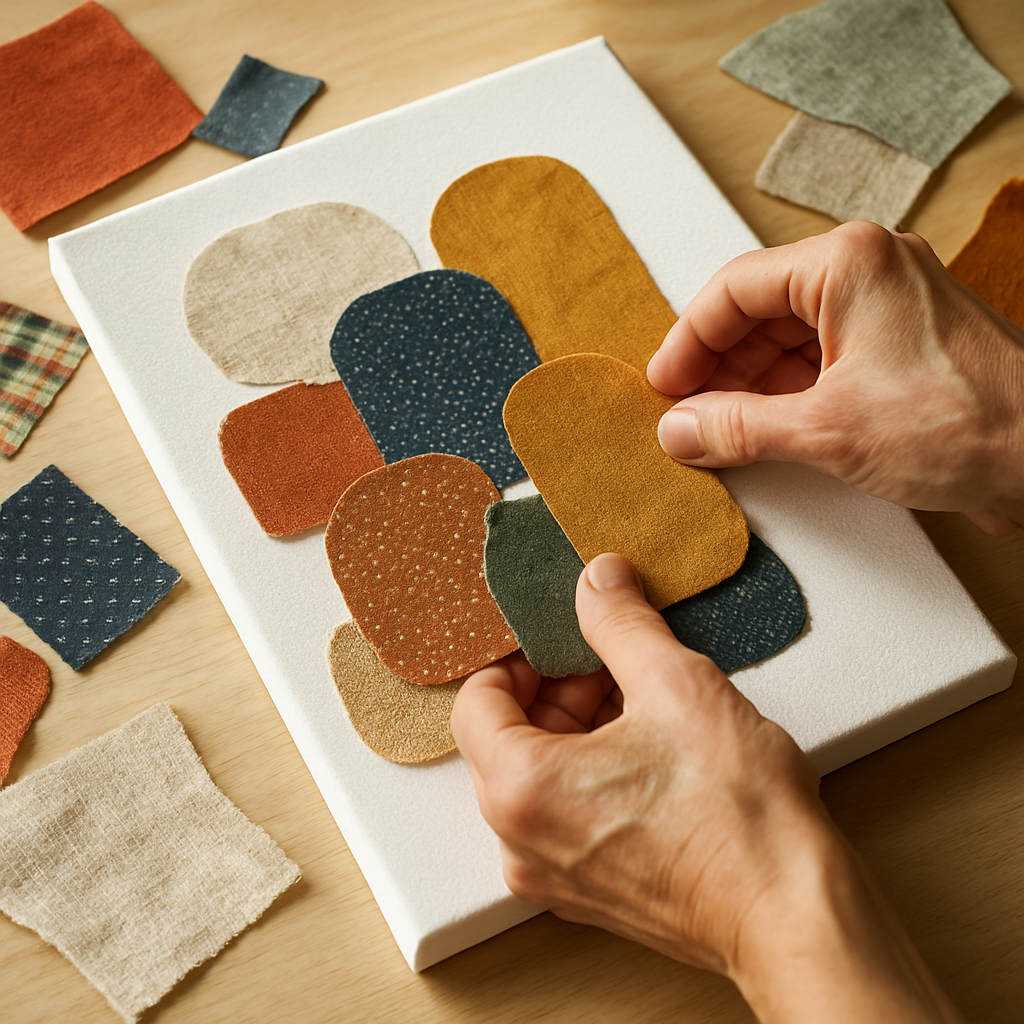
- 5
**5. Plan Your Layout (Dry Run):** Before gluing, arrange your cut fabric pieces on the canvas according to your sketch. Experiment with layering and overlapping to create visual interest. Take a photo with your phone if you like the arrangement, so you can refer back to it.
- 6
**6. Apply First Layer of Fabric:** Starting with the largest pieces, apply a generous, even layer of white craft glue to the back of each fabric piece using a small paintbrush or directly from the bottle. Press each piece firmly onto the canvas, smoothing out any air bubbles with your fingers.
- 7
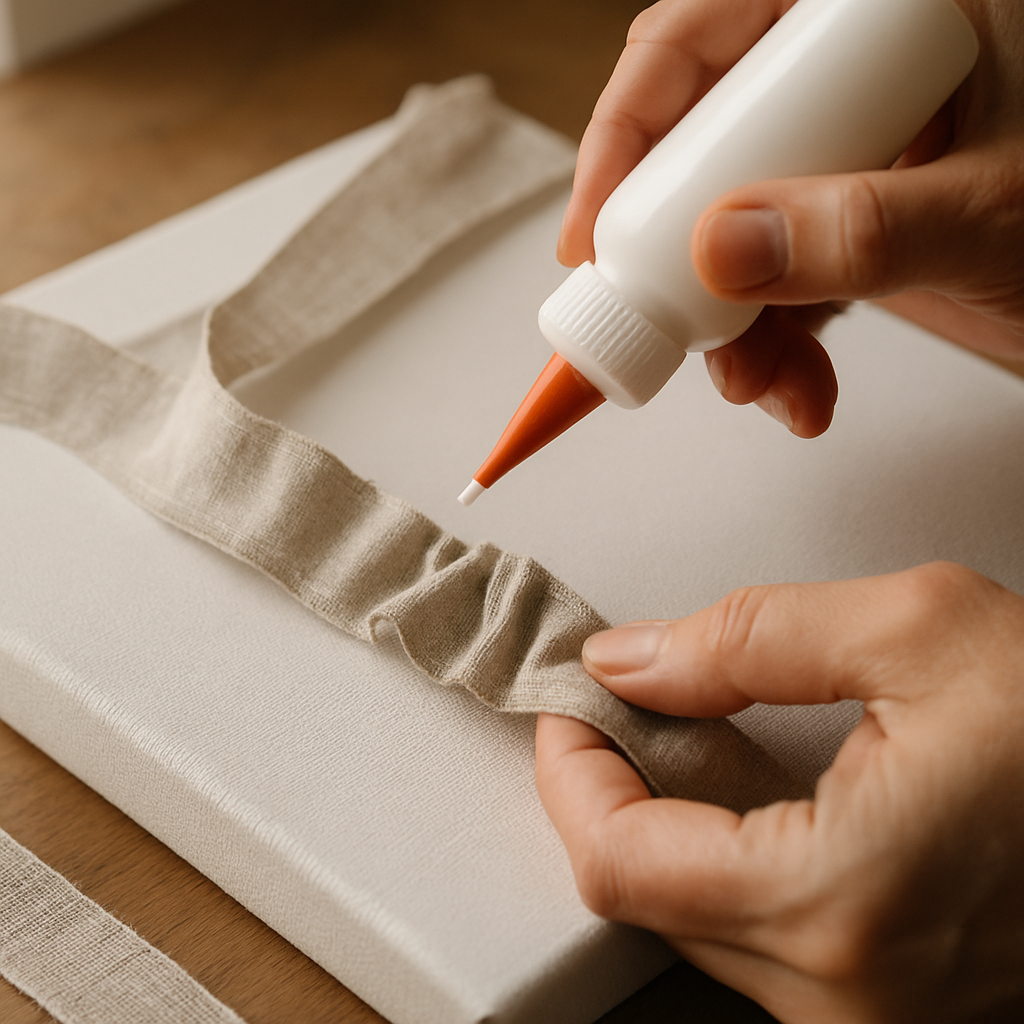
**7. Create Sculptural Folds:** For some fabric pieces, instead of laying them flat, try folding, pleating, or rolling them before gluing. For example, fold a 2cm wide strip of fabric in half lengthwise, then pleat it every 1cm to create a ruffled texture, securing the folds with glue as you attach it.
- 8
**8. Incorporate Yarn/Twine:** Cut lengths of yarn or twine (e.g., 10-20cm long). Apply a thin line of glue directly onto the canvas where you want the yarn to go, then press the yarn into the glue. You can create straight lines, spirals, or even small knots for added dimension.

- 9
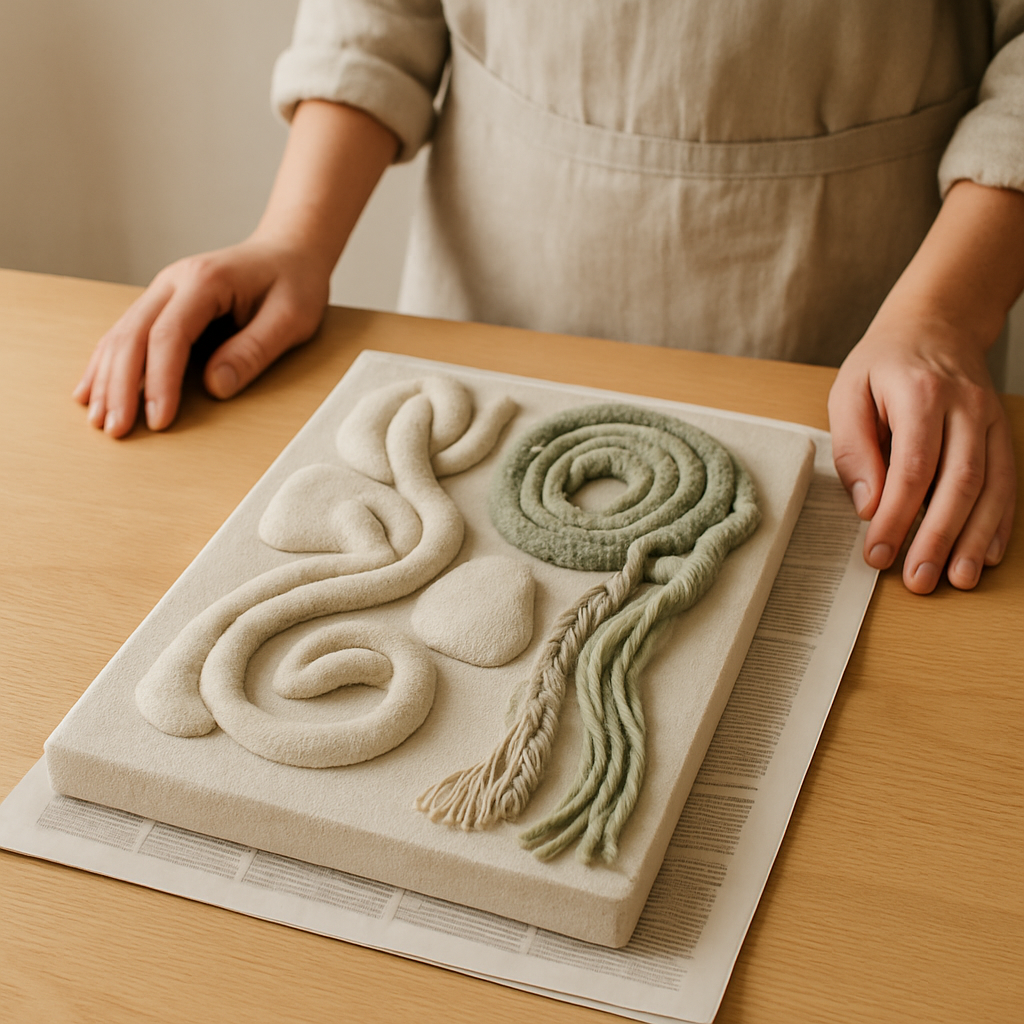
**9. Build Up Layers:** Continue adding smaller fabric pieces and yarn, building up layers and textures. Overlap elements slightly to create depth. Ensure every piece has glue underneath it. If a piece doesn't stick, lift it gently, apply more glue, and press again.

- 10
**10. Allow to Dry Completely:** This is crucial! Let your entire glued artwork dry flat for a minimum of 6-8 hours, or preferably overnight. If you rush this step, the paint may react poorly with wet glue, causing bubbling or uneven coverage.
- 11
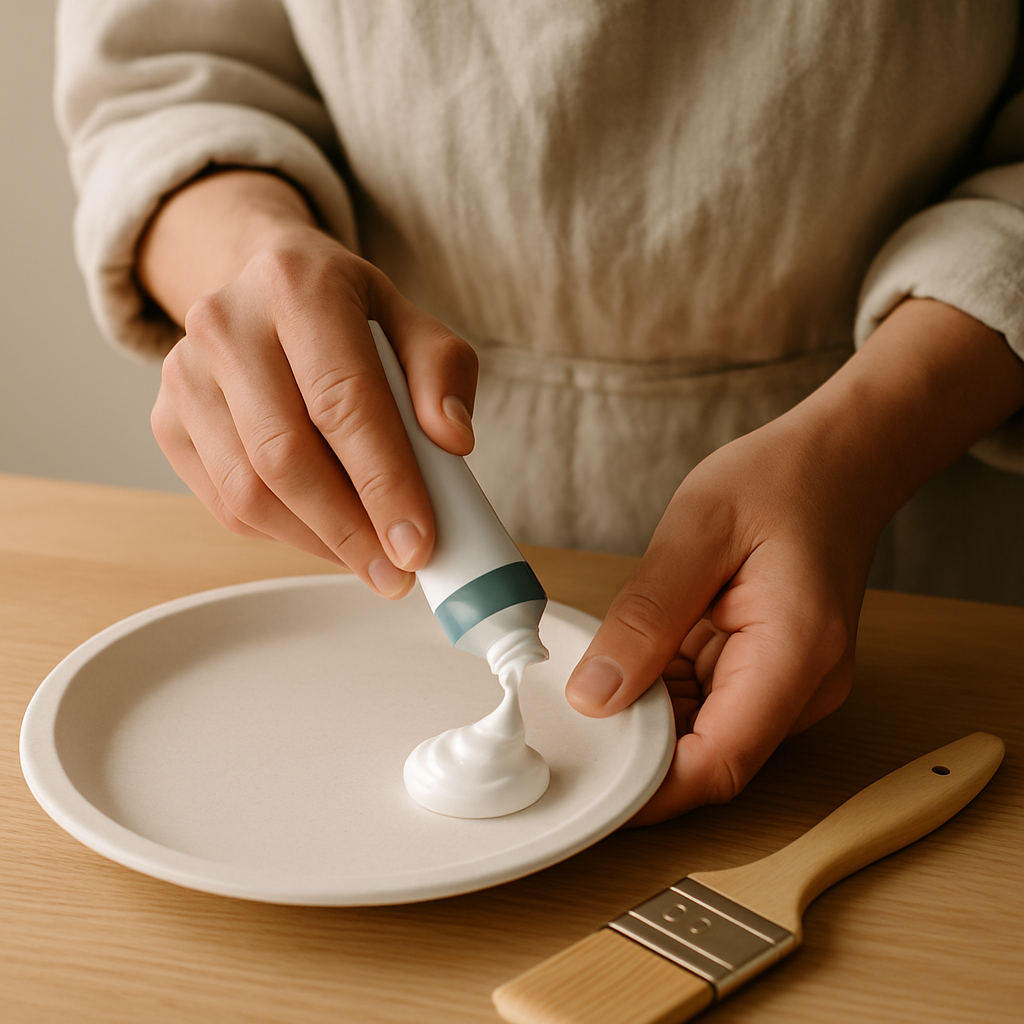
**11. Prepare Base Paint:** On your mixing palette, squeeze out a generous amount of your chosen base acrylic paint (e.g., Titanium White or Warm Grey). If you want a slightly thinner consistency, add a few drops of water and mix well with your flat brush.
- 12
**12. Apply Base Coat:** Using your 2.5cm flat brush, apply a thick, even coat of your base paint over the entire textured surface, ensuring the paint gets into all the crevices and covers all the fabric and yarn. Don't be afraid to use a dabbing motion to push paint into textures.
- 13
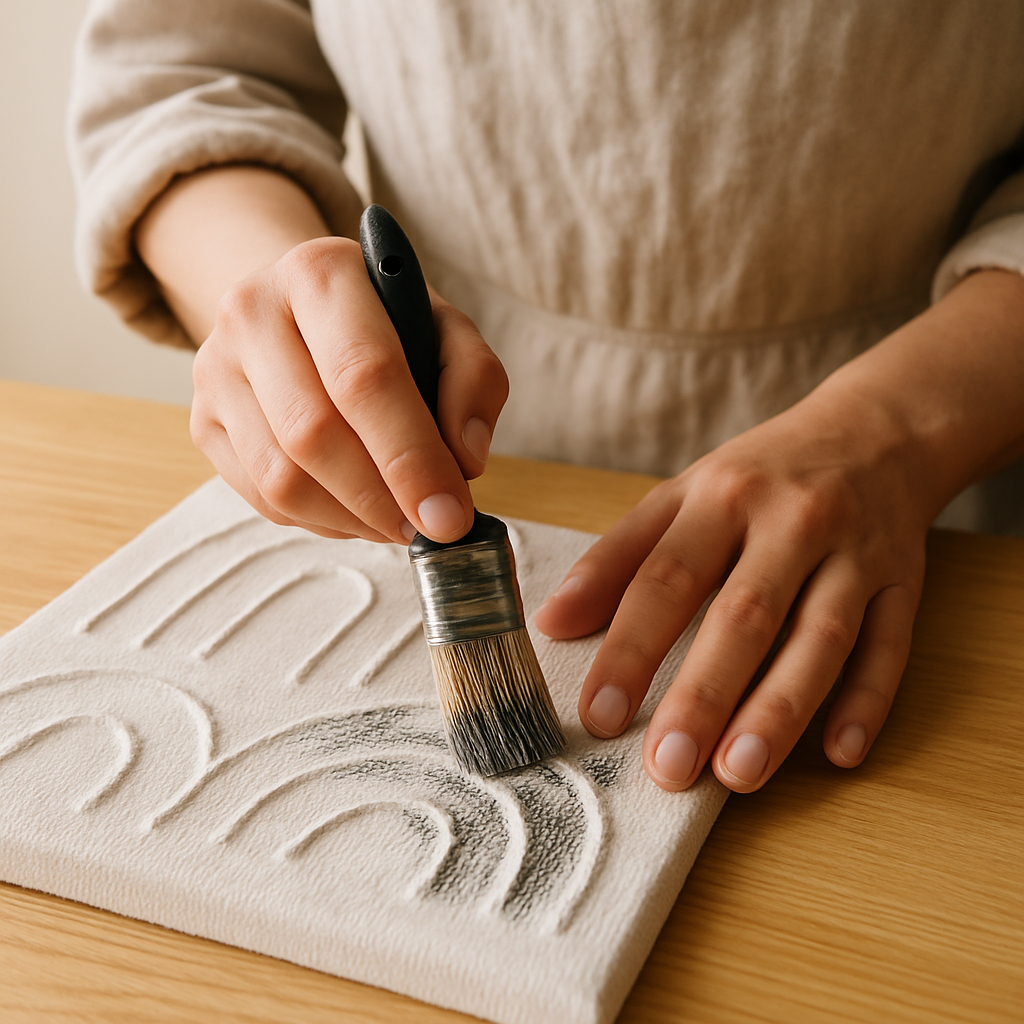
**13. Add Accent Colors (Optional):** While the base coat is still slightly wet (or after it's dry for a layered look), squeeze out your accent colors. Use your fine detail brush or a dry-brush technique with the flat brush to lightly brush contrasting colors over raised areas, highlighting the textures. For example, use a dry brush with black paint to lightly graze the peaks of the texture.
- 14
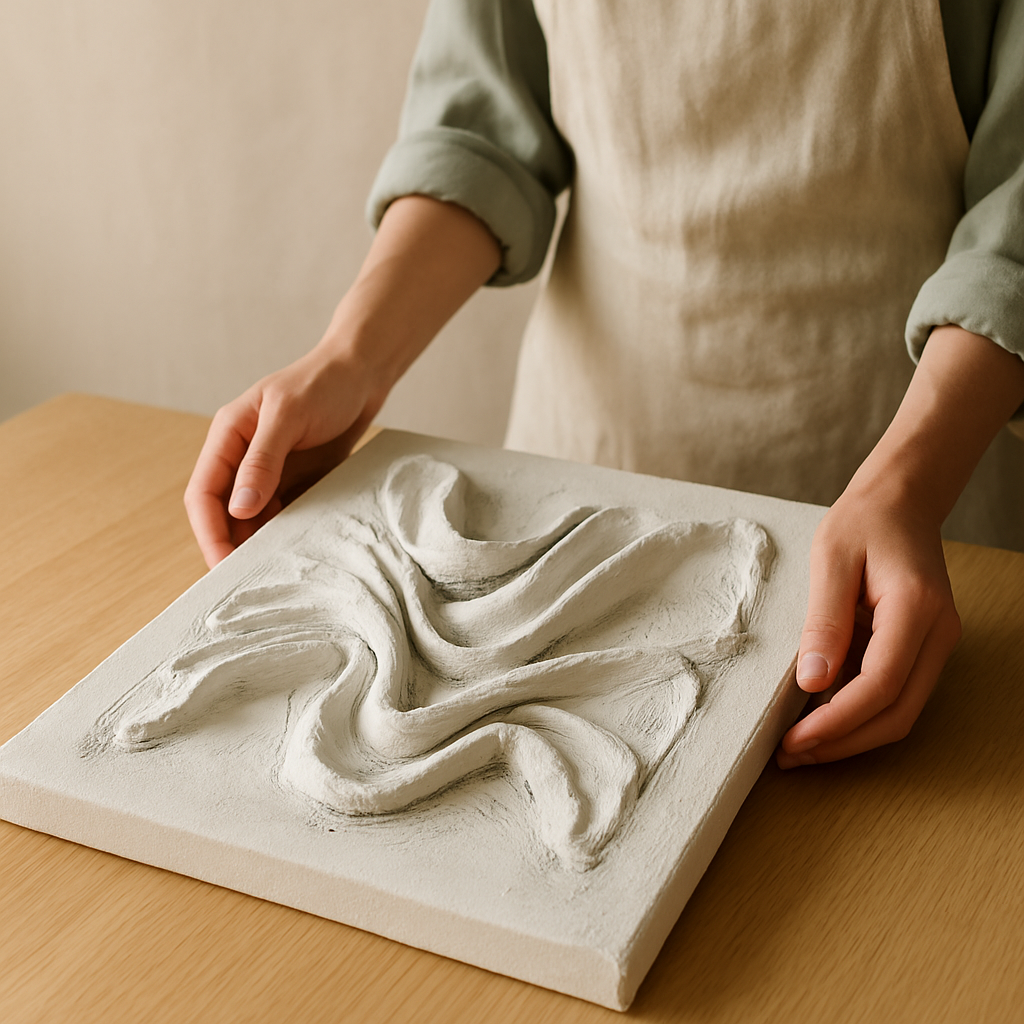
**14. Dry and Refine:** Allow the paint to dry for at least 2-3 hours. Once dry, inspect your piece. If any areas need more coverage or definition, apply additional paint with your detail brush. You can also use a small amount of white paint to "clean up" edges or add highlights.
- 15
**15. Seal Your Artwork (Optional):** For added durability and a uniform finish, apply one or two thin coats of clear matte or gloss acrylic sealer spray (follow product instructions for ventilation and drying times). Hold the can 20-30cm away and spray in even, sweeping motions.
- 16
**16. Prepare for Hanging:** If using a stretched canvas, it usually comes with a hanging wire or sawtooth hanger attached. If using foam board, you can attach self-adhesive picture hangers to the back, ensuring they are centered and level, about 5cm from the top edge.
Tips & Troubleshooting
- 1**1. Scaling Your Project:** To make a smaller piece larger, consider creating a triptych (three panels) or a gallery wall featuring multiple smaller fabric art pieces in complementary colors. For a smaller piece, use a 15x15cm mini canvas and fewer, smaller fabric scraps, focusing on one central textured element.
- 2**2. Personalizing Color Palettes:** Before painting, test your chosen acrylic colors on a scrap piece of fabric or paper. For a modern minimalist look, stick to neutrals (white, grey, beige, black). For a bohemian vibe, incorporate earthy tones like terracotta, olive green, or mustard yellow.
- 3**3. Troubleshooting Loose Fabric:** If a fabric piece lifts after drying, don't panic! Apply a small amount of glue directly underneath the loose edge with a fine brush or toothpick, press it down firmly, and hold it in place for 30 seconds. You can even use a clothespin to secure it while it dries.
- 4**4. Age Adaptations for Younger Crafters:** For children under 8, pre-cut a variety of fabric shapes and yarn lengths. Let them focus on the gluing and arranging steps (steps 5-9). An adult should handle the painting (steps 11-14) or supervise closely, perhaps using larger brushes and fewer colors.
- 5**5. Achieving Different Textures:** Experiment with how you manipulate the fabric. Scrunching fabric before gluing creates a crinkled texture. Rolling thin strips tightly forms rope-like elements. Layering sheer fabrics over opaque ones adds subtle depth. Don't be afraid to try unconventional materials like thin cardboard pieces or dried leaves (sealed first).
- 6**6. Budget-Friendly Alternatives:** Instead of a stretched canvas, use sturdy cardboard from a delivery box or a piece of foam board. Repurpose old t-shirts, jeans, or bedsheets for fabric scraps. You can even use diluted school glue if craft glue isn't available, though drying time might be longer.
- 7**7. Secure Hanging for Various Walls:** For drywall, use a simple picture hook and nail. For plaster walls, you might need a plaster hook or a drill with a masonry bit and wall anchor. For concrete or brick, a drill, masonry bit, and appropriate wall anchors are essential. Always ensure your hanger can support the weight of your finished art.
Related Activities You Might Enjoy
Frequently Asked Questions
My fabric pieces aren't sticking well. What am I doing wrong?
The most common reason for fabric not sticking is insufficient glue or not pressing firmly enough. Ensure you apply a generous, even layer of white craft glue to the entire back surface of each fabric piece, especially the edges. After placing it, press down firmly with your fingers for 10-15 seconds, smoothing from the center outwards to remove air bubbles. If the fabric is very thick or textured, you might need a slightly thicker layer of glue. Also, make sure your canvas or board surface is clean and dry before starting.
How can I make my wall art look more "professional" or high-end?
To elevate your piece, focus on a cohesive color palette (e.g., monochromatic or analogous colors). Pay attention to composition, using the rule of thirds or creating a clear focal point. Use a variety of fabric textures but keep the overall design balanced. A final matte or gloss acrylic sealer can give it a polished, finished look. Consider framing your finished piece in a simple floating frame for an even more gallery-worthy presentation, instantly boosting its perceived value and integrating it seamlessly into your existing decor.
Can I use different types of glue for this project?
White craft glue (PVA glue) is highly recommended as it dries clear, is non-toxic, and provides a strong bond for fabric and yarn. It also accepts paint well, creating a uniform surface. Hot glue can be used for quick adhesion of larger, stiffer pieces, but it creates a raised, visible line and can be difficult to paint over smoothly, often showing through the paint. Fabric glue might work, but ensure it's paintable. Avoid super glue as it's too rigid, can damage fabric, and dries too quickly for careful placement.
How do I clean my finished sculptural fabric wall art?
Since this artwork is made with fabric, glue, and paint, it's best to avoid water or harsh cleaning agents that could damage the finish or loosen the elements. For routine dusting, use a soft, dry paintbrush or a can of compressed air to gently remove dust from the textured surfaces and crevices. If there's a stubborn spot, very lightly dab it with a barely damp cloth (water only), but always test in an inconspicuous area first to ensure it doesn't affect the paint or glue's integrity or color.
What if I don't like my initial sketch? Can I change it?
Absolutely! The beauty of abstract art is its flexibility and the freedom to evolve. Your initial pencil sketch is just a guide, a starting point. As you start laying down fabric, you might find new shapes, compositions, or textures emerge that you prefer. Don't be afraid to deviate from your original plan. If you've already glued some pieces and want to change, you can often carefully peel them off if the glue isn't fully dry, or simply layer new fabric over existing pieces to create a different look. Embrace the process of discovery and let your creativity lead the way!
How can I make this project more eco-friendly?
This project is inherently eco-friendly by repurposing fabric scraps and yarn remnants from old clothes, towels, or discarded textiles, diverting them from landfills. To further enhance its sustainability, choose a base made from recycled cardboard (like a flattened delivery box) instead of purchasing a new canvas. Opt for water-based, non-toxic acrylic paints and glues, which are generally better for the environment. When cleaning brushes, minimize water waste by wiping excess paint off first and disposing of paint water responsibly, rather than pouring it down the drain, to prevent chemical runoff.
What Next?
You've now mastered the art of creating beautiful Sculptural Fabric Wall Art! This project is a fantastic way to repurpose materials, express your creativity, and add a truly unique, modern piece to your home. Don't be afraid to experiment with different fabrics, textures, and color palettes to make it truly yours, reflecting your personal style and existing decor. We've covered everything from initial design to final hanging, ensuring you have all the tools and knowledge to succeed, even tackling common pitfalls. If you encountered any bumps along the way, remember our detailed FAQ section is packed with solutions for common issues, helping you troubleshoot like a pro. We can't wait to see your amazing creations – share them with us at Endless Fold and inspire others to embrace screen-free crafting!
Free: 10 Paper Crafts Anyone Can Make in 5 Minutes
Get our beginner guide + new craft ideas weekly.
No spam. Unsubscribe anytime.
Did you complete this activity?
Related