How to Make Recycled Magazine Coil Coasters — Easy Step-by-Step Guide
Transform old magazines into beautiful, functional coasters with this simple coil technique. A perfect way to upcycle and add a personal touch to your home decor.
Quick answer
To make magazine coil coasters, you need old magazines, glue, scissors, and about 60 minutes. Start by cutting magazine pages into strips and rolling them tightly. This beginner-friendly activity has 10 steps and is perfect for adults looking for screen-free fun.
What you need
Shop on Amazon · As an Amazon Associate we earn from qualifying purchases. Links above are affiliate links — we may earn a commission at no extra cost to you.
Looking for a creative and eco-friendly way to spruce up your home decor? These recycled magazine coil coasters are the perfect solution! This project transforms discarded magazines into vibrant, textured works of art that are as functional as they are beautiful. Ideal for crafters of all ages and skill levels, it's a wonderfully satisfying way to upcycle materials you already have. Get ready to unleash your inner artist and create unique coasters that will impress your guests and add a personal touch to your living space.
On this page
Step-by-Step Instructions
- 1
Select your magazines: Choose magazines with vibrant colors and interesting patterns. Glossy pages tend to hold their shape better and offer a more polished look, but don't shy away from matte pages if they have appealing designs. Gather a good stack, as you'll need quite a few pages to create enough coils for several coasters.
- 2
Prepare your workspace: Lay down a protective covering like newspaper or a cutting mat to keep your surface clean from glue. Ensure you have good lighting and enough space to spread out your materials and work comfortably.
- 3
Cut magazine pages into strips: Using your ruler and scissors, carefully cut magazine pages into strips. Aim for strips that are approximately 1 inch wide and 6 inches long. Consistency in width is key for creating uniform coils that fit together snugly.
- 4
Fold each strip lengthwise: Take one cut strip and fold it in half lengthwise, creating a double-layered strip. This adds strength and thickness to your coil, making it more durable and easier to handle during the rolling process.
- 5
Begin rolling the strip: Starting at one end of the folded strip, begin to tightly roll it around a pencil or dowel rod. Keep the rolling as tight and consistent as possible to create a dense coil that won't easily unravel.
- 6
Continue rolling until a coil forms: Keep rolling the folded strip around the pencil or dowel rod, ensuring each turn is snug against the previous one. Continue this process until you have a tight coil that is approximately 1 inch in diameter. The tighter you roll, the more compact and sturdy your coaster will be.
- 7
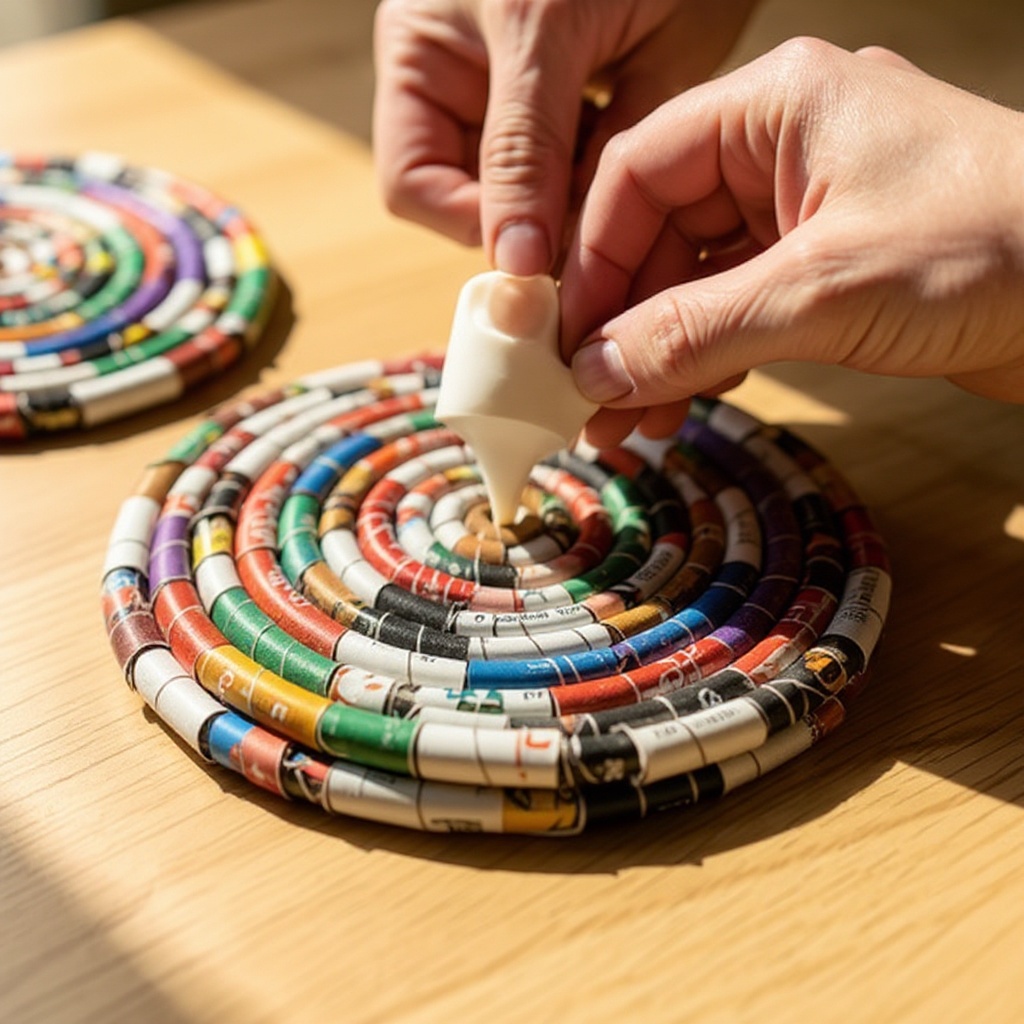
Secure the end of the coil: Once you've reached the desired coil size, apply a small amount of craft glue to the very end of the strip. Press this glued end firmly onto the coil to secure it and prevent it from unraveling. Hold it in place for a few seconds until it starts to adhere.
- 8
Remove the rolling tool: Carefully slide the pencil or dowel rod out from the center of the coil. If it's a bit snug, gently twist and pull to avoid distorting the coil's shape. You should now have a perfectly formed paper coil.
- 9
Repeat to create multiple coils: Continue steps 2 through 7 to create a substantial number of coils. You'll need approximately 15-20 coils per coaster, depending on the desired size and pattern. It's a good idea to make more than you think you'll need.
- 10
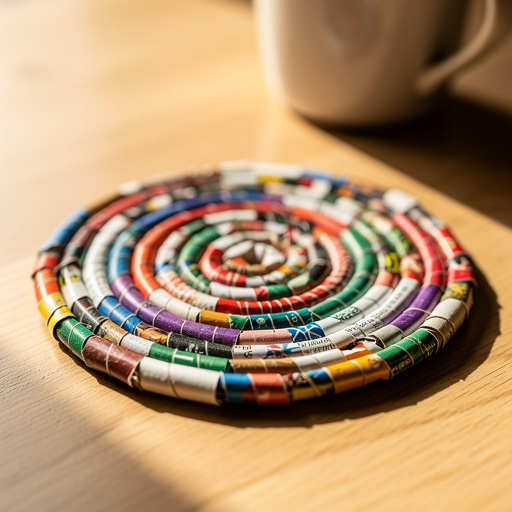
Arrange the coils into your desired shape: Once you have a good collection of coils, begin arranging them side-by-side on a flat surface. You can create classic circular coasters, square coasters, or even more intricate hexagonal or freeform shapes. Experiment with color placement for a unique aesthetic.
- 11
Apply glue between coils: Generously apply craft glue along the edges where the coils meet each other. Ensure you get glue into the small gaps between the coils to create a strong, unified structure. A small brush or the tip of the glue bottle can help with precision.
- 12
Press coils together firmly: Once the glue is applied, press the coils together firmly. You can use your fingers, a bone folder, or the edge of a credit card to ensure good contact and a strong bond between each coil. Hold them in place for a moment to allow the glue to begin setting.
- 13
Allow initial drying: Let the glued coils sit and dry for at least 30 minutes. This initial drying period will help the coaster hold its shape before you move on to the next steps. You can use clothespins or small clamps to gently hold sections together if needed.
- 14
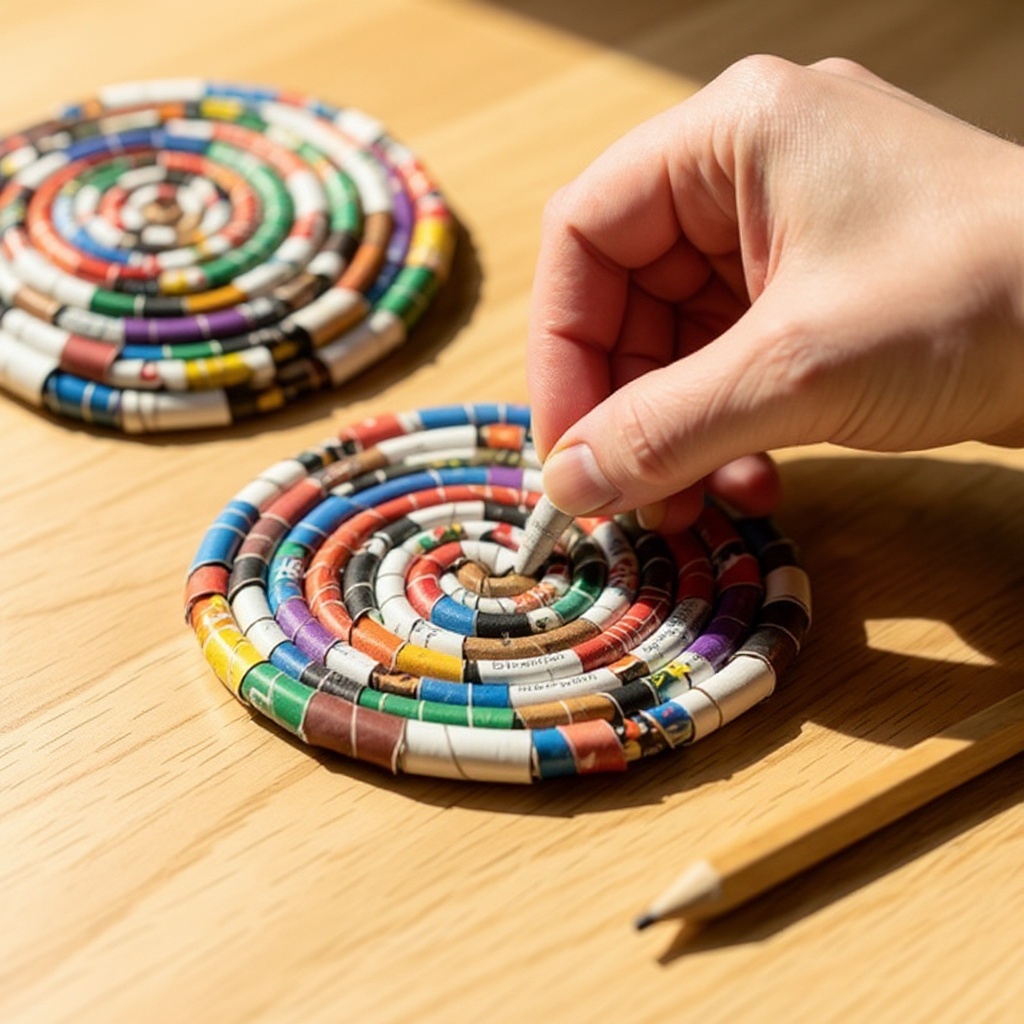
Reinforce the back (optional but recommended): For added durability, flip the coaster over and apply a layer of glue to the entire back surface. This will further strengthen the bonds between the coils and create a smooth, unified backing.
- 15
Allow complete drying: Let the coasters dry completely. This can take anywhere from 1 to 3 hours, depending on the amount of glue used and the humidity. Ensure they are fully dry before proceeding to the sealing stage.
- 16
Apply clear sealant (optional): For enhanced durability and water resistance, spray the dried coasters with a clear sealant. Apply 2-3 thin, even coats, allowing each coat to dry thoroughly according to the product's instructions. This step will protect your coasters from moisture and wear.
- 17
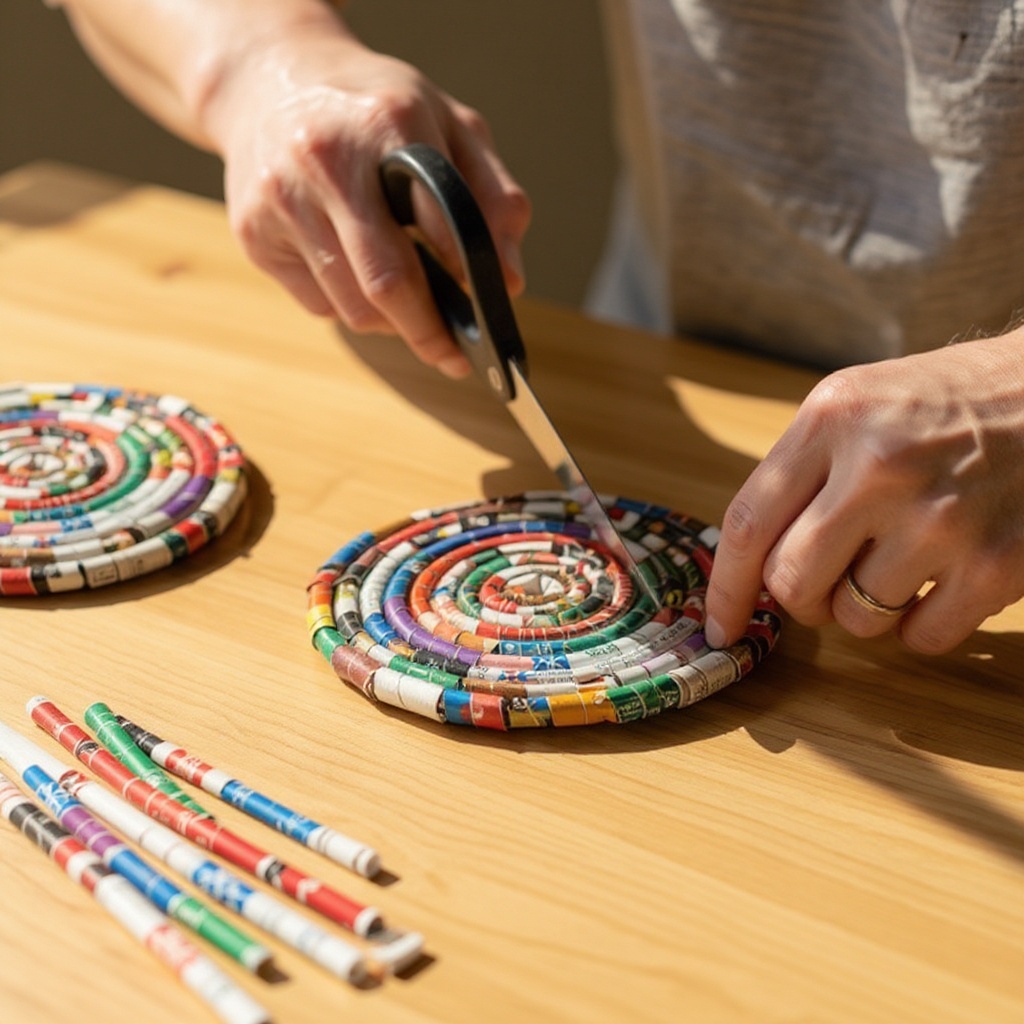
Trim uneven edges (optional): Once the sealant is dry, inspect your coasters for any uneven edges or stray paper bits. Use sharp scissors to carefully trim these areas for a cleaner, more professional finish.
Tips & Troubleshooting
- 1If your coils are coming undone, try using a stronger craft glue or securing the end with a small piece of tape before applying glue. For extra security, you can also use a dab of hot glue on the very end of the strip before pressing it down.
- 2Experiment with different color combinations by selecting specific pages from your magazines. Look for pages with solid colors, interesting patterns, or even text to create unique visual effects within your coasters.
- 3For a more polished look, trim any uneven edges of the finished coaster with sharp scissors. This step can elevate the appearance of your handmade coasters, making them look professionally crafted.
- 4To make larger placemats or trivets, simply create more coils and arrange them in a larger pattern. You can connect multiple smaller coaster designs to form a larger cohesive piece.
- 5Ensure the glue is completely dry before using the coasters to prevent them from falling apart. Rushing this step can lead to weak bonds and a coaster that disintegrates with use.
- 6Vary the width of your magazine strips to create coils of different thicknesses. Thinner strips will result in finer, more delicate coils, while wider strips will create bolder, more substantial coils.
- 7Consider using a variety of magazine types for diverse textures and colors. Old National Geographic magazines, for example, offer stunning photography and rich colors that can make for particularly beautiful coasters.
- 8If you find rolling the strips difficult, try pre-creasing the fold line with a bone folder or your fingernail. This will make the strip easier to manage and roll tightly.
Related Activities You Might Enjoy
Frequently Asked Questions
Can I use any kind of paper for magazine coil coasters?
While you can technically use various types of paper, glossy magazine pages tend to hold their shape better and create a more vibrant, durable coil due to their inherent stiffness and smooth surface. Thicker paper, like cardstock, might be harder to roll tightly and can result in bulkier coils that are more difficult to glue together seamlessly. Very thin paper, such as tissue paper, will likely tear during the rolling process and won't create a sturdy coil. For the best results, stick to standard magazine pages or similar coated papers that offer a good balance of flexibility and rigidity.
How do I make my magazine coil coasters waterproof?
To make your magazine coil coasters more water-resistant and durable, applying a few coats of a waterproof sealant spray or a decoupage medium like Mod Podge is highly recommended. Ensure you apply the sealant evenly to all surfaces of the finished coaster, paying attention to the edges and between the coils. Allow each coat to dry thoroughly before applying the next, which typically takes about 15-30 minutes per coat. For maximum protection, consider using a marine-grade sealant or a product specifically designed for outdoor use, though standard acrylic sealers will offer good protection for everyday use.
What is the best way to glue the coils together?
The most effective way to glue the coils together is by applying a generous amount of craft glue along the sides of the coils where they will touch. Use a fine-tip applicator or a small brush to ensure the glue gets into the crevices between the coils. Once the glue is applied, press the coils firmly together and hold them for a moment to ensure a strong bond as the glue begins to set. For larger coasters or if you're having trouble keeping them in place, you can use clothespins or small clamps to gently hold sections together while the glue dries completely.
Can I make different shapes with these coils?
Absolutely! Once you have your coils, you can arrange them into various shapes beyond the traditional circle or square. Hexagons, octagons, stars, or even more intricate mosaic-like patterns are all achievable. The key is to plan your design beforehand and then meticulously glue the coils together, ensuring a strong bond at every connection point. For more complex shapes, you might find it helpful to draw a template on paper and arrange your coils directly on top of it before gluing.
How long does it take to make a set of coasters?
The time it takes to make a set of magazine coil coasters can vary depending on your speed and the complexity of the design, but generally, you can expect to spend about 60-90 minutes actively crafting per coaster. This includes cutting the strips, rolling the coils, and gluing them together. The drying time is separate; you'll need to allow at least 30 minutes for initial drying and several hours for complete drying, especially if you're applying a sealant. So, while the hands-on time is relatively short, it's a project that requires patience for the drying stages.
What are the best types of magazines to use?
The best types of magazines to use are those with a good variety of colors and patterns, and importantly, pages that are not too thin or too thick. Glossy magazines often yield the most visually appealing and durable coils because the paper is sturdy enough to hold its shape when rolled tightly and the ink colors are often vibrant. Magazines with a mix of solid colors, interesting graphics, and even text can add unique character to your coasters. Avoid magazines with very thin, flimsy pages that might tear easily, or extremely thick cardstock-like pages that are difficult to roll compactly.
How can I ensure my coils are uniformly sized?
To ensure your coils are uniformly sized, consistency in cutting your magazine strips is paramount. Use a ruler to measure and mark your strips before cutting, aiming for an exact width (e.g., 1 inch). When rolling, try to maintain even pressure and tension throughout the process. Using the same diameter rolling tool (like a pencil or dowel rod) for every strip is also crucial. If you notice a coil becoming too loose, gently squeeze it to compact it slightly before securing the end. A consistent rolling technique will lead to coils that fit together seamlessly.
What Next?
Congratulations on creating your beautiful recycled magazine coil coasters! These handmade treasures are not only practical but also a testament to your creativity and commitment to sustainability. Consider gifting them to friends and family or arranging them as a colorful display on your coffee table. For variations, try using different types of paper like old maps or book pages, or experiment with various rolling techniques for unique textures. You can even create larger placemats or trivets by simply scaling up the design. Store your coasters on a shelf or in a decorative box to keep them looking their best.
Free: 10 Paper Crafts Anyone Can Make in 5 Minutes
Get our beginner guide + new craft ideas weekly.
No spam. Unsubscribe anytime.
Did you complete this activity?
Related
You might also like
Tin Can Planter Makeover
Painted Tin Can Planters
Napkin Art Glassware Makeover
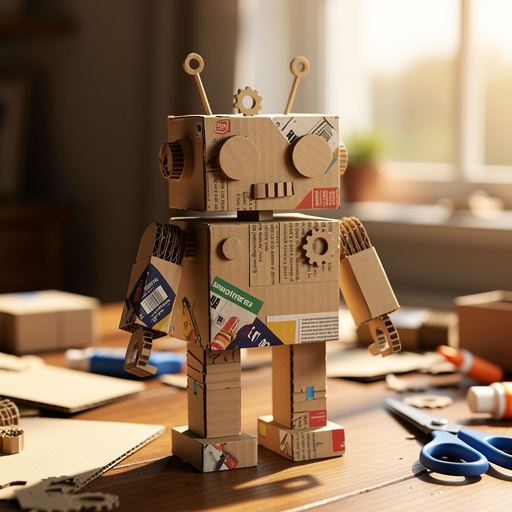
Recycled Cardboard Robot Sculptures
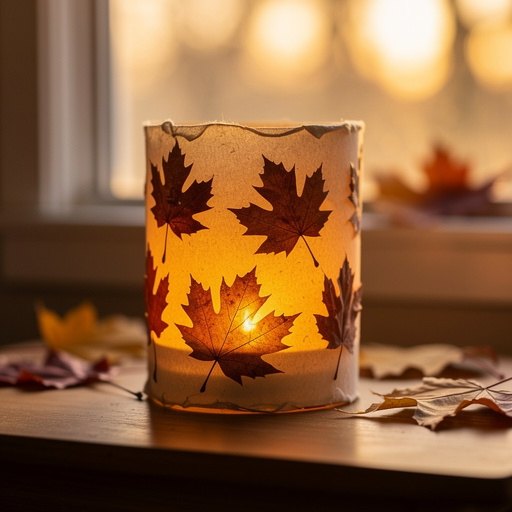
Leaf Silhouette Luminaries