How to Create Amazing Robot Sculptures from Recycled Cardboard — Easy Step-by-Step Guide
Transform everyday cardboard scraps into futuristic robot sculptures! This engaging craft kit encourages imagination and repurposing materials. It's a fantastic way to spark creativity while teaching children about sustainability and the value of upcycling. This project is ideal for a rainy afternoon, a classroom activity, or a fun family bonding experience, offering endless possibilities for unique creations.
Quick answer
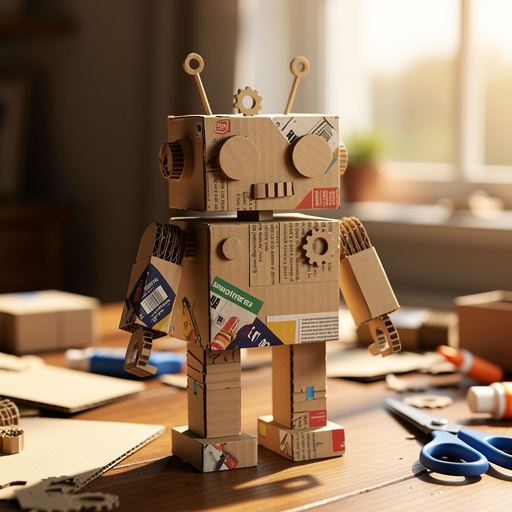
To make recycled cardboard robot sculptures, you need assorted cardboard scraps (cereal boxes, shipping boxes, toilet paper tubes, paper towel tubes), child-safe scissors, white craft glue or a hot glue gun (with adult supervision), and markers, crayons, or paint. Optional embellishments like bottle caps and buttons can add extra flair. The process involves cutting out basic shapes for the body, head, arms, and legs, then assembling and decorating them. This beginner-friendly activity has 10 core steps and can be completed in about 60 minutes, making it perfect for families and kids aged 6+.
What you need
Shop on Amazon · As an Amazon Associate we earn from qualifying purchases. Links above are affiliate links — we may earn a commission at no extra cost to you.
Dive into the exciting world of robotics with a sustainable twist! Creating your own robot sculptures from recycled cardboard is an incredibly rewarding and imaginative project. It’s a fantastic way to teach children about the importance of repurposing materials and to foster their creativity by transforming everyday household items into futuristic companions. This activity is perfect for all ages, from young children who can assist with simple gluing and decorating, to older kids and adults who can tackle more intricate designs. Get ready to unleash your inner inventor and build a one-of-a-kind mechanical marvel!
On this page
Step-by-Step Instructions
- 1
Gather a variety of clean cardboard scraps in different shapes and sizes. Ensure all pieces are free from food residue or excessive tape, as this can affect adhesion and appearance.
- 2
Select a sturdy piece of cardboard for the robot's main body. This could be a rectangular section from a shipping box or a folded cereal box. Cut out a main rectangular or square piece for the robot's body, aiming for a size that feels balanced for your robot's overall proportions.
- 3
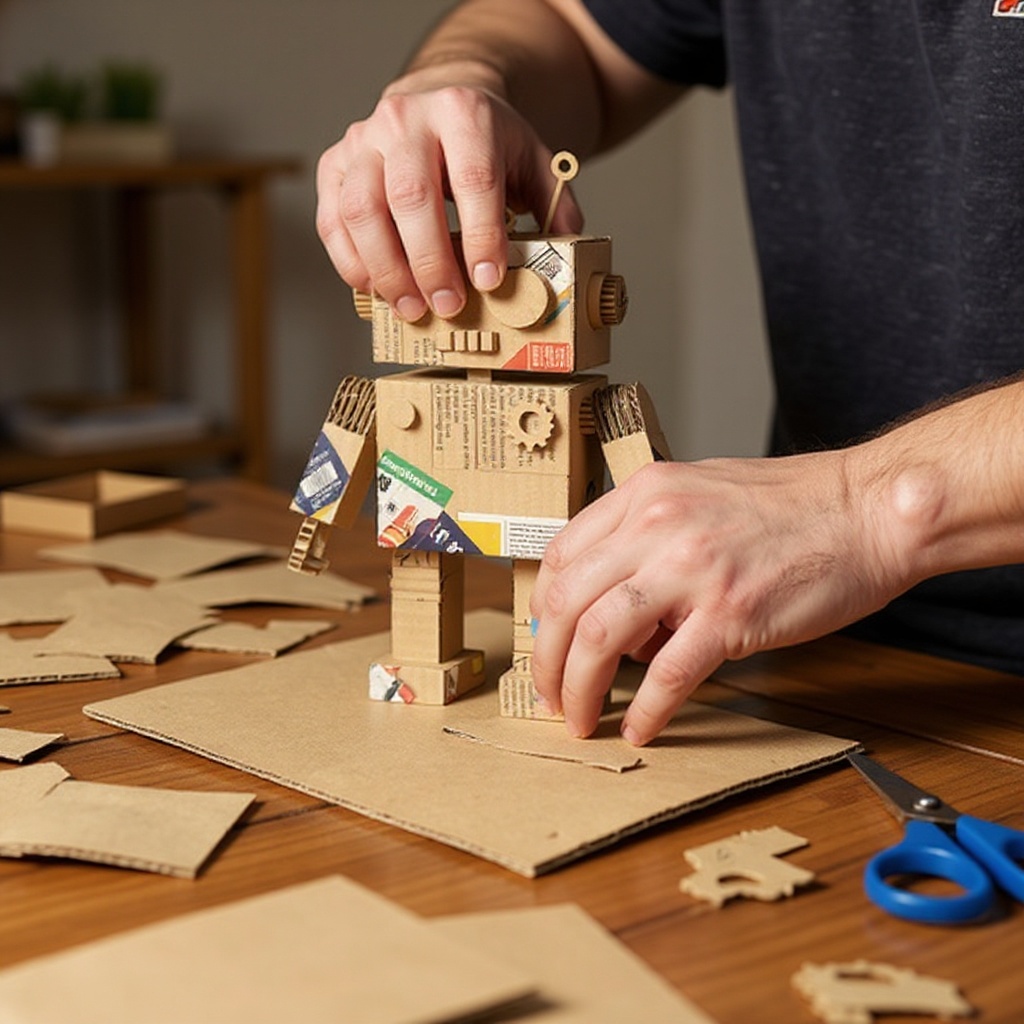
Prepare the head component. This can be a smaller box, a toilet paper tube cut in half, or a simple cardboard circle. Cut out smaller shapes for the head, arms, and legs, considering how they will attach to the body. Toilet paper tubes can make great legs or arms, providing a ready-made cylindrical shape.
- 4
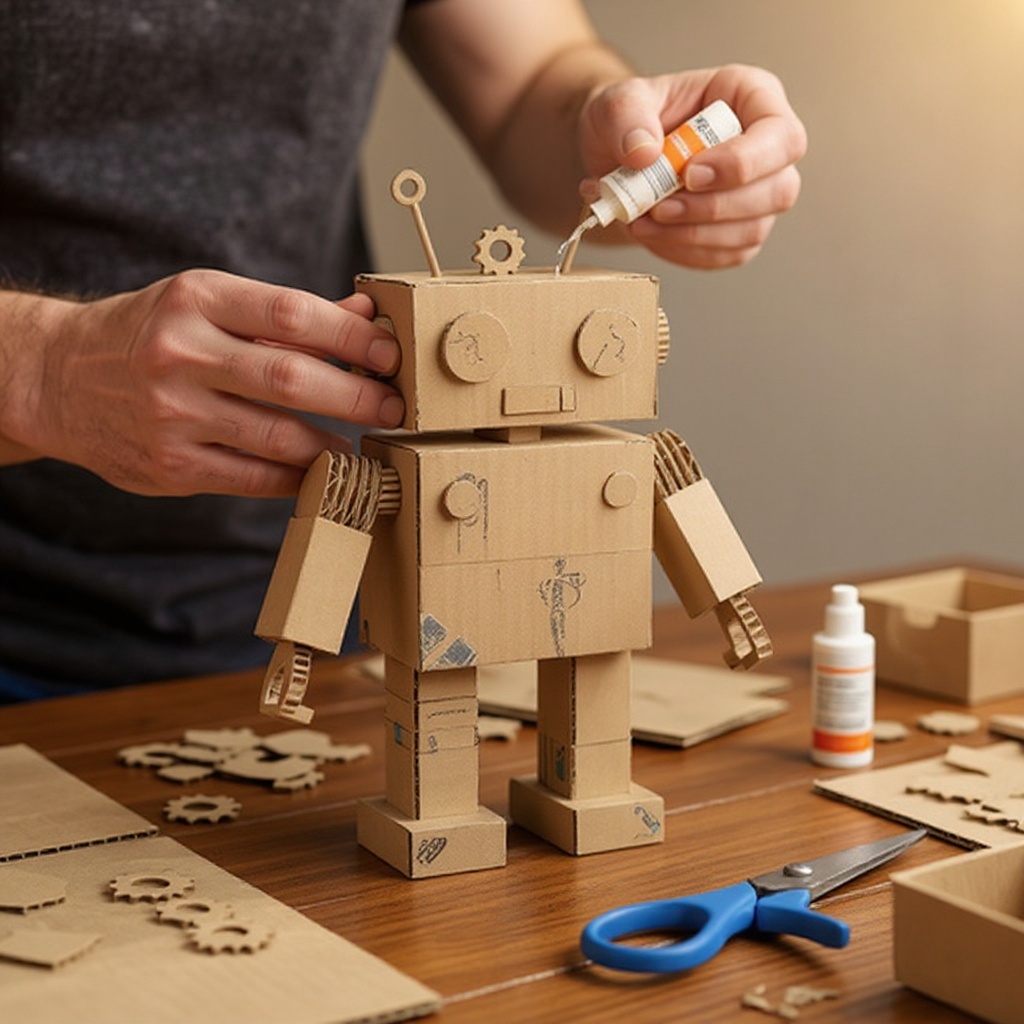
Begin assembly by attaching the head to the top of the body piece. Apply a generous amount of white craft glue or hot glue to the bottom edge of the head and press it firmly onto the designated spot on the body. Hold in place until secure, especially if using craft glue.
- 5
Attach the arms to the sides of the body. You can use smaller cardboard rectangles, toilet paper tube sections, or even strips of corrugated cardboard for the arms. Ensure they are positioned symmetrically for a balanced look, and secure them with glue.
- 6
Secure the legs to the bottom of the body. These can be toilet paper tubes, smaller boxes, or even folded cardboard shapes. Make sure the legs are positioned so your robot can stand independently, or be prepared to create a base later.
- 7
Create and attach facial features. Cut out small circles or squares for eyes and a mouth from contrasting colored cardboard or paper. Glue them onto the head, experimenting with different placements to give your robot a unique expression.
- 8
Add robotic details and embellishments. Cut out small circles or squares for buttons, dials, or control panels. Glue these onto the robot's body and limbs. Consider using optional items like bottle caps for larger buttons or shiny buttons for control panels.
- 9
Incorporate antennae or other unique features. Pipe cleaners can be bent into fun shapes for antennae, or you can cut out small cardboard triangles for fins or wings. Attach these securely to the head or body using glue.
- 10
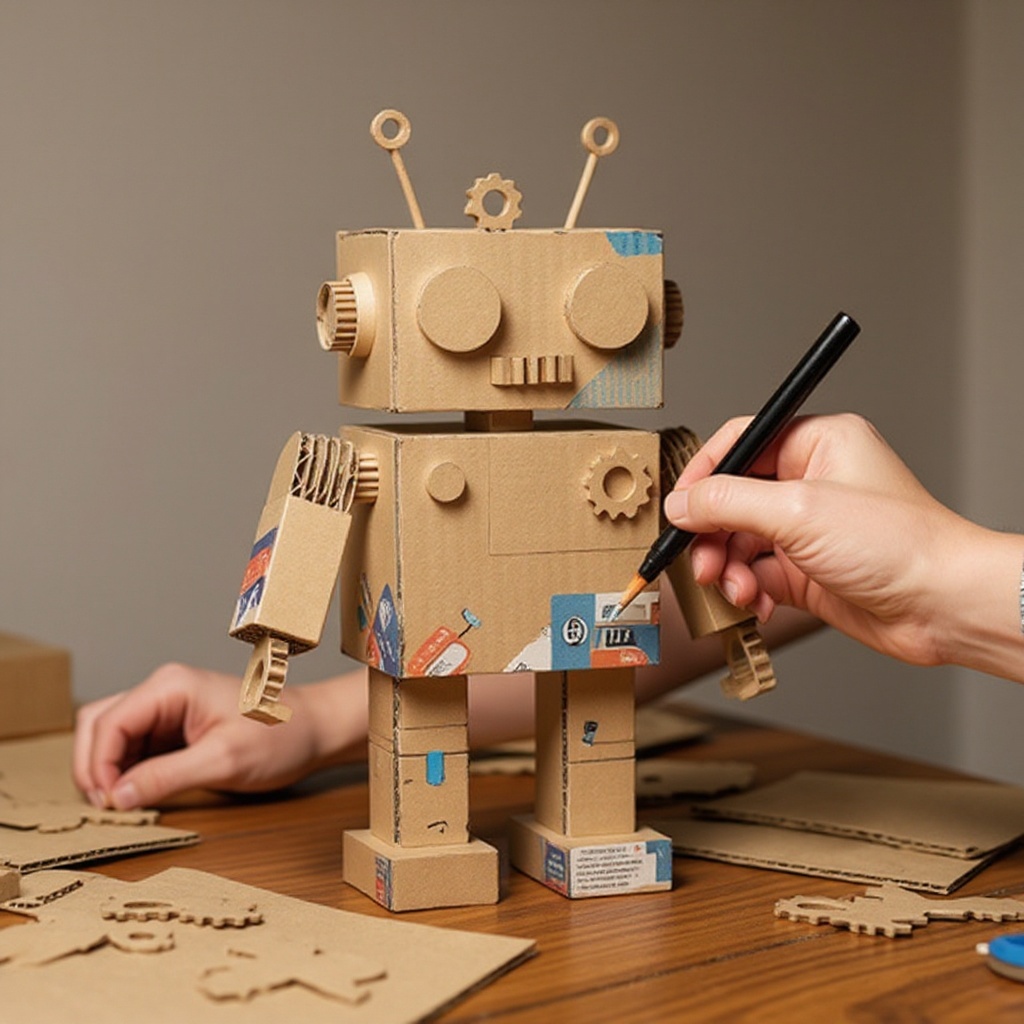
Bring your robot to life with color and patterns. Use markers, crayons, or paint to color your robot. Add intricate designs, metallic accents, or even warning stripes to give your creation a distinct personality. Let your imagination run wild with creative coloring.
- 11
Allow all glue and paint to dry completely before handling or playing with your robot. This is crucial for ensuring all parts are firmly attached and the paint is fully set, preventing smudges and accidental disassembly.
- 12
Reinforce key joints for added durability. If your robot's limbs feel a bit wobbly, consider adding extra layers of cardboard or using hot glue for a stronger bond at the connection points. This is especially helpful for robots intended for more active play.
Tips & Troubleshooting
- 1If using a hot glue gun, ensure an adult is always present and supervising to prevent burns. Hot glue can be very hot and cause immediate injury, so careful handling is paramount.
- 2Don't be afraid to experiment with different shapes and sizes for unique robot features. Think gears, dials, or even wings! The beauty of recycled materials is their versatility, allowing for truly original designs.
- 3For a sturdier robot, consider layering pieces of cardboard or using stronger adhesive like hot glue for key joints. This will make your robot more robust and less likely to break during play.
- 4Encourage kids to name their robots and create a backstory for them. This adds an extra layer of engagement and imaginative play, turning a craft project into a character.
- 5Explore different types of cardboard for varied textures and strengths. Corrugated cardboard offers a robust structure, while thinner cereal boxes are easier to cut and fold into intricate shapes.
- 6Consider adding a base for stability. A flat piece of cardboard glued to the bottom of the robot's legs can prevent it from tipping over, especially if it has a top-heavy design.
- 7Get creative with your embellishments! Beyond the suggested items, look around your house for other recyclable materials like old CDs for shiny panels, plastic lids for wheels, or even fabric scraps for clothing details.
- 8Before gluing, dry-fit your pieces to ensure they fit together well and create the desired look. This helps avoid mistakes and saves on glue and time.
Related Activities You Might Enjoy
Frequently Asked Questions
What kind of cardboard is best for this craft kit?
Any clean, dry cardboard will work wonderfully for your robot sculptures! Cereal boxes are excellent for their smooth surfaces and ease of cutting, making them perfect for details and smaller components. Shipping boxes, especially corrugated ones, provide excellent structural integrity for the main body and limbs, ensuring your robot stands tall and proud. Toilet paper and paper towel tubes are fantastic for creating cylindrical legs, arms, or even heads, offering ready-made shapes. The key is to gather a variety of thicknesses and textures to add visual interest and structural diversity to your robot. Don't be afraid to mix and match different types of cardboard for a truly unique creation.
How can I make my recycled robot more durable?
To enhance the durability of your recycled robot, focus on reinforcing the main connection points. Layering pieces of cardboard for the body and limbs can add significant strength, creating a more robust structure. For instance, you can glue two pieces of cardboard together for the robot's torso or legs. When it comes to assembly, using a hot glue gun (with adult supervision, of course!) for the primary joints will create a much stronger and more resilient bond than white craft glue. For added stability, consider creating a flat cardboard base and securely attaching your robot's legs to it, preventing it from tipping over during play.
Can younger children do this craft kit?
Absolutely! This recycled cardboard robot sculpture project is wonderfully adaptable for younger children, with adult assistance. Younger crafters can focus on the enjoyable tasks of decorating and gluing pre-cut shapes. An adult can take the lead on the cutting of cardboard pieces, ensuring safety and precision. This allows children to engage with the creative process without the frustration of difficult cutting. They can enthusiastically select colors, apply glue to designated areas, and press pieces together, fostering their fine motor skills and artistic expression in a fun and accessible way.
What other materials can I use to decorate my robot?
The decorative possibilities for your robot are virtually limitless! Get creative and raid your craft stash or recycling bin for unique embellishments. Bottle caps make fantastic buttons, dials, or even eyes, adding a dimensional touch. Regular buttons can serve as control panels or decorative accents. Pipe cleaners are perfect for creating flexible antennae, arms, or even intricate wiring details. Googly eyes can give your robot a playful and animated personality. For a futuristic or metallic look, consider using scraps of aluminum foil or even broken pieces of old CDs or DVDs (with adult supervision for safety) to create shiny, reflective surfaces.
How long does this project typically take to complete?
This engaging recycled cardboard robot sculpture project is designed to be relatively quick and enjoyable, making it perfect for a focused crafting session. The actual construction and assembly of the robot, including cutting out the basic shapes and gluing them together, typically takes around 45-60 minutes. However, this timeframe can vary depending on the complexity of your design and the age of the crafter. The decorating phase, where you add colors, patterns, and embellishments, can extend the time spent, allowing for more detailed and personalized creations. Remember to factor in drying time for glue and paint, which can add an additional hour or more, depending on the adhesives and paints used.
What are some ideas for making my robot unique?
To make your recycled robot truly unique, think beyond the basic humanoid form. Consider giving your robot a specific function or personality. Perhaps it's a space explorer with antennae and a rocket booster, or a helpful household assistant with extra arms for carrying things. Experiment with unconventional shapes for the body – maybe a sphere, a pyramid, or even an abstract form. Don't be afraid to incorporate unexpected materials; old plastic containers can become domes, and bits of wire can add intricate mechanical details. The key is to let your imagination guide you and to view each piece of cardboard as an opportunity for creative expression.
What Next?
Congratulations on building your amazing recycled cardboard robot! The possibilities are truly endless, and you've not only created a fantastic piece of art but also contributed to a more sustainable planet. Consider creating a whole robot family, each with its own personality and purpose. You could even design a robot city or a spaceship for your creations to inhabit. Once your robots are complete and dry, they make wonderful desk decorations, imaginative playmates, or even unique gifts. Store them carefully on a shelf to admire your handiwork, and remember that the next great invention is often just a cardboard box away!
Free: 10 Paper Crafts Anyone Can Make in 5 Minutes
Get our beginner guide + new craft ideas weekly.
No spam. Unsubscribe anytime.
Did you complete this activity?
Related
You might also like
Tin Can Planter Makeover
Recycled Magazine Coil Coasters
Tin Can Shakers
Recycled Resonance Instruments
Cardboard Box Puppet Theater