How to Make Construction Paper Animals — Easy Step-by-Step Guide for Preschoolers
Unleash your preschooler's creativity with these simple construction paper animal crafts. Easy to follow steps and minimal materials make this a perfect afternoon activity. This guide provides detailed instructions, helpful tips, and answers to common questions to ensure a fun and successful crafting experience for young children.
Quick answer
To make construction paper animals, you need construction paper (various colors), child-safe scissors, and glue sticks. Start by cutting out basic shapes like ovals and circles for the body and head. This beginner-friendly activity has 9 core steps and can be expanded with additional details, making it perfect for preschoolers aged 3-5. Allow about 20-30 minutes for a basic animal, more if adding intricate details.
What you need
Shop on Amazon · As an Amazon Associate we earn from qualifying purchases. Links above are affiliate links — we may earn a commission at no extra cost to you.
Embarking on a creative journey with construction paper animals is a delightful way to spend quality time with your preschoolers. This project is special because it transforms simple, everyday materials into charming creatures, fostering imagination and artistic expression. It's perfectly suited for young children aged 3-5, offering a low-pressure environment to explore colors, shapes, and textures while developing crucial fine motor skills. The satisfaction of creating their own animal friend provides a wonderful confidence boost, making this an ideal afternoon activity that’s both educational and incredibly fun.
On this page
Step-by-Step Instructions
- 1
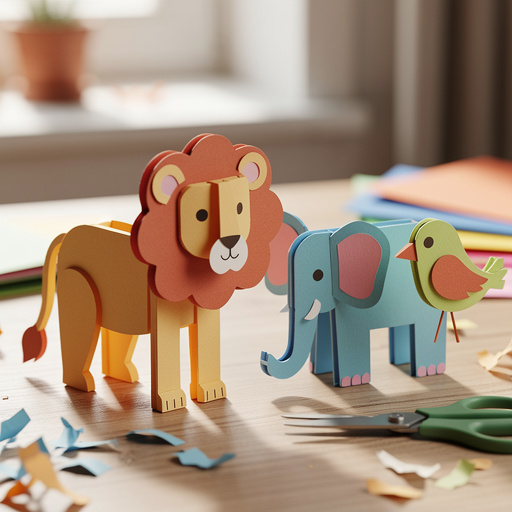
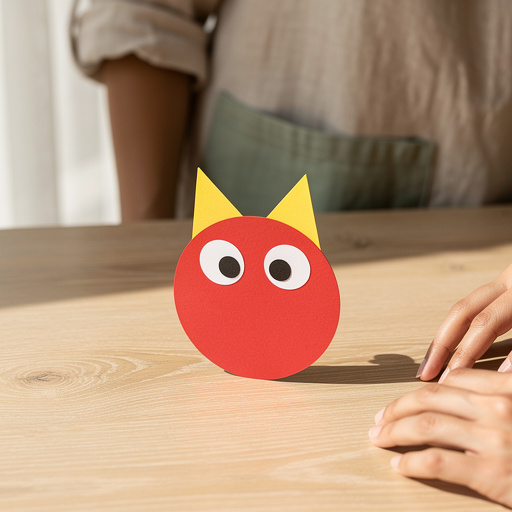
Choose a construction paper color for your animal's body. This will be the largest part of your creation, so pick a color that represents the main hue of your chosen animal, like brown for a bear or green for a frog.
- 2
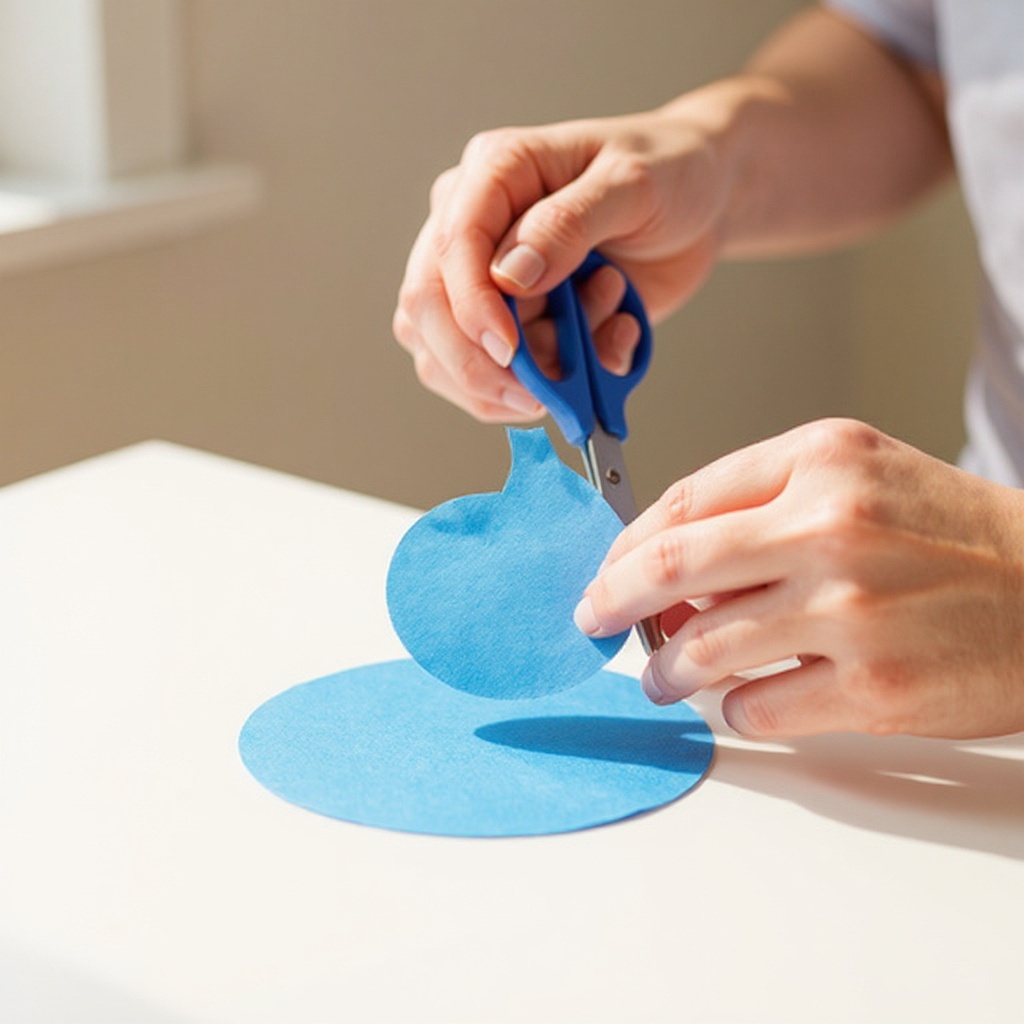
Cut out a large oval or circle for the body. Aim for a size that is easy for little hands to manage, perhaps about 4-6 inches in its longest dimension. Ensure the edges are relatively smooth, avoiding jagged cuts that can be tricky to glue.
- 3
Select a contrasting color for the head and cut out a smaller circle or oval. This shape should be noticeably smaller than the body, typically about half the size, and positioned at the top of the body piece. For instance, a yellow head for a brown body to make a bee.
- 4
Glue the head onto the body. Apply a generous amount of glue stick to the top edge of the body piece and carefully press the head onto it, aligning the edges. Gently rub over the glued area to ensure a secure bond, but be careful not to smudge the glue too much.
- 5
Cut out two small circles or triangles for ears. The shape and size of the ears will greatly influence the animal's appearance; think pointy triangles for a cat or rounded circles for a bunny. These should be proportional to the head size.
- 6
Glue the ears onto the top of the head. Place a small amount of glue on the flat edge of each ear and attach them to the upper part of the head, angling them slightly outwards or upwards as desired. Ensure they are firmly pressed down to prevent them from peeling off.

- 7
Cut out two tiny circles for eyes and a small triangle for a nose. These are the key features that will bring your animal to life. Black or white paper works well for eyes, and a contrasting color like red or black is great for a nose. For a more whimsical look, consider using googly eyes.
- 8
Glue the eyes and nose onto the head to create a face. Position the eyes symmetrically on the head, leaving a small gap between them. Then, place the nose below and between the eyes, creating a simple, recognizable face. Press each piece down firmly.

- 9
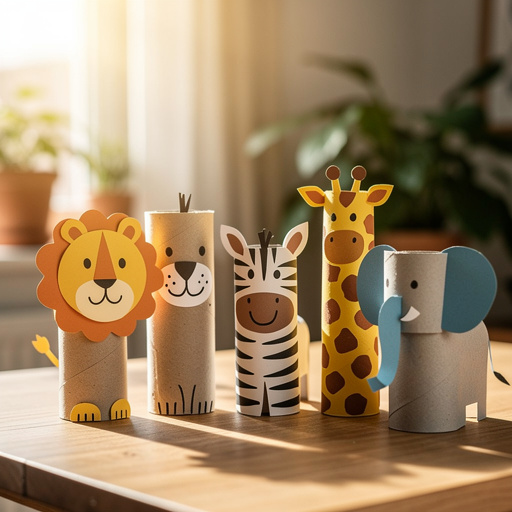
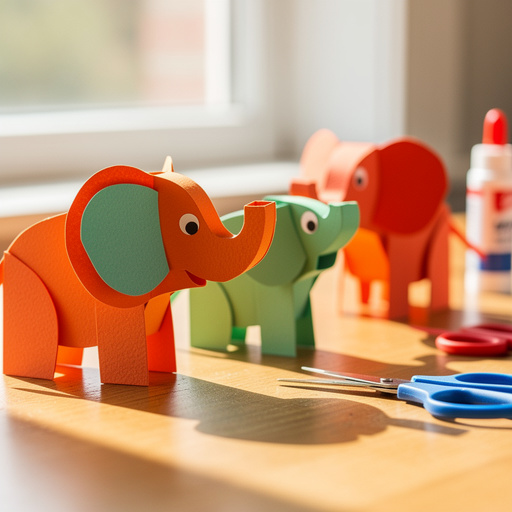
Cut out thin strips of paper for legs or a tail, if desired, and glue them on. For legs, cut 2-4 rectangular strips and glue them to the bottom of the body. For a tail, cut a longer, thinner strip and attach it to the back of the body. You can also cut out other shapes like wings for a bird or fins for a fish at this stage.
- 10
Add extra details for a more unique animal. This is where creativity truly shines! Cut out small shapes for spots, stripes, or even a mouth. For example, black strips for a tiger's stripes, white circles for a cow's spots, or a curved red strip for a smiling mouth. Glue these onto the body or head as appropriate.
- 11
Consider adding a background to enhance the scene. Cut out a larger piece of construction paper in a complementary color to serve as a backdrop. This could be blue for the sky, green for grass, or brown for a forest floor. Glue your finished animal onto this background to create a complete picture.
- 12
Allow the glue to dry completely before handling. This is a crucial step to ensure all the pieces stay attached and your animal doesn't fall apart. Place the finished creations in a safe, flat area where they won't be disturbed until the glue has fully set, which usually takes about 15-30 minutes.
Tips & Troubleshooting
- 1If your preschooler struggles with scissors, pre-cut the shapes for them. This allows them to focus on the assembly and gluing process, which are still excellent for developing fine motor skills. You can cut out a variety of basic shapes beforehand and let them choose which ones to use for their animal.
- 2Encourage different animal combinations by using various colors and shapes. Don't be afraid to mix and match! A blue body with yellow spots can be a unique creature, or a purple head on a green body can be a fantastical beast. This sparks imagination and teaches them that animals don't always have to be realistic.
- 3Add details like stripes or spots by cutting small shapes from other paper colors and gluing them on. This step adds depth and character to the animals. For instance, cutting out small black circles and gluing them onto a white body can create a fun, spotted dog or a playful dalmatian.
- 4Let the glue dry completely before handling the finished animal. Patience is key here; rushing the drying process can lead to pieces falling off and frustration. Once dry, the animals will be sturdy enough for play or display.
- 5Introduce different textures by using patterned construction paper or adding small pieces of fabric or yarn. This adds a sensory element to the craft, making it even more engaging for young children. For example, a fuzzy pipe cleaner could become a cat's tail or whiskers.
- 6Talk about the animals you are making. Ask your child what sounds the animal makes, where it lives, or what it eats. This integrates learning into the craft, making it more educational and fun. It also helps them connect the visual representation to real-world concepts.
- 7Offer praise and encouragement throughout the process. Focus on their effort and creativity rather than perfection. Every cut, every glued piece, is a step in their learning journey. Positive reinforcement builds confidence and encourages them to continue exploring their artistic abilities.
- 8Consider making a whole family of animals or a habitat. Once they've mastered a single animal, encourage them to create multiple creatures or a background scene. This expands the project and promotes storytelling and imaginative play, turning their craft into a miniature world.
Related Activities You Might Enjoy
Frequently Asked Questions
What are the best construction paper crafts for preschoolers?
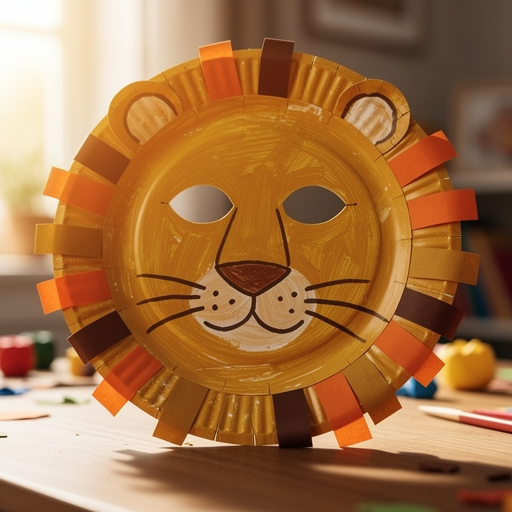
Construction paper crafts like simple animals, shapes, and collages are excellent for preschoolers. They are easy to make, require minimal materials, and help develop fine motor skills. Other fantastic options include creating paper chains, making paper plate masks, building simple houses or castles, and crafting seasonal decorations like snowflakes or flowers. These activities are designed to be engaging, allowing children to explore colors, textures, and shapes while building confidence in their artistic abilities. The focus should always be on the process and the joy of creation, rather than a perfect end product, making these crafts ideal for this age group.
What skills do construction paper crafts help develop in preschoolers?
Construction paper crafts help develop fine motor skills through cutting and gluing, hand-eye coordination, creativity, and color recognition. They also encourage imaginative play. The act of cutting requires precise finger movements, strengthening the muscles needed for writing. Gluing involves careful placement and pressure, further refining dexterity. Choosing colors and shapes enhances their understanding of visual elements and decision-making. Moreover, the imaginative aspect of creating animals or other objects fosters storytelling and problem-solving skills, as they envision and bring their ideas to life. These foundational skills are crucial for their overall development and future learning experiences.
How can I make construction paper crafts easier for preschoolers?
Make crafts easier by pre-cutting shapes, using glue sticks instead of liquid glue, and focusing on simple designs. Offer guidance and praise their efforts, no matter the outcome. For instance, instead of asking them to cut a perfect circle, provide pre-cut circles they can then glue. Glue sticks are less messy and easier for little hands to control than liquid glue. Simple designs, like a basic animal made of just a few shapes, are less overwhelming. Most importantly, celebrate their participation and creativity. Your encouragement is more valuable than a perfectly executed craft, fostering a positive attitude towards art and learning.
What materials are needed for basic construction paper crafts?
For basic construction paper crafts, you'll typically need construction paper, child-safe scissors, and glue sticks. Crayons or markers can also be used for added decoration. Construction paper comes in a wide array of colors, offering endless possibilities for creativity. Child-safe scissors are essential for ensuring safety during the cutting process, and glue sticks provide a mess-free and easy-to-use adhesive. These core materials are versatile and can be used to create a vast range of projects, from simple shapes and animals to more elaborate scenes and decorations, making them a staple for any home or classroom craft supply.
How long does it typically take to complete a construction paper animal craft with a preschooler?
A basic construction paper animal, following the steps outlined, typically takes about 20-30 minutes to complete with a preschooler. This timeframe includes choosing colors, cutting shapes (or assisting with pre-cut shapes), gluing, and adding simple details. However, this can vary significantly based on the child's age, dexterity, attention span, and the complexity of the animal they are creating. Some children might finish quickly, while others may prefer to take their time, breaking the activity into shorter sessions. It's always best to allow ample time and avoid rushing, focusing on the enjoyment of the creative process rather than a strict deadline.
Can I use liquid glue instead of glue sticks for construction paper animals?
While you can use liquid glue, glue sticks are generally recommended for preschooler crafts. Glue sticks are less messy, easier for young children to control, and dry relatively quickly without causing the paper to wrinkle excessively. Liquid glue, especially if applied too liberally, can create a mess, stain clothing, and make the construction paper soggy, leading to tears and frustration. If you do opt for liquid glue, use a small amount and ensure the child understands how to apply it sparingly. A fine-tip applicator can also help manage the amount of glue used.
What Next?
Once your construction paper menagerie is complete, you have a wonderful collection of handmade art! These vibrant animals can be displayed on a refrigerator, a bulletin board, or even used as characters in imaginative play. For a more permanent display, consider mounting them on a larger piece of cardstock or framing them. If you enjoyed this project, explore other construction paper crafts like flowers, houses, or abstract collages. You can also encourage your child to draw backgrounds for their animals, creating a whole habitat. Store finished creations flat in a portfolio or a dedicated craft box to keep them pristine.
Free: 10 Paper Crafts Anyone Can Make in 5 Minutes
Get our beginner guide + new craft ideas weekly.
No spam. Unsubscribe anytime.
Did you complete this activity?