How to Make Fluffy Pom Pom Creatures — Easy Step-by-Step Guide
Transform colorful yarn into charming little creatures with this easy pom pom craft. Perfect for imaginative play and handmade gifts!
Quick answer
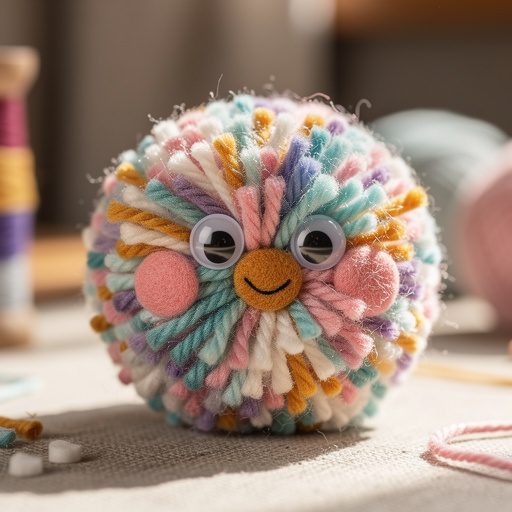
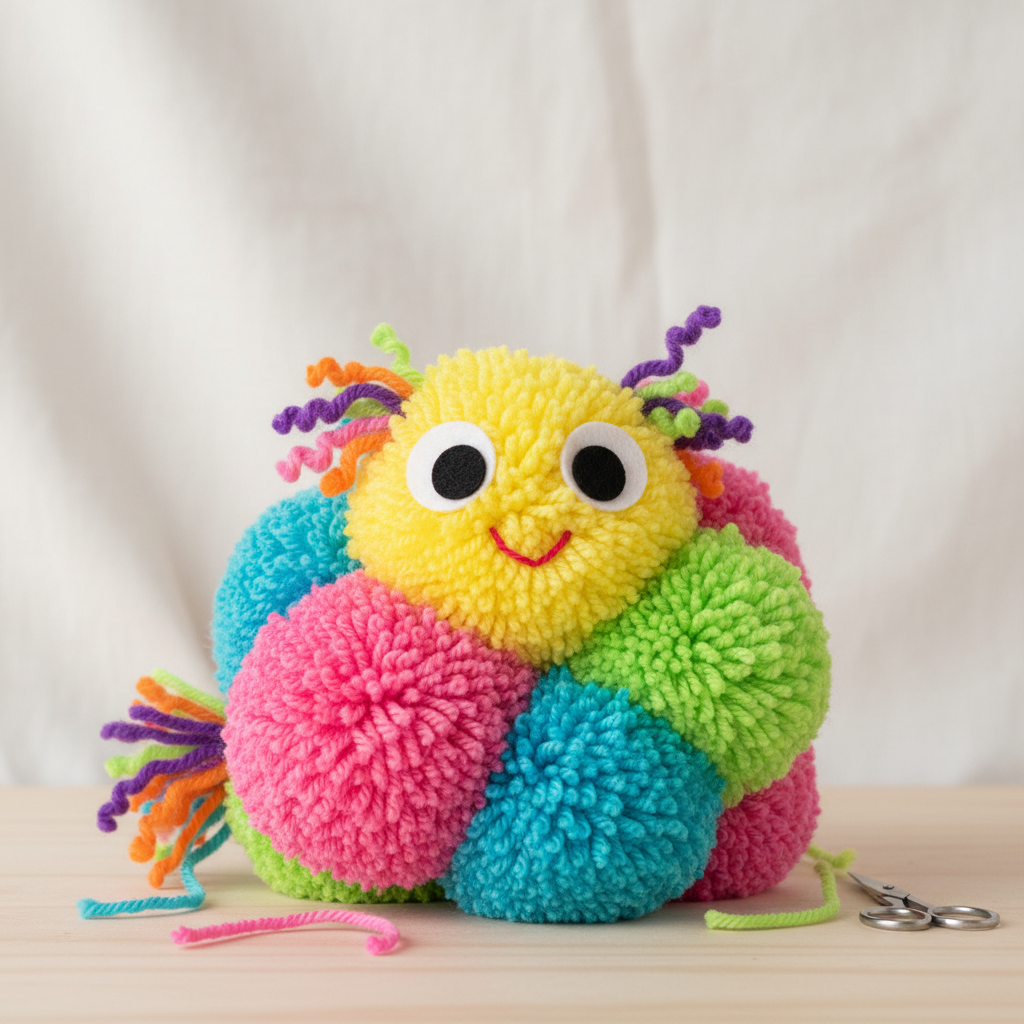
To make fluffy pom pom creatures, you need yarn, scissors, and craft supplies like googly eyes and felt, taking about 30 minutes. Start by wrapping yarn around your fingers or a fork to create a pom pom. This beginner-friendly activity has 10 steps and is perfect for families and kids aged 6+.
What you need
Shop on Amazon · As an Amazon Associate we earn from qualifying purchases. Links above are affiliate links — we may earn a commission at no extra cost to you.
Unleash your creativity and bring whimsical characters to life with this delightful pom pom creature craft! This project is a fantastic way to repurpose yarn scraps into adorable companions, fostering imagination and fine motor skills. It's an accessible craft for all ages, making it ideal for family crafting sessions, classroom activities, or simply a relaxing solo project. The joy of transforming simple yarn into a unique, huggable friend is truly special, offering a tangible reward for your crafting efforts and a charming addition to any toy collection or gift basket.
On this page
Step-by-Step Instructions
- 1
**Prepare Your Pom Pom Maker (or Alternative):** If you're using a pom pom maker, open it up according to the manufacturer's instructions. This usually involves unfolding the two semicircular arms. If you're using your fingers, select two fingers on one hand to be your yarn-wrapping guide; the width of these fingers will determine the diameter of your pom pom. For a fork, use a standard dinner fork, ensuring the tines are clean and smooth.
- 2
**Begin Wrapping the Yarn:** Take the end of your chosen yarn and secure it with a knot around the base of your fingers, the pom pom maker's arm, or the fork tines. Begin wrapping the yarn smoothly and evenly around your chosen tool. Aim for consistent tension to avoid gaps and ensure a dense pom pom. Continue wrapping until you have a substantial amount of yarn; for a standard worsted weight yarn, approximately 50-70 wraps are usually sufficient for a medium-sized pom pom, but more wraps will result in a fuller, fluffier pom pom.
- 3
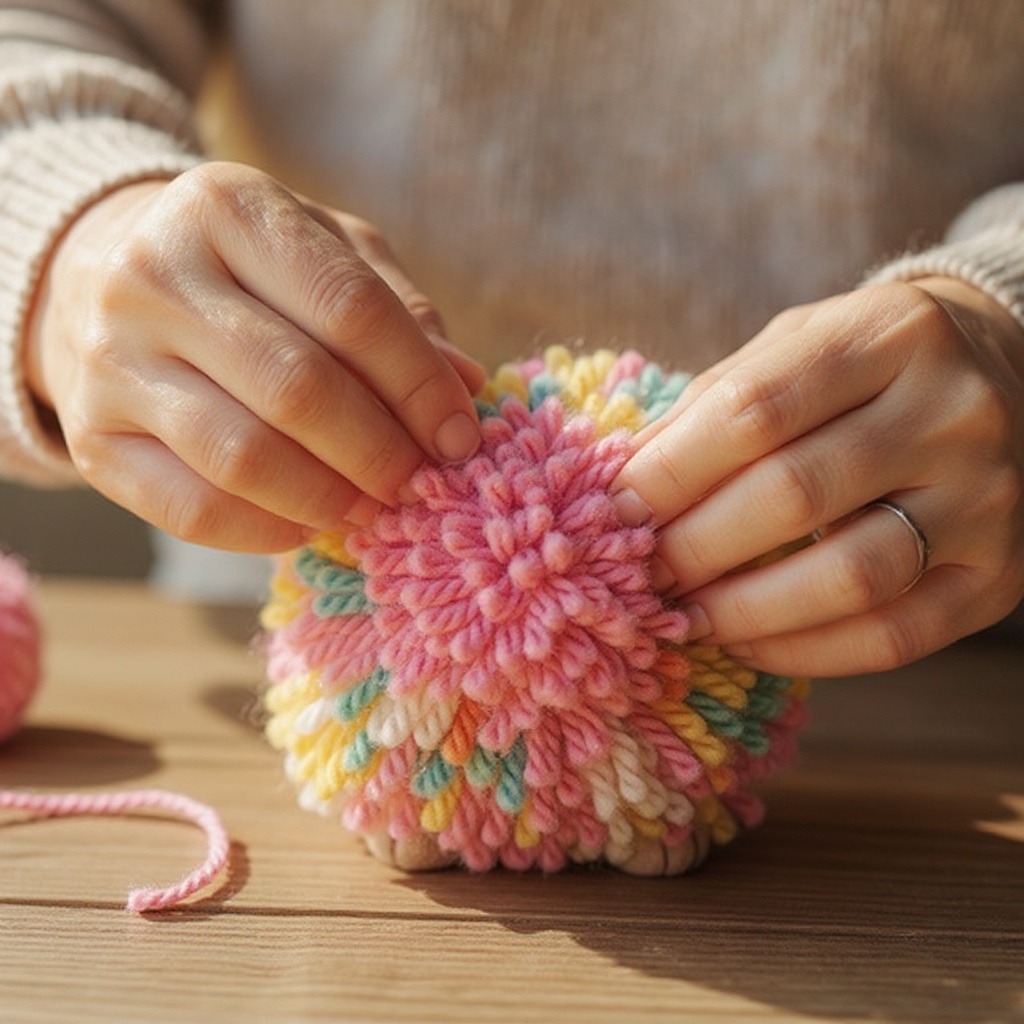
**Secure the Center Tie:** Once you've wrapped enough yarn, take a separate piece of yarn or embroidery floss, about 8-10 inches long. Carefully tie this piece tightly around the very center of the wrapped yarn bundle. Ensure the knot is as tight as possible, as this will prevent the pom pom from unraveling. Leave the two long tails of this tie hanging; these will be crucial for attaching features later or for securing the pom pom itself.
- 4
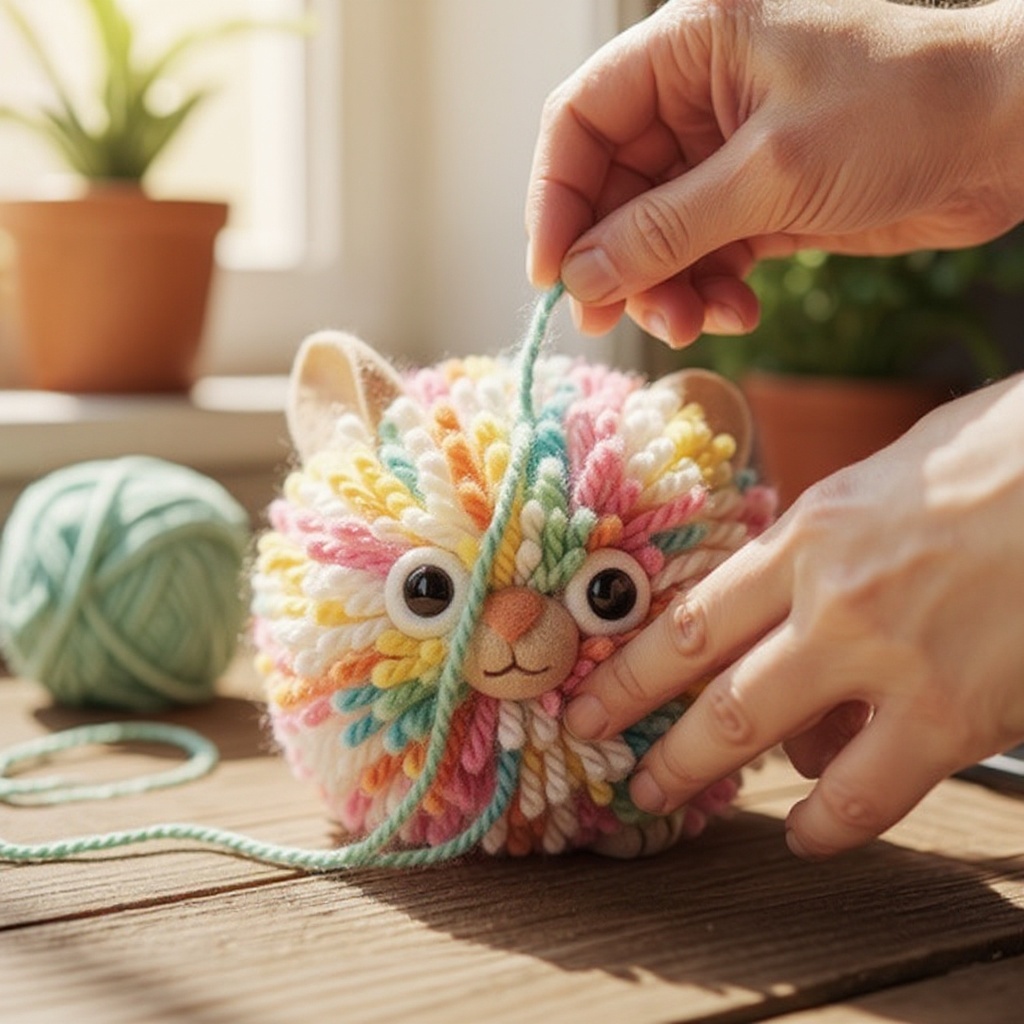
**Release and Cut the Yarn Loops:** If using a pom pom maker, close the arms securely over the yarn bundle, then use sharp scissors to cut through the yarn along the groove provided on the maker. If you used your fingers or a fork, carefully slide the yarn bundle off your fingers or the fork, being careful not to disturb the center tie. Once the yarn is off, you'll have loops on either side of the center tie. Use your sharp scissors to cut through all of these loops, effectively creating the fluffy strands of your pom pom.
- 5
**Shape and Trim for Fullness:** Now that the yarn is cut, your pom pom will look a bit messy and uneven. This is where the trimming comes in! Hold the pom pom firmly and begin to trim the yarn strands evenly with your sharp scissors. Rotate the pom pom as you trim, aiming for a perfectly round shape. The more you trim and fluff, the denser and rounder your pom pom will become. Don't be afraid to trim quite a bit to achieve a satisfyingly fluffy sphere.
- 6
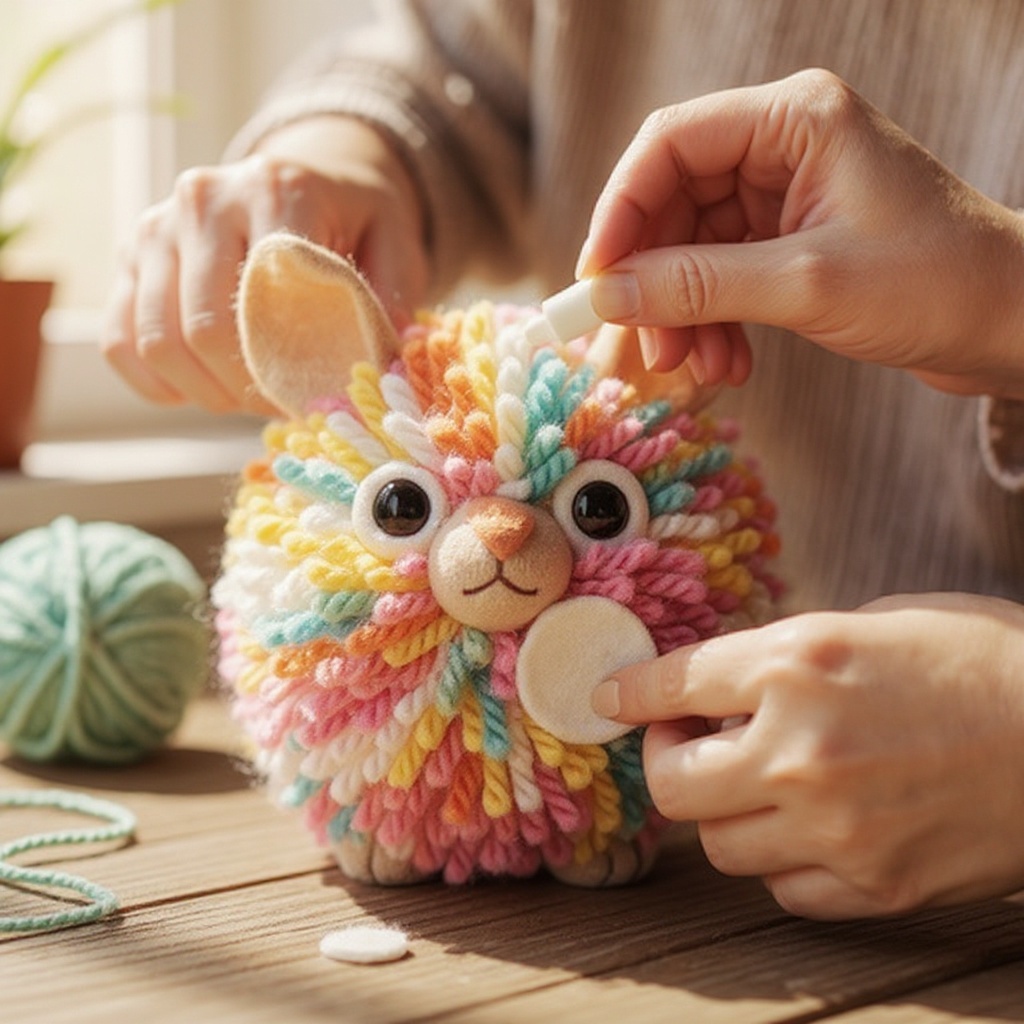
**Create Your Creature's Features:** While your pom pom is drying or once it's fully formed, it's time to prepare the decorative elements. From your craft felt sheets, use a pencil or marker to draw small shapes for your creature's features. Think about ears (triangles, rounded shapes), noses (circles, ovals), wings (various shapes), or even small mouths. You can also use a small craft knife or rotary cutter for more precise cutting if you have one, but scissors work perfectly well for most shapes.
- 7
**Attach the Facial Features:** Using your chosen adhesive (craft glue or hot glue), carefully attach the felt shapes onto your pom pom body. Position the felt pieces where you envision the creature's face or accessories. For example, glue two small triangles to the top for ears, or a tiny circle for a nose. This is also the time to add the googly eyes; apply a small dab of glue to the back of each eye and press them firmly onto the pom pom, ensuring they are positioned symmetrically.
- 8
**Add Optional Pipe Cleaner Details:** If you're incorporating pipe cleaners for antennae, legs, or a tail, cut them to your desired length. For antennae, you might bend the ends slightly for a more whimsical look. For legs, you could bend them into a U-shape. Carefully insert one end of the pipe cleaner into the pom pom, pushing it gently into the yarn. Secure it with a small dab of craft glue or hot glue at the point of insertion to ensure it stays in place.
- 9
**Reinforce and Secure (If Needed):** If your pom pom feels a little loose or you want extra security for the center tie, you can wrap more embroidery floss or thin yarn around the center knot and tie it off securely. This is especially helpful if you plan on attaching heavier elements or if the pom pom will be handled frequently. Ensure any extra ties are trimmed neatly so they don't detract from the overall look.
- 10
**Allow Glue to Dry Completely:** Before your fluffy pom pom creature is ready for its first adventure, it's crucial to allow all the glue to dry thoroughly. This might take anywhere from 15 minutes to a few hours, depending on the type of glue used and the amount applied. Gently test a small area to ensure everything is firmly adhered and won't budge. This prevents any parts from falling off during play.
- 11
**Consider Yarn Texture and Color Combinations:** Explore the vast world of yarn! Different textures, like fuzzy chenille, smooth cotton, or chunky wool, will create distinct looks and feels for your creatures. Don't shy away from variegated or ombre yarns, which can create natural stripes or color gradients on your pom pom, adding an extra layer of visual interest without extra effort. Experimenting with color combinations for the pom pom body and the felt features can lead to truly unique and eye-catching characters.
- 12
**Experiment with Different Pom Pom Sizes:** The size of your pom pom directly impacts the scale and presence of your creature. Use fewer wraps for smaller, delicate creatures, or more wraps and a larger tool (like a wider fork or a bigger pom pom maker) for larger, more substantial friends. Varying sizes can also be used together to create families of creatures or to add detail, like a smaller pom pom for a head on a larger body.
- 13
**Get Creative with Felt Shapes and Additions:** Beyond basic features, think outside the box with your felt. Cut out tiny hearts for cheeks, small stars for embellishments, or even intricate patterns for wings. You can also layer felt pieces for more dimension – for example, a black felt circle for a nose with a tiny white felt dot for a highlight. Consider using embroidery floss to stitch on details like whiskers or a mouth for a more handcrafted look.
- 14
**Utilize Pipe Cleaner Versatility:** Pipe cleaners aren't just for antennae and legs! Bend them into spirals for curly tails, create intricate wing shapes, or even form small glasses to perch on your creature's 'nose'. You can also wrap additional yarn around the pipe cleaner before inserting it for a softer, more integrated look. For a sturdy base, you can insert the pipe cleaner into a small bead before attaching it to the pom pom.
- 15
**Secure Loose Yarn Ends:** After trimming your pom pom, you might notice a few stray yarn ends that stick out. Don't worry about perfection here; a few wisps can add to the charm! However, if any ends are significantly loose or look like they might unravel, you can carefully trim them flush with the rest of the pom pom or secure them with a tiny dab of fabric glue. This ensures the longevity and neat appearance of your creation.
- 16
**Add a Hanging Loop:** If you wish to hang your pom pom creature as a decoration or part of a mobile, you can create a hanging loop before you fully trim the pom pom. Simply leave the center tie longer, or tie an additional loop of sturdy yarn or ribbon around the center knot, ensuring it's securely fastened. Trim the pom pom around this loop, leaving the loop itself intact for hanging.
- 17
**Consider Different Yarn Types for Texture:** While worsted weight is a great starting point, don't limit yourself. Chunky yarns create impressively large and quick pom poms, perfect for statement creatures. Thinner yarns, like fingering weight or lace weight, can be used in multiples or wrapped many more times to create delicate, intricate pom poms for smaller, more detailed characters. Experimenting with novelty yarns, such as boucle or eyelash yarn, can add unique textures and visual appeal.
- 18
**Use Tweezers for Precision:** When working with small felt pieces or attaching tiny googly eyes, tweezers can be your best friend. They allow for precise placement and application of glue, especially when using a hot glue gun where speed is of the essence. Tweezers can also help you hold small felt cutouts steady while you apply glue to the back.
- 19
**Create a 'Face' Template:** For consistency, especially if making multiple creatures or if children are involved, consider creating a simple template on paper for where the eyes and nose should go. This helps ensure a balanced and appealing facial arrangement. You can also draw a light outline on the pom pom itself with a pencil, though be mindful that the pencil marks might be difficult to remove from darker yarns.
Tips & Troubleshooting
- 1For extra fluffy pom poms, use a sharp pair of scissors to trim and fluff them out after tying the center. The sharper the scissors, the cleaner the cut, which helps each strand stand out and contribute to the overall fluffiness. Don't be afraid to trim away quite a bit to achieve that perfectly round, cloud-like appearance.
- 2Experiment with different yarn textures and colors to create unique creatures. Try variegated yarn for a striped effect! Combining different yarn types, like a smooth acrylic with a fuzzy mohair, can add depth and visual interest. Variegated yarns naturally create beautiful color transitions, making each pom pom a one-of-a-kind masterpiece.
- 3If the pom pom feels too loose, you can wrap more yarn around the center tie for extra security. This is particularly important if you plan to add heavier embellishments or if the creature will be played with vigorously. Double-knotting the center tie and adding a few extra wraps can significantly increase the pom pom's durability.
- 4Hot glue dries faster but requires adult supervision. Craft glue is safer for younger children but takes longer to set. When using hot glue, work in small sections and have your googly eyes or felt pieces ready to press into place immediately. For craft glue, be patient and allow ample drying time to ensure a strong bond.
- 5Don't be afraid to embrace imperfections! Slightly uneven pom poms or slightly off-center eyes can give your creatures a charming, handmade character. These little quirks often add to their personality and make them feel more unique and loved.
- 6Consider using embroidery floss for delicate details like mouths, whiskers, or eyebrows. A few simple stitches can add a lot of expression to your creature's face and give it a more refined, finished look. You can also use embroidery floss to create patterns on the pom pom itself.
- 7If you're making multiple creatures, consider preparing all your felt shapes and pipe cleaner pieces in advance. This streamlines the assembly process and makes it easier to switch between different creature designs without losing momentum.
- 8For a truly unique texture, try wrapping your yarn around a cardboard tube (like from a paper towel roll) instead of your fingers or a pom pom maker. This will result in a larger, more elongated pom pom that can be trimmed into various shapes, or used as a base for a more complex creature.
Related Activities You Might Enjoy
Frequently Asked Questions
How do I make a pom pom without a pom pom maker?
You can easily make pom poms using your fingers or a fork. Wrap yarn around them, tie tightly in the middle, and then cut and trim to create a fluffy ball. This method is just as effective! For fingers, use two or three fingers and wrap the yarn around them about 50-70 times for a medium pom pom. For a fork, wrap yarn around the tines. Once wrapped, take a separate piece of yarn and tie it very tightly around the center of the bundle, leaving long tails. Carefully slide the yarn off and then cut through the loops on both sides. Trim and shape until you have a round pom pom. This technique is a classic and works wonderfully!
What kind of yarn is best for pom pom crafts?
Worsted weight yarn is ideal for most pom pom crafts as it's easy to work with and creates a good density. However, you can experiment with bulkier or thinner yarns for different textures and sizes. Worsted weight yarn offers a good balance of fluffiness and ease of handling, making it perfect for beginners and children. Bulky yarns will create larger, quicker pom poms, while thinner yarns will require more wraps but result in finer, more delicate creations. Acrylic, wool, and cotton blends are all excellent choices, offering durability and a wide range of colors.
How do I attach decorations to my pom pom creature?
Craft glue or a hot glue gun (with adult supervision) works well for attaching googly eyes, felt shapes, or pipe cleaners. Ensure the glue is dry before handling the creature. For googly eyes and felt, a small dab of craft glue or hot glue applied to the back of the item is usually sufficient. For pipe cleaners, insert them into the pom pom and secure the base with a bit of glue. If using a hot glue gun, work quickly as the glue sets fast. For craft glue, allow ample drying time for a strong bond.
Can I make different types of pom pom creatures?
Absolutely! By changing the colors of yarn, the shapes of felt additions, and the placement of features, you can create an endless variety of creatures like owls, cats, monsters, or even abstract characters. Think about the defining characteristics of an animal or creature: pointy ears for a cat, big round eyes for an owl, or multiple eyes for a monster. You can also use different colored yarn for stripes, spots, or even to create a gradient effect. The possibilities are truly limitless, limited only by your imagination!
How do I make my pom poms extra fluffy?
To achieve extra fluffy pom poms, the key is in the trimming and the amount of yarn used. After tying the center securely and cutting the loops, use a very sharp pair of scissors to trim the pom pom into a perfect sphere. Don't be afraid to trim away a significant amount of yarn; this process fluffs out the strands and creates a denser, more luxurious feel. For even more fluffiness, wrap more yarn around your fingers or pom pom maker than you think you'll need. The more yarn you start with, the fuller the final pom pom will be.
What age is this craft suitable for?
This craft is suitable for children aged 6 and up, with adult supervision recommended, especially when using scissors or a hot glue gun. Younger children can participate by helping to select yarn colors, choose googly eyes, or even by wrapping yarn (with assistance). Older children and adults can enjoy the entire process independently. The simplicity of the pom pom making and the creative freedom in decorating make it an engaging activity for a wide range of ages and skill levels.
Can I make pom pom creatures with different yarn weights?
Yes, you can absolutely use different yarn weights! Worsted weight is standard, but bulkier yarns will create larger, quicker pom poms, perfect for statement creatures. Thinner yarns, like fingering or lace weight, require many more wraps but yield delicate, intricate pom poms for smaller, detailed characters. Combining different yarn weights can also create interesting textural contrasts within a single creature or across a collection. Just remember that the number of wraps will need to be adjusted based on the yarn's thickness to achieve a similar density.
What Next?
Once your fluffy pom pom creatures are complete and dry, they're ready for adventure! Encourage imaginative play by creating a whole menagerie of unique characters. For variations, consider using different yarn weights for varied textures, or even braiding strands of yarn before wrapping for a unique striped effect. You can also experiment with adding small beads for eyes or using embroidery floss for delicate details. Display your creations on a shelf, in a shadow box, or even string them together to make a whimsical garland. Store them gently in a basket or box to keep them fluffy and dust-free, ready for their next imaginative escapade.
Free: 10 Paper Crafts Anyone Can Make in 5 Minutes
Get our beginner guide + new craft ideas weekly.
No spam. Unsubscribe anytime.
Did you complete this activity?
Related