How to Make a Paper Plate Lion Mask — Easy Step-by-Step Guide
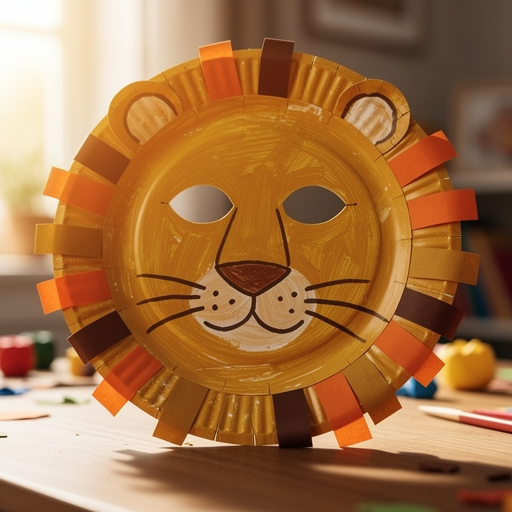
Unleash your little one's creativity with this adorable paper plate lion mask. A simple and engaging craft for preschoolers!
Quick answer
To make a paper plate lion mask, you need a paper plate, yellow, orange, and brown construction paper, child-safe scissors, glue, and crayons/markers. This beginner-friendly activity takes about 30 minutes and is perfect for preschoolers aged 3-6. Start by cutting out the lion's face shape and then assemble the features to create a majestic mane and expressive face.
What you need
Shop on Amazon · As an Amazon Associate we earn from qualifying purchases. Links above are affiliate links — we may earn a commission at no extra cost to you.
Roar into fun with this delightful paper plate lion mask craft! It’s a fantastic way to spark imagination and engage young children in a hands-on creative experience. This project is incredibly beginner-friendly, making it ideal for preschoolers and early elementary-aged children who are just developing their fine motor skills. Not only is it an enjoyable activity, but the finished mask also serves as a wonderful prop for imaginative play, storytelling, or even a simple costume. Get ready to create a friendly, fierce, and fabulous lion that your little one will be proud to wear!
On this page
Step-by-Step Instructions
- 1
Begin by laying your white paper plate flat on your work surface. This will serve as the base for your lion's face, providing a sturdy foundation for all the elements you'll be adding.
- 2
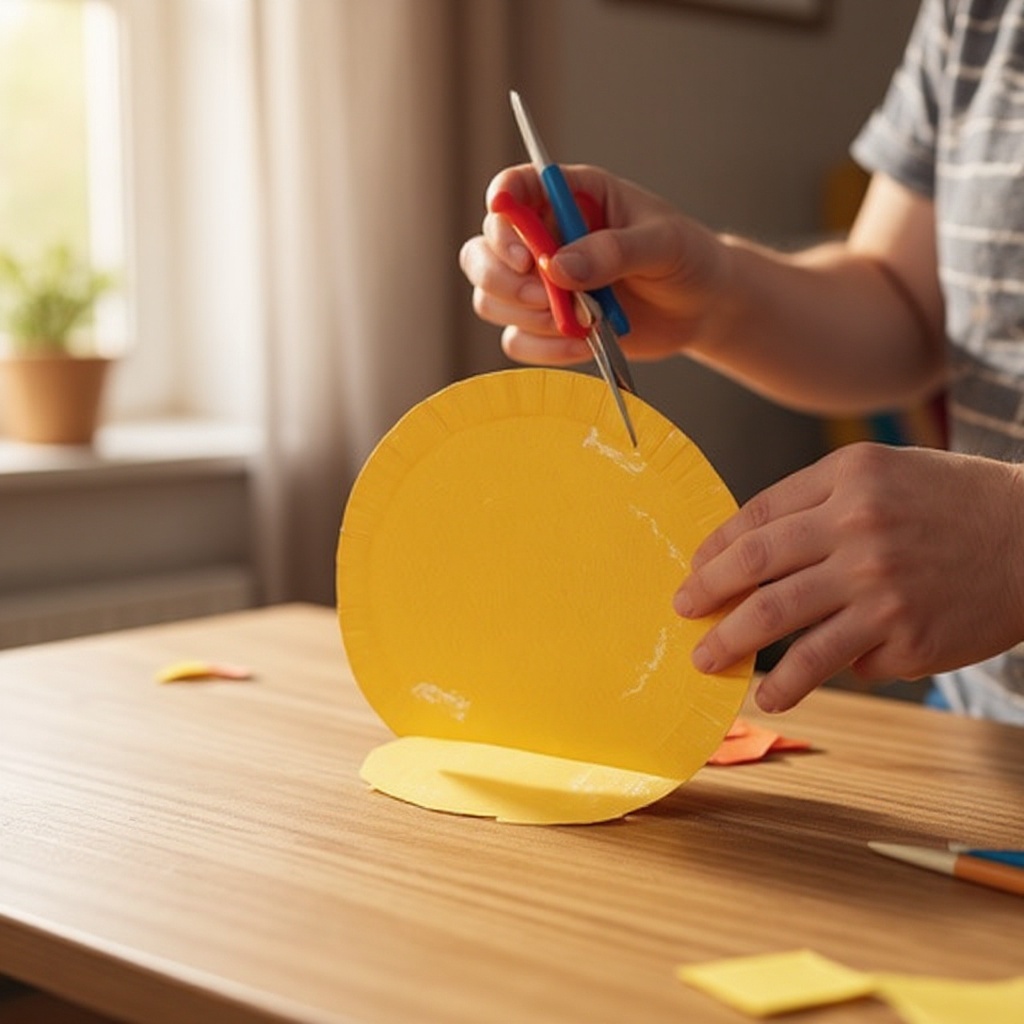
Take your yellow construction paper and, using a pencil, lightly trace a circle that is slightly smaller than the paper plate. This will be the main part of your lion's face. Carefully cut out this yellow circle using your child-safe scissors, aiming for a smooth, even edge.
- 3
Next, select your orange construction paper and trace a smaller circle, approximately half the size of the yellow face circle. This will be the lion's nose. Cut this orange circle out precisely, ensuring it's a neat shape that will stand out on the face.
- 4
Now, grab your brown construction paper and cut out two small, triangular shapes. These will be the lion's ears. Aim for them to be roughly the same size and shape, and consider making them slightly rounded at the tips for a softer look.
- 5
For the magnificent mane, take your yellow and orange construction paper and cut several thin strips. Aim for each strip to be about 1 inch wide and between 4 to 6 inches long. The more strips you cut, the fuller and more impressive your lion's mane will be.
- 6
Carefully apply glue to the back of the yellow construction paper circle. Center it onto the white paper plate, ensuring there's a visible border of the paper plate showing around the edges. Press down gently to secure it firmly.
- 7
Now, take the orange nose circle and apply glue to its back. Position it on the lower half of the yellow face circle, making sure it's centered and looks like a proud lion's nose. Press down to adhere it.
- 8
Apply glue to the flat edge of each brown ear triangle. Position these ears on the top edge of the paper plate, allowing them to peek out slightly from behind the top edge of the yellow face circle. This creates a natural, layered effect.
- 9
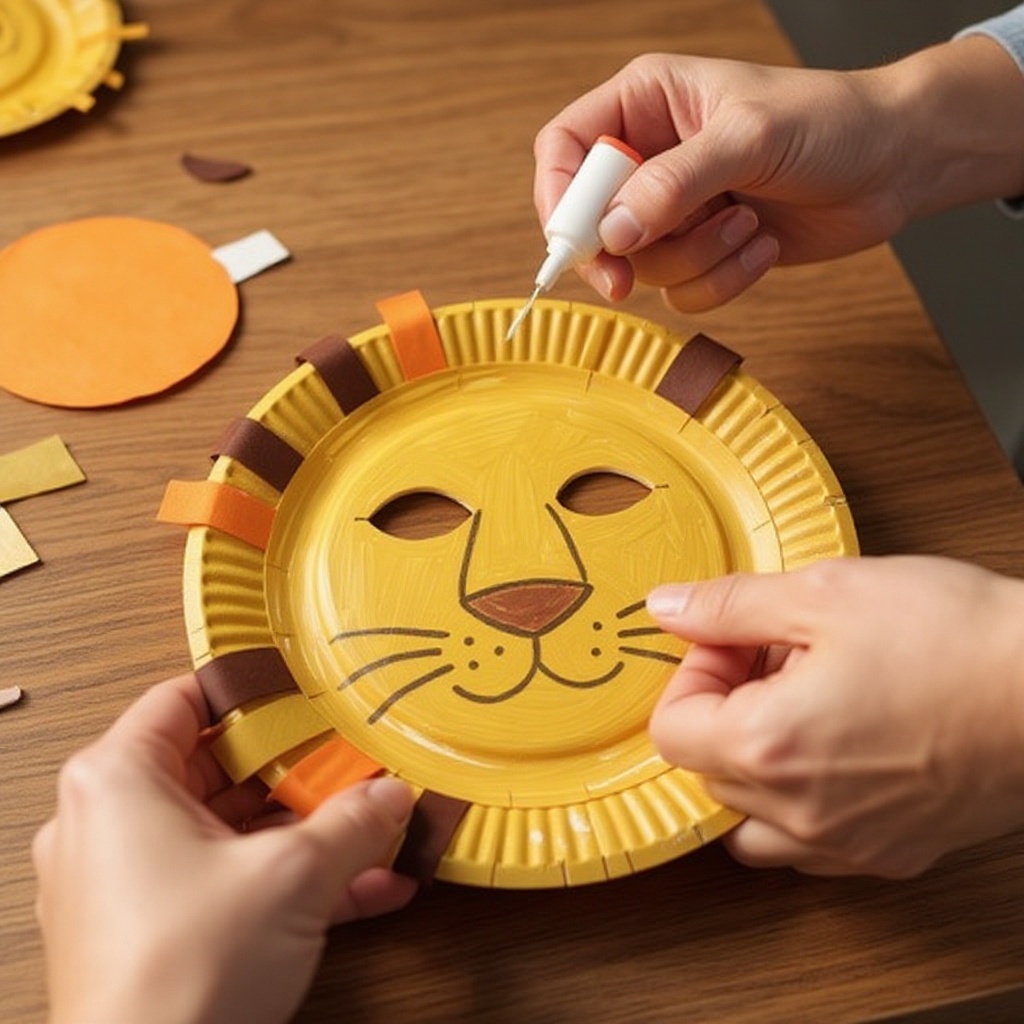
Begin attaching the construction paper strips to create the lion's mane. Apply glue to one end of a strip and press it onto the outer edge of the paper plate, around the yellow face. Overlap the strips slightly as you work your way around the entire perimeter of the plate. Alternate between yellow and orange strips for a vibrant, multi-toned mane.
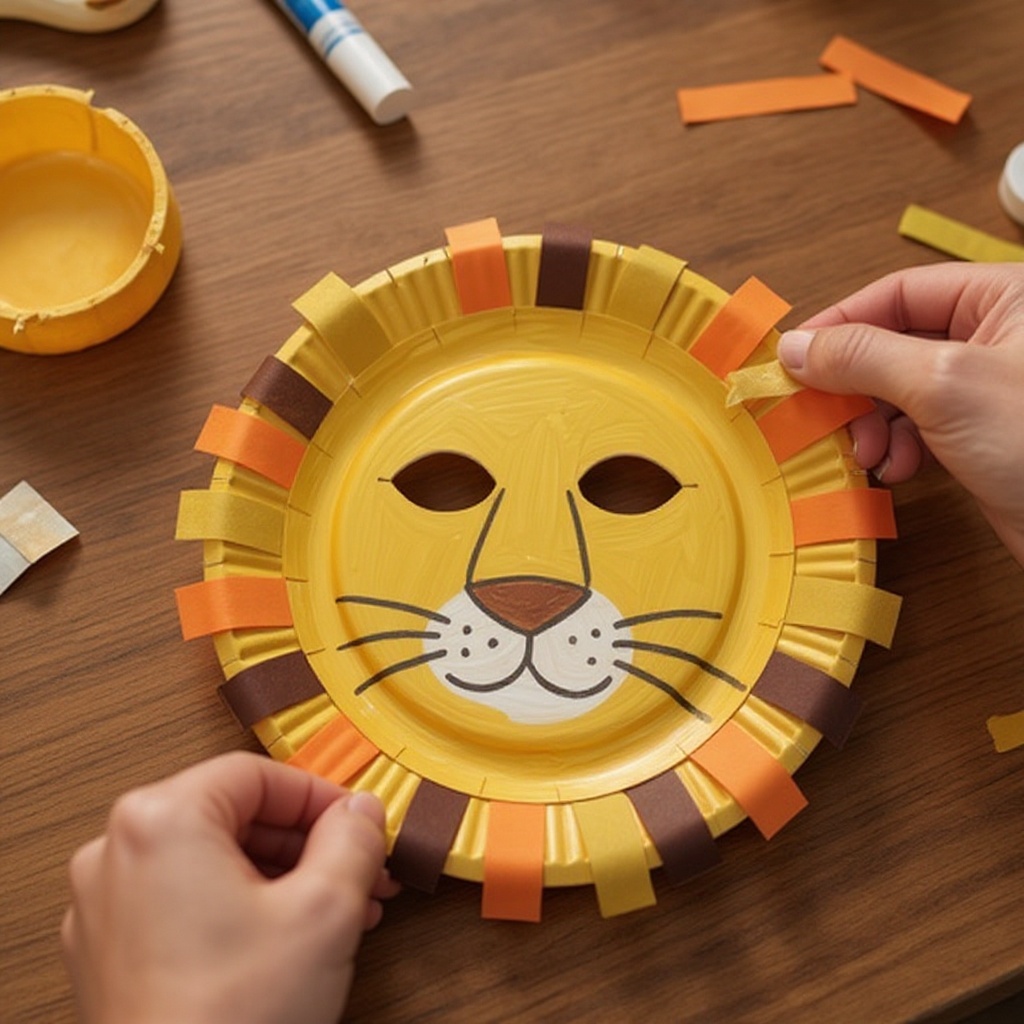
- 10
Once the mane is complete and the glue is dry, it's time to bring your lion to life with facial features. Using brown and black crayons or markers, carefully draw the lion's eyes on the yellow face circle. You can make them round, almond-shaped, or even add a playful wink. Then, draw a mouth, perhaps a gentle smile or a slightly open mouth showing a hint of teeth.
- 11
Add some extra detail and dimension to your lion's face. You can use the orange crayon or marker to add some subtle shading around the nose or cheeks, or even draw some whiskers extending from the nose area. A touch of white crayon can be used to add tiny highlights to the eyes, making them sparkle.
- 12
For a more robust and durable mask, consider gluing a second paper plate to the back of your existing one before you start adding the mane. This will reinforce the structure and make the mask less prone to bending or tearing, especially if it will be handled frequently.
- 13
Encourage your child to personalize their lion by letting them choose the colors for the mane and nose. They might want a fiery orange mane, a deep brown nose, or even a mix of unexpected colors. This freedom of choice fosters creativity and ownership of the project.
- 14
If you're using liquid craft glue, it's essential to allow ample drying time before you begin drawing on the face. Applying markers or crayons to damp glue can cause the colors to smudge and bleed, ruining the crisp details of your lion's features.
- 15
To transform your paper plate creation into a wearable mask, you'll need to add a way to secure it to your child's head. Carefully punch two small holes on opposite sides of the paper plate, typically near the edge where the mane is attached. Ensure these holes are sturdy enough to hold the string.
- 16
Thread a piece of elastic string or yarn through the punched holes. Make sure the string is long enough to comfortably fit around your child's head. Tie the ends of the string securely to the holes, creating a loop that will hold the mask in place.
- 17
For an extra touch of flair, consider adding some extra decorative elements to your lion's mane. You could glue on small pieces of yarn, felt shapes, or even a few googly eyes for a more whimsical look. This is a great way to add texture and visual interest.
- 18
If your child is particularly proud of their creation, you can easily turn it into a piece of wall art. Simply attach a loop of string or ribbon to the back of the mask, and hang it in their room or on a craft display board. This preserves their artwork and celebrates their accomplishment.
- 19
When it comes to drawing the facial features, encourage your child to experiment with different expressions. A happy lion, a sleepy lion, or even a roaring lion can all be achieved with simple changes to the eyes and mouth. This adds another layer of imaginative play potential.
- 20
Ensure that all glued pieces are firmly attached before proceeding to the next step. A gentle tug on the mane strips or ears can help confirm they are well-secured, preventing them from falling off during the crafting process or during play.
Tips & Troubleshooting
- 1For a sturdier mask that will withstand enthusiastic play, consider gluing a second paper plate to the back of your primary plate before you begin adding the decorative elements. This creates a more robust structure that is less likely to bend or tear, ensuring your lion mask lasts longer.
- 2Empower your child's creativity by letting them choose the colors for the mane and nose. This personalization makes the mask uniquely theirs and increases their pride in the finished product. They might surprise you with their color combinations!
- 3If you opt for liquid craft glue, it's crucial to allow ample drying time before you start drawing on the face with crayons or markers. Applying color to still-wet glue can lead to smudging and a less defined look, so patience here is key for a clean finish.
- 4To make the lion mask wearable and ready for imaginative adventures, you can punch two small holes on opposite sides of the paper plate, near the edge. Thread a piece of elastic string or sturdy yarn through these holes and tie it securely to create a comfortable fit.
- 5Don't be afraid to experiment with different textures for the mane. Instead of just construction paper strips, you could also use yarn, felt, or even strips of fabric for a more tactile and visually interesting mane that adds depth and character to your lion.
- 6For an extra touch of fierceness or friendliness, consider adding googly eyes instead of drawing them. They add a fun, three-dimensional element and can be easily glued onto the yellow face circle. Just be sure to use a strong adhesive suitable for plastic.
- 7If your child is very young and struggles with cutting, you can pre-cut the shapes for them. This allows them to focus on the enjoyable parts of gluing and decorating, ensuring a successful and frustration-free crafting experience for everyone involved.
- 8To add a unique touch to the mane, try cutting the construction paper strips with a wavy edge or a zig-zag pattern before gluing them on. This adds visual interest and makes your lion's mane look even more dynamic and wild.
Related Activities You Might Enjoy
Frequently Asked Questions
What materials do I need for a paper plate lion mask?
To create this adorable paper plate lion mask, you'll need a few common craft supplies. The core items include one white paper plate, yellow, orange, and brown construction paper, child-safe scissors, and a glue stick or liquid craft glue. For decorating the face, you'll want crayons or markers in colors like brown, black, and orange. If you plan to make the mask wearable, you'll also need elastic string or yarn and a hole punch. These materials are readily available at most craft stores, supermarkets, or even around your home, making this an accessible project for everyone.
How long does it take to make a paper plate lion mask?
This delightful paper plate lion mask is a relatively quick and engaging craft project. Typically, the entire process, from cutting out the shapes to gluing them in place and drawing the facial features, takes approximately 30 minutes to complete. This timeframe is ideal for young children's attention spans. If you are using liquid glue and want to ensure a perfectly dry surface before drawing, you might want to factor in an additional 10-15 minutes for drying time. However, with a glue stick, you can usually proceed to the decorating stage almost immediately.
Can preschoolers do this craft independently?
With appropriate supervision and guidance, preschoolers can absolutely participate in making this paper plate lion mask. While they might need assistance with the cutting steps, especially if they are still developing their fine motor skills, they can enthusiastically take on tasks like coloring the face, applying glue to the construction paper shapes, and pressing them onto the mask. For younger preschoolers, consider pre-cutting the shapes to simplify the process. As they grow, they can gradually take on more responsibility for the cutting and assembly, fostering their independence and confidence.
How can I make the lion mask wearable?
Transforming your paper plate lion mask into a wearable accessory is a simple yet crucial step for imaginative play. To do this, carefully use a hole punch or the tip of your scissors to create two small, sturdy holes on opposite sides of the paper plate, typically near the outer edge where the mane is attached. Once the holes are made, thread a piece of elastic string or a length of sturdy yarn through each hole. Tie the ends of the string securely to the inside of the mask, creating a loop that can be comfortably worn around your child's head.
What are some ways to make the lion mask unique?
There are many creative ways to make your paper plate lion mask truly unique and personalized! Encourage your child to choose their own color palette for the mane and nose; perhaps a fiery red mane or a purple nose for a whimsical touch. You can also experiment with different textures for the mane by using yarn, felt strips, or even crinkled tissue paper. Adding googly eyes instead of drawing them can give your lion a fun, lively appearance. Don't forget to add details like whiskers drawn with a marker, or even a small construction paper tongue peeking out for extra personality.
Can I use materials other than construction paper for the mane?
Absolutely! While construction paper is a fantastic and readily available option for the lion's mane, feel free to get creative with other materials to add unique textures and visual appeal. You could cut strips of yarn in various shades of yellow, orange, and brown and glue them around the edge of the paper plate for a shaggy, wild look. Felt scraps can also be cut into strips or fringed to create a soft, luxurious mane. Even strips of fabric or crêpe paper can be used to achieve different effects, allowing for endless customization and a truly one-of-a-kind lion mask.
What Next?
Congratulations on creating your magnificent paper plate lion mask! This project is a fantastic starting point for a world of creative adventures. You can easily adapt this design by using different colored construction paper for a unique lion, or even adding glitter for extra sparkle. Consider making a whole pride of lions by creating masks for each family member! Once your masterpiece is complete, it can be displayed proudly on a wall or used as a cherished prop for hours of imaginative play. For future projects, explore other animal masks or even create a jungle scene to accompany your lion.
Free: 10 Paper Crafts Anyone Can Make in 5 Minutes
Get our beginner guide + new craft ideas weekly.
No spam. Unsubscribe anytime.
Did you complete this activity?