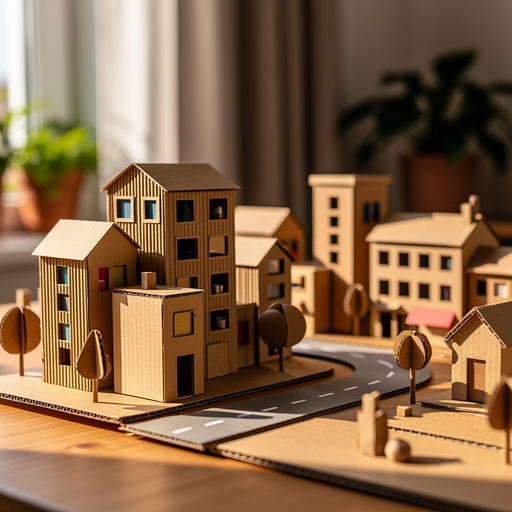
How to Build a Cardboard Cityscape Diorama — Easy Step-by-Step Guide
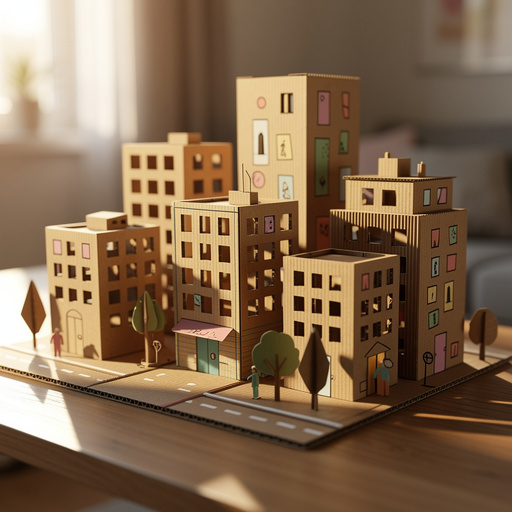
Transform cardboard boxes into a miniature city! This fun diorama project lets kids design and build their own urban landscape. It's a fantastic way to spark creativity, develop spatial reasoning, and create a unique piece of art.
Quick answer
To make a cardboard cityscape diorama, you need cardboard boxes, scissors, glue, and paint, taking about 90 minutes. Start by cutting and assembling your building shapes, then paint and arrange them on a base. This intermediate activity has 10 steps and is perfect for 12 year olds.
What you need
Shop on Amazon · As an Amazon Associate we earn from qualifying purchases. Links above are affiliate links — we may earn a commission at no extra cost to you.
Embark on a creative urban adventure with this Cardboard Cityscape Diorama project! Transforming humble cardboard boxes into a bustling miniature metropolis is an incredibly rewarding experience. This project is perfect for young aspiring architects and designers, offering a tangible way to bring their imaginative cityscapes to life. It's an ideal activity for fostering creativity, problem-solving skills, and a sense of accomplishment, making it a standout choice for kids aged 12 and up looking for a fun and engaging DIY challenge.
On this page
Step-by-Step Instructions
- 1
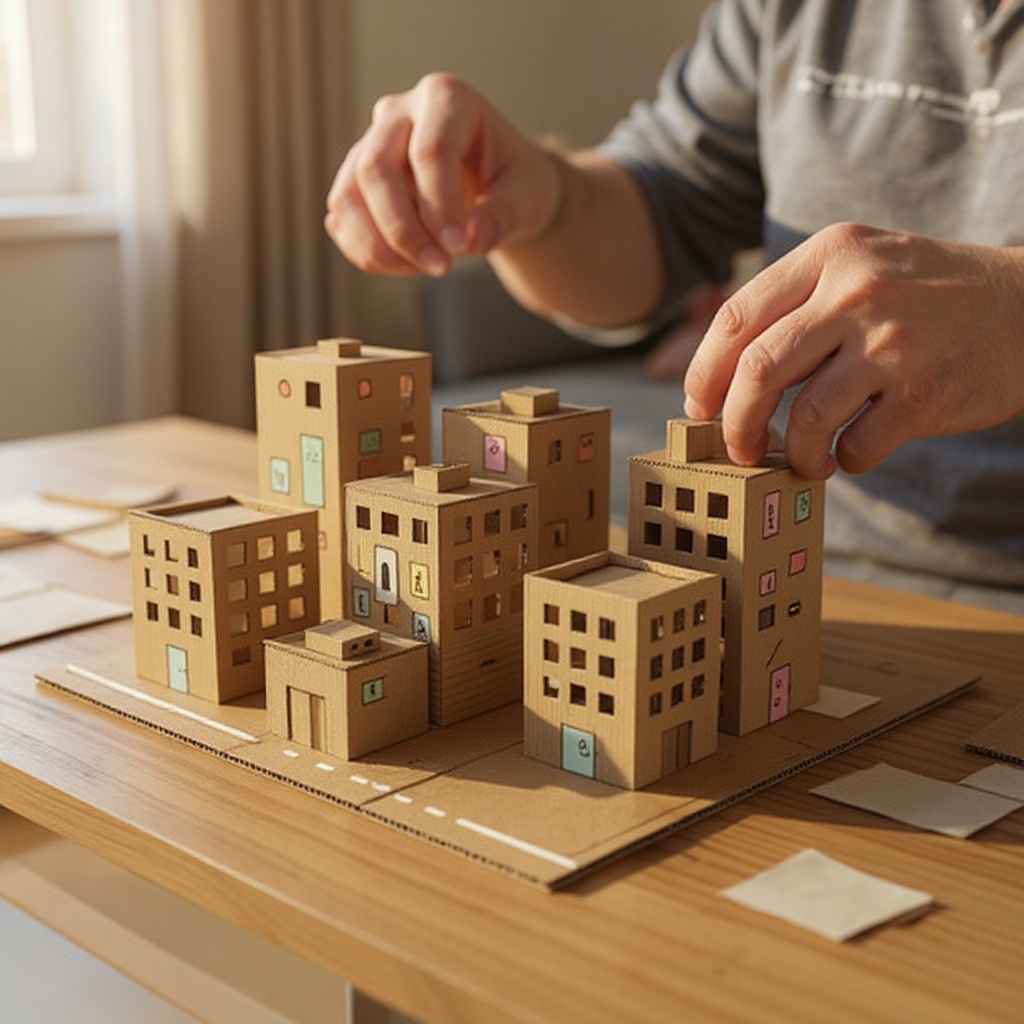
Gather your cardboard boxes and decide on the overall size and shape of your cityscape. Lay out your chosen boxes and consider how they might fit together to form the foundation of your city, thinking about the scale and the number of buildings you want to create.
- 2
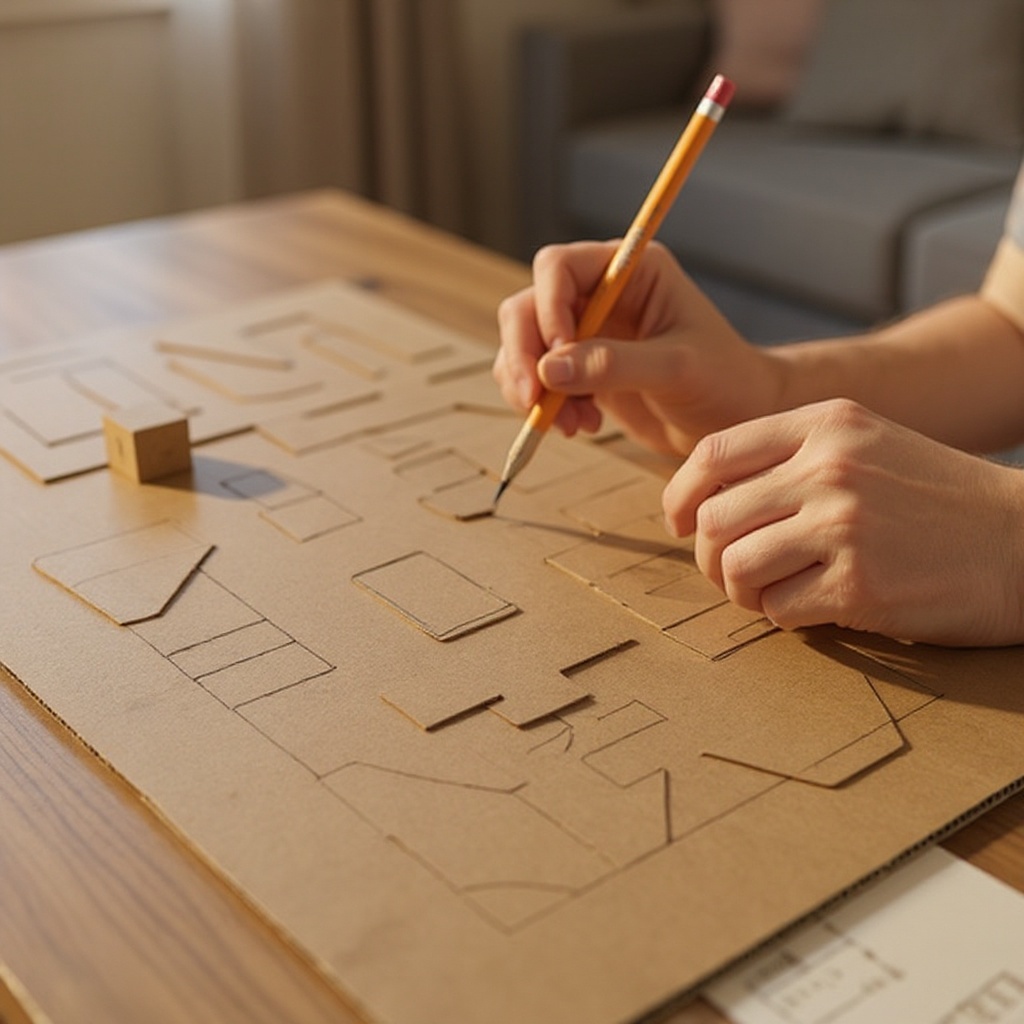
Using a ruler and pencil, sketch out the basic shapes of your buildings on the cardboard. Think about different heights and widths to create visual interest and a sense of depth, sketching simple rectangular prisms, cubes, or more complex L-shapes.
- 3
Carefully cut out your building shapes using a craft knife or scissors. For taller buildings, you might need to cut and fold larger pieces of cardboard, ensuring clean, straight lines for a professional look.
- 4
Assemble the buildings by folding and gluing the edges together to create 3D structures. Use tape to hold pieces in place while the glue dries if needed, ensuring all seams are securely joined for structural integrity.
- 5
Cut out small windows and doors from the building facades. You can also cut out larger openings for a more dramatic effect, using a ruler to guide your cuts for straight lines and precise shapes.
- 6
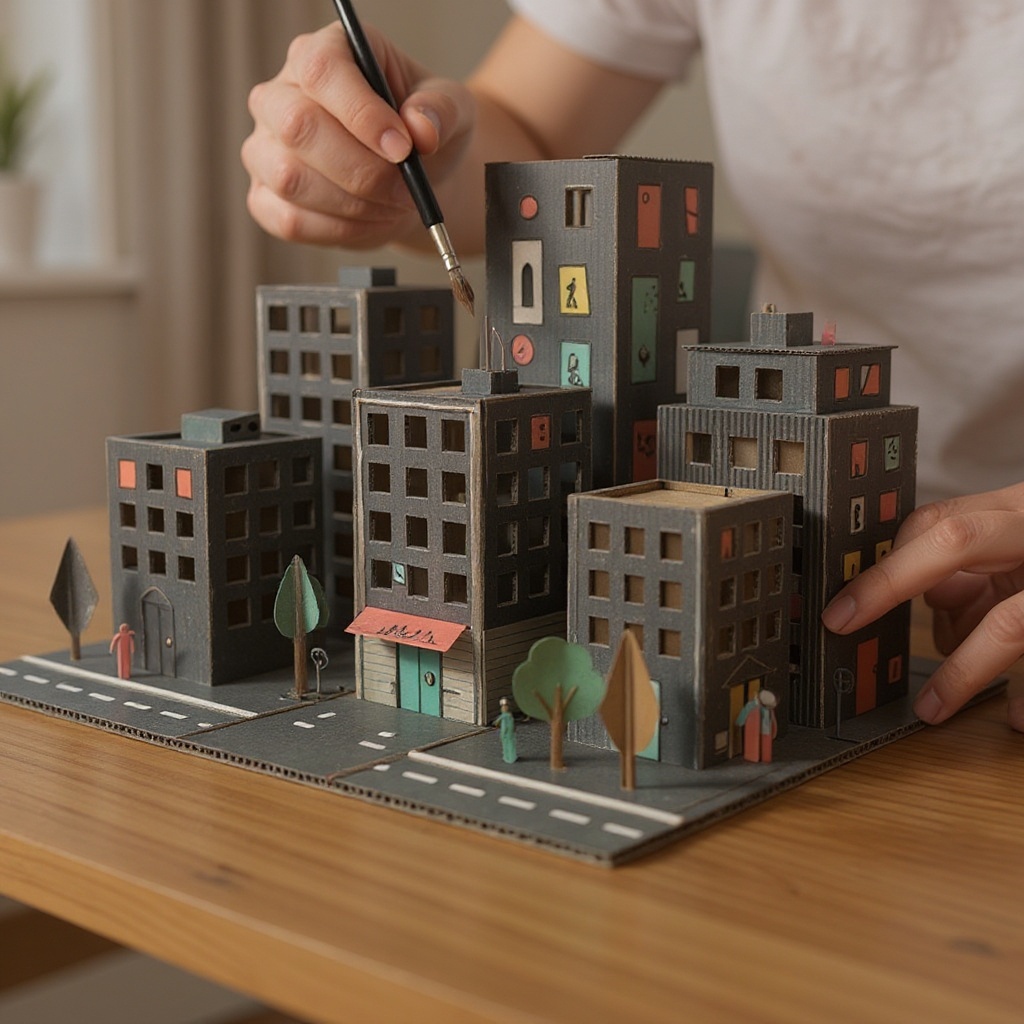
Paint the buildings. Start with base colors like grey, black, or white for the main structures, applying a smooth, even coat. Let them dry completely before moving on to the next step to avoid smudging.
- 7
Add details to the buildings. Use smaller brushes to paint window panes, door frames, and architectural accents, such as balconies or ledges. Consider adding rooftop details like antennas, water towers, or ventilation units for added realism.
- 8
Prepare your diorama base. This could be a large piece of sturdy cardboard or the bottom of a larger shipping box, painted to represent the ground, streets, or even a body of water.
- 9
Paint the base of your diorama. You can create a street with grey paint, add green spaces with blue and green paint for parks and rivers, or even a dark blue for a night sky effect.
- 10
Glue the finished buildings onto the diorama base in an arrangement that looks like a city. Vary the heights and spacing for visual interest, placing taller buildings towards the back and shorter ones in the foreground to create a sense of perspective.
- 11
Add any optional decorative elements like cardboard tube trees, bottle cap streetlights, or glitter for a starry night sky. Let everything dry thoroughly before handling or displaying your finished masterpiece.
Tips & Troubleshooting
- 1For cleaner cuts, use a ruler as a guide when using a craft knife. Always cut away from yourself, applying steady pressure to ensure a smooth, precise edge that will make assembly easier and the final product look more polished.
- 2Experiment with different textures by gluing on small pieces of fabric or crumpled paper before painting. This can add a unique dimension to your buildings, mimicking brickwork, concrete, or even grassy areas, and can be painted over for a cohesive look.
- 3If using a hot glue gun, ensure an adult is present to supervise and assist. Hot glue dries quickly and creates strong bonds, but it can cause burns if not handled with care, so safety is paramount.
- 4Consider adding a background to your diorama by painting a sky on a separate piece of cardboard and attaching it to the back. This will add depth and complete the illusion of a vast urban landscape, making your cityscape feel more immersive.
- 5Don't be afraid to mix and match different types of cardboard for varied textures and thicknesses. Corrugated cardboard can add a rougher texture, while thinner cereal box cardboard is excellent for intricate details and smoother surfaces.
- 6Before painting, consider creating a blueprint or sketch of your desired cityscape layout. This will help you visualize the placement of buildings, roads, and any other elements, ensuring a balanced and aesthetically pleasing final composition.
- 7For realistic windows, try cutting out the window shapes and then gluing small pieces of clear plastic (from packaging) behind the openings before painting the frames. This will give the illusion of glass and add a professional touch to your buildings.
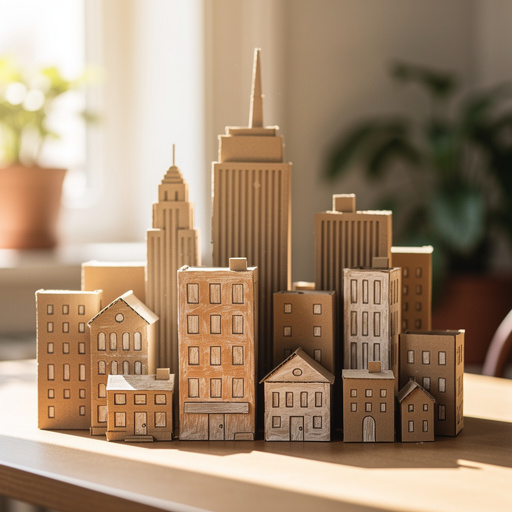
- 8To create a sense of scale, ensure your buildings are relatively proportional to each other, even if they vary in height. Think about how real cities are laid out, with different types of structures existing side-by-side.
Related Activities You Might Enjoy
Frequently Asked Questions
What are the best cardboard crafts for 12 year olds?
Cardboard crafts for 12 year olds offer a fantastic avenue for creativity and skill development. Beyond building intricate forts and imaginative robots, creating detailed dioramas like this cityscape is highly recommended. Other excellent options include designing and constructing unique board games with custom pieces, crafting elaborate masks for dress-up or display, or even building functional items like storage boxes or small furniture pieces. These projects not only encourage artistic expression but also foster problem-solving, spatial reasoning, and fine motor skills, making them both fun and educational.
How can I make a cardboard cityscape look realistic?
To make a cardboard cityscape look realistic, focus on variety and detail. Use a diverse range of building heights, widths, and architectural styles to mimic the organic growth of a real city. Pay close attention to adding detailed windows and doors, perhaps even using different shades of paint for depth. Painting with realistic colors, considering shadows and highlights, will also enhance the realism. Don't forget the ground elements: add streetlights made from bottle caps, trees from cardboard tubes or twigs, and a textured ground surface. A well-designed background, like a painted sky, can further immerse the viewer.
What materials do I need for a cardboard diorama?
For a basic cardboard diorama, you'll primarily need cardboard boxes of various sizes to serve as your building blocks and base. Essential tools include scissors or a craft knife for cutting, and a reliable adhesive like white craft glue or a hot glue gun (with adult supervision). Acrylic paints and a set of paintbrushes are crucial for bringing your creation to life. For added detail and texture, consider optional materials such as markers for fine lines, glitter for special effects, small found objects like bottle caps or twigs, and cardboard tubes for elements like trees or chimneys. A ruler and pencil are also indispensable for planning and precise cutting.
Is building a cardboard cityscape a good project for a 12 year old?
Absolutely! Building a cardboard cityscape is an excellent project for a 12-year-old, offering a rich blend of creative freedom and practical skill-building. It significantly develops spatial reasoning as they plan and construct three-dimensional structures, and enhances design skills as they decide on building aesthetics and city layout. The fine motor control required for cutting and painting further refines their dexterity. Moreover, it provides a wonderful canvas for imagination, allowing them to express their unique vision of an urban environment and fostering a sense of accomplishment upon completion.
How long does it typically take to build a cardboard cityscape diorama?
The time it takes to build a cardboard cityscape diorama can vary depending on the complexity and size of the project, but a good estimate for a moderately detailed piece is around 90 minutes to 3 hours. This timeframe includes gathering materials, designing and cutting the building shapes, assembling the structures, painting the buildings and base, and adding any final decorative touches. Younger crafters or those aiming for a simpler design might complete it closer to the 90-minute mark, while more intricate designs with numerous buildings and detailed embellishments could extend the project to several hours, potentially spread over a couple of sessions to allow for drying time.
What are some ways to add variety to the buildings in my cardboard cityscape?
To add variety to your cardboard cityscape, think beyond simple boxes. Cut and fold cardboard to create angled roofs, bay windows, or even curved facades. Use different types of cardboard for varied textures; corrugated cardboard can mimic brickwork when painted, while smooth cereal box cardboard is ideal for sleek modern buildings. Incorporate found objects like bottle caps for streetlights, small plastic containers for silos, or even bits of wire for antennas. Experiment with different painting techniques, such as dry brushing for a weathered look or using stencils for repeating patterns like windows. Even the way you cut doors and windows – some recessed, some flush – can add visual interest.
What Next?
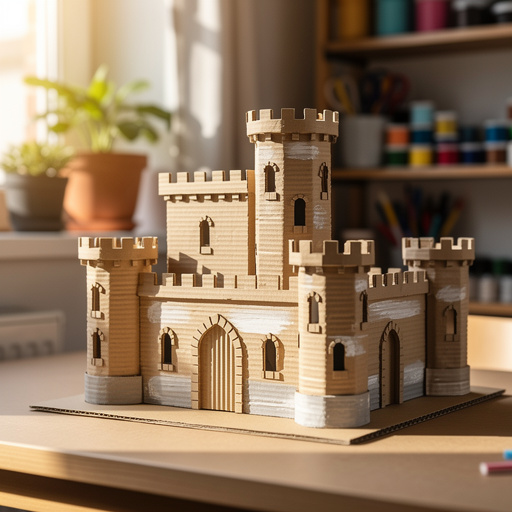
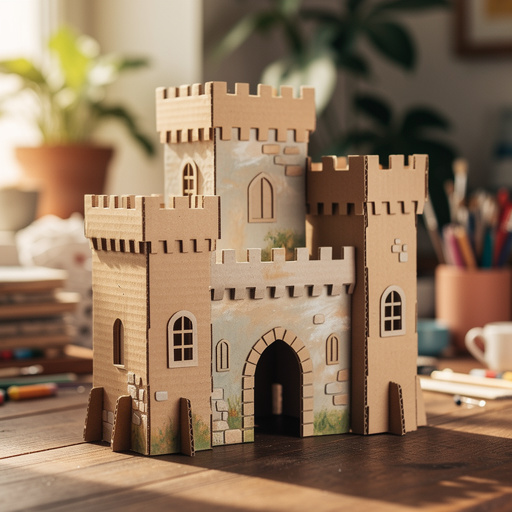
Once your cardboard cityscape is complete and thoroughly dry, it’s ready to be displayed! Find a prominent spot on a shelf or desk to showcase your miniature urban marvel. For a more permanent display, consider sealing it with a clear acrylic spray sealant. This project can easily be adapted for different themes – imagine a futuristic city, a historical town, or even a fantasy realm! For your next project, consider building a cardboard castle, a detailed vehicle, or even a miniature park to complement your cityscape.
Free: 10 Paper Crafts Anyone Can Make in 5 Minutes
Get our beginner guide + new craft ideas weekly.
No spam. Unsubscribe anytime.
Did you complete this activity?
Related