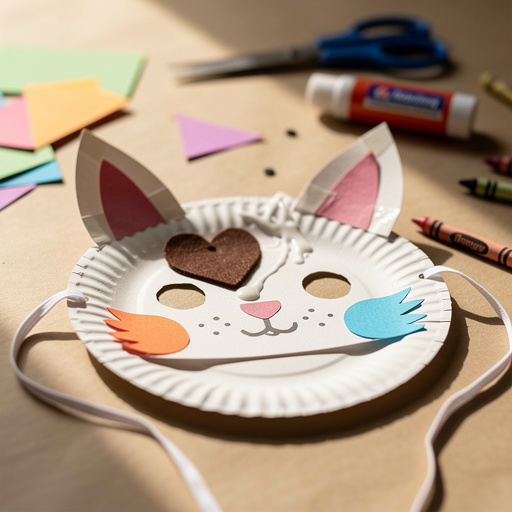
How to Make Adorable Paper Plate Animal Masks — Easy Step-by-Step Guide
Transform simple paper plates into a menagerie of fun animal masks! This easy craft is perfect for kindergarteners and sparks hours of creative play. Follow our simple guide to create unique animal masks that will delight your little ones.
Quick answer
To make paper plate animal masks, you need paper plates, scissors, glue, and crayons/markers. Start by folding the plate to find the center, then carefully cut out eye holes. This beginner-friendly activity has 15 steps and is perfect for kindergarteners aged 4-6, encouraging imaginative play and artistic expression.
What you need
Shop on Amazon · As an Amazon Associate we earn from qualifying purchases. Links above are affiliate links — we may earn a commission at no extra cost to you.
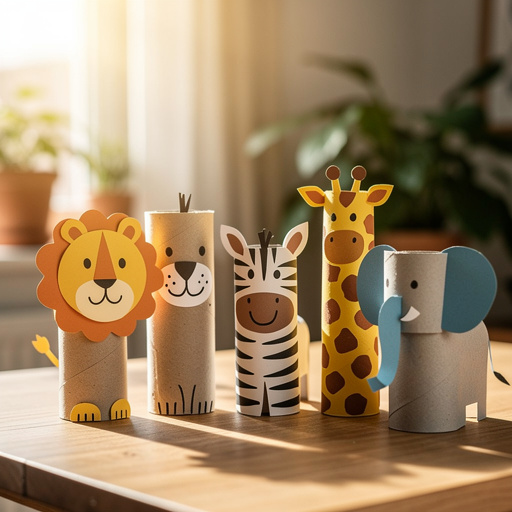
Dive into a world of imagination with our delightful paper plate animal mask craft! This project is a fantastic way to engage young children, transforming everyday materials into wearable works of art. It’s incredibly accessible for little hands, making it a perfect activity for playdates, rainy days, or classroom fun. Beyond just crafting, these masks are a gateway to imaginative play, allowing children to become their favorite creatures and embark on exciting adventures. Get ready to create a whole zoo of adorable masks!
On this page
Step-by-Step Instructions
- 1
Begin by selecting your paper plate. For most animals, a standard 9-inch paper plate works wonderfully, providing ample space for features. Ensure the plate is clean and free of any food residue.
- 2
Fold the paper plate in half gently, creating a clear crease down the center. This fold will serve as your guideline for symmetry and for placing the eye holes accurately.
- 3
Using your pencil or pen, lightly mark where the eye holes should be on the folded side of the paper plate. Consider the size of a child's eyes and the overall animal design you envision. A common mistake is making them too small or too far apart.
- 4
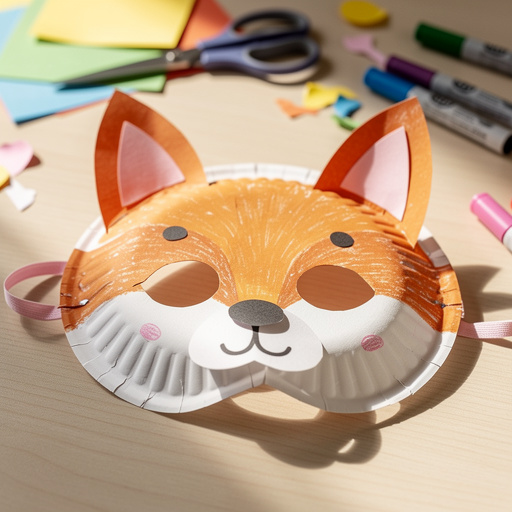
Carefully cut out the two eye holes along your marked lines using child-safe scissors. For younger children, an adult should perform this step or at least supervise very closely to ensure safety. Make sure the edges are smooth to prevent any scratching.
- 5
Unfold the paper plate to reveal your mask base with the eye holes. You should now have a symmetrical opening for your child to see through.
- 6
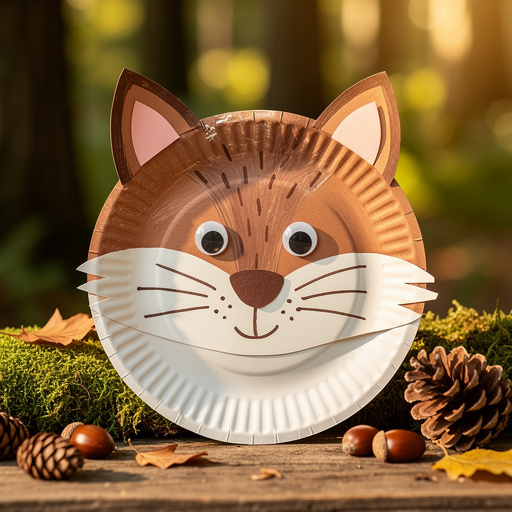
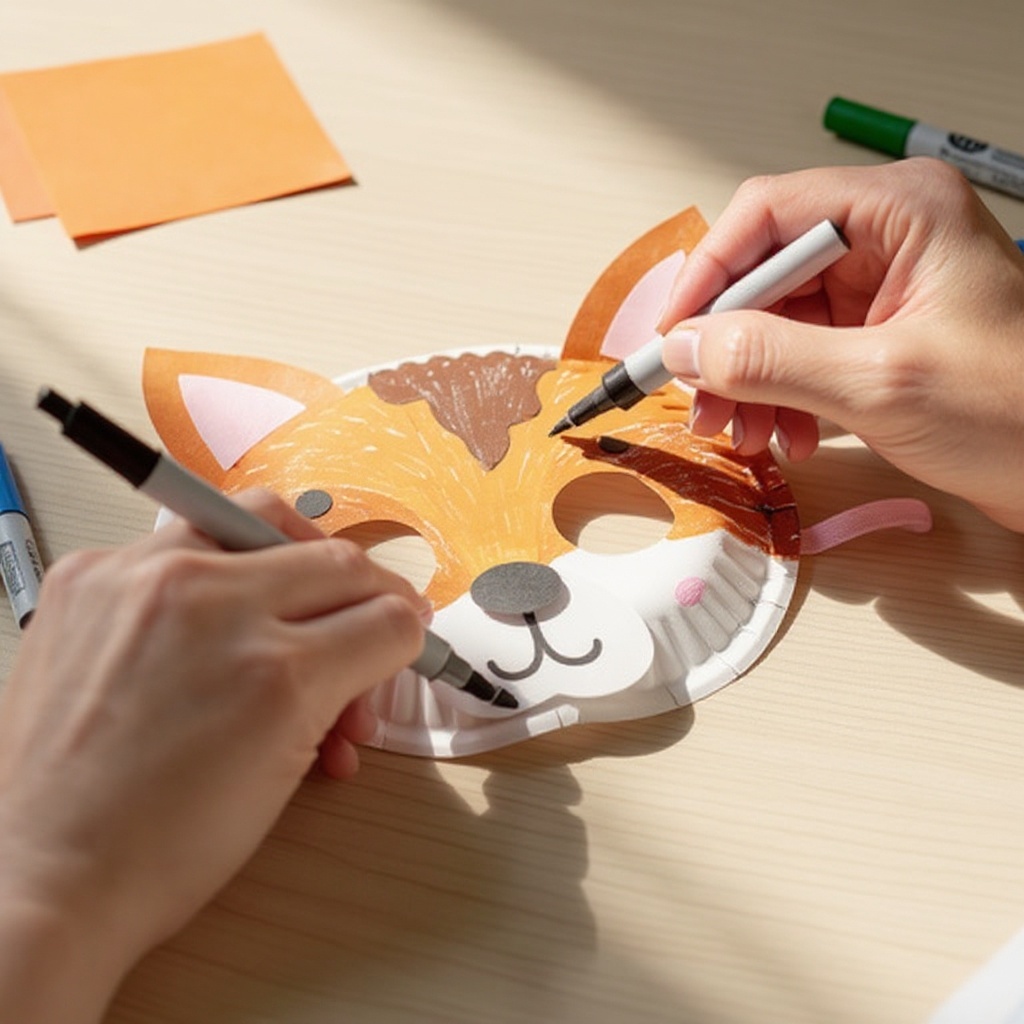
Now, it's time to bring your animal to life with color! Use washable markers or crayons to decorate the entire surface of the paper plate. Think about the natural colors of your chosen animal – brown for a bear, yellow or orange for a lion, white for a polar bear, or black and white for a panda.
- 7
Add details with your coloring tools. For a lion, draw a shaggy mane around the edge of the plate. For a bear, add a darker snout area and some simple paw prints. Don't be afraid to experiment with different patterns and textures.
- 8
Next, plan out the additional features for your animal. This is where construction paper comes in handy. For example, you might need pointed ears for a cat, round ears for a bear, a long snout for a dog, or floppy ears for a rabbit.
- 9
Cut out these shapes from your construction paper scraps. Be precise with your cuts to create clean lines. For ears, consider cutting two identical shapes, or perhaps one larger and one smaller for a more whimsical look. For a snout, a simple oval or a more complex shape with a nose cut-out can work.
- 10
Apply glue to the back of your construction paper shapes and carefully attach them to the paper plate mask. Position them strategically to create the animal's face – ears at the top, a snout in the center, and perhaps some small circles for cheeks.
- 11
If you're creating an animal with whiskers, like a cat or a mouse, you have a few options. You can draw them on with a marker, or for a more tactile feel, cut thin strips of black construction paper or use pipe cleaners.
- 12
For a lion's mane, yarn is an excellent material. Cut short lengths of yarn (about 2-3 inches) and apply glue around the outer edge of the paper plate, then press the yarn pieces onto the glue, layering them to create a full, bushy mane.
- 13
Add extra personality and detail with googly eyes. If you don't have googly eyes, you can simply draw them on with markers or cut out small white circles for the eyes and black circles for the pupils.
- 14
If you're using pipe cleaners for antennae or other embellishments, bend them into the desired shapes and glue them securely onto the mask. For example, you could twist two pipe cleaners together for antennae or bend them into a zig-zag for a more abstract design.
- 15
Once all the glued elements are in place, allow all the glue to dry completely. This is a crucial step to ensure your mask holds together well and doesn't fall apart when being worn. This might take a few hours depending on the type of glue used and the humidity.
- 16
To make the mask wearable, you have a couple of options. You can punch a hole on each side of the mask (near the temples) and thread an elastic band through, tying knots to secure it. Alternatively, you can glue a sturdy craft stick or a ruler to the back of the mask, allowing the child to hold it up to their face.
- 17
Test the fit of the mask if you've added an elastic band. Ensure it's comfortable and stays in place without being too tight. Adjust the elastic as needed for a perfect fit.
- 18
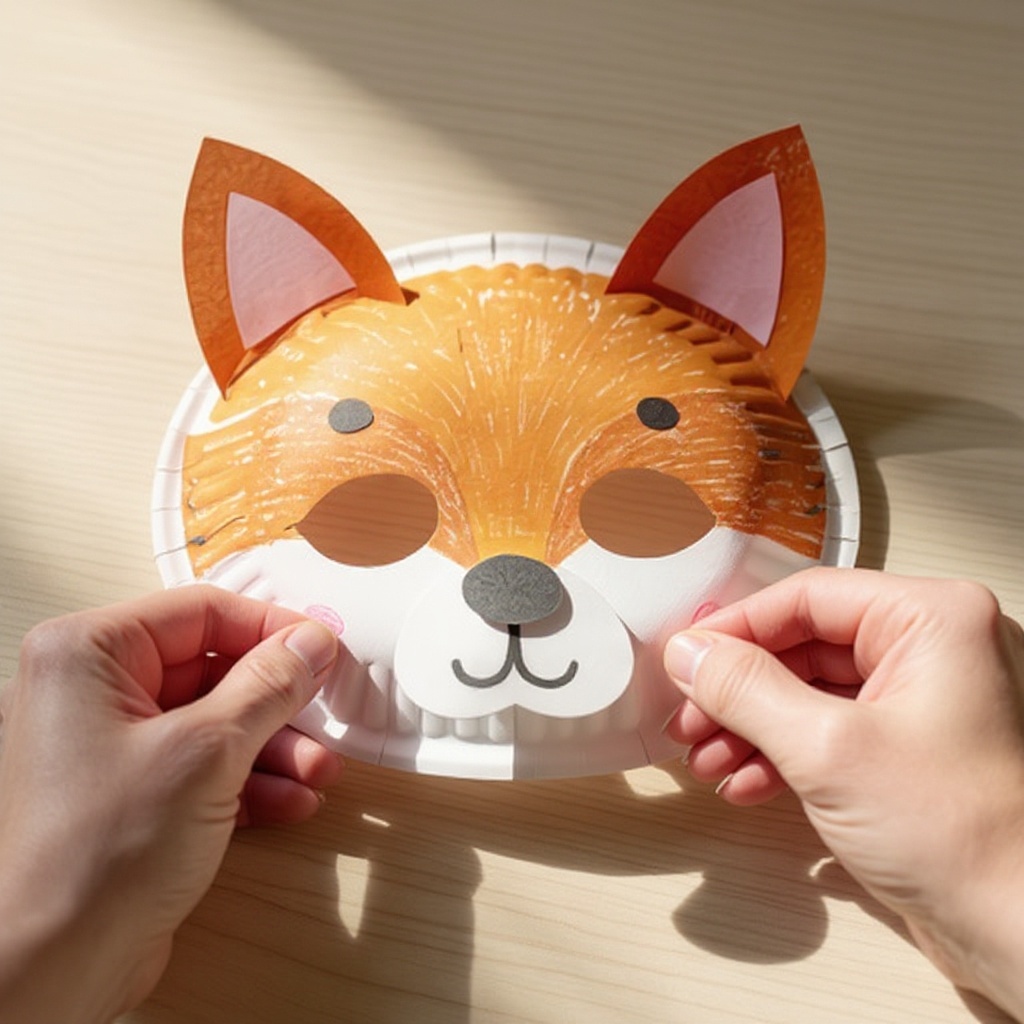
Review your finished mask. Are there any loose pieces? Are the eye holes clear for good visibility? Make any final adjustments or add any last-minute touches to perfect your adorable animal creation.
Tips & Troubleshooting
- 1For very young children or those who struggle with fine motor skills, it's highly recommended to pre-cut the eye holes. This ensures safety and makes the crafting process smoother, allowing them to focus on the decorating aspect.
- 2Encourage children to be as creative as possible! Don't limit them to realistic animal colors or features. Let them mix and match colors, add glitter, or invent entirely new animal characteristics to foster their unique artistic vision.
- 3If cutting eye holes feels too challenging or you're concerned about safety, drawing them on is a perfectly acceptable alternative. Simply draw two large oval shapes where the eyes would be and color them in black or a dark color.
- 4To make the masks easier to wear and more durable, consider attaching a craft stick or a sturdy cardboard strip to the back of the mask. This allows children to hold the mask up to their face without it slipping or needing to be tied.
- 5Experiment with different textures by incorporating materials like cotton balls for fluffy fur, felt scraps for smoother patches, or even small pieces of fabric for a unique look. This adds a sensory element to the craft.
- 6Before starting, brainstorm a list of animals with your child. This helps them visualize what they want to create and can inspire them to think about the specific features of each animal, like the shape of ears or the pattern of fur.
- 7Consider using a hole punch to create small holes around the edge of the mask for adding yarn or ribbon streamers. This can create a more elaborate mane or a decorative fringe.
- 8If you're making masks for a group or a party, prepare some basic shapes in advance, like ears or noses, to save time and ensure consistency if desired. However, always allow for individual creativity in decorating.
Related Activities You Might Enjoy
Frequently Asked Questions
What are the best paper plate crafts for kindergarteners?
Paper plate animal masks are absolutely fantastic for kindergarteners due to their simplicity and the imaginative play they inspire. Other excellent paper plate crafts for this age group include creating vibrant paper plate suns by cutting rays and coloring them yellow, making colorful paper plate flowers with layered petals, or designing simple character faces with expressive features. These activities are not only easy to execute but also provide a wonderful canvas for children to express their creativity and develop fine motor skills. They are a gateway to hours of engaging and educational fun.
How do you make eye holes in a paper plate mask safely?
Making eye holes in a paper plate mask safely is paramount, especially when crafting with young children. The most secure method involves folding the paper plate in half to create a central guideline. Then, using child-safe scissors, carefully cut out two oval or circular shapes on the folded side. For children under 5, it is highly recommended that an adult supervises this step closely or performs the cutting entirely. Alternatively, if you prefer not to cut, you can simply draw the eye holes on with a dark marker, ensuring they are large enough for clear visibility.
What materials are needed for paper plate crafts?
The beauty of paper plate crafts lies in their simplicity and the readily available materials. The core essentials for most paper plate crafts include sturdy paper plates, child-safe scissors for cutting, and coloring tools such as washable markers, crayons, or even paint. A reliable adhesive, like a glue stick or liquid craft glue, is also crucial for attaching various elements. Beyond these basics, construction paper scraps in a variety of colors are incredibly useful for adding details like ears, noses, or decorative shapes. Optional additions can include yarn, googly eyes, pipe cleaners, or even fabric scraps to enhance texture and visual appeal.
Can paper plate crafts be used for pretend play?
Absolutely! Paper plate crafts, especially animal masks, are perfectly suited for pretend play and are a fantastic catalyst for imaginative adventures. Once a child has created their paper plate animal mask, they can instantly transform into their chosen creature. This opens up a world of possibilities for storytelling, role-playing, and creating their own unique scenarios. Whether they're roaring like a lion, hopping like a bunny, or scurrying like a mouse, these masks encourage children to develop their narrative skills, social interaction, and creative thinking in a fun and engaging way.
How can I make paper plate animal masks more durable for play?
To enhance the durability of paper plate animal masks for extended play, consider a few reinforcement techniques. First, using sturdier, thicker paper plates will provide a more robust base. When attaching construction paper elements, ensure you use a strong glue and allow ample drying time. For the mask itself, you can reinforce the edges by gluing a thin strip of cardstock or even duct tape around the perimeter. To make them wearable and prevent tearing, attach a craft stick or a sturdy cardboard strip to the back of the mask with strong glue or even staples. Alternatively, punching holes on the sides and threading a durable elastic band will allow them to be worn comfortably and securely.
What age group is this craft best suited for?
This paper plate animal mask craft is ideally suited for children aged 4 to 6 years old, which typically encompasses kindergarten and early elementary grades. At this age, children are developing their fine motor skills, allowing them to participate actively in cutting, gluing, and decorating. The project is simple enough to be managed with some adult guidance, yet engaging enough to hold their attention. Younger children might need more assistance with cutting, while older children in this range can often complete the project with minimal supervision, fostering independence and a sense of accomplishment.
What Next?
Once your paper plate animal masks are complete and dry, the real fun begins! Encourage your children to put on their creations and let their imaginations run wild. These masks are wonderful for dress-up, storytelling, or even putting on a mini animal play. For storage, consider keeping them in a designated craft bin or hanging them on a wall as colorful decorations. As a next step, you could explore making paper plate crowns or even larger-than-life paper plate puppets. The possibilities for creative fun are endless!
Free: 10 Paper Crafts Anyone Can Make in 5 Minutes
Get our beginner guide + new craft ideas weekly.
No spam. Unsubscribe anytime.
Did you complete this activity?