How to Create Custom Charm Bracelets — Easy Step-by-Step Guide
Design and assemble your own personalized charm bracelets using a variety of wholesale charms. A fun and creative screen-free activity for the whole family.

Quick answer
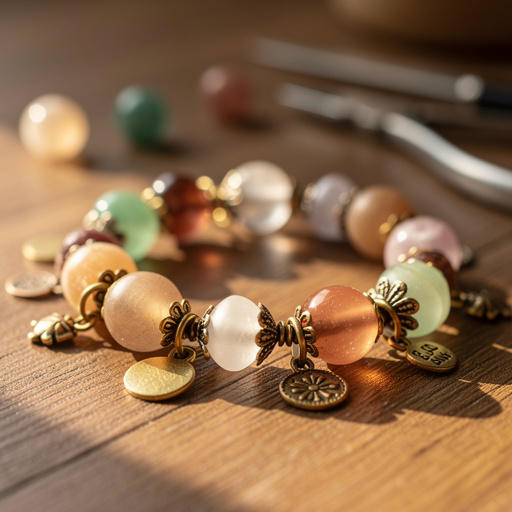
To make custom charm bracelets, you need wholesale charms, bracelet bases, and jewelry pliers, taking about 30 minutes. Start by selecting your charms and bracelet base. This beginner-friendly activity has 7 steps and is perfect for families.
What you need
Shop on Amazon · As an Amazon Associate we earn from qualifying purchases. Links above are affiliate links — we may earn a commission at no extra cost to you.
Embark on a delightful journey of self-expression and creativity by crafting your very own custom charm bracelets. This project is more than just making jewelry; it's about telling a story, capturing memories, and showcasing your unique personality through a collection of meaningful trinkets. Whether you're looking for a relaxing solo activity, a fun bonding experience with loved ones, or a way to create heartfelt, personalized gifts, this guide will walk you through every step. Get ready to transform simple materials into wearable art that’s as individual as you are.
On this page
Step-by-Step Instructions
- 1
Gather your chosen wholesale charms, bracelet bases, and jewelry pliers. Ensure you have a clean, well-lit workspace and all your materials laid out for easy access. Having everything ready before you begin will streamline the creative process and prevent interruptions.
- 2
Select your bracelet base. Consider the style you're aiming for – a delicate chain bracelet offers a classic look, a leather or fabric cord provides a more casual vibe, and a rigid bangle offers a modern aesthetic. Ensure the base is the correct size for your wrist or the intended recipient.
- 3
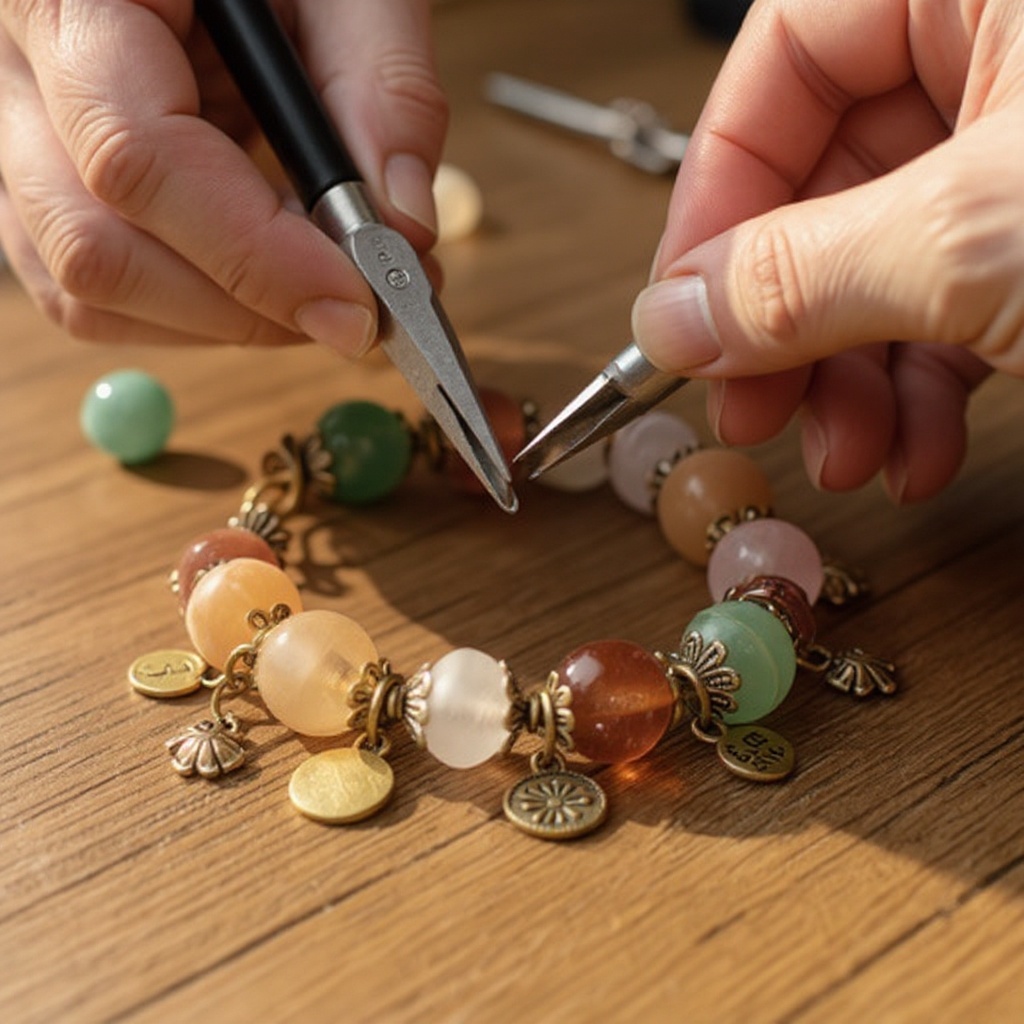
Begin by selecting your first wholesale charm. Examine its loop to ensure it's sturdy and free of any manufacturing defects. If the loop is small, you might need to use your round-nose pliers to gently open it slightly, but be careful not to deform it.
- 4
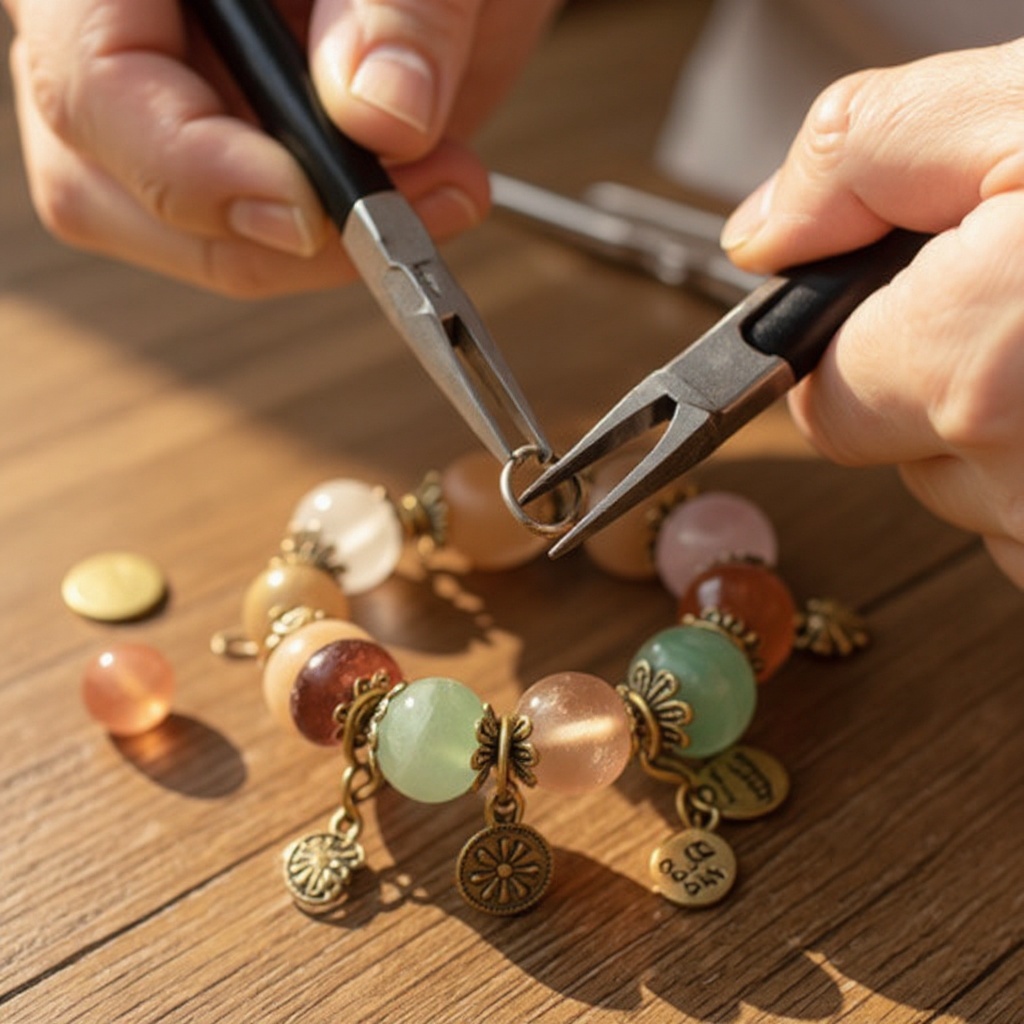
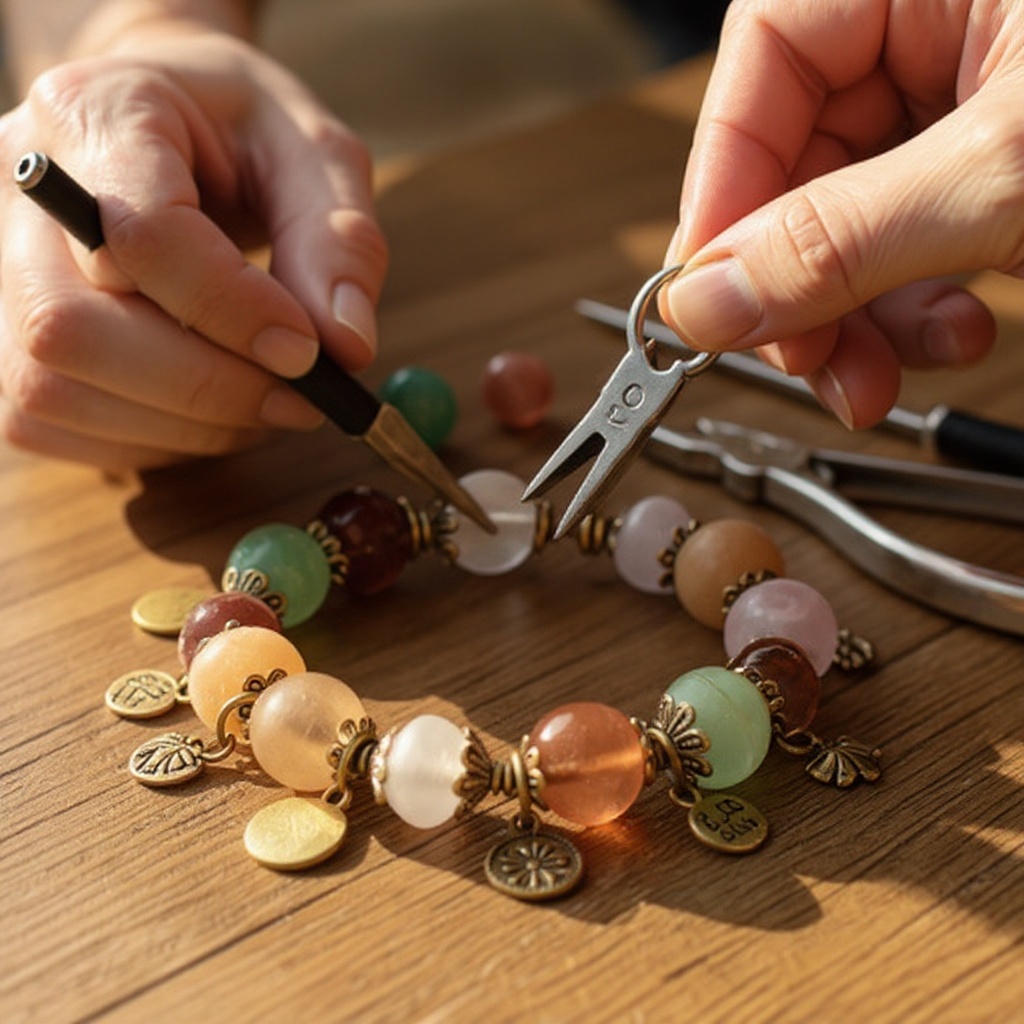
Take a jump ring and place the tips of your flat-nose pliers on either side of the jump ring's opening. Gently twist one end of the jump ring away from you and the other end towards you, effectively opening it like a tiny door. Never pull the jump ring apart, as this can weaken the metal and make it difficult to close securely.
- 5
Carefully slide the opened jump ring onto the loop of your chosen charm. Ensure the jump ring is fully seated within the charm's loop before proceeding to the next step.
- 6
Now, identify where you want to attach the charm to your bracelet base. This could be a link on a chain bracelet, a pre-drilled hole on a cord, or even the bangle itself if it has attachment points. Slide the other end of the jump ring onto this designated spot on your bracelet base.
- 7
Using your flat-nose pliers again, grasp both ends of the opened jump ring. Gently twist them back together in the opposite direction you opened them, ensuring the ends meet flush. A secure closure is crucial to prevent your charms from falling off.
- 8
Repeat steps 3 through 7 for each subsequent charm you wish to add. Consider the placement and balance of your charms as you go, aiming for an aesthetically pleasing arrangement that hangs comfortably on the wrist. Don't be afraid to experiment with different positions and combinations.
- 9
Once you have attached all your desired charms, take a moment to inspect each jump ring closure. Gently tug on each charm to ensure it's securely fastened. This is your last chance to reinforce any connections before considering the bracelet complete.
- 10
If your bracelet base does not have a clasp, you will need to add one. Attach a jump ring to one end of the bracelet base, then attach your chosen clasp to that jump ring. Ensure the jump ring is securely closed around both the bracelet and the clasp.
- 11
For added length or to create a more intricate closure, attach an extension chain to the other end of your bracelet base using a jump ring. This allows for adjustable sizing and can add an extra decorative element.
- 12
Arrange your charms thoughtfully. Group similar themes together, such as travel-related charms or animal charms, for a cohesive look. Alternatively, create a vibrant mosaic by mixing and matching different colors, shapes, and materials for a truly eclectic style.
- 13
If you're using beads in conjunction with charms, you can thread them onto the jump rings before attaching them to the bracelet, or string them directly onto a cord bracelet between charms. Consider how the beads will complement the colors and textures of your charms.
- 14
When attaching multiple charms close together, ensure there is enough space between them so they don't constantly bump into each other and get tangled. This also allows each charm to be seen and appreciated individually.
- 15
For bracelets that are meant to be very full, consider using smaller jump rings to attach charms closer to the bracelet base, creating a denser, more layered effect. This technique can be particularly effective on thicker chain bracelets.
- 16
If you are working with a bangle bracelet, you can attach charms directly to the bangle using jump rings, or you can create small clusters of charms on individual jump rings and then attach those clusters to the bangle. This allows for more dynamic arrangements.
- 17
Once all charms are attached and any necessary clasps or extension chains are secured, admire your unique, custom-made charm bracelet! You've successfully transformed simple components into a personalized piece of wearable art.
- 18
Take a final look at your finished bracelet. Ensure all charms are facing the desired direction and that the bracelet drapes comfortably. Make any minor adjustments to charm placement or jump ring security as needed.
Tips & Troubleshooting
- 1When attaching charms, consider the weight and size distribution to ensure your bracelet hangs comfortably. A bracelet that is too heavy on one side might twist or feel unbalanced on the wrist, so try to distribute larger or heavier charms more evenly.
- 2If your bracelet base doesn't have a clasp, use pliers to attach a jump ring and a clasp to one end, and an extension chain to the other. This provides adjustability and a professional finish, making it easier to put on and take off.
- 3For a more cohesive look, group charms by theme or color. You can also mix and match different materials for visual interest, such as combining shiny metal charms with matte acrylic ones or adding the sparkle of glass beads.
- 4Store your wholesale charms in small containers or baggies to keep them organized and prevent tangling. Compartmentalized bead organizers are ideal for this, allowing you to easily see and select the charms you need for your next project.
- 5When opening and closing jump rings, always use two pairs of pliers if possible – one to hold the ring steady and the other to manipulate the opening. This provides better control and reduces the risk of damaging the jump ring or your pliers.
- 6If you're creating a bracelet for someone else, think about their personal style, hobbies, and significant life events. Incorporating charms that represent these aspects will make the gift incredibly thoughtful and meaningful.
- 7Don't be afraid to layer multiple jump rings for a charm if you want it to dangle more freely or to attach multiple small charms to a single point on the bracelet. This can add depth and movement to your design.
- 8For cord or leather bracelets, you might need to use crimp beads or knots to secure the ends of the cord before attaching charms or clasps. Ensure these are tight and neat for a durable finish.
Related Activities You Might Enjoy
Frequently Asked Questions
Where can I buy wholesale charms for jewelry making?
You can find wholesale charms from a variety of sources, both online and in physical stores. Reputable online craft suppliers like Fire Mountain Gems, Artbeads, and Amazon offer vast selections of charms in bulk, often with discounts for larger quantities. Specialty jewelry-making supply stores, both brick-and-mortar and online, are also excellent resources. Additionally, keep an eye out at craft fairs and trade shows, where you might discover unique artisans and bulk deals. When purchasing, look for vendors that clearly label their items as wholesale or offer bulk pricing to ensure you're getting the best value for your money.
What are the best types of charms for beginners?
For beginners, the easiest charms to work with are those that come with pre-attached loops, as this simplifies the attachment process significantly. Metal charms with sturdy loops are a great starting point, as they are durable and widely available in countless designs. Acrylic charms are also highly recommended for beginners because they are lightweight, affordable, and come in a vast array of fun shapes, colors, and themes, making them very forgiving to work with. It's best to avoid charms that require complex assembly, such as those needing wire wrapping or intricate gluing, until you've gained more experience with basic jewelry-making techniques.
How do I attach charms to a bracelet without loops?
Attaching charms without pre-existing loops requires a bit more technique, but it's certainly achievable. For charms with a flat surface on the back, you can use a strong jewelry glue to adhere them directly to a flat pad that you've attached to your bracelet base with a jump ring. Another method is wire wrapping: use jewelry wire to create a loop around the charm and then attach that wire loop to your bracelet. For charms that are more three-dimensional and lack a clear attachment point, you might need to get creative with wire wrapping to form a secure bail. However, for simplicity, especially when starting out, it's always easiest to choose charms that already have loops.
Can I make charm bracelets for gifts?
Absolutely! Charm bracelets make wonderful, personalized gifts that are deeply cherished because they are handmade and thoughtfully curated. The beauty of a charm bracelet lies in its ability to tell a story or represent the recipient's unique interests, passions, and memories. When selecting charms for a gift, consider the recipient's hobbies (e.g., a tiny book for a reader, a paintbrush for an artist), significant life events (e.g., a graduation cap, a wedding ring), or personal symbols that hold meaning for them. A custom charm bracelet is a tangible expression of your care and understanding, making it a truly special and memorable present for any occasion.
How do I ensure my charm bracelet is the right size?
Ensuring your charm bracelet is the right size involves a few simple steps. First, measure your wrist circumference with a flexible measuring tape. Add about 1/2 inch to 1 inch to this measurement, depending on how loose or snug you prefer your bracelets to be. This gives you the ideal length for your bracelet base. If your bracelet base doesn't have an adjustable clasp or extension chain, you'll need to ensure the base itself is the correct length. If you're unsure, it's always better to err on the side of slightly too long, as you can easily add an extension chain or adjust the clasp placement. For gifts, a standard women's bracelet size is typically around 7-8 inches, but measuring the recipient's wrist discreetly is the most accurate method.
What are some popular themes for charm bracelets?
Charm bracelets are incredibly versatile, and popular themes often reflect personal interests and life experiences. Common themes include travel, with charms like globes, airplanes, and landmarks; hobbies, such as musical notes for musicians, paintbrushes for artists, or sports equipment for athletes; and zodiac signs or birthstones for a personal touch. Many people also create bracelets based on significant life events like graduations, weddings, or the birth of a child, using relevant symbols. Friendship bracelets with charms representing shared memories or inside jokes are also very popular, as are bracelets themed around animals, nature, or even favorite fictional characters. The possibilities are truly endless and driven by individual creativity.
What Next?
Congratulations on creating your stunning custom charm bracelet! The beauty of this craft lies in its endless possibilities. Experiment with different themes – travel, hobbies, zodiac signs, or even inside jokes – to create bracelets for every occasion and person. Consider adding dangling beads or small charms to the clasp for extra flair. Once complete, display your creations on a jewelry stand or in a clear display box to showcase their intricate details. Store your collection of wholesale charms in compartmentalized organizers to keep them tidy and ready for your next inspired design.
Free: 10 Paper Crafts Anyone Can Make in 5 Minutes
Get our beginner guide + new craft ideas weekly.
No spam. Unsubscribe anytime.
Did you complete this activity?
Related
You might also like
DIY Friendship Bracelets with Beads
Clay & Button Bead Necklace
Clay Bead Statement Necklace
Hammered Metal Stamped Charms
Air Dry Clay Trinket Dishes