DIY Adult Animal Masks: Your Ultimate Guide to Crafting Unique Felt Creations
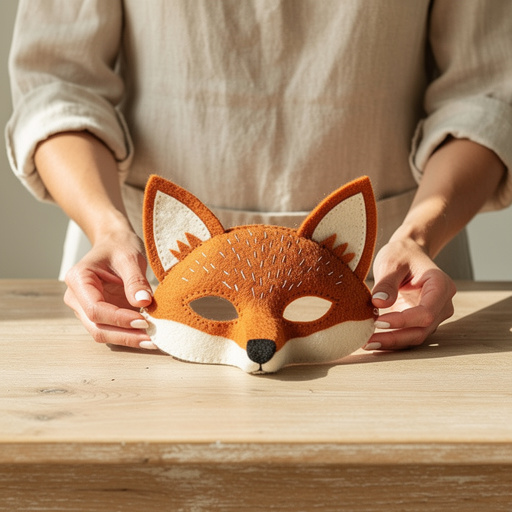
Ready to ditch those flimsy store-bought masks? Dive into this fun, screen-free crafting project and create your own unique, comfortable, and durable felt animal mask from scratch. This guide will show you how to make a fantastic fox mask, with plenty of ideas to transform it into other creatures!

Quick answer
To make adult animal masks, you'll need felt sheets (approx. 2-3 sheets of 9x12 inch per mask), 1 yard of 1/2 inch elastic, scissors, a hot glue gun, and embellishments. The process takes about 90 minutes and is suitable for ages 12+ with adult supervision for younger crafters. This guide focuses on creating a fox mask, but includes tips for customization.
What you need
Shop on Amazon · As an Amazon Associate we earn from qualifying purchases. Links above are affiliate links — we may earn a commission at no extra cost to you.
Are you tired of those flimsy store-bought masks that barely last one Halloween, or perhaps you're looking for a truly unique, handmade touch for your next costume party or even a theatrical production? Crafting your own adult-sized animal mask might sound intimidating, but it's surprisingly achievable and incredibly rewarding! This step-by-step tutorial will guide you through creating a stunning, comfortable, and durable mask from scratch, tailored just for you.
On this page
Step-by-Step Instructions
- 1
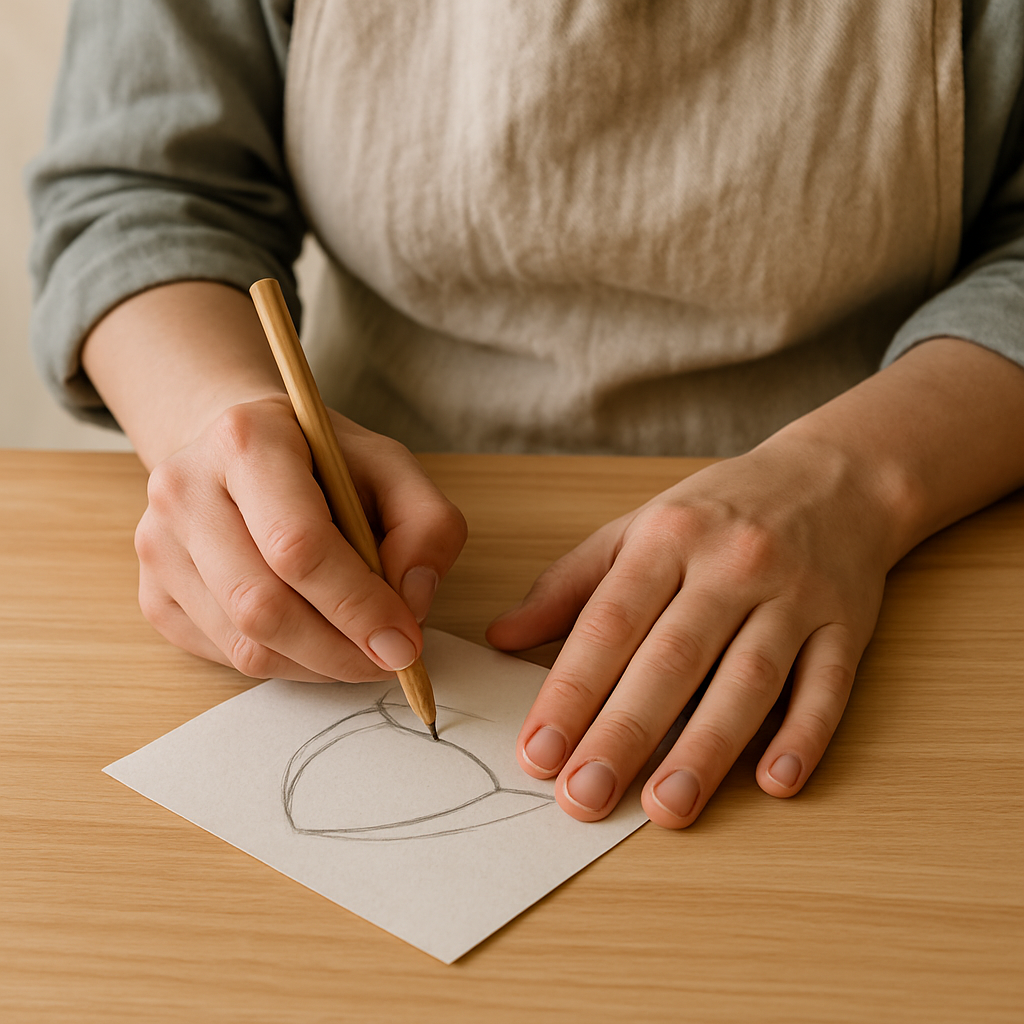
Step 1: Sketch your base mask shape on scrap paper, aiming for a rounded triangle. For a fox, the base should be roughly twice as wide as it is tall, with the top point extending about 1/3 of the total height above eye level. Aim for a base width of approximately 6 inches (15 cm) and a height of 3 inches (7.5 cm) for the main mask shape before adding ear extensions. If your sketch looks too narrow or wide, adjust the proportions before cutting.
- 2
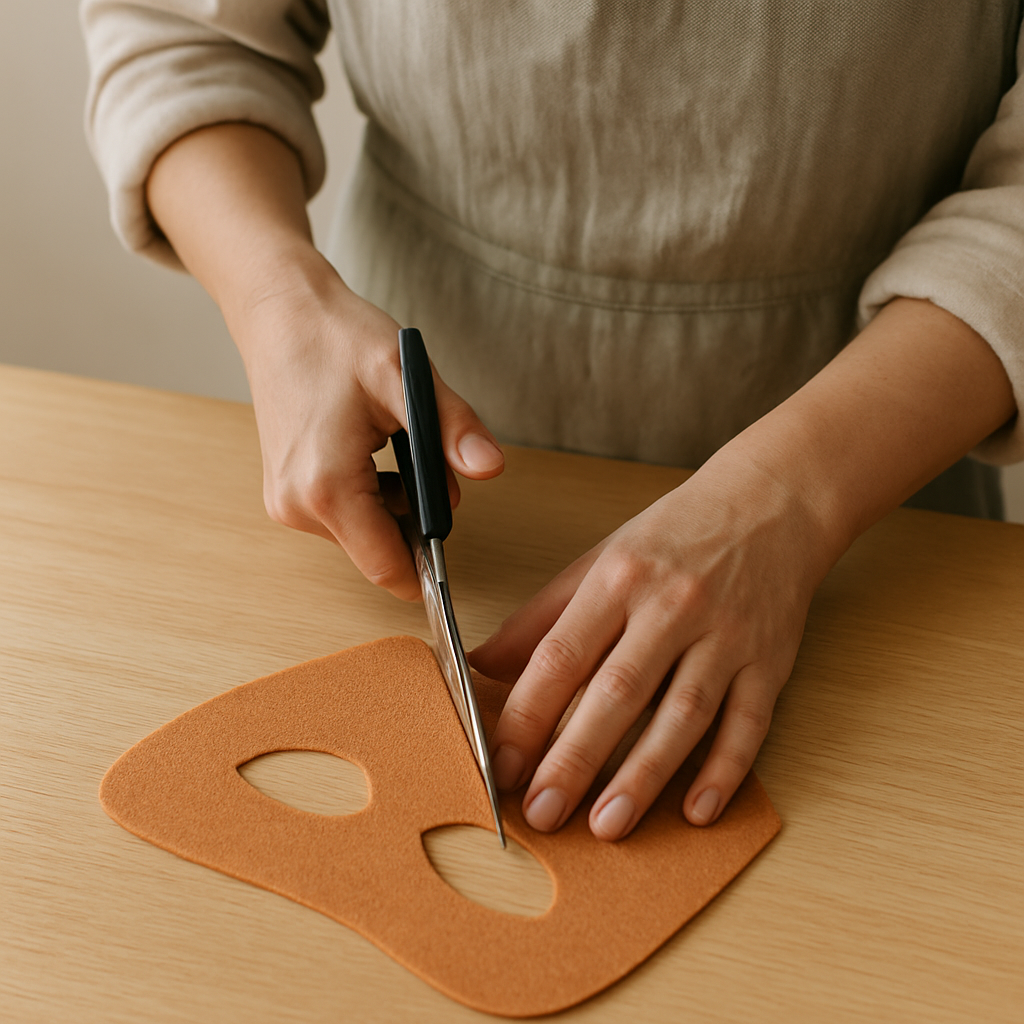
Step 2: Carefully cut out the base mask shape from your main felt color (e.g., orange). Mark and cut out the eyeholes, ensuring they are at least 2.5 inches (6.5 cm) wide and 1.5 inches (4 cm) tall for comfortable visibility. Position the center of each eyehole approximately 1 inch (2.5 cm) from the center line of the mask and 1 inch (2.5 cm) down from the top edge of the eye level area. If the edges of the eyeholes are jagged, trim them with sharp scissors for a cleaner finish.
- 3
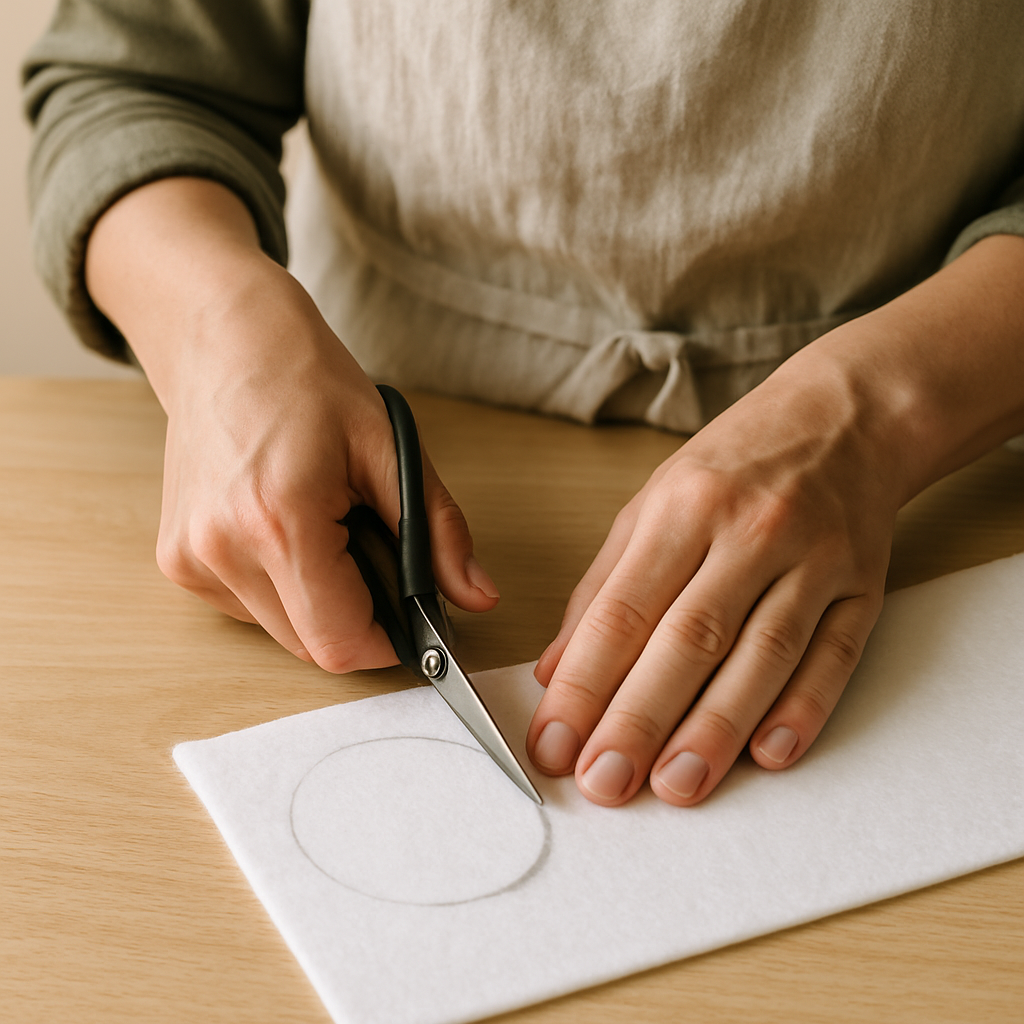
Step 3: Trace and cut out the muzzle piece from white felt, aiming for a rounded shape that will fit neatly onto the lower half of your base mask. If the muzzle appears too large once positioned, trim approximately 0.5 cm (0.2 inches) from its edges to refine its size. If it looks too small, you can always re-trace and cut a slightly larger one.
- 4
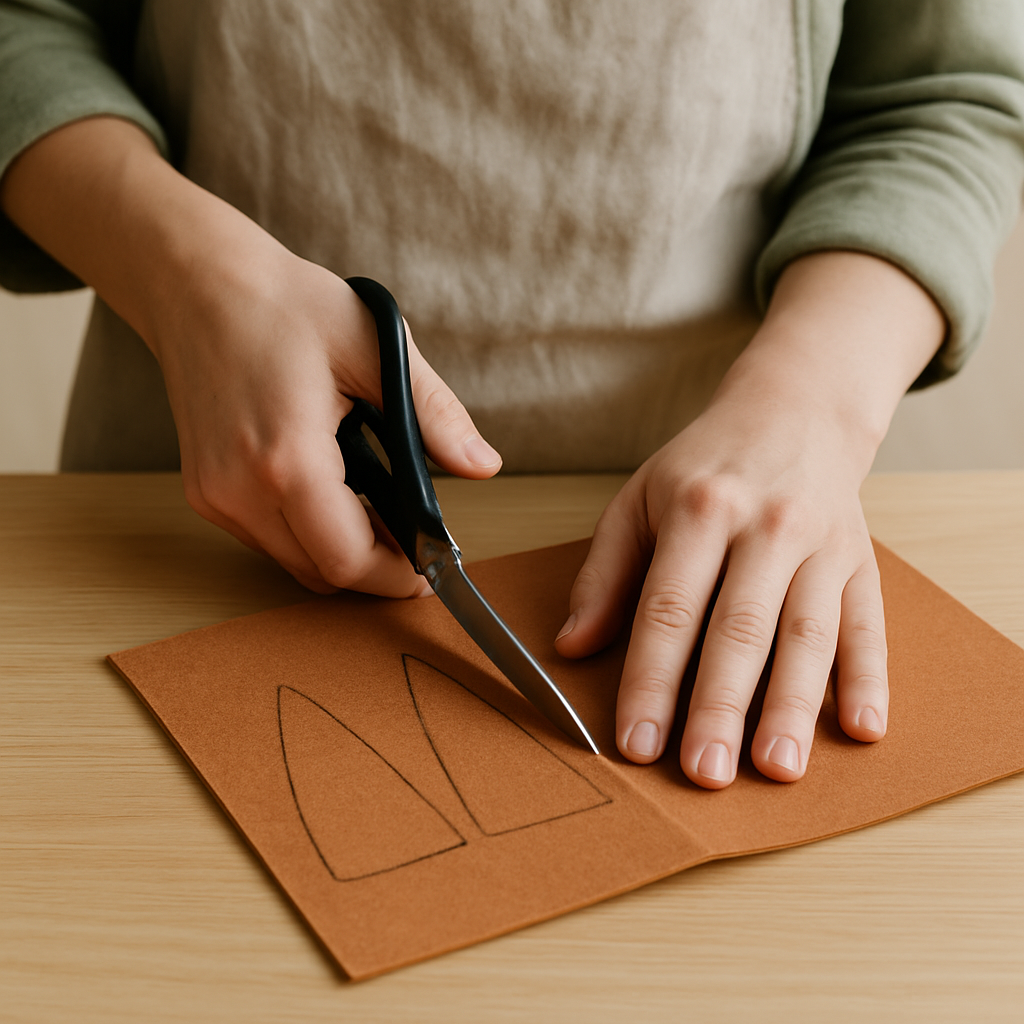
Step 4: Cut out two ear shapes from the main felt color (e.g., orange), creating elongated triangles. If these ears look too small in proportion to the mask, add approximately 1 cm (0.4 inches) to the base width of each ear shape before cutting, resulting in a base width of about 7 cm (2.8 inches). For a more pointed look, slightly curve the outer edges inward; if the curve is too sharp, trim it gently.
- 5
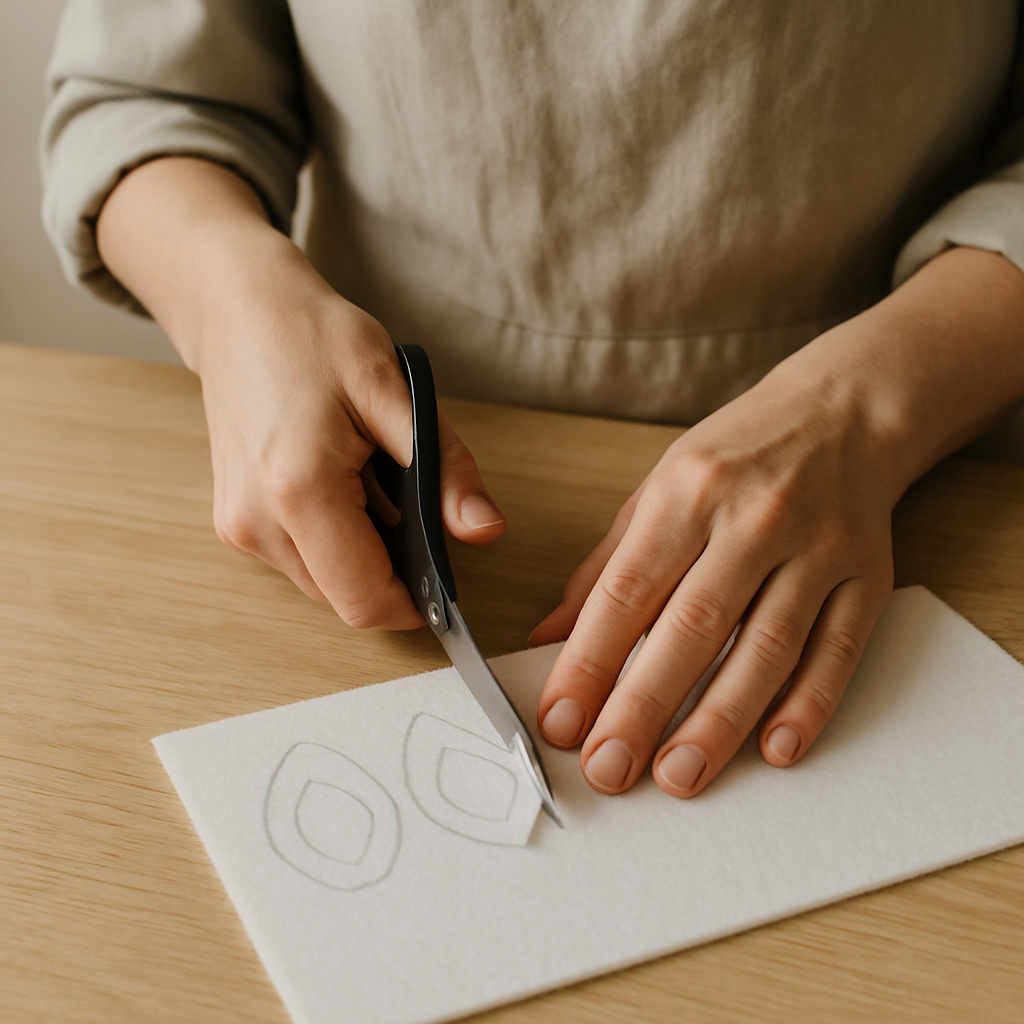
Step 5: Trace and cut out two smaller ear inner pieces from white felt, ensuring they are slightly smaller than the main orange ear shapes to allow for a layered effect. If the white pieces overlap the orange too much and obscure the main ear shape, trim about 0.3 cm (0.1 inches) from the edges of the white felt. If the white felt tears, use fabric glue for a stronger bond.
- 6
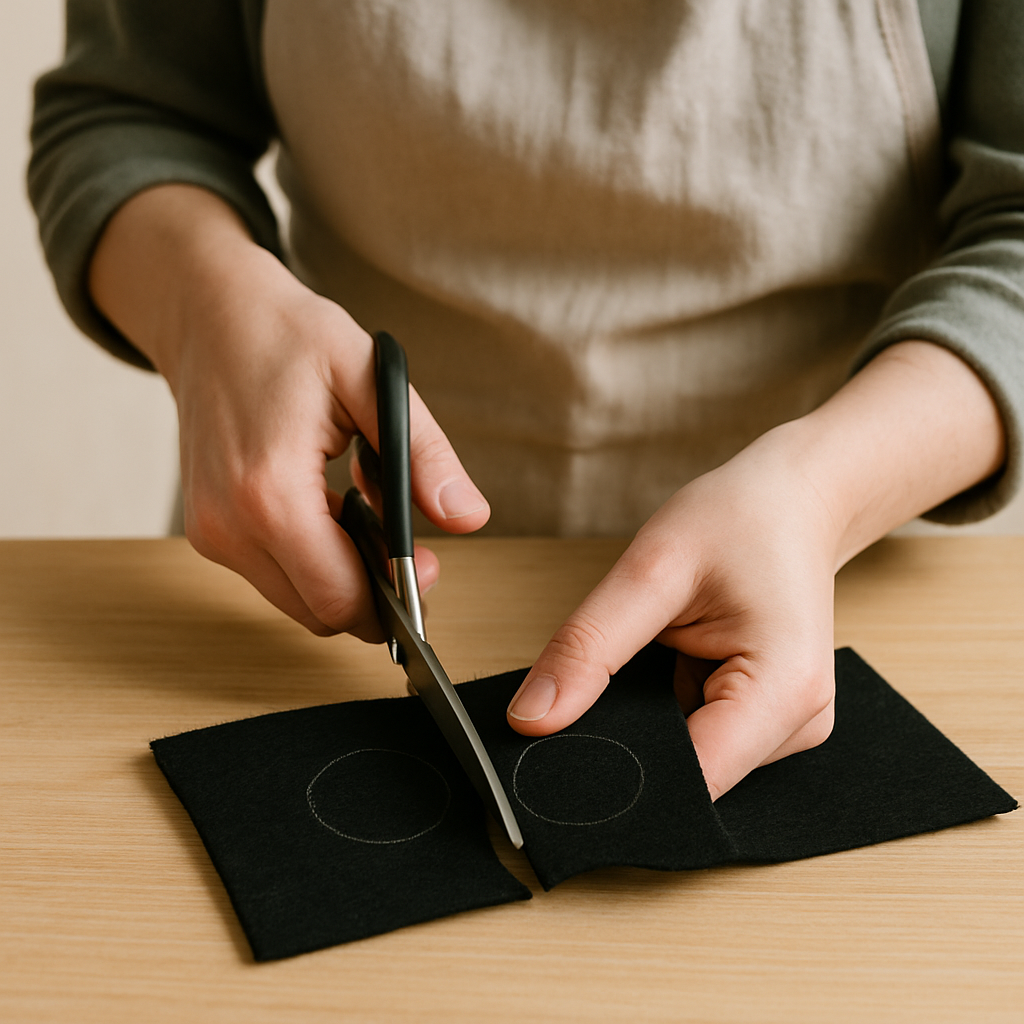
Step 6: Cut out two eye details from black felt, typically circles or ovals, to be placed within the eyeholes for added depth and definition. Ensure these details are about 2 inches (5 cm) in diameter. If these black pieces obscure too much of your vision when held up to your eyes, reduce their diameter by approximately 0.5 cm (0.2 inches).
- 7
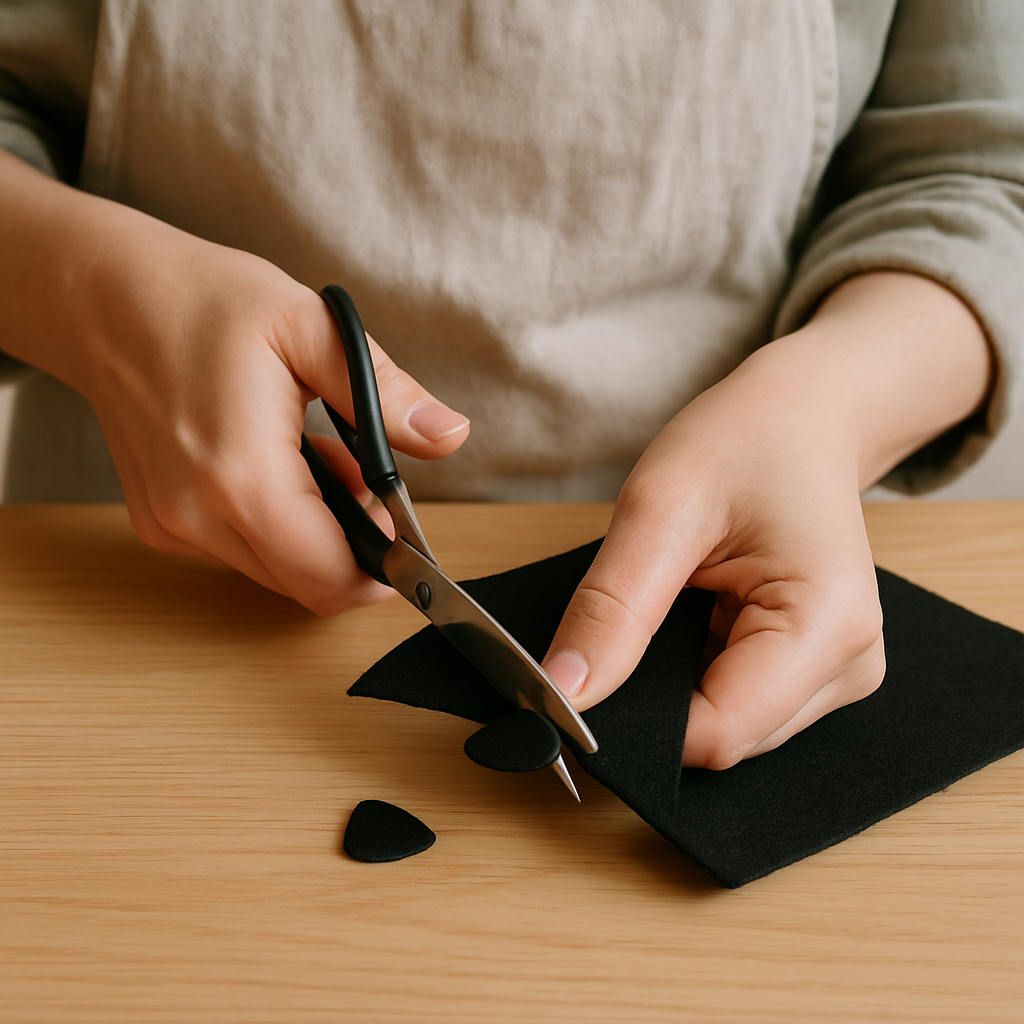
Step 7: Cut out a small nose piece from black felt, usually a rounded triangle or oval shape, about 1 inch (2.5 cm) wide. If the nose appears too large for the muzzle once you position it, scale down the shape by roughly 25% by trimming its edges. If the felt frays, use a tiny bit of fabric glue on the edges.
- 8
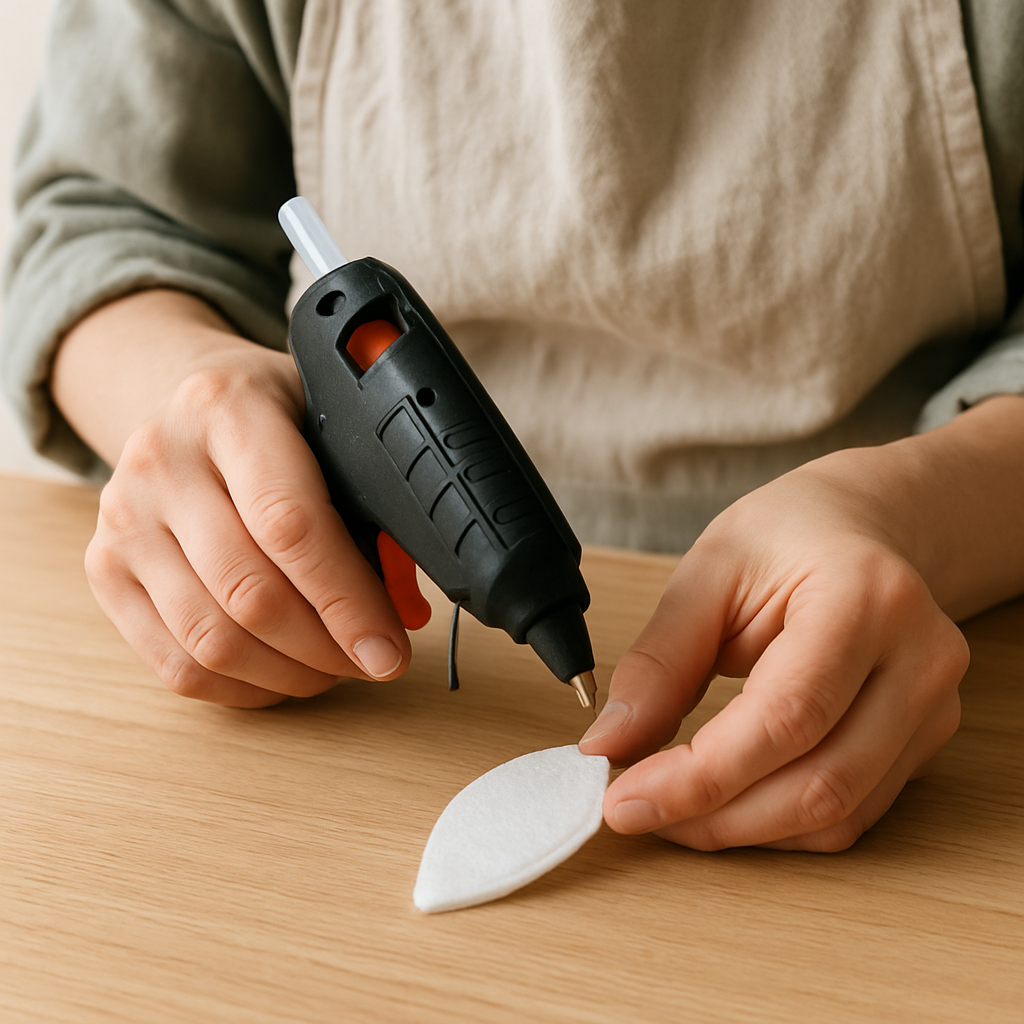
Step 8: Begin assembly by applying hot glue to the edges of the white ear inners and attaching them to the orange ear bases. Center them carefully, ensuring an even border of orange felt is visible around the white. If glue seeps out and creates strings, quickly wipe it with a damp cloth before it hardens; if the felt wrinkles from too much heat, let it cool and then gently smooth it out.
- 9
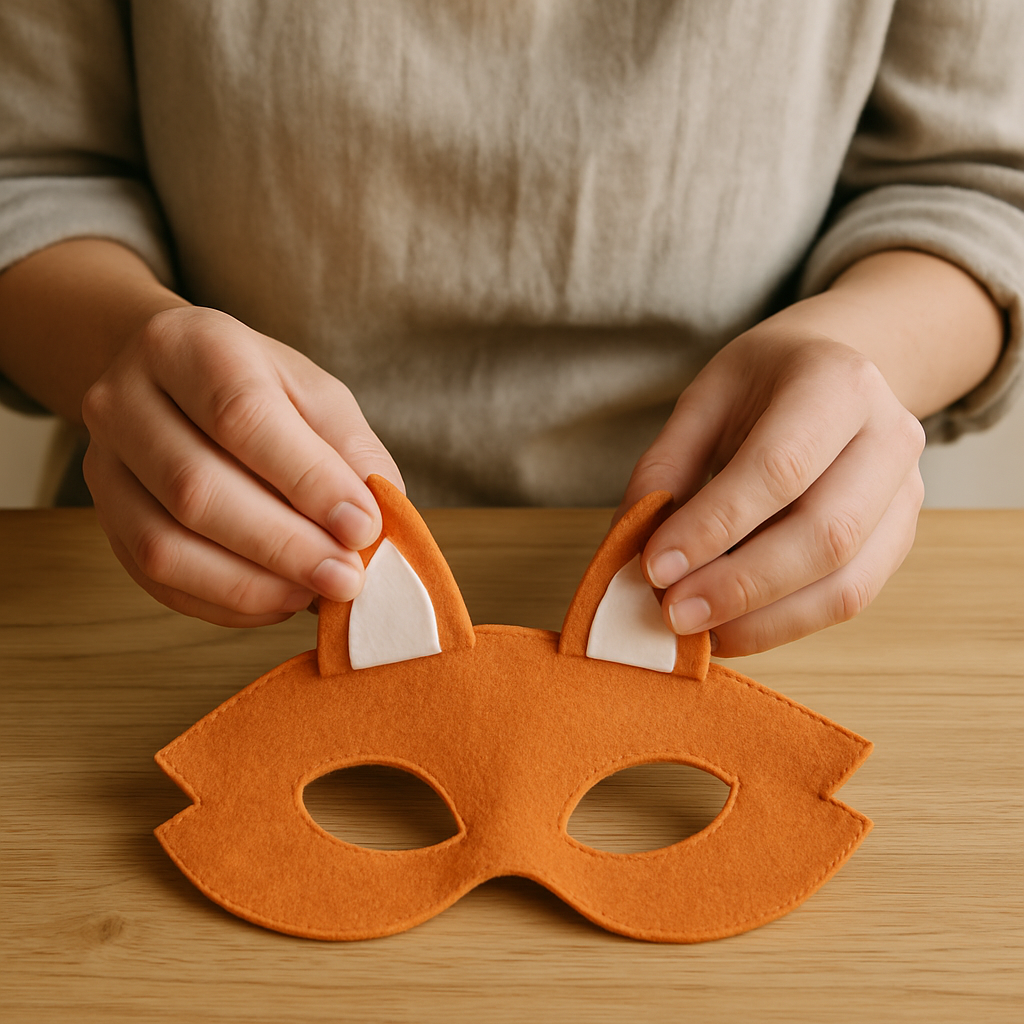
Step 9: Attach the completed ears to the top edges of the base mask using hot glue. Position them about 2 cm (just under an inch) from the center seam, angled outwards at approximately 15 degrees from vertical for a natural look. If the ears feel loose after initial placement, add more hot glue along the base where they meet the mask, ensuring it holds firmly.
- 10
Step 10: Apply hot glue in a thin, even line around the edges of the white muzzle piece and press it onto the lower section of the base mask, aligning it centrally. If the felt wrinkles during application, try applying the glue in smaller sections or use fabric glue for a smoother finish. If the muzzle shifts, hold it in place for 15-20 seconds until the glue sets.

- 11
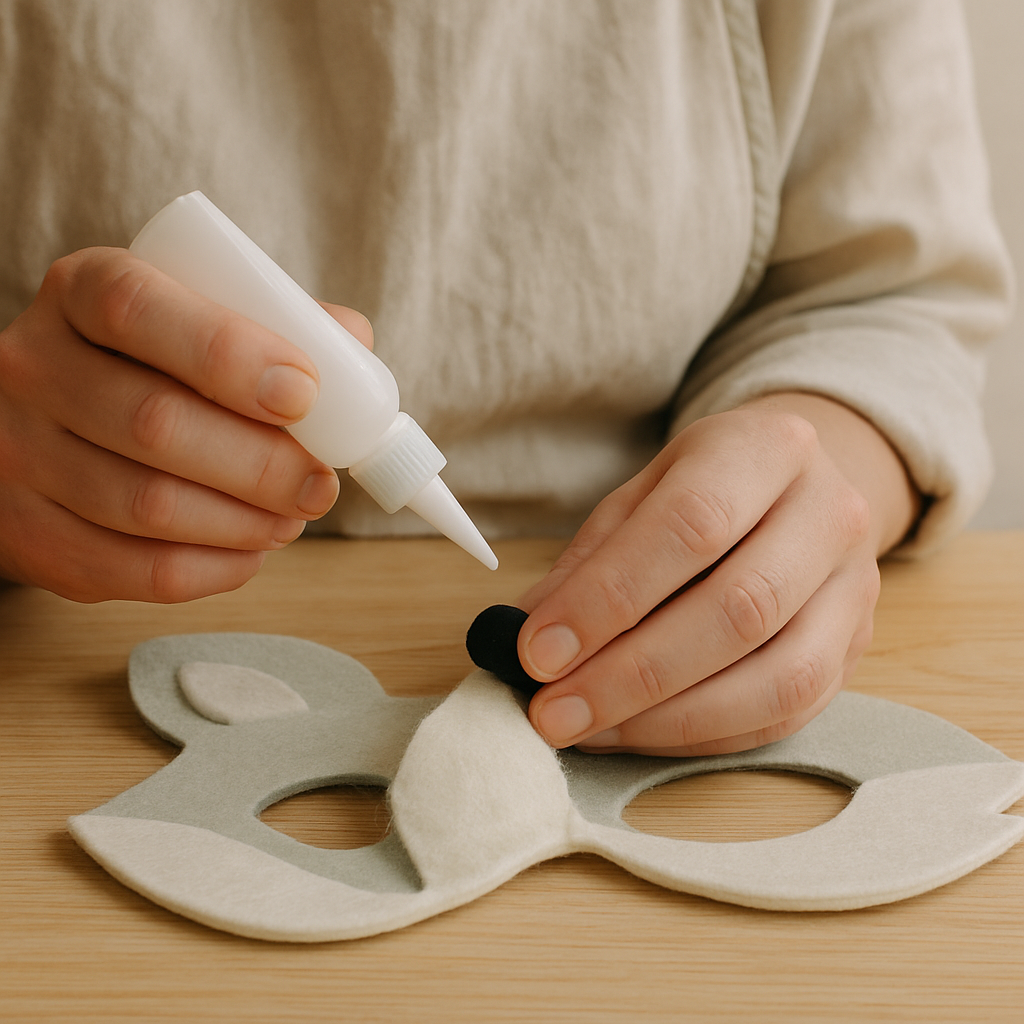
Step 11: Glue the black nose piece onto the tip of the white muzzle using hot glue, ensuring it's firmly attached. If the nose piece slides while you're applying glue, hold it in place with your fingers (carefully!) or tweezers for at least 10 seconds until the glue sets. If the glue doesn't seem strong enough, add a small bead of fabric glue around the edges for extra security.
- 12
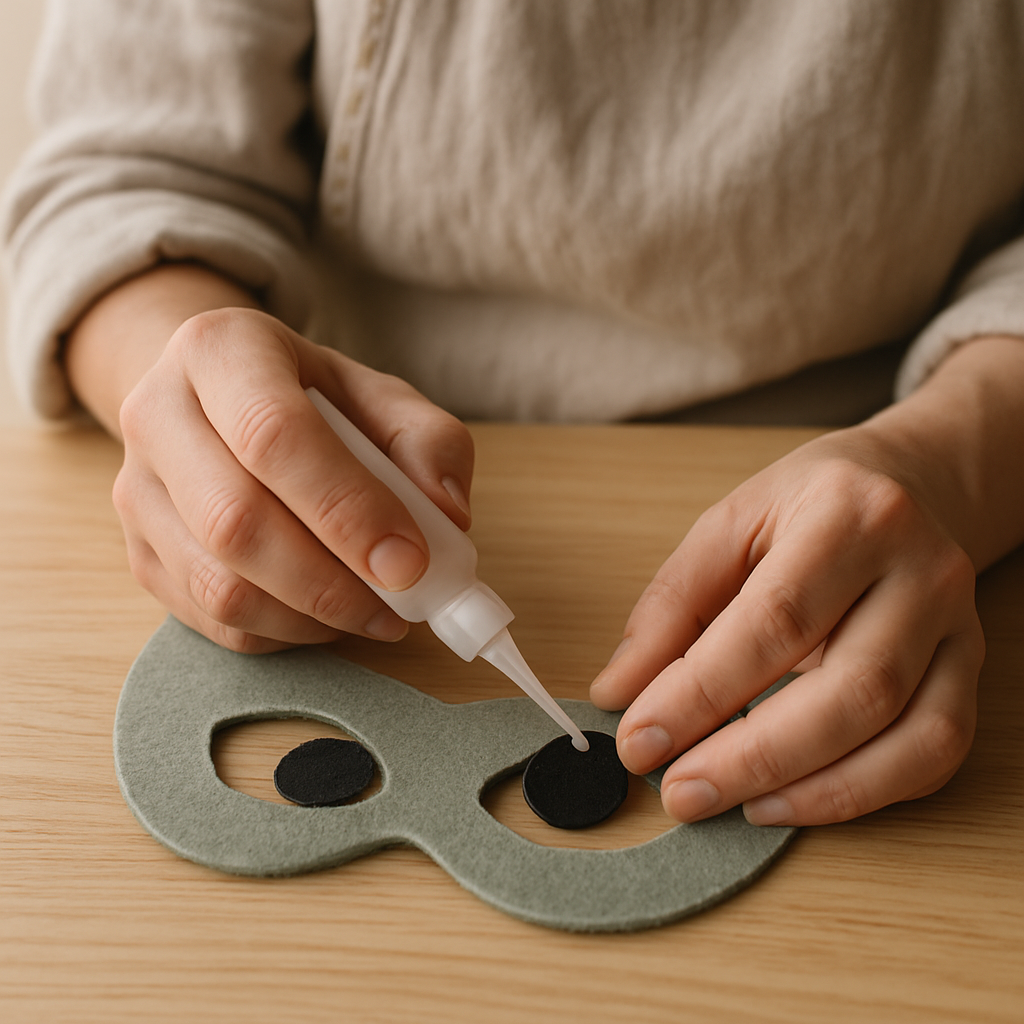
Step 12: Position the black eye details inside the eyeholes of the base mask and secure them with hot glue or fabric glue. Fabric glue can offer a stronger, more flexible hold for these smaller pieces. If they shift during application, use a small dab of fabric glue for a more permanent bond. Ensure they are aligned symmetrically for the best effect.
- 13
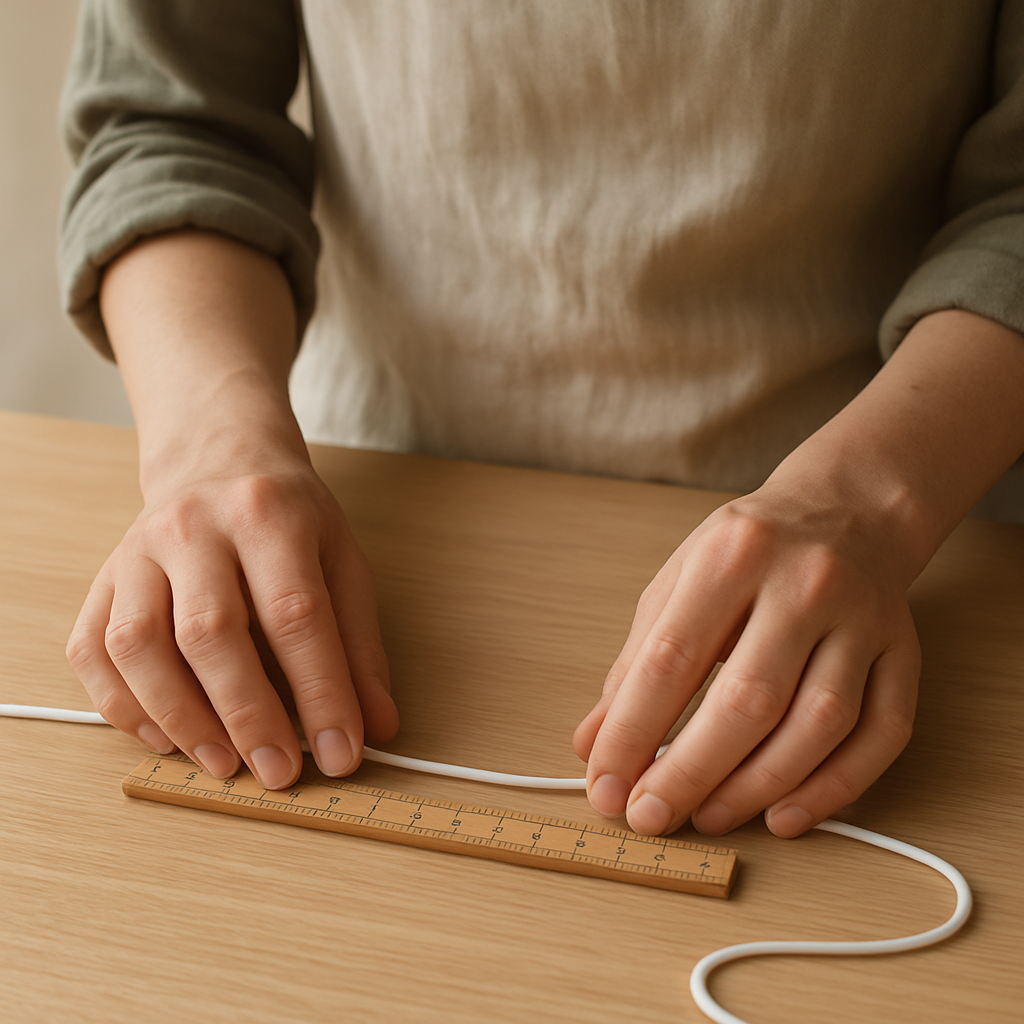
Step 13: Measure around the back of your head where the elastic will sit, adding 5 cm (2 inches) for overlap. Cut the elastic cord to this measurement. For most adults, this will be approximately 35-40 cm (14-16 inches); if it feels too tight when you test it, add another 2 cm (0.8 inches).
- 14
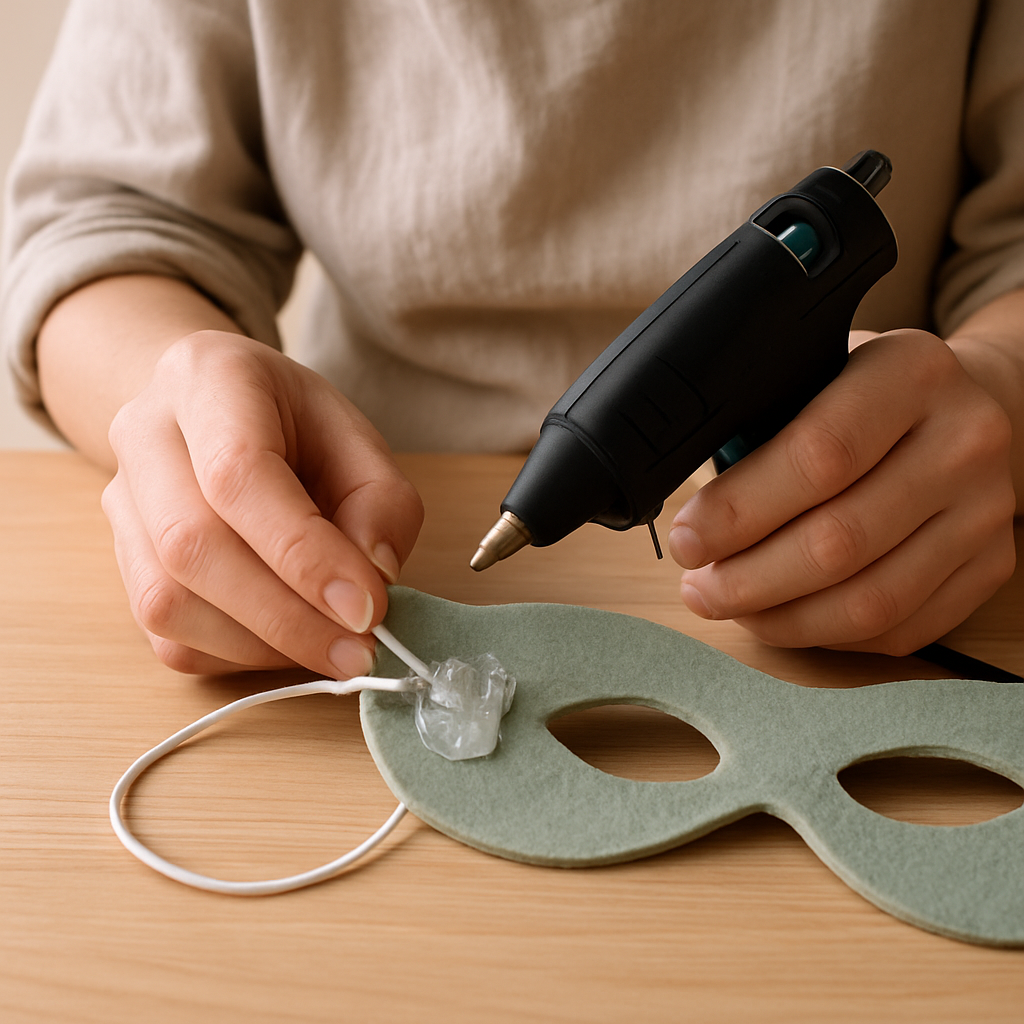
Step 14: Securely attach the elastic ends to the sides of the mask, about 2 cm (just under an inch) up from the bottom edge. Use generous amounts of hot glue on the inside of the mask, pressing the elastic firmly into the glue for at least 30 seconds. For younger crafters, ensure adult supervision during this step due to the hot glue gun. If the elastic feels insecure, reinforce it by sewing it to the mask as well.
- 15
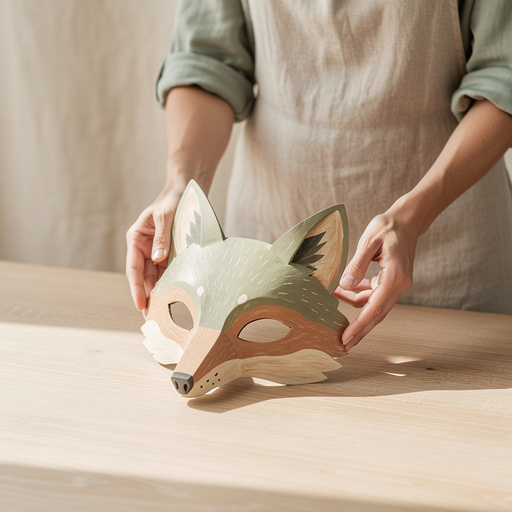
Step 15: Add any optional embellishments to bring your creature to life! For a fox, glue strands of yarn along the edges of the ears for a furrier look, or use acrylic fabric paints to add subtle shading. Let all glue and paint dry completely before wearing your magnificent creation. For other animals, consider adding different ear shapes for a bear, changing the muzzle for a cat, or adding feather-like cuts for an owl.
Tips & Troubleshooting
- 1For a more realistic look, consider using different shades of felt for subtle color variations, like a darker orange for the tips of the ears or a lighter shade for the belly of the muzzle. Layering these pieces with fabric glue can create depth and dimension. For a stylized look, experiment with geometric shapes for ears and muzzles, or use contrasting, unexpected colors. Think neon pink ears on a blue wolf mask for a whimsical effect, or sharp, angular cuts for a more abstract creature.
- 2If you're finding it difficult to cut precise shapes with scissors, especially for smaller details like the nose or eye accents, try using a rotary cutter and a self-healing cutting mat for cleaner, straighter edges. If the felt frays, a tiny dab of fabric glue along the cut edge can help prevent further unraveling.
- 3Troubleshooting mask collapse: If your mask feels flimsy, especially around the nose or eye area, reinforce it by cutting a second identical base layer from felt and gluing it to the back of the first layer. This adds significant stability and structure. For a more sculpted look, try layering felt pieces with slight curves or adding a small amount of batting underneath for dimension.
- 4For a more comfortable fit, especially for extended wear, consider adding a thin layer of soft fabric, like fleece or batting, to the inside of the mask where it rests against your forehead and cheeks. This also helps absorb sweat and prevents irritation. If the elastic feels too tight, you can add a small buckle or Velcro strip for adjustability.
- 5Age Adaptation: For younger crafters (ages 5-7), pre-cut all the felt pieces and let them focus on the fun part: gluing and decorating. Use fabric glue sticks as a safer alternative to hot glue. For ages 8-11, they can handle cutting simpler shapes with supervision, but still use fabric glue for most attachments. For ages 12+, they can follow the main tutorial with adult supervision for hot glue and sharp tools.
- 6If your hot glue gun is leaving messy strings, try heating it up for a few minutes before starting, and then carefully wiping the nozzle clean with a cotton swab dipped in rubbing alcohol. This can help reduce stringing and create cleaner glue lines. If a felt piece loses its shape or becomes creased during gluing, try gently steaming it from a distance (do not touch with the iron!) and then carefully pressing it flat between two pieces of cardboard while it cools.
- 7Safety First! Craft knives and rotary cutters are very sharp. Always use them on a self-healing mat and cut away from your body. Ensure adult supervision if children aged 12-99 are using these tools. Hot glue guns also require caution; always supervise younger crafters when they are using them.
- 8Cost-Effective Tip: Instead of buying new felt for every mask, save scraps from previous projects! You can often piece together smaller scraps to create larger sections for muzzles, ears, or decorative elements, especially for smaller details. This is a great way to reduce waste and save money.
Related Activities You Might Enjoy
Frequently Asked Questions
What are the best materials for making adult animal masks that are durable and comfortable?
For durability and comfort, felt is an excellent choice for adult animal masks. Craft felt is inexpensive and easy to cut, while wool felt offers a more luxurious texture and better drape. For structural support, consider adding a layer of stiffened fabric or thin craft foam to the inside. For comfort, ensure the elastic strap is wide enough (at least 1/2 inch) and adjustable. Adding a soft lining like fleece where the mask touches the skin can also prevent irritation during extended wear.
How can I ensure my adult animal mask fits securely and comfortably without slipping?
The key to a secure fit is the elastic strap. Measure around your head, adding about 5cm (2 inches) for overlap, and cut your elastic cord. Attach the elastic firmly to the sides of the mask using a generous amount of hot glue or by sewing it directly onto the felt. Position the attachment points about 2cm (just under an inch) up from the bottom edge of the mask for optimal stability. If the mask still feels loose, you can add a small, adjustable buckle or a Velcro strip to the elastic for a custom fit.
What are some creative ways to customize a basic adult animal mask to look more realistic or unique?
Customization is where your mask truly comes alive! For realism, add texture with yarn glued strategically to mimic fur, or use small feathers for birds or lions. Paint details like whiskers or subtle shading with acrylic fabric paints. For unique flair, incorporate beads around the eyes, use metallic felt for accents, or even attach small, lightweight accessories like tiny bells or faux flowers. Layering different felt colors and shapes also adds depth and character. You can transform the basic fox into a bear by using rounded ears, or a cat by adding a different muzzle shape.
How do I troubleshoot common crafting issues like collapsing masks or smudged paint?
Mask collapse often happens when the felt isn't stiff enough. Reinforce the base by gluing a second layer of felt to the inside, or carefully insert a thin piece of craft foam behind the main felt. For smudged paint, ensure you're using fabric paints designed for flexibility, and allow each layer to dry completely before adding the next. If using markers, test them on scrap felt first to see how they bleed. For hot glue stringing, let the glue gun heat fully and wipe the nozzle clean before application.
What Next?
You've now got the skills to create a whole menagerie of felt forest creatures! Mastering these felt techniques—precise cutting, layered details, and secure elastic attachment—will elevate your mask-making game. Now go forth and create your forest menagerie! I can't wait to see what creatures you bring to life.
Free: 10 Paper Crafts Anyone Can Make in 5 Minutes
Get our beginner guide + new craft ideas weekly.
No spam. Unsubscribe anytime.
Did you complete this activity?
Related
You might also like
Cardboard Critter Masks
Cardboard Box Accordion

Cardboard Tube Desk Organizer
Leaf Rubbing Nature Collage
Backyard Bird Buffet Bonanza