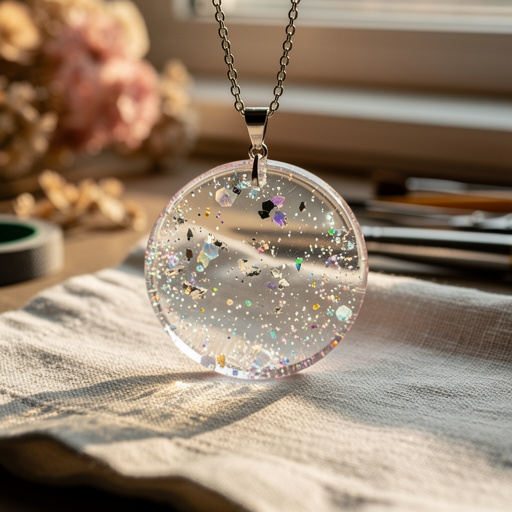
How to Create Floating Glitter Resin Pendants — Easy Step-by-Step Guide
Unleash your creativity with these unique resin jewelry ideas! Learn to craft mesmerizing floating glitter pendants that shimmer and shine. This beginner-friendly activity has 10 steps and is perfect for families with kids aged 10+.

Quick answer
To make floating glitter resin pendants, you need epoxy resin, glitter, pendant bezels, and about 60 minutes of active time. Start by mixing the resin and adding glitter. Pour into bezels and let cure. This beginner-friendly activity has 10 steps and is perfect for families with kids aged 10+.
What you need
Shop on Amazon · As an Amazon Associate we earn from qualifying purchases. Links above are affiliate links — we may earn a commission at no extra cost to you.
Dive into the dazzling world of resin crafting with this captivating project: Floating Glitter Resin Pendants! These unique pieces capture light and movement, creating a mesmerizing effect that's sure to turn heads. Whether you're a seasoned crafter or a complete beginner, this tutorial offers a straightforward path to creating beautiful, personalized jewelry. It's an ideal activity for adding a touch of sparkle to your style or for creating thoughtful, handmade gifts that recipients will cherish.
On this page
Step-by-Step Instructions
- 1
Prepare your workspace by covering it with a protective mat or newspaper. Ensure good ventilation by opening a window or using a fan, as resin fumes can be strong and potentially irritating.
- 2
Put on your protective gloves and safety glasses. This is a crucial step to protect your skin and eyes from the uncured resin, which can cause irritation or allergic reactions.
- 3
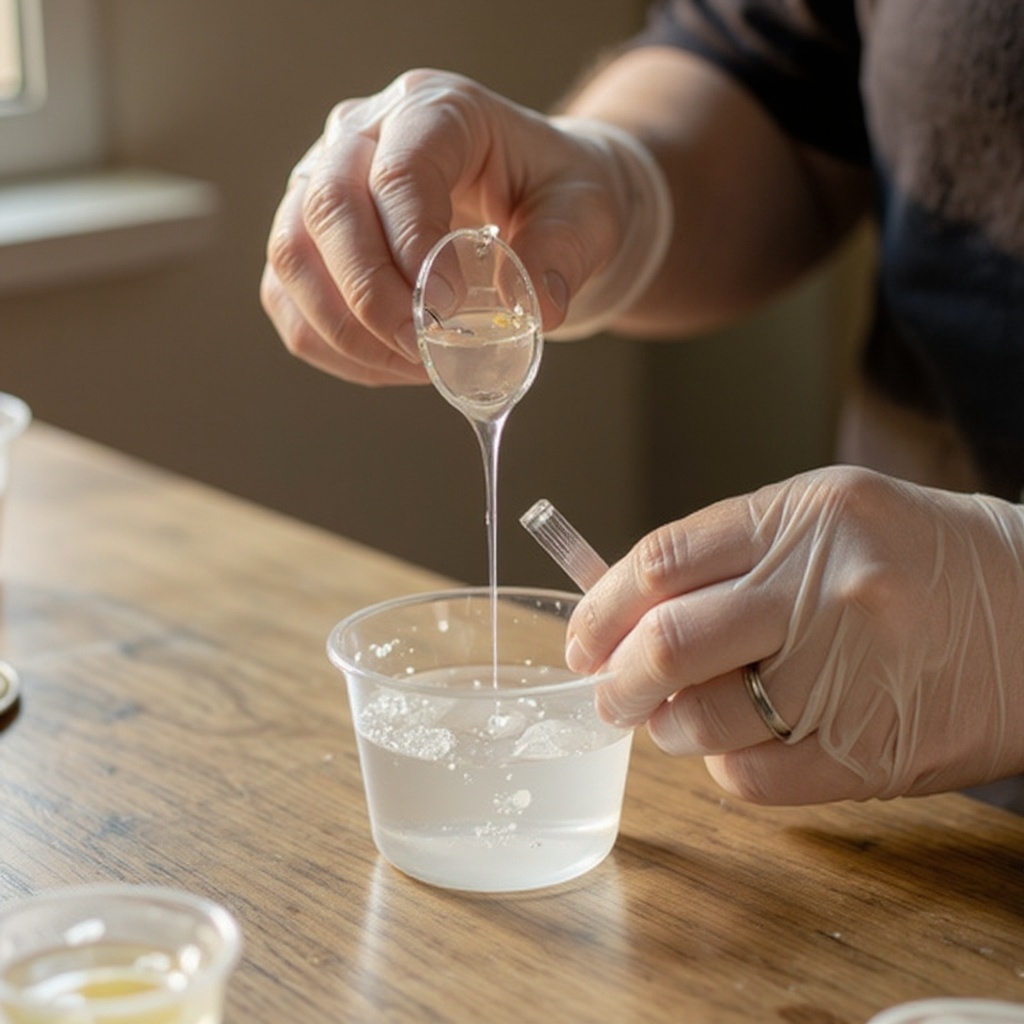
Carefully measure equal parts of resin and hardener into a mixing cup according to the manufacturer's instructions. For example, if the instructions say a 1:1 ratio by volume, measure 1 oz of resin and 1 oz of hardener, ensuring accuracy for proper curing.
- 4
Stir the resin and hardener together thoroughly for the recommended time (usually 2-3 minutes), scraping the sides and bottom of the cup to ensure it's fully mixed. This thorough mixing is vital for the resin to cure correctly; incomplete mixing will result in sticky or uncured spots.
- 5
Once the resin is thoroughly mixed, allow it to sit for a few minutes (check your resin instructions, typically 5-10 minutes) to allow some of the initial bubbles to rise to the surface. This pre-settling step can significantly reduce the number of bubbles you'll need to remove later.
- 6
Divide the mixed resin into smaller disposable cups, one for each glitter color you plan to use. This allows you to create different colored mixtures without contaminating your main batch.
- 7
Add a small amount of glitter to each cup of resin and stir gently until evenly distributed. Don't overfill the cup with glitter; you want the resin to be the primary medium, with the glitter suspended within it, not a solid mass of glitter.

- 8
Carefully pour a small amount of the glitter-resin mixture into your pendant bezels. Fill them about halfway to allow for swirling and potential layering without overflowing.
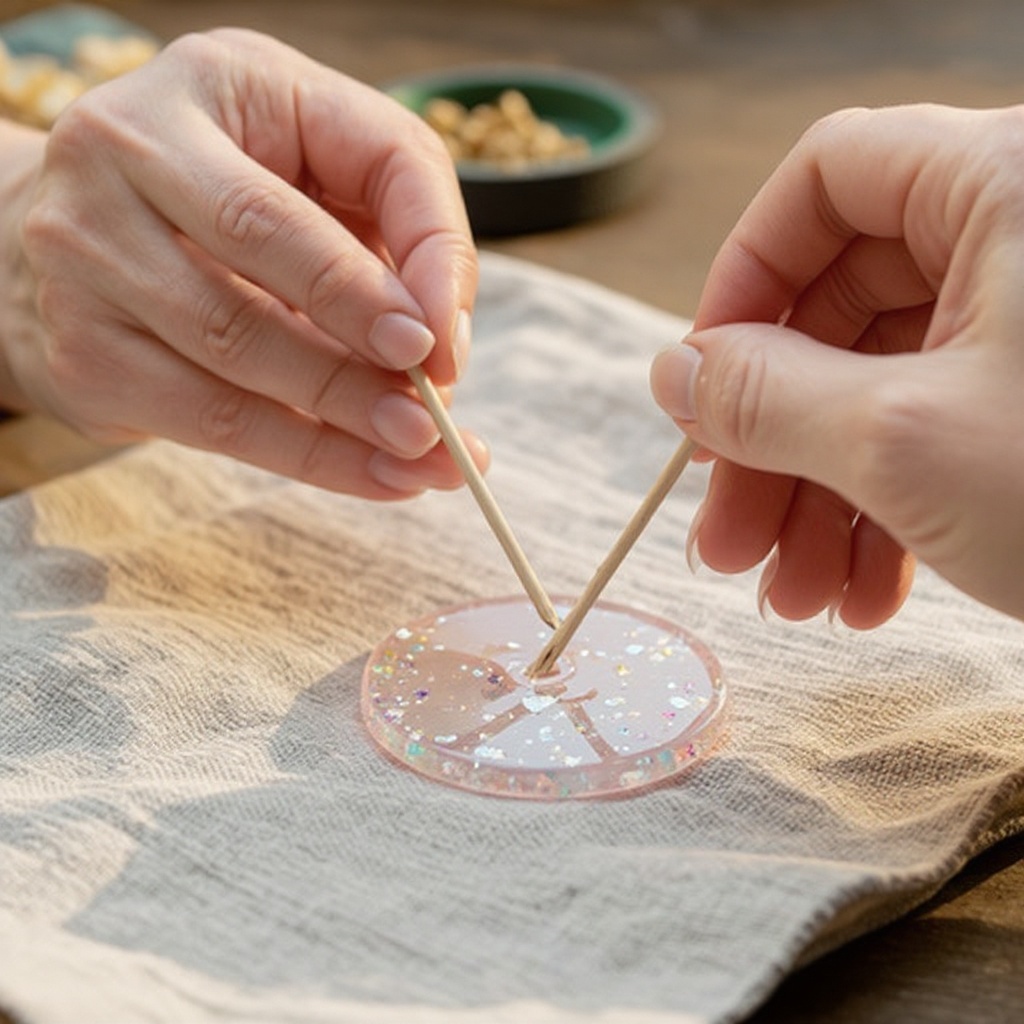
- 9
Use a toothpick to gently swirl the glitter within the resin, creating a dynamic, floating effect. You can drag the toothpick through the mixture to create streaks or gently agitate it to disperse the glitter; experiment with different motions to achieve unique patterns.
- 10
Add more glitter-resin if needed to fill the bezel, leaving a tiny bit of space at the top (about 1-2mm) to prevent overflow and allow for a smooth, finished surface. This small gap also helps prevent the resin from touching the surface it's curing on, which can cause sticking.
- 11
If any bubbles are visible on the surface, you can gently pop them using a toothpick or by carefully using a heat gun or kitchen torch held at a distance. Move the heat source continuously to avoid scorching or damaging the resin.
- 12
Allow the resin to cure completely according to the manufacturer's instructions (typically 24-72 hours). Avoid touching or moving the pendants during this time, as disturbing them can create ripples or imperfections in the surface.
- 13
Once fully cured and hardened, inspect your pendants for any rough edges or imperfections. You can gently sand them with fine-grit sandpaper if needed, or use a clear sealant for a smooth finish.
- 14
Attach the jump rings to the pendant bezels using jewelry pliers. If your bezels don't come with jump rings, you'll need to add them now to create your finished jewelry pieces.
Tips & Troubleshooting
- 1To avoid bubbles, stir the resin slowly and deliberately, scraping the sides and bottom of the cup multiple times. Over-mixing or whipping the resin can introduce excessive air, so focus on a steady, consistent stir. If bubbles appear, you can gently warm the surface with a heat gun or a lighter held at a distance (be very careful not to scorch the resin), or use a toothpick to pop them individually.
- 2Experiment with different glitter sizes and types, like holographic, iridescent, or metallic glitters, for varied effects. You can also layer colors by allowing the first layer of glitter-resin to partially cure (become gel-like) before adding the next layer, creating depth and distinct color separation.
- 3If you accidentally spill resin, clean it up immediately with rubbing alcohol while it's still wet. Once cured, it's much harder to remove and may require scraping or sanding. Keep paper towels and rubbing alcohol readily accessible during your crafting session.
- 4Store your finished pendants in a cool, dry place away from direct sunlight to prevent yellowing or damage. Prolonged exposure to UV light can degrade the resin over time, causing it to become brittle or discolored.
- 5For a truly unique look, consider adding small, lightweight embellishments like tiny dried flowers, micro beads, or even small metallic flakes to your resin mixture. Ensure any organic materials are completely dry before embedding to prevent moisture issues.
- 6When measuring your resin, precision is key for a proper cure. If your kit doesn't have clear volume markings, consider using a digital scale for accurate weight measurements or investing in small measuring syringes for liquids.
- 7If you find your resin is too thick to pour easily, you can gently warm the resin bottles in a warm water bath before mixing. Be cautious not to overheat, as this can affect the curing process. This is especially helpful in cooler environments.
- 8Clean your stirring sticks and cups thoroughly with rubbing alcohol immediately after use. Resin can be difficult to remove once it has hardened, so a quick cleanup will save you a lot of effort later.
Related Activities You Might Enjoy
Frequently Asked Questions
What is the best resin for jewelry making?
For jewelry, a casting epoxy resin is generally recommended. Look for kits specifically designed for art and jewelry, as they often have lower viscosity, cure clear, and are UV resistant to prevent yellowing. These resins are formulated to cure to a hard, durable finish suitable for wear and tear. Brands like ArtResin, Counter Culture DIY, and Alumilite are popular choices among crafters for their quality and ease of use. Always check the product description to ensure it's suitable for the type of project you're undertaking, especially for embedding objects or creating thick layers.
How do I prevent bubbles in my resin jewelry?
Slow and thorough stirring is key to minimizing bubbles. Avoid over-mixing or whipping the resin, as this can introduce excess air. Stir gently but consistently for the recommended time, ensuring you scrape the sides and bottom of the mixing cup. You can also use a toothpick to pop any visible bubbles before the resin cures. Allowing the resin to sit for a few minutes after mixing can also help some bubbles rise to the surface. Using a heat gun or torch briefly over the surface can also pop remaining bubbles, but use with extreme caution to avoid damaging the resin.
Can I add other things to my resin jewelry besides glitter?
Absolutely! Resin is incredibly versatile and can be used to embed a wide variety of small objects. You can embed small dried flowers, tiny beads, glitter flakes, metallic foil, small printed images (ensure they are printed with a laser printer and sealed if necessary), or even small charms. Ensure any organic materials like flowers are completely dry to prevent mold or discoloration within the resin, and consider sealing porous materials before embedding to prevent them from absorbing resin and changing color.
How long does resin jewelry take to cure?
Cure times vary by brand and environmental factors like temperature and humidity, but most epoxy resins for jewelry take 24-72 hours to fully harden. Some resins may be touch-dry sooner, but 'fully cured' means they have reached their maximum hardness and durability. It's best to let them cure undisturbed for the full recommended time to ensure durability and prevent any issues like warping or cracking. Always refer to the specific instructions provided with your resin kit for accurate cure times.
What safety precautions should I take when working with resin?
Safety is paramount when working with resin. Always wear protective gloves, preferably nitrile or latex, to prevent skin contact, as uncured resin can cause irritation or allergic reactions. Wear safety glasses to protect your eyes from splashes. Ensure you are working in a well-ventilated area, either by opening windows or using a fan, as resin fumes can be strong. Avoid eating, drinking, or smoking in your workspace. It's also advisable to wear a mask if you are particularly sensitive to fumes or working in a less-than-ideal ventilation situation.
Can I make these pendants in different shapes and sizes?
Yes, you can absolutely make these pendants in different shapes and sizes! The key is to use pendant bezels that match your desired aesthetic. Bezels come in a vast array of shapes, from classic circles and ovals to more intricate geometric designs, hearts, stars, and even themed shapes. The size of the bezel will determine the final size of your pendant. When choosing bezels, ensure they have a decent depth to accommodate the resin and glitter mixture without overflowing. Larger bezels might require more resin and glitter, so adjust your quantities accordingly.
What Next?
Congratulations on creating your beautiful floating glitter resin pendants! The possibilities are endless, from experimenting with different glitter combinations and shapes to embedding small charms or dried flowers for a truly personalized touch. These pendants can be strung onto necklaces, bracelets, or even incorporated into earrings. Store your finished creations in a cool, dry place away from direct sunlight to maintain their vibrant sparkle and prevent any potential yellowing. Consider displaying them in a jewelry box or on a dedicated display stand to showcase their unique charm.
Free: 10 Paper Crafts Anyone Can Make in 5 Minutes
Get our beginner guide + new craft ideas weekly.
No spam. Unsubscribe anytime.
Did you complete this activity?
Related
You might also like
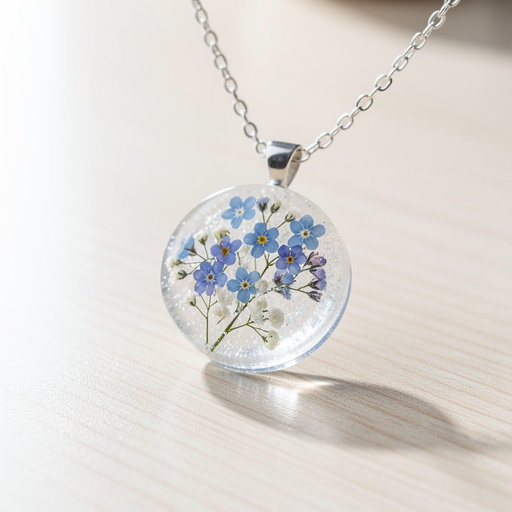
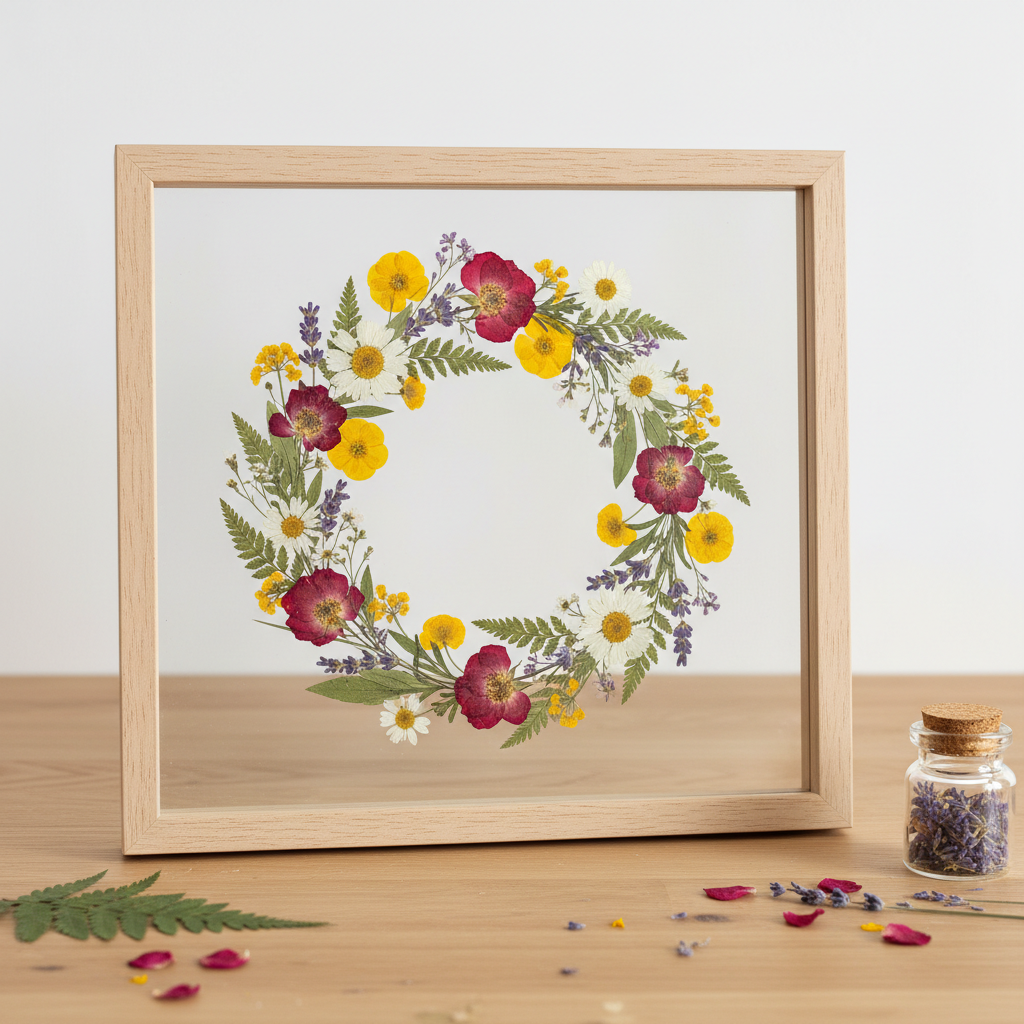
Layered Botanical Resin Pendant
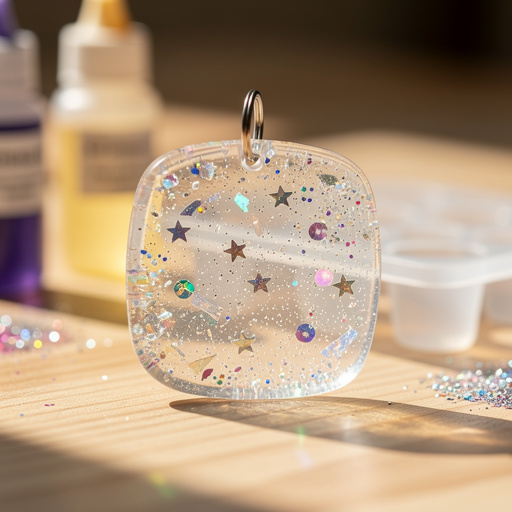
Floating Glitter Resin Charms
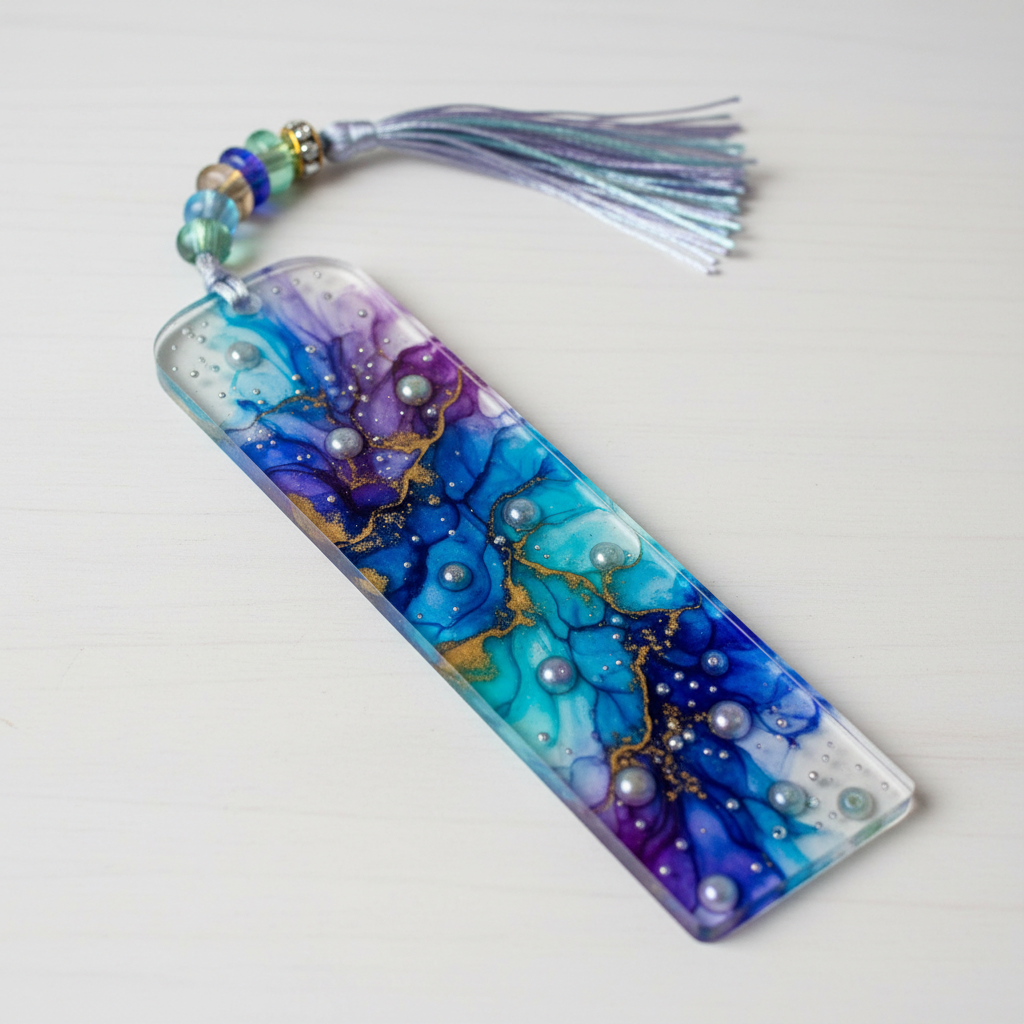
Resin Bookmark with Alcohol Ink Swirls

Pressed Flower Resin Coasters
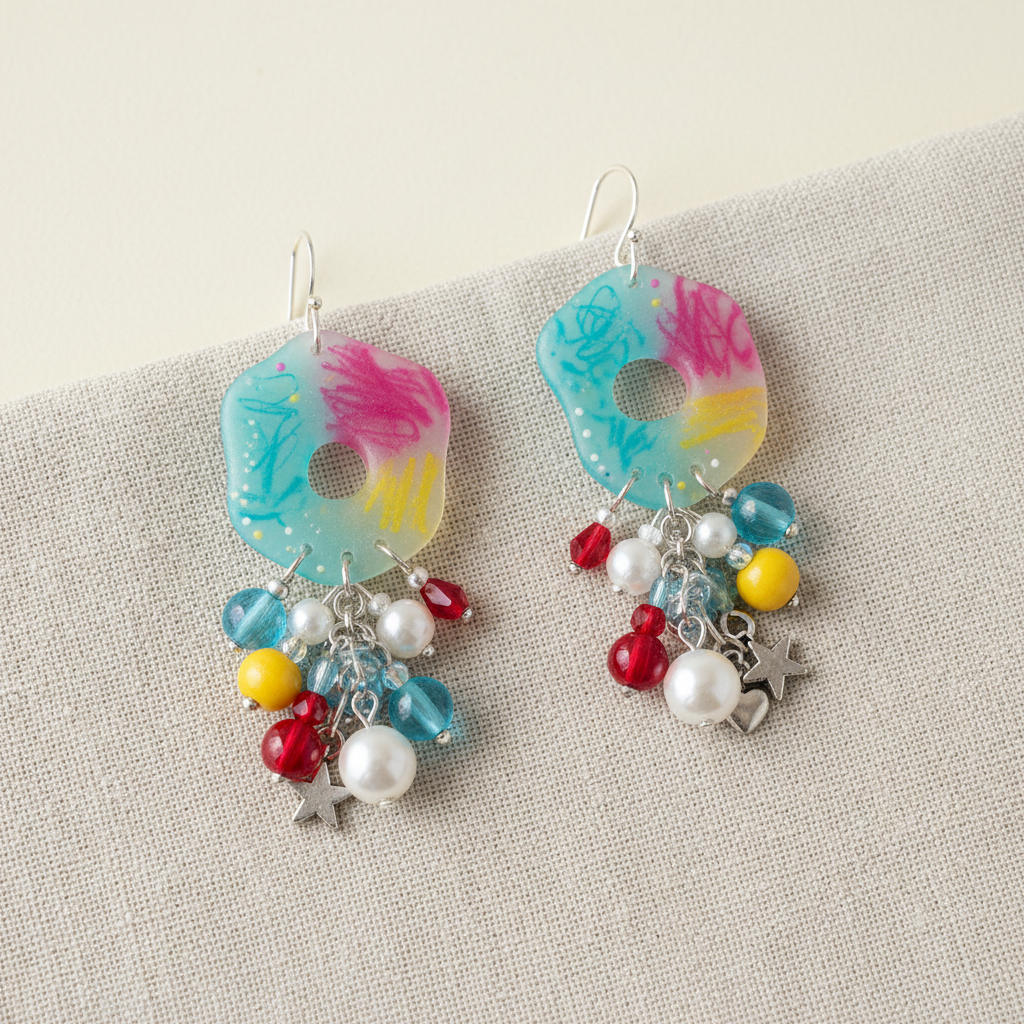
Shrink Plastic Statement Earrings