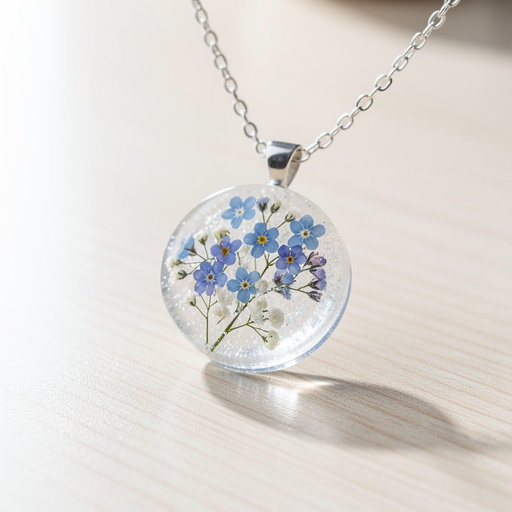
15 Steps to Create a Layered Botanical Resin Pendant — From Start to Finish
Dive into the mesmerizing world of resin jewelry making with this comprehensive tutorial. Learn to create a beautiful layered botanical pendant, perfect for gifting or wearing.
Quick answer
To make a layered botanical resin pendant, you need a silicone pendant mold, 2-part epoxy resin, dried botanicals, mica powder, and basic tools. The project takes approximately 2-3 hours of active crafting time, plus 24-48 hours for resin curing.
What you need
Shop on Amazon · As an Amazon Associate we earn from qualifying purchases. Links above are affiliate links — we may earn a commission at no extra cost to you.
Welcome, fellow makers, to the enchanting realm of resin jewelry! If you've ever admired those crystal-clear pieces encapsulating tiny treasures, you're in the right place. This project will guide you through crafting a stunning layered botanical resin pendant, perfect for adding a touch of nature to your style or gifting to a loved one. We'll use flexible silicone molds to achieve a professional, glossy finish. This tutorial is designed for intermediate beginners, meaning some patience and attention to detail are key. Expect to spend about 2-3 hours on active crafting, plus significant curing time, making it a wonderful weekend project.
On this page
Step-by-Step Instructions
- 1
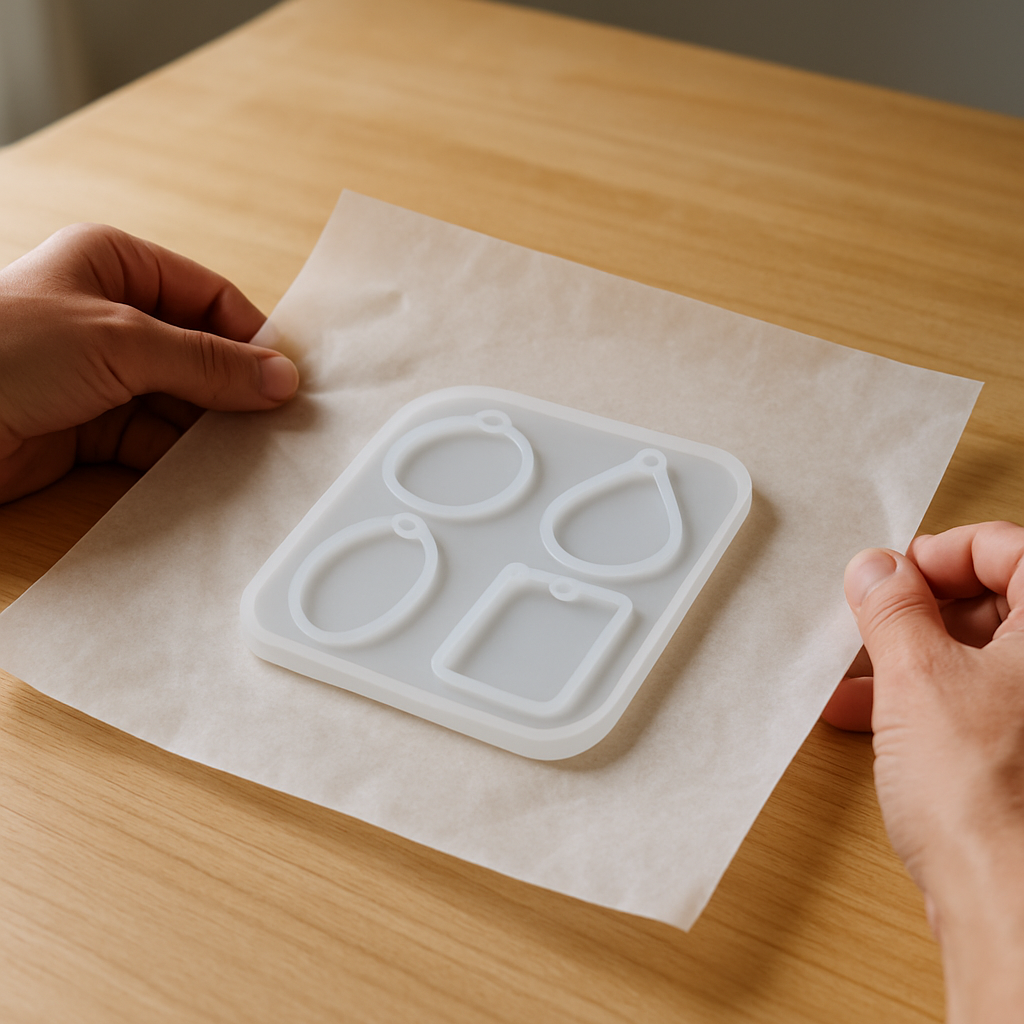
Step 1: Prepare Your Workspace. Lay down a sheet of wax paper (approx. 30cm x 30cm) on a flat, level surface in a well-ventilated area. Ensure your silicone pendant mold is clean and dust-free; wipe it gently with a paper towel dampened with rubbing alcohol and let it air dry completely.
- 2
Step 2: Don Your Safety Gear. Put on your nitrile gloves to protect your hands from resin. Resin can be irritating to skin, so always wear gloves and avoid direct contact. If resin gets on your skin, wash immediately with soap and water.
- 3
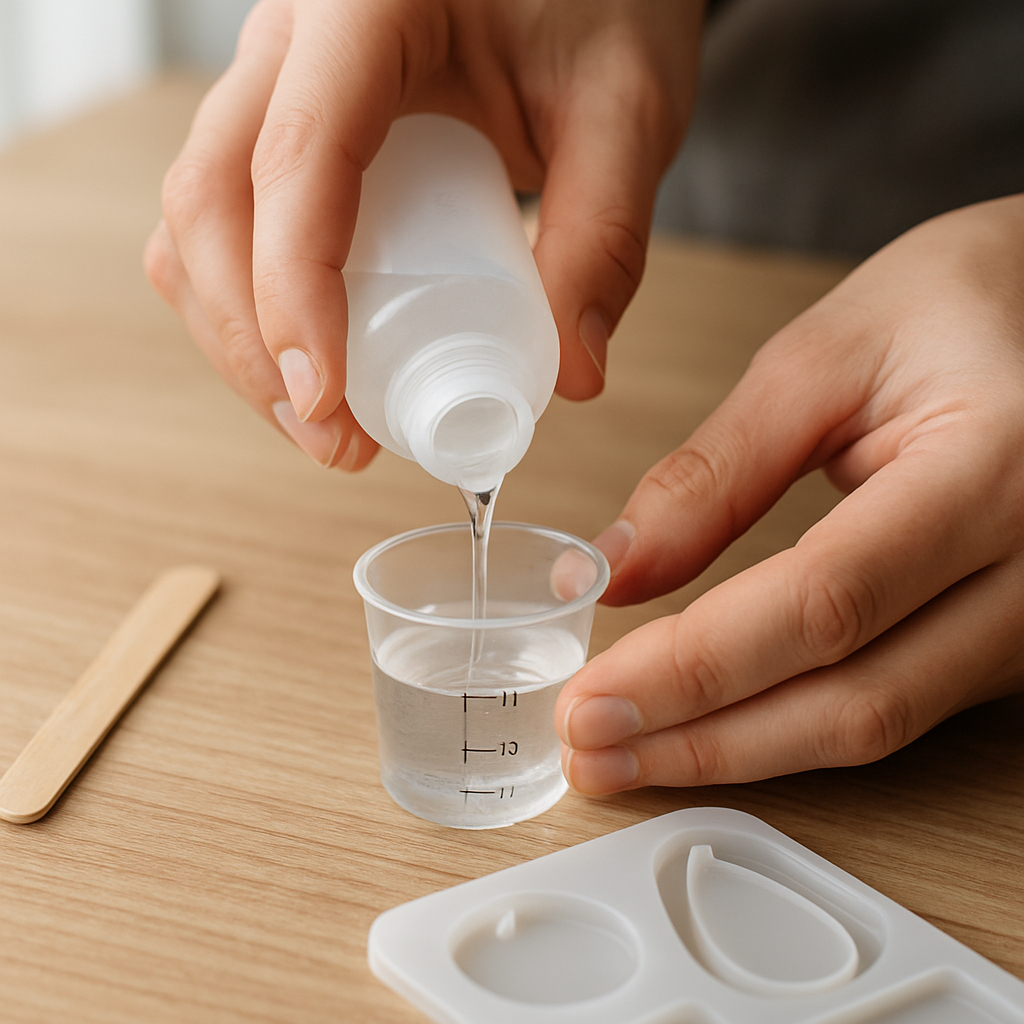
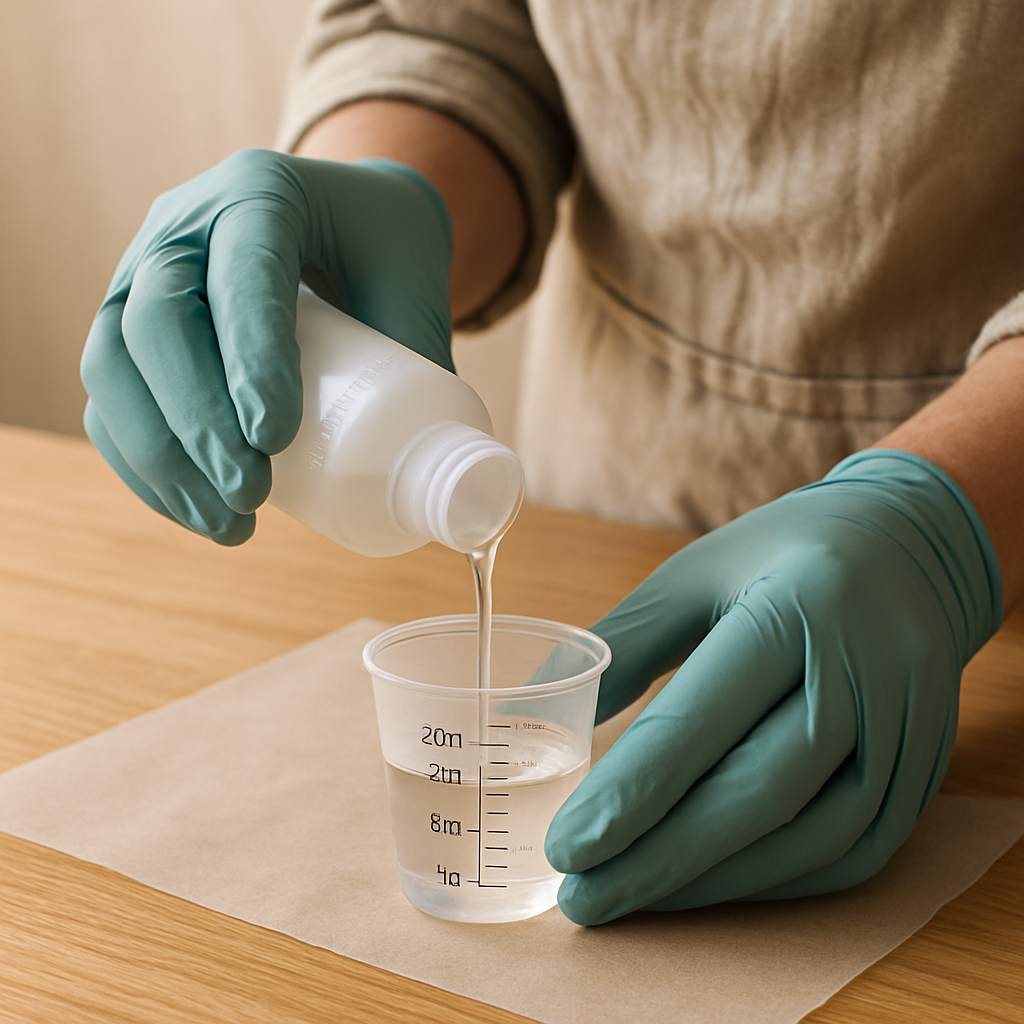
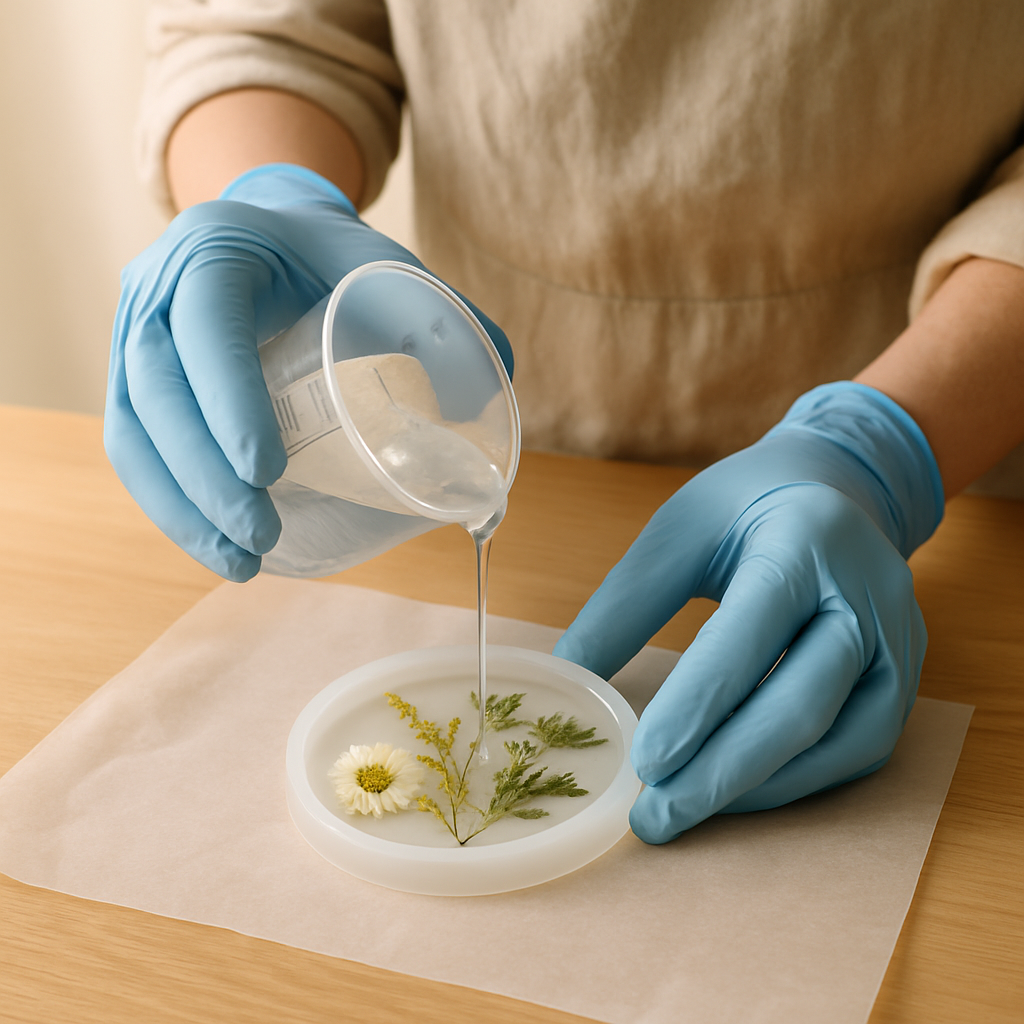
Step 3: Measure Resin Part A. Pour 10ml of Resin Part A (the resin component) into one of your disposable plastic measuring cups. Be precise with your measurement; inaccurate ratios are a common cause of sticky resin. If you pour too much, use a craft stick to carefully remove the excess.
- 4
Step 4: Measure Resin Part B. Pour 10ml of Resin Part B (the hardener component) into the *same* measuring cup as Part A. Again, accuracy is crucial for proper curing. The total volume in your cup should now be 20ml.
- 5
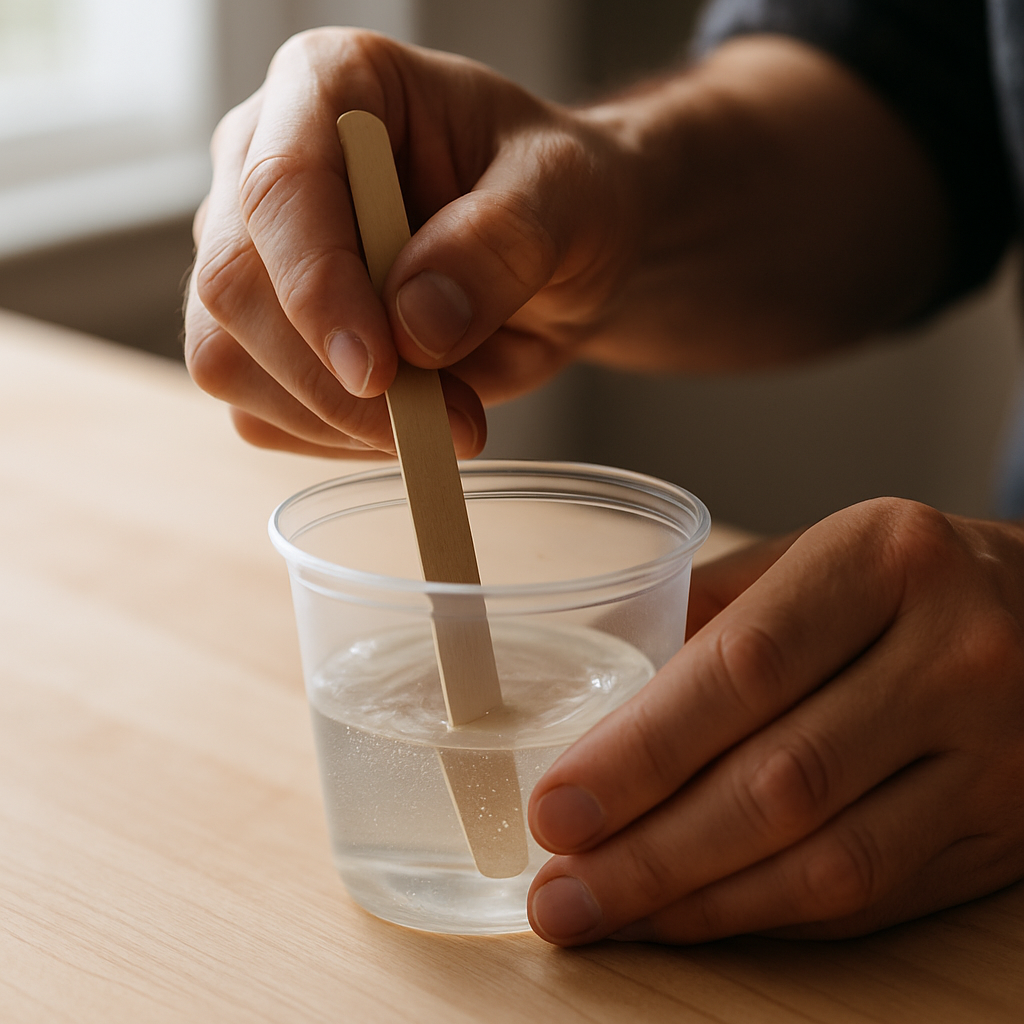
Step 5: Mix the Resin Thoroughly. Using a clean wooden craft stick, slowly stir the resin mixture for a full 3 minutes. Scrape the sides and bottom of the cup frequently to ensure both parts are fully incorporated. Failure to mix thoroughly will result in sticky, uncured spots in your finished piece.
- 6
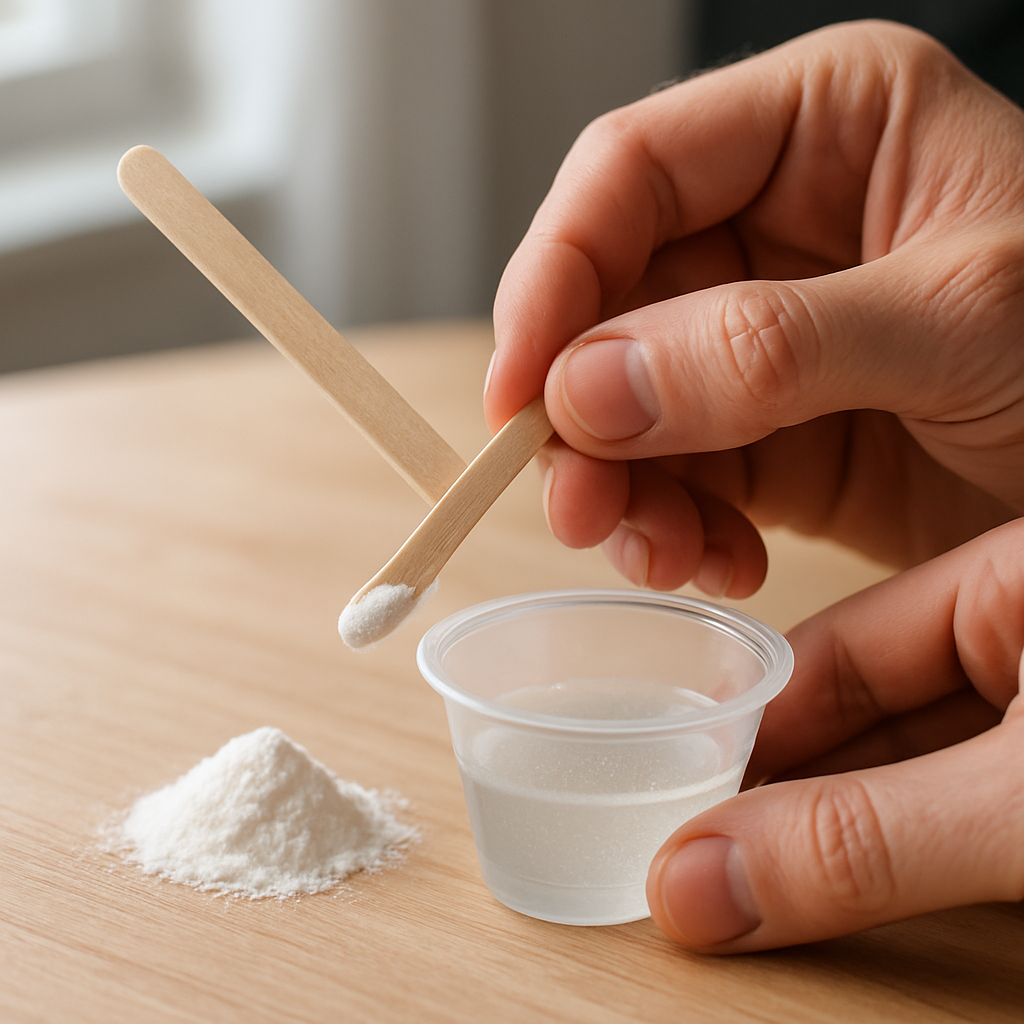
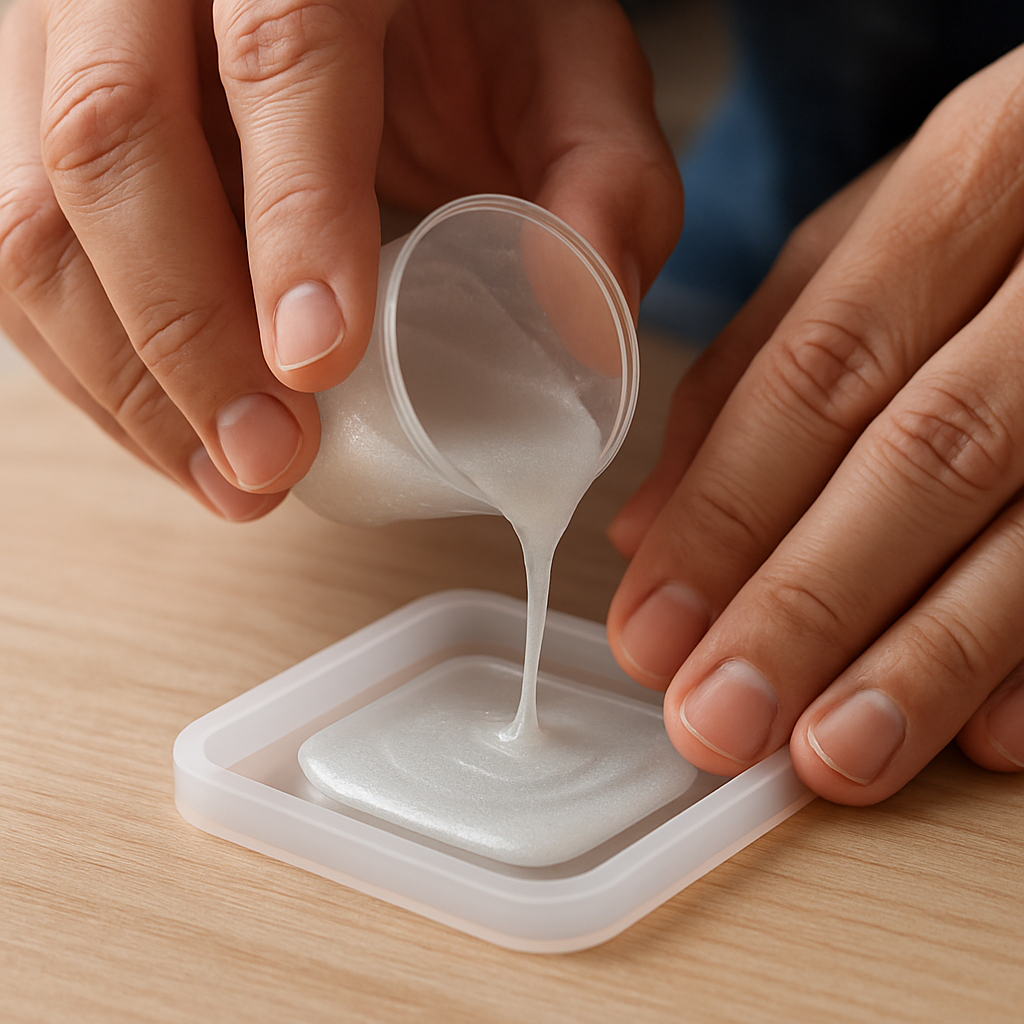
Step 6: Add Mica Powder for the First Layer. Dip a clean craft stick into your mica powder pigment (e.g., pearl white) and add a small amount (about 1/8 teaspoon) to your mixed resin. Stir gently until the color is evenly dispersed, avoiding vigorous stirring which can introduce more bubbles.
- 7
Step 7: Pour the Base Layer. Carefully pour approximately 5ml of the colored resin into the bottom of your silicone pendant mold. Aim for an even layer that covers the entire base, about 2mm deep. If you pour too much, gently tilt the mold to spread it or use a clean craft stick to remove a tiny amount.
- 8
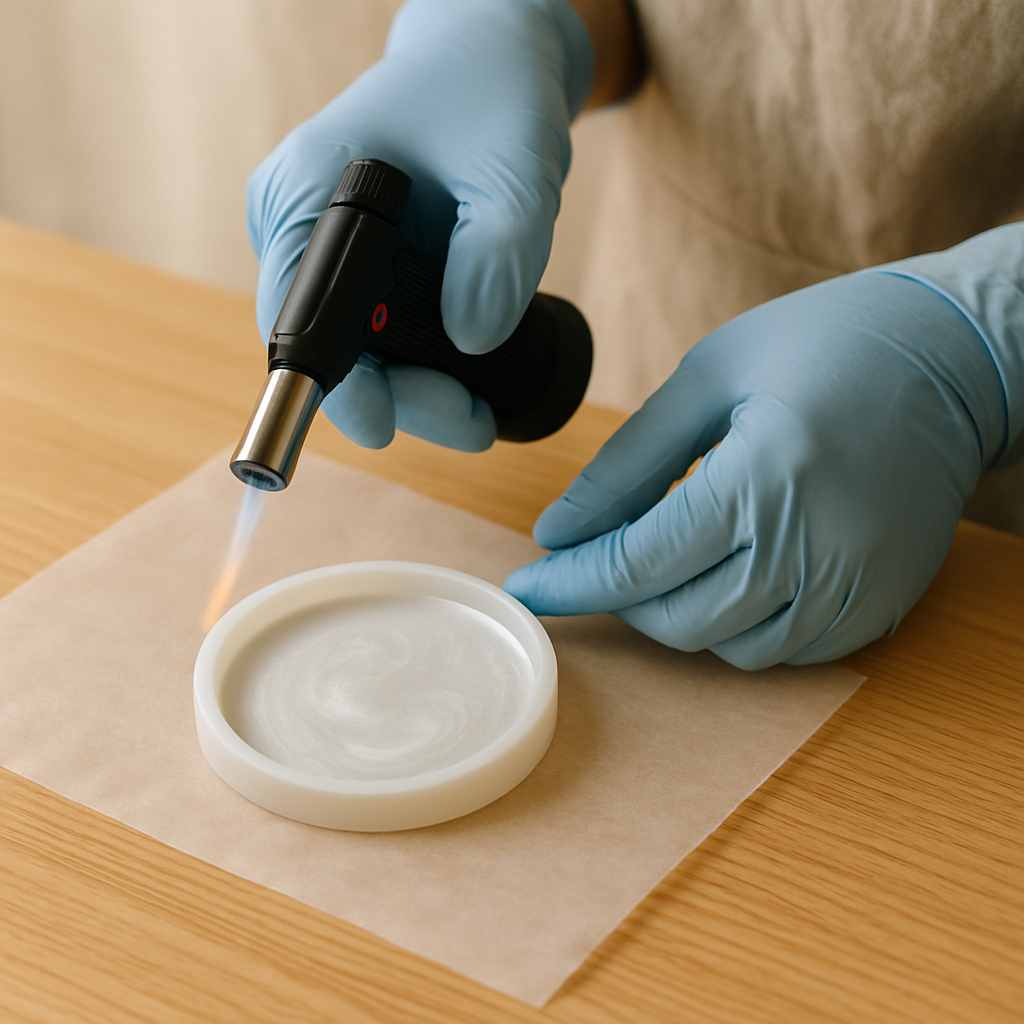
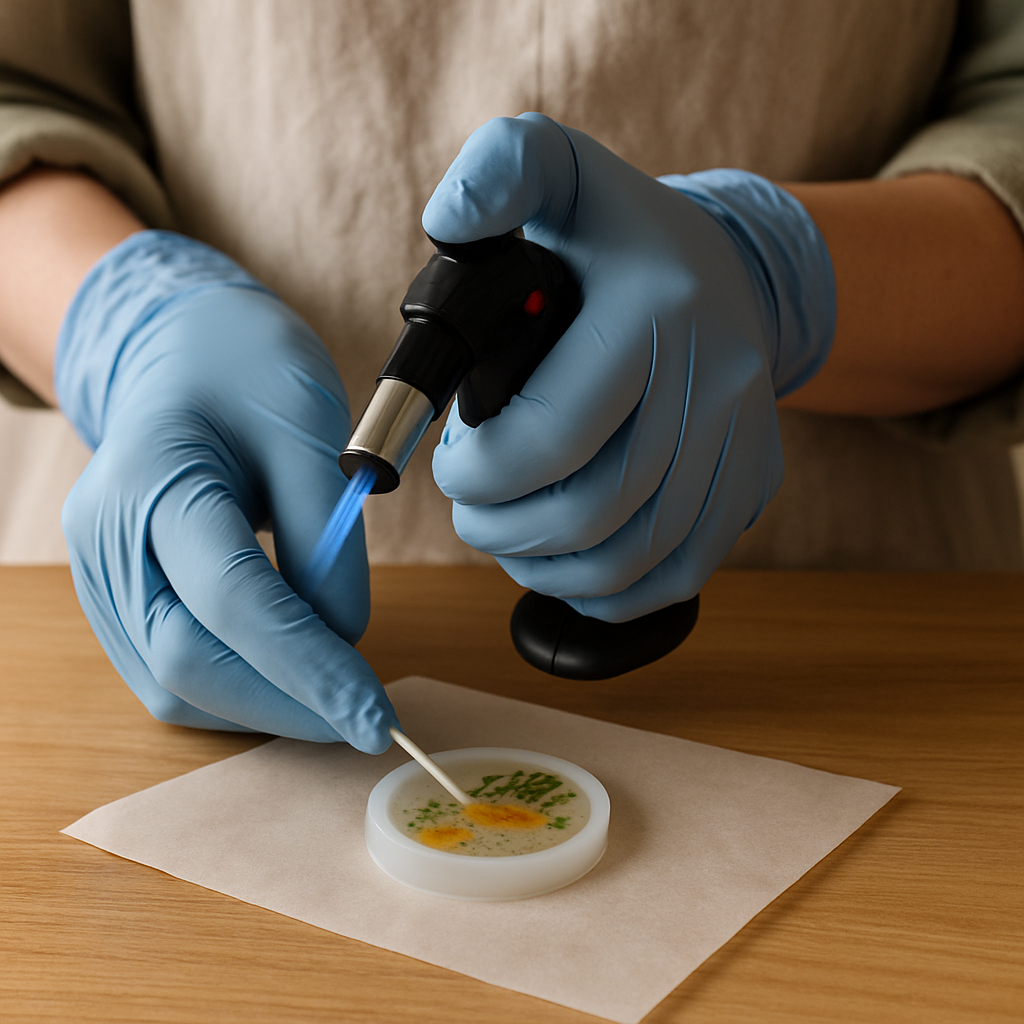
Step 8: Remove Bubbles from the Base Layer. Hold your mini butane torch or heat gun about 10-15cm above the resin surface and quickly sweep the flame or heat across the resin for 1-2 seconds. This burst of heat will pop any surface bubbles. Do not hold the flame in one spot, as it can damage the mold or scorch the resin.
- 9
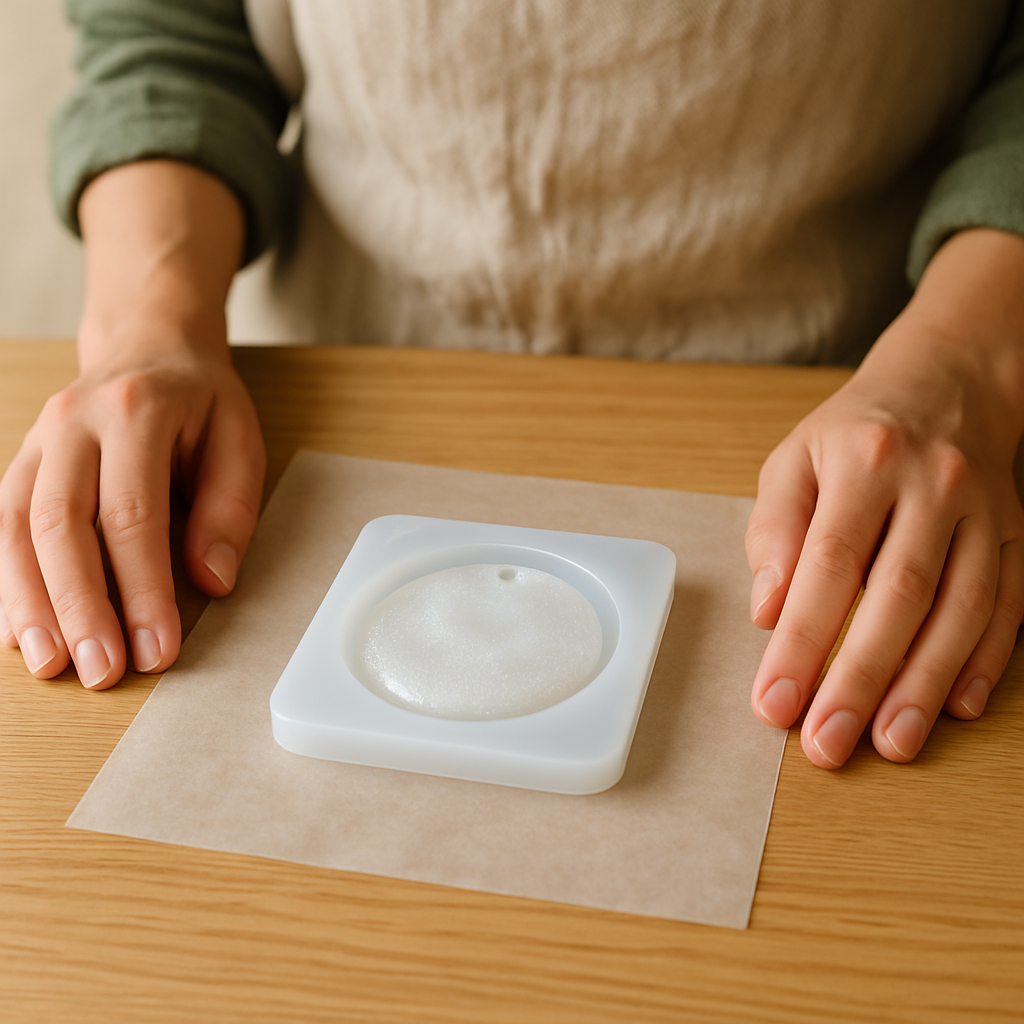
Step 9: Cure the Base Layer (Partial Cure). Allow this first layer to partially cure for 2-3 hours at room temperature (around 22°C / 72°F). It should be tacky to the touch but not fully hardened, which is ideal for embedding without sinking. If it's too liquid, your botanicals will float; if too hard, they won't adhere.
- 10
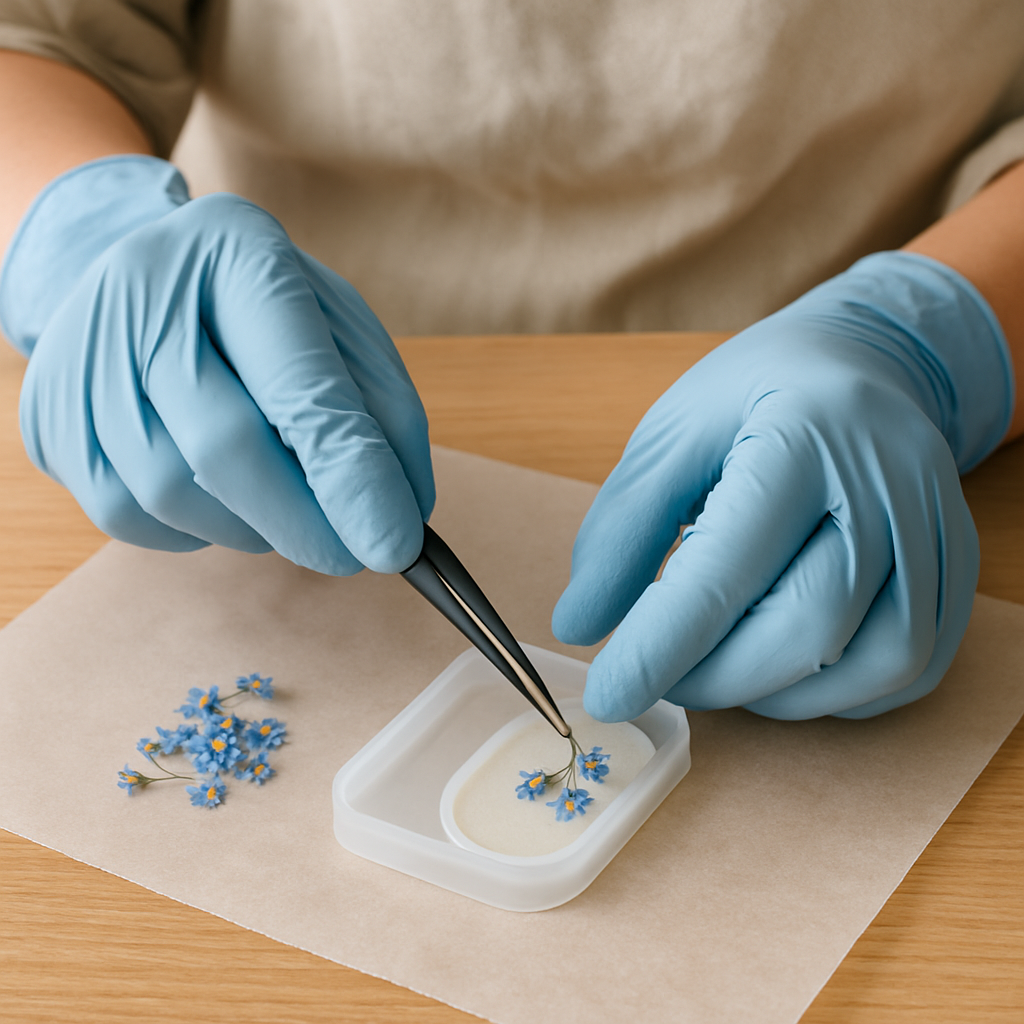
Step 10: Arrange Your Botanicals. Once the base layer is tacky, use your precision tweezers to carefully place your dried pressed flowers or leaves onto the tacky resin. Arrange them aesthetically, ensuring they lie flat against the surface. For younger crafters, pre-select and flatten botanicals to simplify this step.
- 11
Step 11: Prepare and Pour the Second Resin Layer. Mix another fresh batch of 20ml clear resin (10ml Part A + 10ml Part B, stirred for 3 minutes) in a new clean measuring cup. Slowly pour this clear resin over your arranged botanicals, filling the mold to about 1mm below the rim. This layer will encapsulate your design.
- 12
Step 12: Remove Bubbles from the Second Layer. Repeat the bubble removal process from Step 8, using your mini butane torch or heat gun to quickly sweep over the surface. Pay close attention to any bubbles trapped around the botanicals. If bubbles persist, gently nudge them to the surface with a clean craft stick or toothpick.
- 13
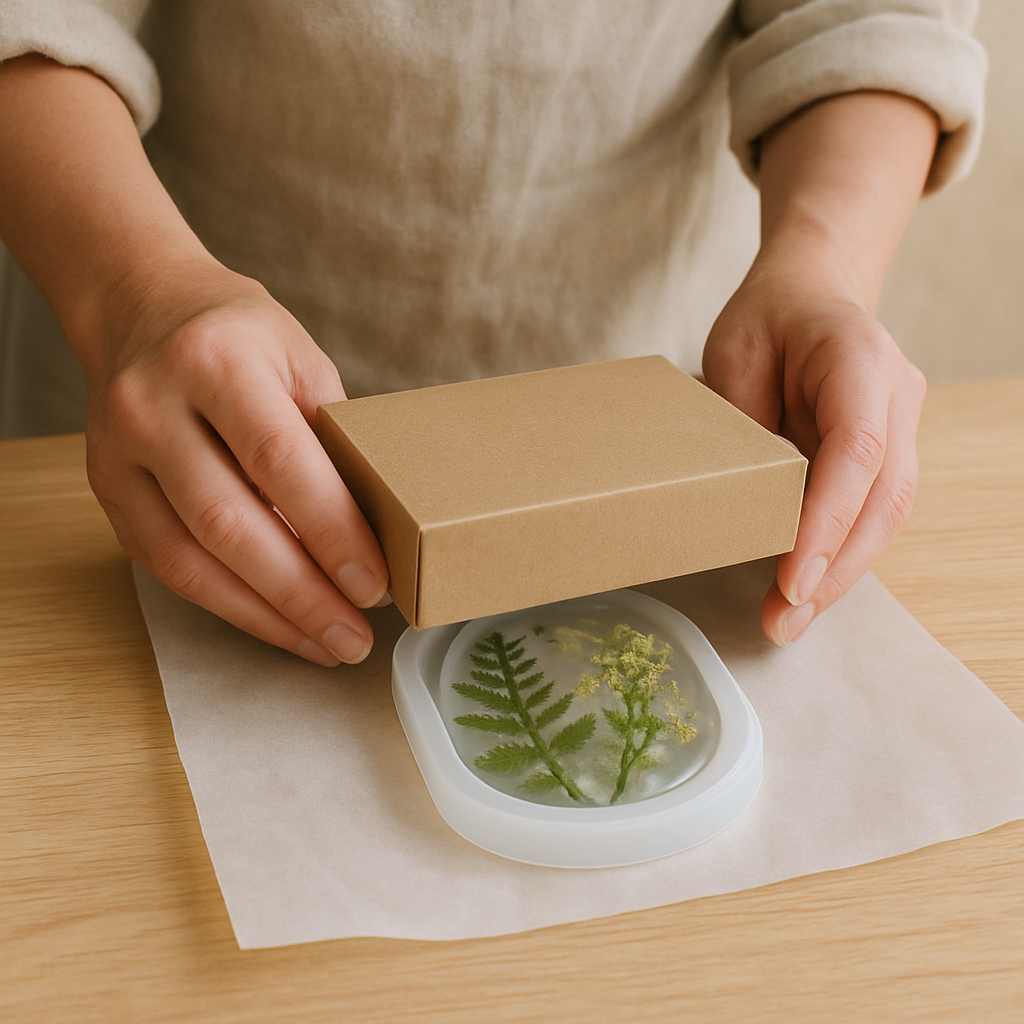
Step 13: Final Cure. Cover your mold with a cardboard box or dome to protect it from dust and allow the resin to fully cure for 24-48 hours at room temperature. Do not disturb the mold during this time. Premature handling can lead to fingerprints or an uneven finish.
- 14
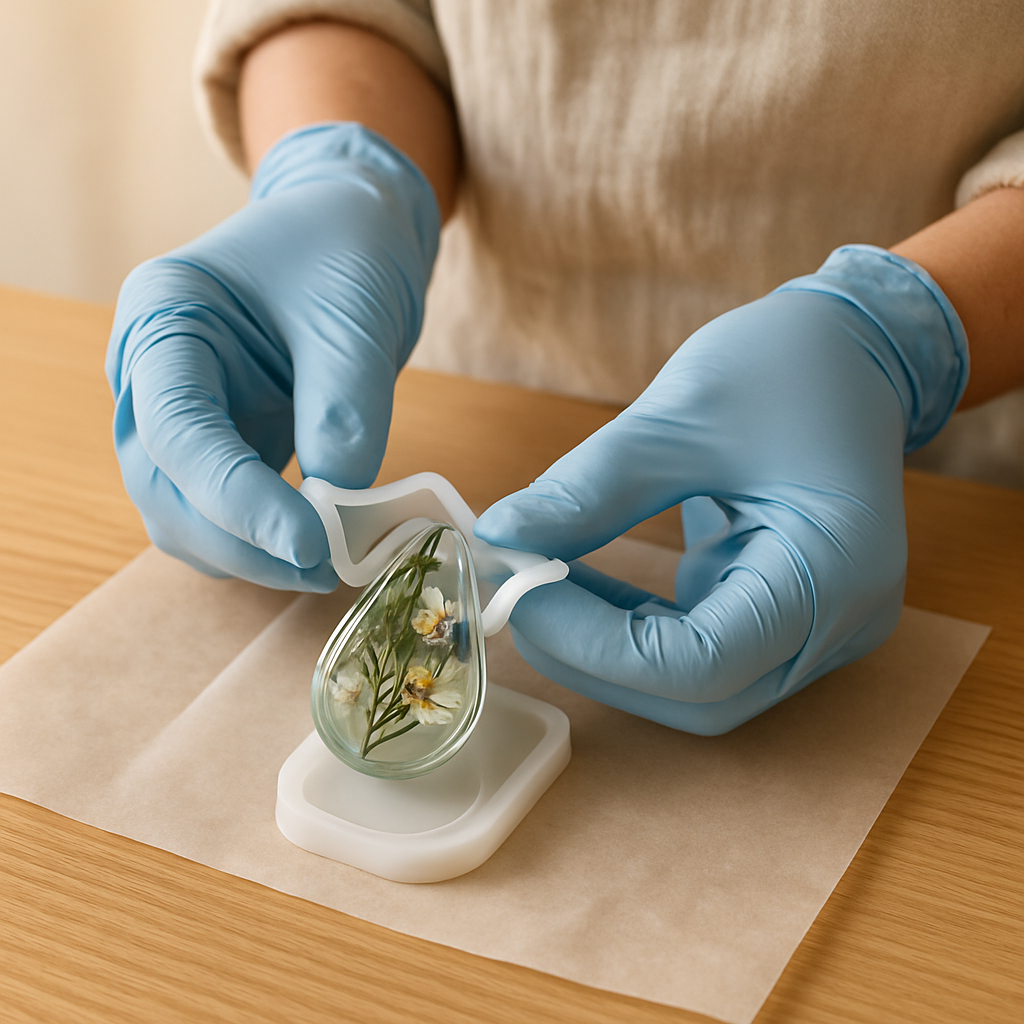
Step 14: Demold Your Pendant. Once the resin is completely hard and no longer tacky, gently flex the silicone mold to release your pendant. Silicone molds are very flexible, so you should be able to push the resin piece out easily. If it feels sticky, it needs more cure time; do not force it.
- 15
Step 15: Add Findings and Finish. If your mold has a hole, attach a 6mm jump ring through it using small pliers. If not, you may need to drill a small hole (use a hand drill with a 1.5mm bit, wearing safety glasses). Thread your necklace chain through the jump ring. For a truly professional finish, you can lightly sand any rough edges with 400-grit sandpaper and then polish with a resin polishing compound and a soft cloth.
Tips & Troubleshooting
- 1**Preventing Bubbles:** The most common issue! To minimize bubbles, mix your resin slowly and deliberately for the full 3 minutes, scraping the sides. After pouring, let the resin sit for 5-10 minutes before using a heat gun or torch; this allows some bubbles to naturally rise. For under-12s, use a toothpick to pop bubbles instead of a torch, always with adult supervision.
- 2**Dealing with Sticky Resin:** If your resin is sticky after 48 hours, it's usually due to inaccurate measuring or insufficient mixing. The best fix is to mix a small, fresh batch of resin and pour a thin, clear layer over the sticky piece, allowing it to cure fully. For future projects, double-check your measurements with a scale (by weight) for ultimate accuracy.
- 3**Choosing the Right Resin:** For jewelry, a 'casting resin' or 'deep pour epoxy' is ideal as it cures harder and clearer, often with a longer working time. 'Art resin' is typically thicker and designed for coating surfaces. UV resin is an alternative that cures instantly under a UV light, great for small, quick projects, but can yellow over time and requires a UV lamp.
- 4**Embedding Techniques:** When embedding items like botanicals, ensure they are completely dry. Any moisture will cause them to rot or create cloudy spots in your resin over time. For delicate items, you can 'seal' them first with a thin layer of clear resin or a sealant spray before embedding to prevent discoloration or air release.
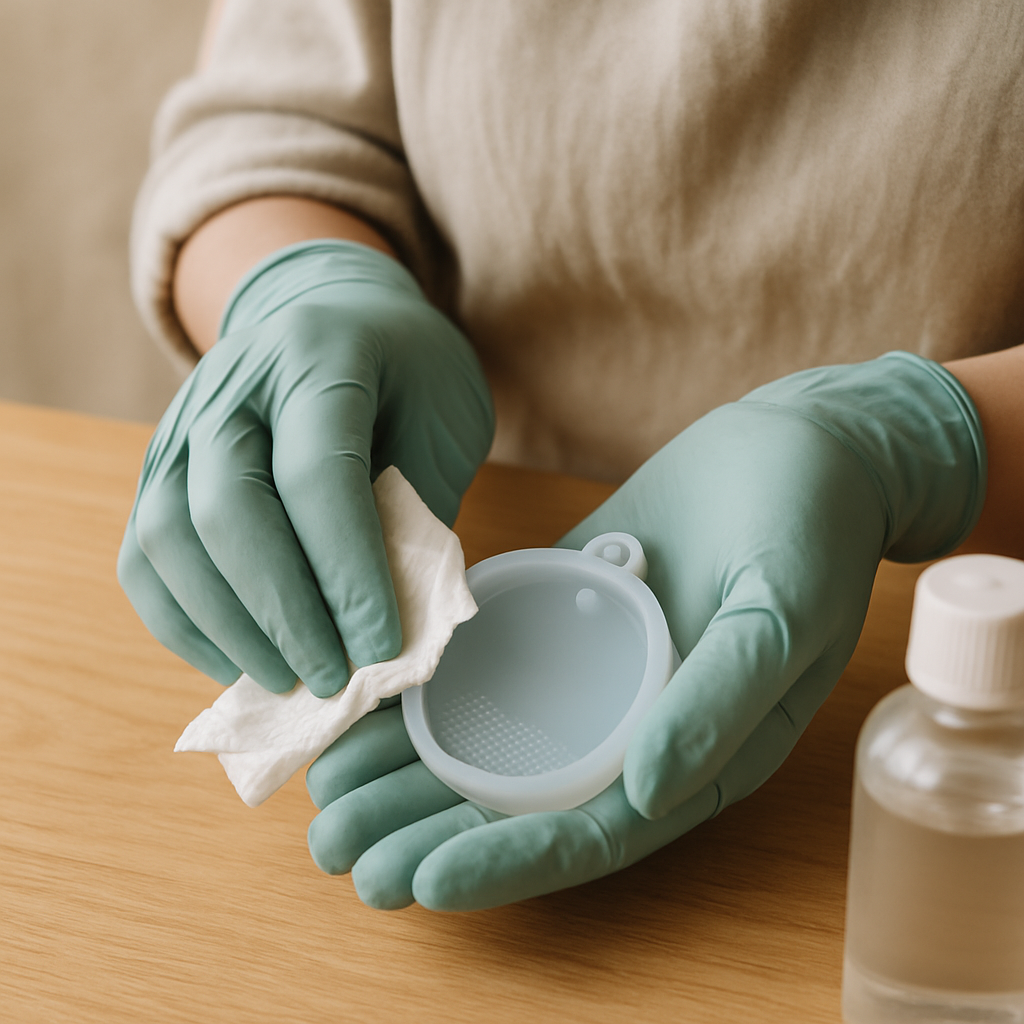
- 5**Caring for Your Molds:** To extend the life of your silicone molds, clean them immediately after use with rubbing alcohol and a soft cloth, then let them air dry. Store them flat and away from direct sunlight or extreme temperatures. Avoid using sharp objects inside the molds, as scratches can transfer to your finished resin pieces.
- 6**Age Adaptations for Younger Crafters (12+):** While resin crafting is best for older children due to chemical handling, younger teens (12-15) can participate with strict adult supervision. Focus on pre-measured resin batches, using toothpicks for bubble popping instead of torches, and emphasizing glove use and ventilation. Let them choose and arrange botanicals, fostering their creativity within safety guidelines.
Related Activities You Might Enjoy
Frequently Asked Questions
Why is my resin still sticky after curing?
Sticky resin is almost always a sign of improper mixing or incorrect resin-to-hardener ratios. Ensure you measure both parts precisely, either by volume (using clear measuring cups) or by weight (using a digital scale), according to your resin manufacturer's instructions. Stir slowly and thoroughly for at least 3 minutes, scraping the sides and bottom of your mixing cup. Insufficient mixing leaves uncured spots. Additionally, ensure your workspace temperature is within the recommended range (typically 22-24°C or 72-75°F); colder temperatures can inhibit proper curing. If it's already sticky, you can try placing it in a warmer spot for another 24 hours, or pour a thin, fresh layer of properly mixed resin over it.
How do I prevent bubbles in my resin jewelry?
Bubbles are a common challenge but can be minimized. First, mix your resin slowly and deliberately to avoid whipping air into the mixture. After pouring, let the resin sit for 5-10 minutes; this allows many bubbles to rise naturally. Then, use a heat gun or a mini butane torch (held 10-15cm away and swept quickly) to pop surface bubbles. For bubbles trapped around embedded objects, use a toothpick to gently dislodge them. Warming your resin bottles slightly in a warm water bath before mixing can also reduce viscosity, allowing bubbles to escape more easily. Ensure your molds are clean and dry, as dust can also create nucleation points for bubbles.
What's the difference between casting resin, art resin, and UV resin for jewelry?
Each resin type has specific uses. **Casting resin** (like the 2-part epoxy used here) is typically thinner, has a longer working time, and cures very hard and clear, making it ideal for pouring into molds and encapsulating objects. **Art resin** is thicker, designed for coating surfaces like paintings or tabletops, and offers a shorter working time. **UV resin** is a single-part resin that cures instantly (within minutes) under a UV lamp or direct sunlight. It's great for small, quick projects or doming, but can be more expensive, may yellow over time, and requires a UV light source. For detailed jewelry with embedded elements, 2-part casting epoxy resin is generally the most versatile and durable choice.
Can I use fresh flowers or leaves in my resin jewelry?
No, it's crucial to use only completely dried botanicals in your resin jewelry. Fresh flowers and leaves contain moisture, which will eventually cause them to rot, turn brown, and create cloudy spots or mold within your resin piece. To preserve their color and integrity, flowers and leaves must be thoroughly dried using methods like pressing, silica gel, or air drying. For delicate items, a thin coat of clear resin or a sealant spray can be applied before embedding to prevent discoloration and ensure no moisture is trapped, leading to a beautiful, long-lasting encapsulation.
How do I clean and care for my silicone resin molds?
Proper care significantly extends the life of your silicone molds. After demolding your resin piece, immediately clean the mold. The easiest way is to use rubbing alcohol (isopropyl alcohol, 70% or higher) on a soft cloth or paper towel to wipe away any residual uncured resin. Avoid using harsh chemicals or abrasive scrubbers, as these can damage the mold's surface. Ensure the mold is completely dry before storing. Store your silicone molds flat, ideally in a dust-free container or bag, away from direct sunlight and extreme temperatures. This prevents them from warping or attracting dust, ensuring your next resin piece comes out just as perfectly as the last.
What Next?
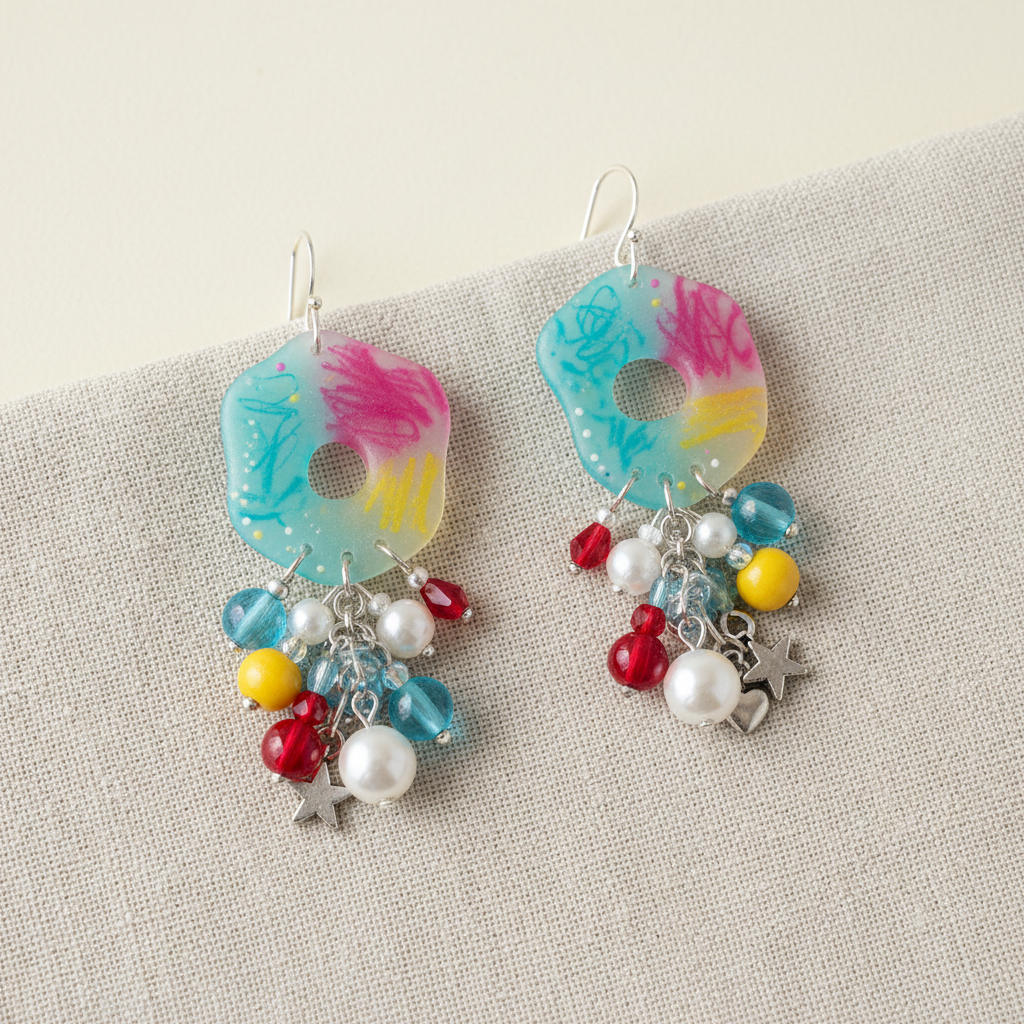
Congratulations, you've created a beautiful, personalized piece of wearable art! The skills you've honed in measuring, mixing, embedding, and layering resin are incredibly versatile. To customize your next project, try experimenting with different mold shapes like earrings or keychains, incorporating various pigments for a marbled effect, or embedding tiny beads and glitter for extra sparkle. This journey into resin crafting can also open doors to other exciting techniques like resin art on canvases, creating decorative coasters, or even making custom buttons. Keep exploring, keep creating, and remember that every pour is a chance to make something truly unique!
Free: 10 Paper Crafts Anyone Can Make in 5 Minutes
Get our beginner guide + new craft ideas weekly.
No spam. Unsubscribe anytime.
Did you complete this activity?
Related
You might also like
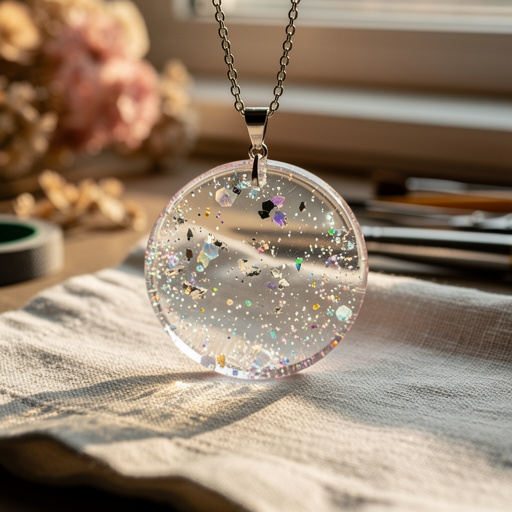
Floating Glitter Resin Pendants
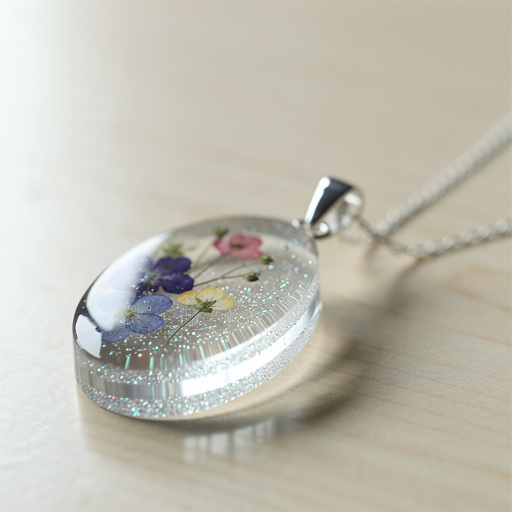
Botanical Layered Resin Pendants

Resin Paperweight with Found Objects
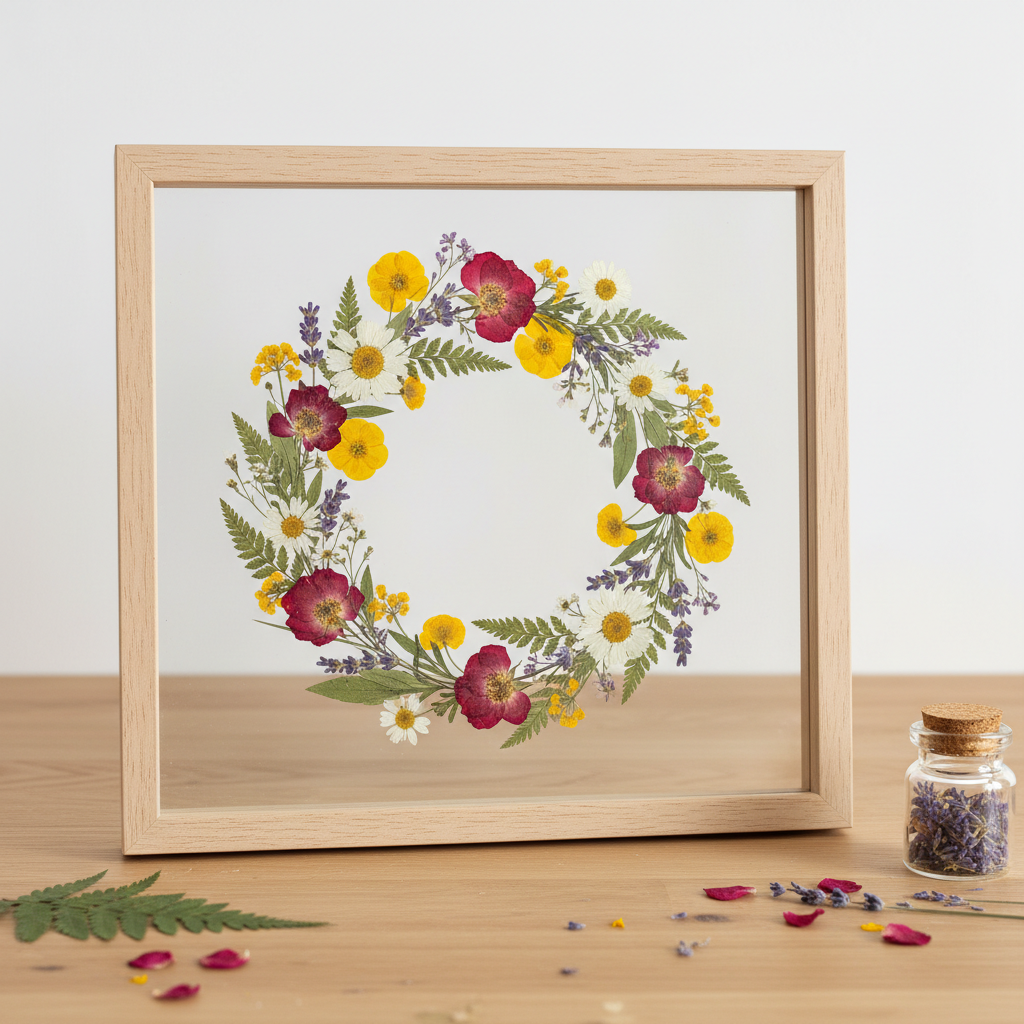
Pressed Flower Resin Coasters
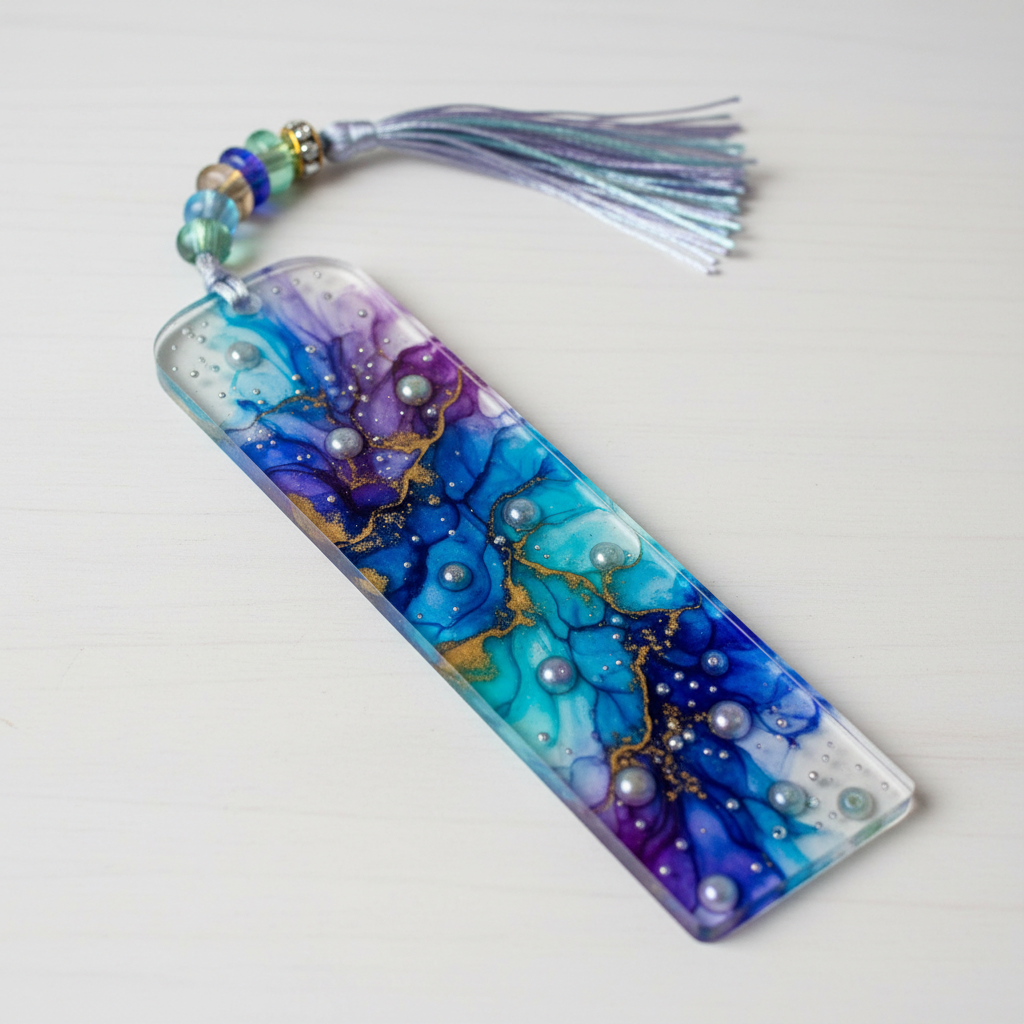
Resin Bookmark with Alcohol Ink Swirls