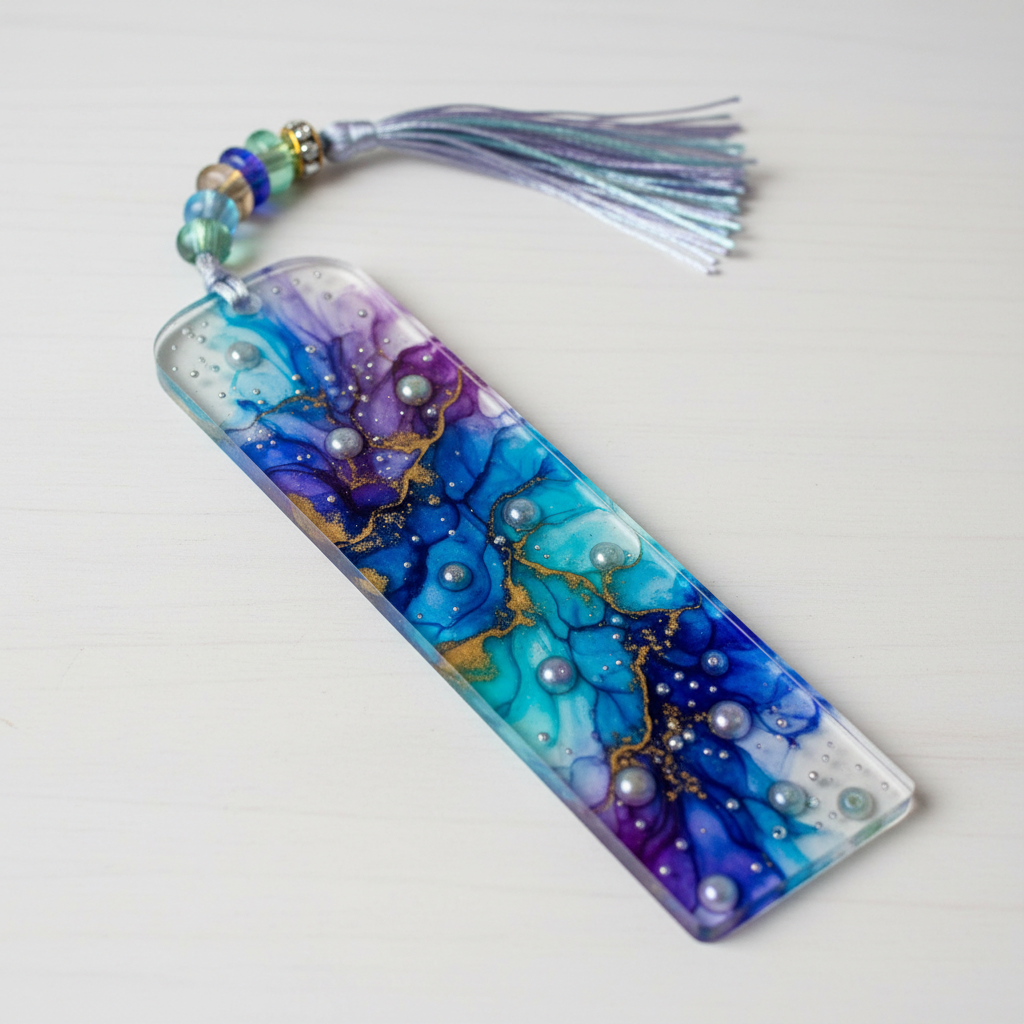
Resin Bookmark with Alcohol Ink Swirls
Elevate your reading experience with a custom-made resin bookmark featuring mesmerizing alcohol ink swirls. This project is perfect for beginners and experienced crafters alike, offering a beautiful and functional way to express your creativity. Learn how to achieve stunning marbled effects and create a unique accessory that's as individual as your favorite book.

Quick answer
Create beautiful resin bookmarks by mixing epoxy resin, pouring a base layer into a silicone mold, adding alcohol inks, swirling them for a marbled effect, and allowing them to cure. Optionally, add a tassel for a finishing touch.
What you need
Shop on Amazon · As an Amazon Associate we earn from qualifying purchases. Links above are affiliate links — we may earn a commission at no extra cost to you.
Dive into the captivating world of resin crafting with this stunning DIY project: the Resin Bookmark with Alcohol Ink Swirls. These bookmarks aren't just functional; they're miniature works of art, transforming simple pages into vibrant displays of color and creativity. The magic lies in the unpredictable yet beautiful patterns created by alcohol inks dancing within clear resin, making each piece utterly unique. Whether you're a seasoned crafter looking for a quick and rewarding project or a complete beginner eager to explore resin, this tutorial offers a delightful entry point. Perfect for gifting to fellow bookworms or simply adding a personal touch to your own reading nook, these bookmarks are sure to impress.
On this page
Step-by-Step Instructions
- 1
**Prepare Your Workspace and Protect Yourself:** Before you begin, ensure you are working in a well-ventilated area, as resin can produce fumes. Put on your disposable gloves and protective eyewear to safeguard your skin and eyes from any accidental spills or splashes. Having a level surface to work on is also crucial for ensuring your resin cures evenly and without imperfections.
- 2
**Read Your Resin Kit Instructions Thoroughly:** Every 2-part epoxy resin kit has specific ratios and mixing times. It is absolutely vital to read and understand the manufacturer's instructions before you start mixing. This will prevent issues like incomplete curing, stickiness, or a cloudy finish, ensuring the best possible outcome for your beautiful bookmark.
- 3
**Accurately Measure Resin Components:** In a clean mixing cup, precisely measure the resin and hardener according to the ratio specified in your kit's instructions. Using a digital scale for accuracy is highly recommended, as even slight deviations can affect the curing process. Ensure you are measuring both parts correctly before combining them.
- 4
**Thoroughly Mix the Resin:** Once measured, gently but thoroughly stir the resin and hardener together with a clean stir stick. Mix for the duration recommended by the manufacturer, typically 3-5 minutes, scraping the sides and bottom of the cup to ensure all components are fully incorporated. Over-mixing can introduce excess air bubbles, while under-mixing can lead to uncured spots.
- 5
**Allow Resin to Degas (Optional but Recommended):** After mixing, let the resin sit undisturbed in the cup for a few minutes (check your kit's instructions for recommended degassing time). This allows some of the trapped air bubbles to rise to the surface and dissipate naturally, leading to a clearer final product.
- 6
**Pour a Thin Base Layer of Clear Resin:** Carefully pour a thin, even layer of the mixed clear resin into your silicone bookmark mold, just enough to cover the bottom. This initial layer acts as a base and helps to prevent the alcohol inks from sinking too deeply into the mold, allowing for better control over the swirling effect.
- 7
**Apply Alcohol Ink Drops:** Now for the fun part! Apply a few drops of your chosen alcohol ink colors directly onto the surface of the clear resin in the mold. Don't overdo it; a few drops strategically placed will create a beautiful effect. You can layer colors or place them next to each other to encourage interesting interactions.
- 8
**Gently Swirl the Alcohol Inks:** Using a clean stir stick, gently swirl the alcohol ink drops into the clear resin. The goal is to create a marbled or swirled effect, not to completely mix the colors. Use light, sweeping motions, and observe how the inks interact and spread. Avoid vigorous stirring, which can muddy the colors and create an undesirable muddy appearance.
- 9
**Continue Layering Resin and Ink:** Continue adding small amounts of clear resin and a few more drops of alcohol ink, swirling gently after each addition. This layering technique allows you to build depth and complexity into your design. Aim to fill the mold to about 3/4 full at this stage, leaving room for any final adjustments and to prevent overflow.
- 10
**Guide Resin to Edges and Remove Bubbles:** Carefully use a clean stir stick to gently guide the resin mixture to the edges of the mold, ensuring it fills all corners and crevices. This step is crucial for preventing trapped air bubbles along the sides and edges of your bookmark. If you see any surface bubbles, you can gently pop them with the tip of your stir stick or use a heat gun/torch briefly.
- 11
**Remove Surface Bubbles (Optional):** If you notice any stubborn bubbles on the surface of the resin, you can carefully use a heat gun on a low setting or a small butane torch to quickly pass over the surface. Hold it a few inches away and move it constantly; a brief burst of heat will cause the bubbles to pop and dissipate. Be careful not to overheat the resin, as this can cause yellowing or damage the mold.
- 12
**Fill the Mold to the Desired Level:** Continue adding resin and swirling inks until the mold is filled to your desired thickness, usually just shy of the top to allow for a smooth finish. Ensure you don't overfill, as this can lead to a messy overflow that's difficult to clean up after curing.
- 13
**Final Swirl and Inspection:** Give the resin one last gentle swirl to ensure the colors are distributed to your liking and that the entire surface is covered. Take a moment to inspect the mold for any missed spots or trapped air bubbles. Make any necessary adjustments with your stir stick before allowing the resin to cure.
- 14
**Allow the Resin to Cure Completely:** Place the filled mold on a level surface in a dust-free environment and allow the resin to cure completely according to your resin kit's instructions. This typically takes 24-72 hours, depending on the resin type and ambient temperature. Resist the urge to touch or move the mold during this time, as it can disrupt the curing process and create imperfections.
- 15
**Demold Your Bookmark:** Once the resin is fully cured and no longer tacky to the touch, carefully flex the silicone mold to release your beautiful resin bookmark. Work slowly and gently to avoid damaging the delicate edges of your creation. If it seems stuck, try flexing the mold further or gently peeling it away from the edges.
- 16
**Create a Hole for a Tassel (If Needed):** If your silicone mold does not have a pre-made hole for a tassel, now is the time to create one. Use a hand drill or a Dremel tool with a small drill bit to carefully drill a hole at the top of the bookmark. Go slowly and steadily to avoid cracking the resin.
- 17
**Attach a Tassel (Optional):** If you're adding a tassel, thread a jump ring through the hole you created (or the one provided by the mold). Then, thread the tassel through the jump ring and tie a secure knot to keep it in place. Trim any excess string from the knot for a neat finish.
- 18
**Clean Up Your Workspace:** While the resin is curing or after demolding, use isopropyl alcohol and paper towels to clean up any stray resin drips or spills on your workspace, tools, and mold. It's much easier to clean while the resin is still slightly pliable or immediately after it's cured.
Tips & Troubleshooting
- 1**Experiment with Alcohol Ink Colors:** Don't be afraid to mix and match different alcohol ink colors to see what beautiful combinations you can create. Lighter colors tend to float on top of darker ones, creating interesting depth, while similar color families can blend seamlessly for a more subtle effect.
- 2**Control the Swirl:** The key to a good swirl is gentle manipulation. Use the tip of your stir stick to create delicate lines and curves rather than aggressive stirring. You can also try tilting the mold slightly to encourage the inks to move in specific directions.
- 3**Prevent Bubbles:** Working in a warm environment (around 70-75°F or 21-24°C) can help reduce bubbles, as can allowing your mixed resin to degas for a few minutes before pouring. Using a heat gun or torch briefly on the surface after pouring can also pop any surface bubbles.
- 4**Achieve a Smooth Finish:** Ensure your mold is clean and free of dust before pouring resin. If you want an extra glossy finish, you can apply a thin layer of resin to the back of the bookmark after it's cured and demolded, or use a resin sealant spray.
- 5**Consider Adding Embellishments:** For extra flair, you can add fine glitter, mica powders, or even small dried flowers to your resin before or during the swirling process. Just be mindful that heavier embellishments might sink, so plan your design accordingly.
- 6**Patience is Key for Curing:** Resin needs time to cure properly. Avoid the temptation to demold too early, as this can result in a sticky or warped bookmark. Follow the curing times recommended by your specific resin kit for the best results.
- 7**Mold Care:** After demolding, clean your silicone mold thoroughly with warm, soapy water or isopropyl alcohol to remove any resin residue. This will ensure it's ready for your next creative project and prolong its lifespan.
Related Activities You Might Enjoy
Frequently Asked Questions
What kind of resin is best for making bookmarks with alcohol inks?
For creating resin bookmarks with alcohol inks, it's best to use a 2-part epoxy resin specifically designed for casting or art projects. Look for a resin with a low viscosity, as this will allow the alcohol inks to flow and swirl more freely, creating beautiful marbled effects. Avoid high-viscosity resins, which can make it difficult to achieve the desired fluid patterns. Always ensure the resin is food-safe if you plan to use it for items that might come into contact with food, though for bookmarks, this is not a primary concern. Reading reviews and checking the manufacturer's specifications for clarity, bubble release, and UV resistance will help you choose the ideal resin for your project.
How do I prevent air bubbles in my resin bookmarks?
Air bubbles are a common challenge in resin crafting, but there are several ways to minimize them. First, ensure your workspace is at a comfortable temperature, ideally between 70-75°F (21-24°C), as resin flows better in warmer conditions. When mixing the resin, stir slowly and deliberately to avoid whipping air into the mixture. Scrape the sides and bottom of the mixing cup thoroughly to ensure all components are incorporated without excessive agitation. After pouring the resin into the mold, let it sit for a few minutes to allow some bubbles to rise naturally. You can then use a heat gun or a small butane torch held a few inches away and moved constantly to pop any surface bubbles. Gently poking bubbles with a toothpick or stir stick can also be effective for stubborn ones.
Can I add glitter or other embellishments to my alcohol ink resin bookmarks?
Absolutely! Adding glitter, mica powders, dried flowers, or even small metallic flakes can significantly enhance the visual appeal of your alcohol ink resin bookmarks. For glitter and mica powders, you can mix them directly into the resin before pouring, or sprinkle them onto the wet resin after pouring the base layer. If you're using dried flowers or other lightweight embellishments, place them carefully onto the wet resin and gently press them down to ensure they are fully encapsulated. Be aware that heavier items might sink to the bottom of the mold, so consider this when planning your design. Experimentation is key to discovering unique and beautiful combinations.
How long does it take for resin bookmarks to cure completely?
The curing time for resin bookmarks can vary depending on the specific type of 2-part epoxy resin you are using, as well as the ambient temperature and humidity of your workspace. Generally, most casting resins require a curing period of 24 to 72 hours to become fully hard and non-tacky. Some faster-curing resins might be ready in as little as 8-12 hours, but these can sometimes be more prone to yellowing or cracking if not mixed and poured correctly. It's crucial to follow the manufacturer's instructions for your specific resin kit. Avoid touching or disturbing the bookmarks during the curing process, as this can lead to imperfections or incomplete hardening.
What is the best way to clean my silicone bookmark molds after use?
Cleaning your silicone bookmark molds promptly after demolding your creations is essential for their longevity and for ensuring your next project turns out perfectly. The easiest method is to wash them with warm, soapy water and a soft cloth or sponge. For any stubborn dried resin residue, you can use isopropyl alcohol (rubbing alcohol) on a paper towel or lint-free cloth to gently wipe away the excess. Avoid using abrasive scrubbers or harsh chemicals, as these can scratch or damage the silicone surface. After washing and rinsing, allow the molds to air dry completely or pat them dry with a clean, lint-free towel before storing them.
My alcohol inks are not swirling as expected; what could be wrong?
If your alcohol inks aren't swirling as beautifully as you'd hoped, there are a few common reasons. Firstly, the viscosity of your resin plays a significant role; a thicker resin will resist the ink's movement. Ensure you're using a low-viscosity casting resin. Secondly, the amount of alcohol ink you're using matters; too little might not create a visible effect, while too much can overpower the resin and become muddy. Start with just a few drops and add more sparingly if needed. The technique of swirling is also critical; use a light touch with your stir stick, focusing on gentle movements rather than vigorous mixing. Lastly, ensure your resin is properly mixed and at the right temperature, as these factors influence how the inks interact.
What Next?
Congratulations on creating your beautiful Resin Bookmark with Alcohol Ink Swirls! This project opens the door to endless creative possibilities. Consider experimenting with different color combinations, adding glitter or mica powders for extra sparkle, or even embedding small dried flowers for a more natural aesthetic. These bookmarks make thoughtful and personalized gifts for any occasion, especially for the avid reader in your life. Once cured, display your creations proudly in your favorite books or store them safely in a dry, cool place away from direct sunlight to preserve their vibrant colors. Ready for your next adventure? Try making resin coasters or keychains using similar techniques!
Free: 10 Paper Crafts Anyone Can Make in 5 Minutes
Get our beginner guide + new craft ideas weekly.
No spam. Unsubscribe anytime.
Did you complete this activity?
Related
You might also like
Floating Glitter Resin Pendants
Layered Botanical Resin Pendant
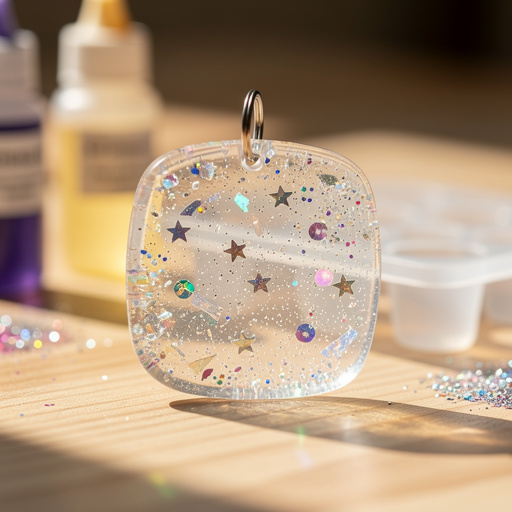
Floating Glitter Resin Charms
Shrink Plastic Pet Portraits
Pressed Flower Resin Coasters