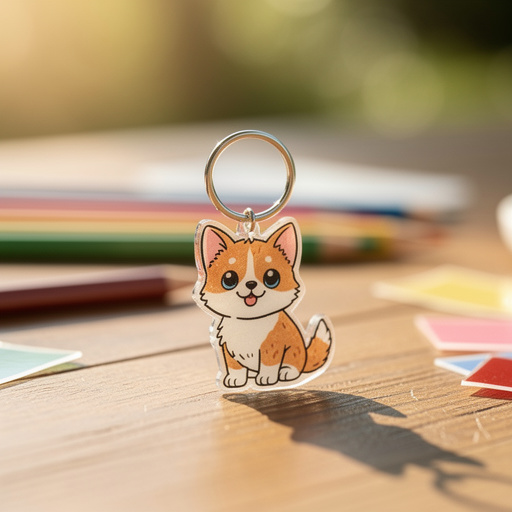
How to Make Floating Glitter Resin Charms — Easy Step-by-Step Guide
Unleash your creativity with these enchanting floating glitter resin charms. A fun, screen-free activity for the whole family to make dazzling jewelry and decorations. This beginner-friendly project is perfect for adding a touch of magic to your accessories.
Quick answer
To make floating glitter resin charms, you need a 1:1 ratio epoxy resin kit, fine iridescent glitter, small silicone charm molds, and tiny metal charms. The process involves mixing resin, pouring thin layers, adding glitter and charms, and allowing it to cure. This beginner-friendly activity has approximately 10-15 steps and takes about 60 minutes of active time, with a curing time of 24-72 hours. It's perfect for families with children aged 8+ (with supervision).
What you need
Shop on Amazon · As an Amazon Associate we earn from qualifying purchases. Links above are affiliate links — we may earn a commission at no extra cost to you.
Dive into the magical world of resin crafting with these captivating floating glitter resin charms! This project is a fantastic way to create unique, eye-catching jewelry pieces and decorative elements that sparkle with an inner glow. What makes these charms truly special is the illusion of glitter suspended in mid-air, surrounding a tiny, whimsical charm. It's an incredibly rewarding and screen-free activity, ideal for sparking imagination and providing quality family time. Whether you're a seasoned crafter or a complete beginner, these charms are surprisingly easy to make and offer endless possibilities for personalization.
On this page
Step-by-Step Instructions
- 1
Prepare your workspace by covering it with a protective material like a silicone mat or newspaper to catch any drips or spills, and ensure the area is well-ventilated by opening a window or using a fan. Put on your disposable gloves to protect your skin from the resin.
- 2
Carefully measure equal parts of resin and hardener into a clean mixing cup according to your specific resin kit's instructions. For example, if your kit specifies a 1:1 ratio by volume, measure exactly 1 oz of resin and 1 oz of hardener into the cup, ensuring accuracy for proper curing.
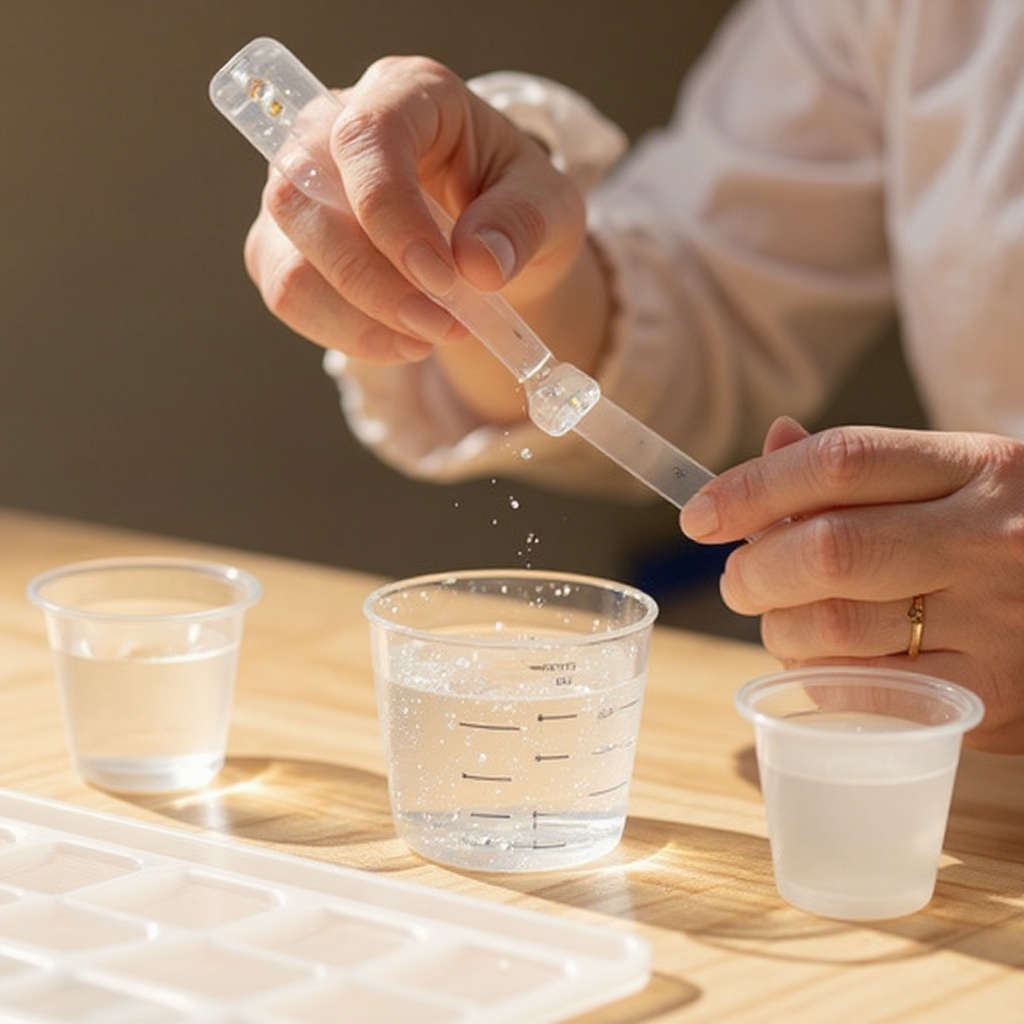
- 3
Stir the resin and hardener together slowly and thoroughly for the time recommended by the manufacturer, typically 2-3 minutes, meticulously scraping the sides and bottom of the cup to ensure every bit of resin and hardener is fully incorporated. Inconsistent mixing is a primary cause of uncured resin.
- 4
Pour a very thin, translucent layer of the mixed resin into the bottom of your silicone charm molds. This initial layer should be just enough to cover the bottom of each cavity and create a smooth, foundational surface for the glitter and charm.
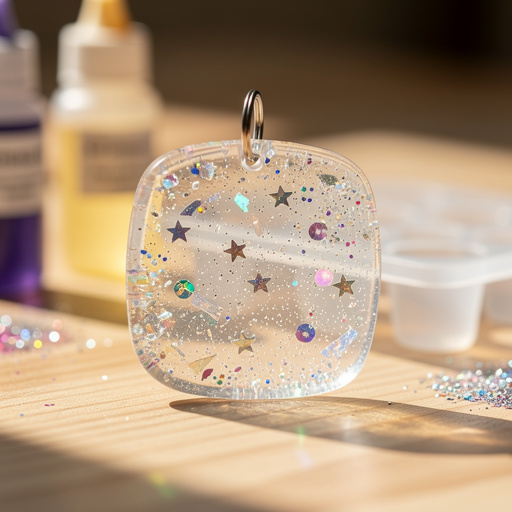
- 5
Sprinkle a small amount of your chosen fine iridescent glitter onto the thin resin layer in each mold cavity. Avoid over-glittering; the goal is to have the glitter suspended, not clumped, so a light dusting is ideal for a beautiful, ethereal effect.
- 6
Gently place one small metal charm onto the glitter in each mold cavity using fine-tipped tweezers or a toothpick. Ensure the charm is submerged slightly into this first resin layer, but not completely encased, to allow for the 'floating' effect.
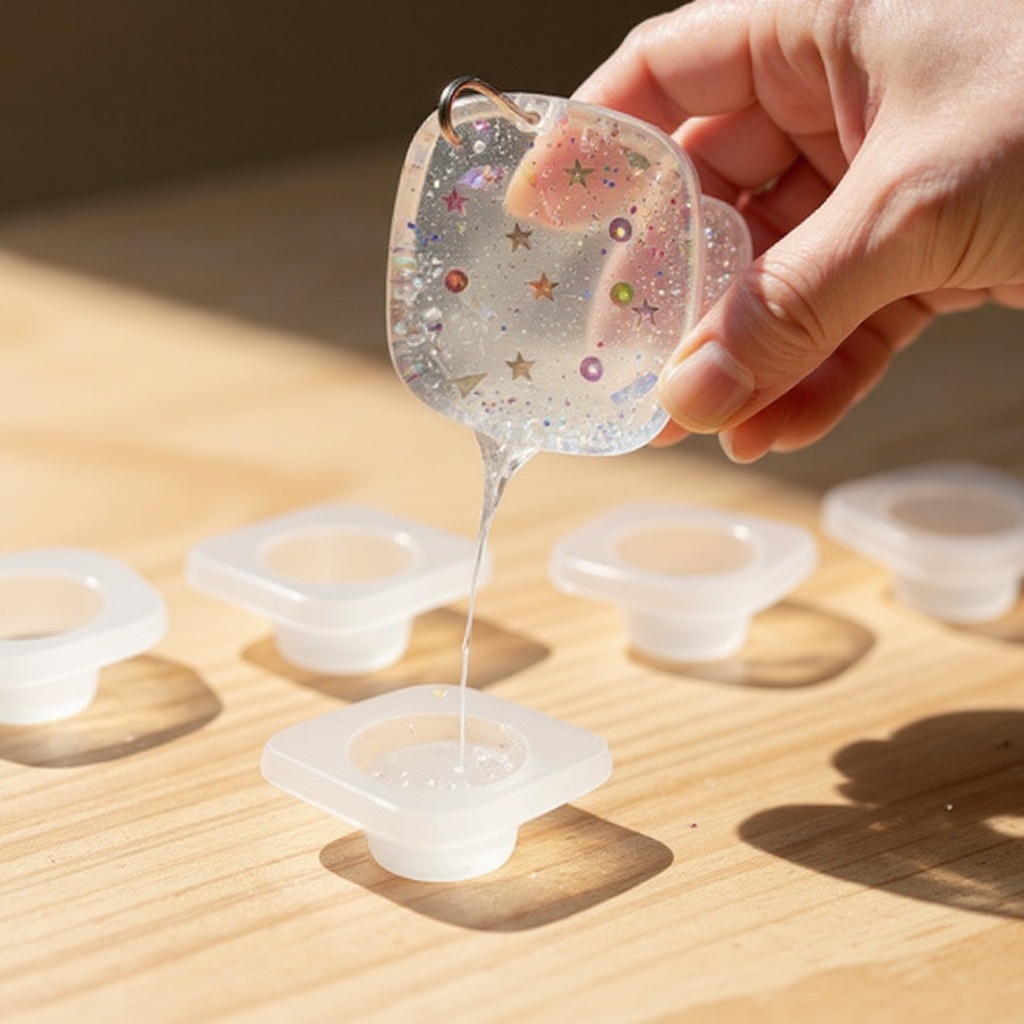
- 7
Carefully pour a second, slightly thicker layer of mixed resin over the charm and glitter, filling the mold cavity almost to the top. Leave a tiny bit of space (about 1-2 mm) at the very top to prevent overflow when the resin settles or if any slight expansion occurs during curing.
- 8
Use a toothpick or the tip of your fine-tipped tweezers to gently pop any visible air bubbles that may have risen to the surface of the resin. For more stubborn bubbles, a quick pass with a heat gun on a low setting (held at a distance and moved constantly) can also be effective.
- 9
Allow the resin to cure completely according to the manufacturer's instructions, which typically ranges from 24 to 72 hours. It is crucial to avoid moving or disturbing the molds during this curing period to ensure a smooth, flawless finish.
- 10
Once the resin is fully cured and hard to the touch, carefully demold your floating glitter resin charms by gently flexing the silicone mold away from the edges of the charm. If any edges feel slightly sharp, a light sanding with fine-grit sandpaper can smooth them.
- 11
Inspect your finished charms for any imperfections. If a charm isn't perfect, you can often sand it down and re-coat it with a thin layer of resin, or even repurpose it into a different craft project.
- 12
If you plan to attach these charms to jewelry, consider adding a jump ring or a small eye pin before the resin fully cures in the final layer, or drill a small hole once cured. This provides a secure attachment point for your creations.
Tips & Troubleshooting
- 1If you notice a lot of bubbles forming, try warming your resin bottles slightly in a warm water bath (ensure they are sealed and completely dry before opening to prevent moisture contamination). Stirring slowly and consistently for the recommended time is also key to minimizing bubbles.
- 2Experiment with different glitter sizes, shapes, and colors to achieve unique effects. You can layer different glitters for a more complex and dimensional look, perhaps starting with a larger glitter and then adding a finer glitter on top.
- 3For a truly 'floating' effect, ensure the charm is not completely encased in the first thin layer of resin. The second pour should lift it slightly, creating the illusion that it's suspended within the glittery depths.
- 4Clean up any resin spills immediately with rubbing alcohol and paper towels while the resin is still wet, as cured resin is extremely difficult to remove from surfaces and tools. Have your cleaning supplies readily accessible.
- 5Consider adding a tiny drop of resin dye or mica powder to one of your resin batches for a colored background to your glitter and charm, adding another layer of visual interest and personalization to your creations.
- 6When placing the metal charms, ensure they are not too heavy or large for the mold cavity, as they might sink too deeply or cause the resin to overflow. Test the weight and size of your charms in the mold before pouring.
- 7For a super glossy finish, you can apply a thin top coat of resin after demolding and curing, or use a UV resin for a quick curing top layer. This will enhance the shine and protect the surface.
- 8Always work in a well-ventilated area and wear gloves to avoid skin contact with uncured resin. Read and follow all safety precautions outlined in your specific resin kit's instructions.
Related Activities You Might Enjoy
Frequently Asked Questions
What is the best resin for making jewelry?
For jewelry making, a 1:1 ratio epoxy resin kit is generally recommended due to its ease of use and excellent clarity. Look for brands that are specifically formulated for casting or jewelry, are UV resistant to prevent yellowing over time, and are self-leveling for the best results and a smooth finish. Brands like ArtResin, Counter Culture DIY, and Alumilite are popular choices among crafters. Always prioritize safety by reading and following the manufacturer's guidelines regarding ventilation and personal protective equipment.
How do I prevent bubbles in my resin jewelry?
Preventing bubbles in resin jewelry involves a combination of careful technique and preparation. Ensure your resin is thoroughly mixed but stirred slowly and deliberately, scraping the sides and bottom of the cup to incorporate all components without whipping air into the mixture. Warming the resin bottles in a warm water bath before mixing can help reduce viscosity and minimize bubble formation. After pouring, use a heat gun on a low setting (held at a distance and moved constantly) or a toothpick to gently pop any visible bubbles that rise to the surface. Working in a warm environment (around 70-75°F or 21-24°C) also helps the resin flow better and release bubbles.
Can kids make resin jewelry?
Yes, with adult supervision! Epoxy resin requires careful handling and good ventilation due to its chemical nature. Children aged 8 and up can absolutely participate in making resin jewelry, but it's essential that an adult oversees the entire process. The adult should handle the measuring and mixing of the resin components, while children can enjoy adding glitter, placing charms, and popping bubbles with supervision. Ensure the workspace is protected, and everyone involved wears gloves. This makes it a fantastic, engaging, and educational craft for families.
How long does resin jewelry take to cure?
The curing time for epoxy resin jewelry can vary significantly depending on the brand, the thickness of the pour, and ambient temperature and humidity. Typically, most 1:1 ratio epoxy resins require a minimum of 24 to 72 hours for a full cure, meaning they are completely hardened and safe to handle without any stickiness. Some resins may reach a 'tack-free' stage sooner, allowing for further manipulation, but it's crucial to wait for the full cure time recommended by the manufacturer to ensure durability and prevent damage to your finished pieces.
What kind of glitter is best for floating resin charms?
For floating glitter resin charms, fine iridescent glitter is ideal because it catches the light beautifully and creates a magical, suspended effect. Avoid chunky glitters or those with large flakes, as they tend to sink or clump rather than float evenly. Iridescent glitters come in a vast array of colors and finishes, offering endless creative possibilities. You can also experiment with holographic glitters for an extra dazzling sparkle. Ensure the glitter is made from materials that are safe for resin and won't degrade or bleed color.
Can I add other elements besides glitter and charms?
Absolutely! The beauty of resin crafting lies in its versatility. Beyond glitter and small metal charms, you can embed other tiny elements into your floating charms. Consider using small dried flowers, tiny beads, sequins, or even small pieces of colored paper. For a more opaque look, you can add a drop of resin dye or mica powder to the resin itself, creating a colored background for your suspended elements. Just ensure that any added elements are completely dry and won't leach moisture into the resin, which could compromise the cure.
What Next?
Congratulations on creating your dazzling floating glitter resin charms! These versatile creations can be transformed into unique pendants for necklaces, dangles for earrings, or embellishments for keychains and scrapbooks. To prolong their beauty, store them away from direct sunlight and extreme temperatures. For your next project, consider experimenting with different mold shapes, adding alcohol inks for vibrant backgrounds, or even embedding small dried flowers for a more natural aesthetic. The possibilities are as limitless as your imagination!
Free: 10 Paper Crafts Anyone Can Make in 5 Minutes
Get our beginner guide + new craft ideas weekly.
No spam. Unsubscribe anytime.
Did you complete this activity?
Related
You might also like
Floating Glitter Resin Pendants

Crystal Resin Geode Slices
Hammered Metal Stamped Charms
Clay Bead & Charm Creations
Shrink Plastic Pet Charms