How to Draw a Realistic Eye — Easy Step-by-Step Guide for Adults
Master the art of drawing a lifelike eye with this detailed, step-by-step tutorial. Perfect for adults looking to enhance their portraiture skills.
Quick answer
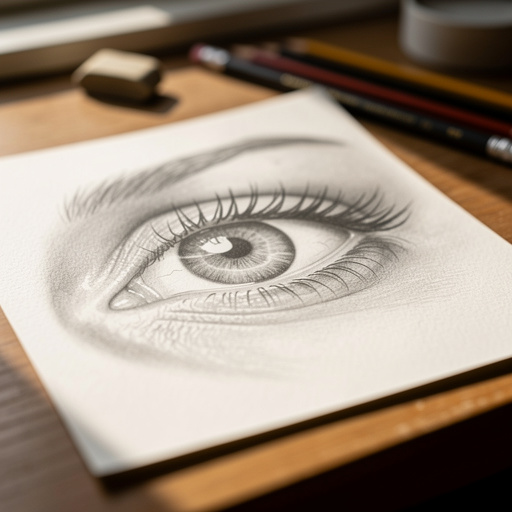
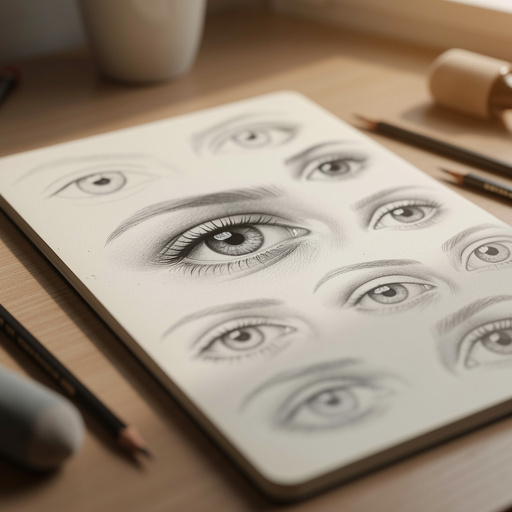
To draw a realistic eye, you need a graphite pencil set (HB, 2B, 4B), blending stump, kneaded eraser, white plastic eraser, and drawing paper, taking about 45 minutes. Start by sketching the basic outline of the eye shape. This intermediate activity has 12 steps and is perfect for adults seeking to improve their drawing skills.
What you need
Shop on Amazon · As an Amazon Associate we earn from qualifying purchases. Links above are affiliate links — we may earn a commission at no extra cost to you.
Embark on a captivating artistic journey with this comprehensive guide to drawing a realistic eye. This project is particularly rewarding as the eye is often considered the window to the soul, and mastering its depiction can significantly elevate your portraiture skills. Whether you're a budding artist looking to refine your technique or an experienced individual seeking to add a new dimension to your portfolio, this tutorial offers a clear, accessible path to creating lifelike eyes. Prepare to be amazed by the depth and emotion you can bring to your drawings with just a few simple steps and the right tools.
On this page
Step-by-Step Instructions
- 1
Lightly sketch the basic almond shape of the eye with your HB pencil, including the upper and lower eyelids. Ensure the lines are faint and easily erasable, focusing on the overall proportion and curvature of the eye socket.
- 2
Draw a circle for the iris within the eye shape, ensuring it's not perfectly centered. Leave a small gap at the top and bottom for the eyelids to slightly cover it, as a real eye is rarely fully visible.
- 3
Add a smaller circle inside the iris for the pupil. Make it a deep black, representing the absence of light reflection within this area. This circle should be positioned centrally within the iris.
- 4
Sketch the tear duct in the inner corner of the eye, a small, rounded shape that connects to the lower eyelid. Pay attention to its subtle curve and how it tucks into the corner.
- 5
Draw the upper and lower eyelashes. Start with a few longer, curved lines for the top lashes, originating from the eyelid and sweeping outwards, and shorter, straighter lines for the bottom lashes, pointing downwards.
- 6
Begin shading the iris using your 2B pencil. Create subtle radial lines extending from the pupil outwards, varying their thickness and darkness to mimic the natural texture and color variations within the iris.
- 7
Add a highlight to the iris by leaving a small, bright white area, or by carefully lifting graphite with your white eraser. This highlight is crucial for making the eye look wet and alive, representing a direct reflection of light.
- 8
Shade the pupil with your 4B pencil, making it the darkest part of the eye. Ensure it's a solid, deep black, as this is where light enters the eye and is not reflected.
- 9
Use your blending stump to gently blend the shading in the iris, softening the radial lines and creating a smooth gradient. Avoid over-blending, which can make the iris look flat; aim for subtle transitions.
- 10
Shade the sclera (the white of the eye) with your HB pencil. Remember, it's not perfectly white; add subtle shading, especially towards the edges and under the upper eyelid, to create a spherical form and indicate shadow.
- 11
Refine the eyelashes with your 2B and 4B pencils, adding more layers and varying their direction and thickness to create a more natural, feathery appearance. Use your white eraser to lift any stray marks and sharpen the tips of individual lashes.
- 12
Add subtle shading to the eyelid crease above the eye and under the lower eyelid to create depth and dimension. Use your kneaded eraser to lift highlights on the skin around the eye, such as on the brow bone or cheekbone, to enhance realism.
- 13
Further develop the iris by adding more subtle variations in tone and texture. Use the tip of your 2B pencil to add finer details and the blending stump to smooth out any harsh lines, ensuring a natural flow of color.
- 14
Enhance the pupil by deepening its blackness with the 4B pencil if necessary, ensuring it remains the darkest element. Carefully blend the edges of the pupil into the iris to avoid a stark, unnatural separation.
- 15
Refine the shading of the sclera by observing how light falls on a real eye. Add darker tones in the corners and where the eyelids cast shadows, using your HB pencil and blending stump for subtle transitions.
- 16
Add subtle skin texture around the eye. Use light, feathery strokes with your HB pencil to suggest pores or fine lines, and use your kneaded eraser to lift highlights, mimicking the natural contours of the face.
- 17
Consider the tear duct's subtle shine. Use your white eraser to create a small, soft highlight within the tear duct area to suggest moisture.
- 18
Review your drawing as a whole, stepping back to assess the balance of light and shadow. Make any necessary adjustments to deepen shadows, lift highlights, or refine edges to achieve a cohesive and lifelike appearance.
Tips & Troubleshooting
- 1Don't make the sclera perfectly white. Observe real eyes; they have subtle grey tones and shadows, especially where the eyelids cast them. This adds depth and prevents the eye from looking flat or cartoonish.
- 2Vary the pressure on your pencil to create different shades. Lighter pressure for subtle tones, heavier for darker areas, and a very light touch for initial sketches. This control is key to achieving smooth transitions and realistic form.
- 3Practice drawing different eye shapes and sizes to build your versatility. Observe people's eyes for inspiration, noting their unique characteristics, the way light reflects, and the subtle nuances of their structure.
- 4Use your kneaded eraser to lift graphite for highlights, rather than erasing aggressively. This gives a softer, more natural effect, allowing you to build up highlights gradually and blend them seamlessly into the surrounding shading.
- 5Pay close attention to the direction of your pencil strokes, especially when rendering eyelashes and iris details. Following the natural flow of these elements will greatly enhance the realism of your drawing.
- 6Don't be afraid to layer your graphite. Building up tones gradually with different pencil grades (HB, 2B, 4B) will create richer, more nuanced shading than trying to achieve darks with a single heavy application.
- 7Consider the surrounding skin. The way the eyelids fold, the subtle shadows under the brow bone, and the curve of the cheekbone all contribute to the overall realism of the eye. Don't treat the eye in isolation.
- 8Take breaks and view your drawing from a distance. This helps you to see the overall composition and identify areas that might need adjustment in terms of value or form, preventing you from getting lost in the details.
Related Activities You Might Enjoy
Frequently Asked Questions
What pencils are best for drawing realistic eyes?
A range of graphite pencils is ideal for capturing the subtle nuances of a realistic eye. An HB pencil is perfect for initial, light sketching and building up lighter tones in the sclera and skin. A 2B pencil is excellent for mid-tones, adding detail to the iris, and creating softer shadows. For the deepest shadows, particularly the pupil and the darkest parts of the iris, a 4B or even a 6B pencil will provide the necessary richness and depth. Complementing these pencils with a blending stump or tortillon for smooth transitions and a kneaded eraser for lifting highlights and subtle adjustments is crucial for achieving a lifelike result.
How do I make the eye look wet and shiny?
The key to a wet and shiny eye lies in the strategic placement and rendering of highlights. The most prominent highlight, often a sharp, bright reflection of a light source, should be left as pure white paper or carefully lifted with a white plastic eraser. Surrounding this highlight, use your blending stump to create a soft, luminous glow by gently blending the surrounding graphite. Subtle variations in the iris shading, with slightly darker tones leading into the highlight, can also enhance the illusion of wetness and depth, making the eye appear more alive and reflective.
What is the hardest part of drawing a realistic eye?
Many artists find capturing the subtle nuances of shading in the iris and creating believable eyelashes to be the most challenging aspects of drawing a realistic eye. The iris is a complex structure with intricate patterns and color variations that require careful observation and delicate rendering. Eyelashes, while seemingly simple, need to be drawn with a sense of direction, thickness, and overlap to avoid looking like a uniform fringe. Patience, careful observation of reference images, and practice in layering graphite and controlling your blending techniques are key to overcoming these hurdles and achieving a convincing result.
Can I use colored pencils for this tutorial?
While this tutorial focuses on graphite, the fundamental principles of shading, form, and highlight placement can absolutely be adapted to colored pencils. You would approach the process by layering colors to build up tones, starting with lighter shades and gradually adding darker hues to create depth and dimension. For highlights, you would either leave areas of the paper untouched or use a white colored pencil to carefully lift or add bright spots. The key is to understand how light interacts with the form, which is a universal concept across different drawing mediums.
How long does it typically take to draw a realistic eye?
The time it takes to draw a realistic eye can vary significantly depending on your skill level, the level of detail you aim for, and the tools you use. For a beginner following this intermediate guide, it might take anywhere from 45 minutes to an hour and a half. More experienced artists, or those aiming for hyperrealism with intricate details like individual iris fibers and subtle skin textures, could spend several hours on a single eye. The key is not to rush the process, but to focus on careful observation and deliberate application of shading and detail.
What are the common mistakes to avoid when drawing an eye?
A common mistake is making the sclera (the white of the eye) too starkly white, which makes it look unnatural and flat. Another frequent error is drawing eyelashes as uniform, straight lines; they should be varied in length, thickness, and curve, and originate from the eyelid with a slight bend. Over-blending can also be an issue, leading to a loss of texture and form. Finally, neglecting the subtle shadows cast by the eyelids onto the eyeball, or the subtle curvature of the eyeball itself, can result in a flat, unconvincing eye. Always refer to a reference and observe the interplay of light and shadow.
What Next?
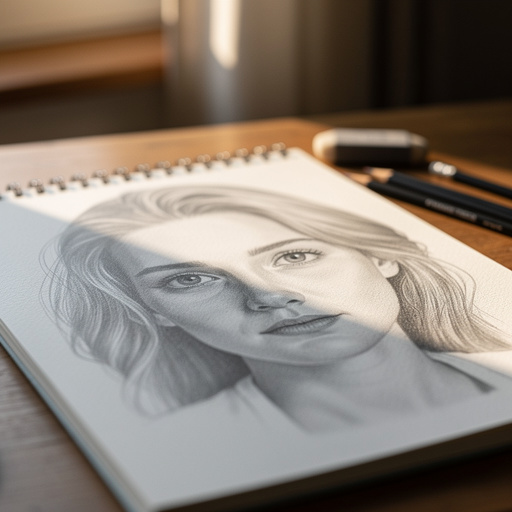
Congratulations on completing your realistic eye drawing! This foundational skill opens doors to countless creative possibilities. You can experiment with different eye shapes, ethnicities, or even add unique details like tears or reflections of surroundings. Consider framing your finished artwork or incorporating it into a larger portrait. For your next project, try drawing another facial feature like a nose or mouth, or perhaps a complete portrait. Remember to store your artwork away from direct sunlight and moisture to preserve its quality for years to come.
Free: 10 Paper Crafts Anyone Can Make in 5 Minutes
Get our beginner guide + new craft ideas weekly.
No spam. Unsubscribe anytime.
Did you complete this activity?