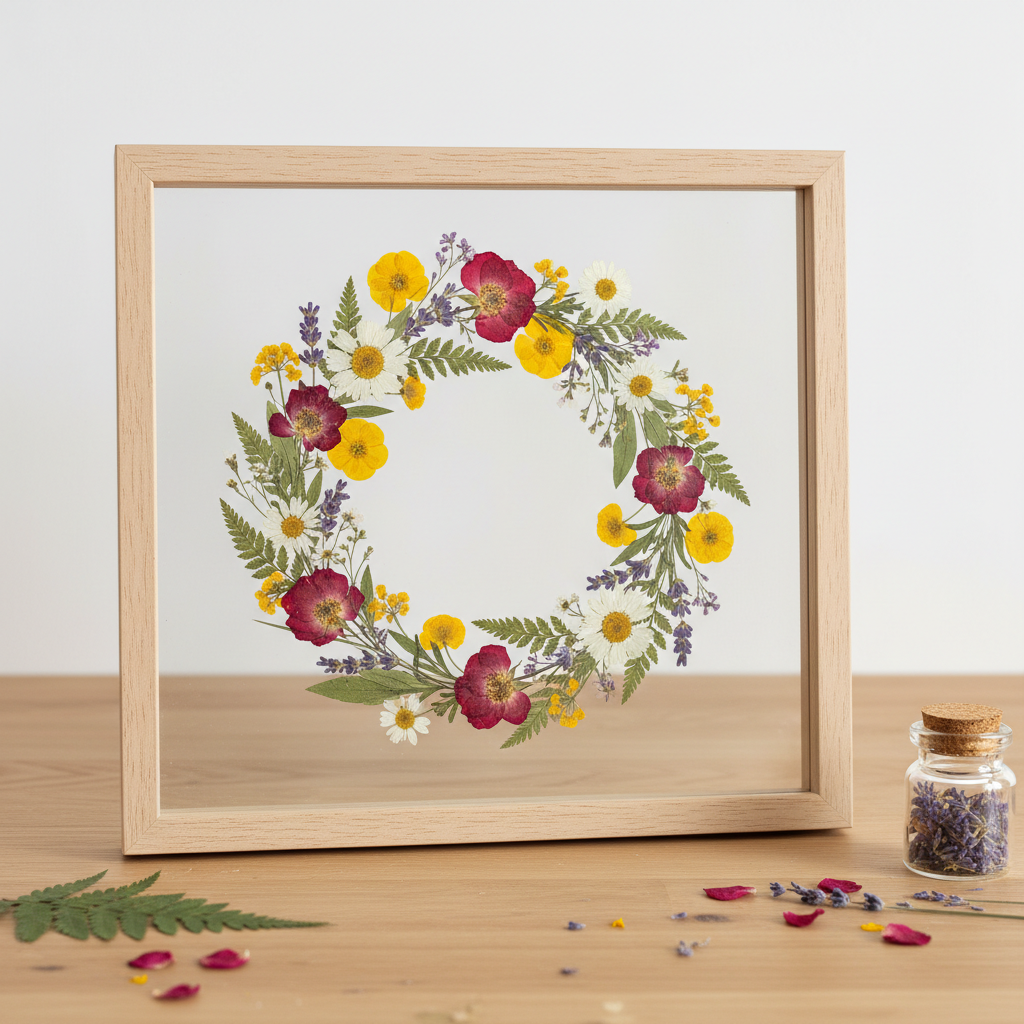
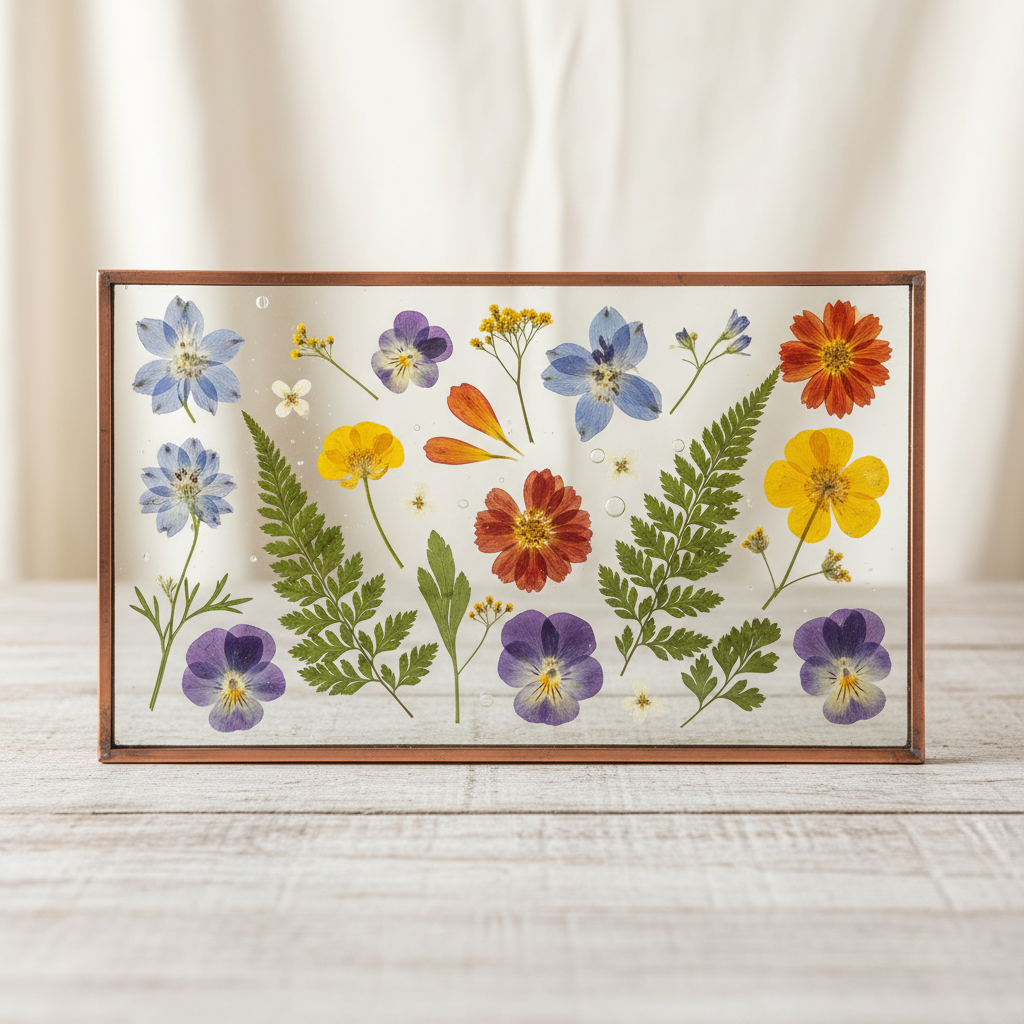
How to Make Pressed Flower Art in Glass — Easy Step-by-Step Guide
Transform delicate flowers and leaves into stunning art pieces encased in glass. This screen-free activity is perfect for families looking to create lasting memories.
Quick answer
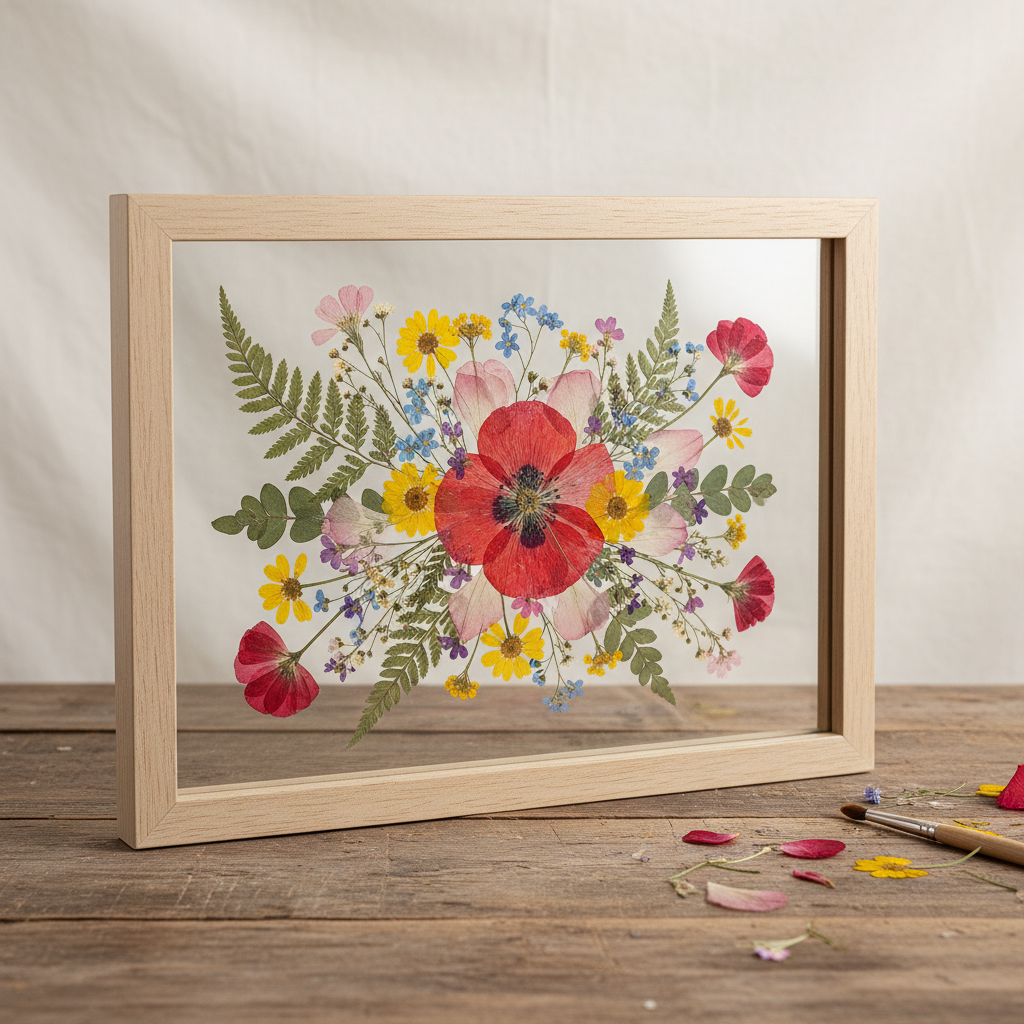
To make pressed flower art in glass, you need pressed flowers, two pieces of clear glass (e.g., 4x6 inches), clear craft glue or Mod Podge, tweezers, and about 60 minutes of active crafting time, plus drying time. Start by arranging your flowers on one glass panel, then carefully adhere the second panel on top. This beginner-friendly activity has 12 steps and is perfect for families with children aged 8+.
What you need
Shop on Amazon · As an Amazon Associate we earn from qualifying purchases. Links above are affiliate links — we may earn a commission at no extra cost to you.
Discover the enchanting art of preserving nature's fleeting beauty by creating pressed flower art encased in glass. This delightful and screen-free project offers a wonderful opportunity to connect with nature and unleash your creativity. It's an ideal activity for families seeking to create meaningful keepsakes, for individuals looking for a calming and rewarding craft, or for anyone wanting to add a touch of natural elegance to their home decor. With just a few simple materials, you can transform delicate botanicals into luminous, lasting works of art that capture the essence of a garden's bloom.
On this page
Step-by-Step Instructions
- 1
Gather your dried, pressed flowers and leaves. Ensure they are completely dry and flat; any residual moisture can lead to mold or discoloration within the glass, so check them carefully before proceeding. Gently handle them as they can be brittle.
- 2
Prepare your workspace by laying down a protective mat or newspaper on a clean, flat surface to catch any potential spills or drips. Ensure good lighting so you can clearly see your arrangement and any glue residue.
- 3
Clean both pieces of glass thoroughly with a glass cleaner and paper towels until they are spotless and free of any smudges or dust. For an extra clean surface, you can wipe them down with rubbing alcohol after cleaning.
- 4
Lay one piece of glass flat on your clean work surface, ensuring it is stable and won't move during the arrangement process. You might want to place it on a non-slip mat to prevent accidental sliding.
- 5
Using tweezers, carefully begin to arrange your pressed flowers and leaves onto the glass, creating your desired design. Take your time to experiment with different placements and compositions, treating the glass as your canvas.
- 6
Consider the overall balance and flow of your design, overlapping petals and leaves strategically to create depth and visual interest. You can create abstract patterns, floral bouquets, or even simple, elegant arrangements, ensuring no flower is sticking up too far from the surface.
- 7
Once you are happy with the arrangement on the first piece of glass, gently lift the second piece of glass, preparing it for the adhesive. Hold it by the edges to avoid leaving fingerprints on the surface that will be glued.
- 8
Apply a thin, even layer of clear craft glue or Mod Podge to the entire surface of the second glass piece. Ensure the adhesive covers the glass right up to the edges, but avoid applying too much, which can cause excessive seepage and a messy appearance.
- 9
Carefully place the glued glass piece on top of the arranged flowers, aligning the edges precisely with the bottom piece of glass. This step requires a steady hand to avoid disturbing your carefully placed botanicals; a ruler can help with alignment.
- 10
Gently press down on the top glass panel, starting from the center and working your way outwards, to ensure good contact between the glass and the flowers, and to help spread the adhesive evenly. Avoid pressing too hard, which could crush the delicate flowers.
- 11
Immediately after pressing, use a damp paper towel to carefully wipe away any excess glue that seeps out from the edges. Work gently to avoid smudging the glue or disturbing the flowers; a cotton swab can be useful for tight spots.
- 12
Allow the glue to dry completely according to the product's instructions, which typically takes 24-48 hours. Place the artwork in a safe, undisturbed location where it won't be bumped or moved during the drying process, perhaps on a drying rack.
- 13
Once the glue is completely dry, inspect the edges for any small, hardened glue remnants. If necessary, you can carefully use a craft knife or razor blade held at a low angle to gently scrape away any unsightly dried glue, being very careful not to scratch the glass.
- 14
For added durability and a polished look, consider applying a thin bead of clear silicone sealant or a specialized glass edge sealant around the perimeter of your artwork once the glue is fully cured. This will further protect the pressed flowers and create a more finished appearance.
- 15
Allow any sealant to dry completely according to its manufacturer's instructions before handling or displaying your pressed flower art in glass.
- 16
Your pressed flower art in glass is now ready to be displayed! Admire your creation and the preserved beauty of nature. You can lean it against a wall, place it on a shelf, or even attach a hanging mechanism if your glass pieces have pre-drilled holes.
Tips & Troubleshooting
- 1Ensure your flowers are completely dry before pressing. Any residual moisture can lead to mold or discoloration within the glass, compromising the longevity and appearance of your artwork. They should feel brittle to the touch.
- 2Experiment with different types of flowers and leaves for varied textures and colors. Consider adding small twigs, seed pods, or even delicate butterfly wings (ethically sourced) for extra detail and visual appeal, but ensure they are also completely dry.
- 3For a more permanent and durable seal, you can use a specialized glass sealant around the edges after the initial glue has dried, or consider framing the finished piece in a shadow box for added protection and a polished look. This also helps to prevent dust from getting in.
- 4If you don't have pre-pressed flowers readily available, you can press your own using heavy books or a dedicated flower press. This process will add extra drying time to your project, so plan accordingly by starting the pressing process several weeks in advance.
- 5When arranging your flowers, think about creating a narrative or a specific mood. Consider the color palette and the shapes of the botanicals to evoke feelings of spring, summer, or a serene woodland scene, and don't be afraid to layer elements for depth.
- 6For a truly professional finish, ensure the glass is impeccably clean before starting. Even a tiny speck of dust or a fingerprint can be noticeable once the pieces are sealed together, so take your time with this step.
- 7When applying the glue, a thin, even layer is crucial. Too much glue can seep out and create an unsightly mess, while too little might not create a strong enough bond, potentially causing the flowers to shift over time. A small brush can help with even application.
- 8Consider the size and shape of your glass panels when planning your arrangement. Smaller panels are great for single blooms or delicate sprigs, while larger panels allow for more elaborate, multi-layered designs. Ensure your botanicals fit within the glass boundaries.
Related Activities You Might Enjoy
Frequently Asked Questions
How do I press flowers for art?
To press flowers effectively, select fresh, unblemished blooms and leaves. Gently place them between sheets of absorbent paper, such as newspaper, blotting paper, or even coffee filters. Enclose these paper-lined flowers within the pages of a heavy book or a dedicated flower press. Apply significant weight to ensure the flowers are flattened. Leave them undisturbed for 2-3 weeks, changing the absorbent paper every few days if it becomes damp, as moisture is the enemy of preservation. Ensure they are completely dry and brittle before using them in your glass art.
What kind of glue should I use for pressed flower art in glass?
Clear craft glue or Mod Podge are excellent choices for this project as they dry clear and provide a strong, reliable bond between the glass and the delicate pressed botanicals. For the best results and to prevent discoloration over time, it's highly recommended to look for acid-free options. These glues are specifically formulated to be archival, meaning they won't yellow or degrade the natural pigments of your flowers, ensuring your artwork remains vibrant for years to come. Ensure the glue is suitable for glass and paper/botanicals.
Can I make pressed flower art without glass?
Absolutely! While the glass provides a beautiful, protective, and luminous enclosure, pressed flower art can be created on other surfaces. You can adhere pressed flowers onto paper or cardstock using a thin layer of clear craft glue, creating lovely greeting cards or framed artwork. Another popular method is embedding them in clear resin, which offers a similar encased effect to glass but requires different materials and techniques, including proper ventilation and safety precautions due to the chemicals involved. You can also create pressed flower collages on canvas or wood panels.
How do I prevent my pressed flowers from fading in the glass?
The key to preventing fading is using fully dried flowers and ensuring they are properly sealed within the glass. Once encased, they are protected from direct sunlight and moisture, which are the primary culprits behind fading. To further preserve their vibrant colors, store the finished art away from direct sun exposure. Even though they are protected by glass, prolonged exposure to intense UV rays can still cause gradual fading over time. Displaying your artwork in a location with indirect light will help maintain its beauty and longevity.
What are the best types of flowers and leaves to use for pressed flower art?
For pressed flower art, it's best to choose flowers and leaves that are relatively flat and have a lower moisture content. Delicate blooms like pansies, violets, cosmos, and asters press beautifully. Fern fronds, delicate leaves from trees, and even small sprigs of herbs work wonderfully. Avoid very thick or fleshy flowers like roses or succulents, as they can be difficult to press completely flat and may retain moisture, leading to spoilage. Experimenting with different textures and shapes will add depth and interest to your designs.
How long does it take to make pressed flower art in glass?
The active crafting time for making pressed flower art in glass is surprisingly short, typically around 60 minutes, depending on the complexity of your design. However, the most significant time commitment comes from pressing the flowers themselves, which can take 2-3 weeks. Once your flowers are pressed and dry, the assembly process – arranging, gluing, and sealing – is quite quick. The crucial waiting period is for the glue to dry completely, which usually takes 24-48 hours, ensuring a strong and lasting bond.
Can I add other elements to my pressed flower art in glass?
Yes, you can absolutely incorporate other natural elements into your pressed flower art in glass to add texture and visual interest. Consider adding delicate dried grasses, small seed pods, tiny pinecones, or even thin slices of dried citrus peel. Ensure that any additional elements are also thoroughly dried and pressed flat, just like your flowers and leaves, to prevent moisture issues. The key is to maintain a relatively flat profile so that the two pieces of glass can seal together effectively without gaps.
What Next?
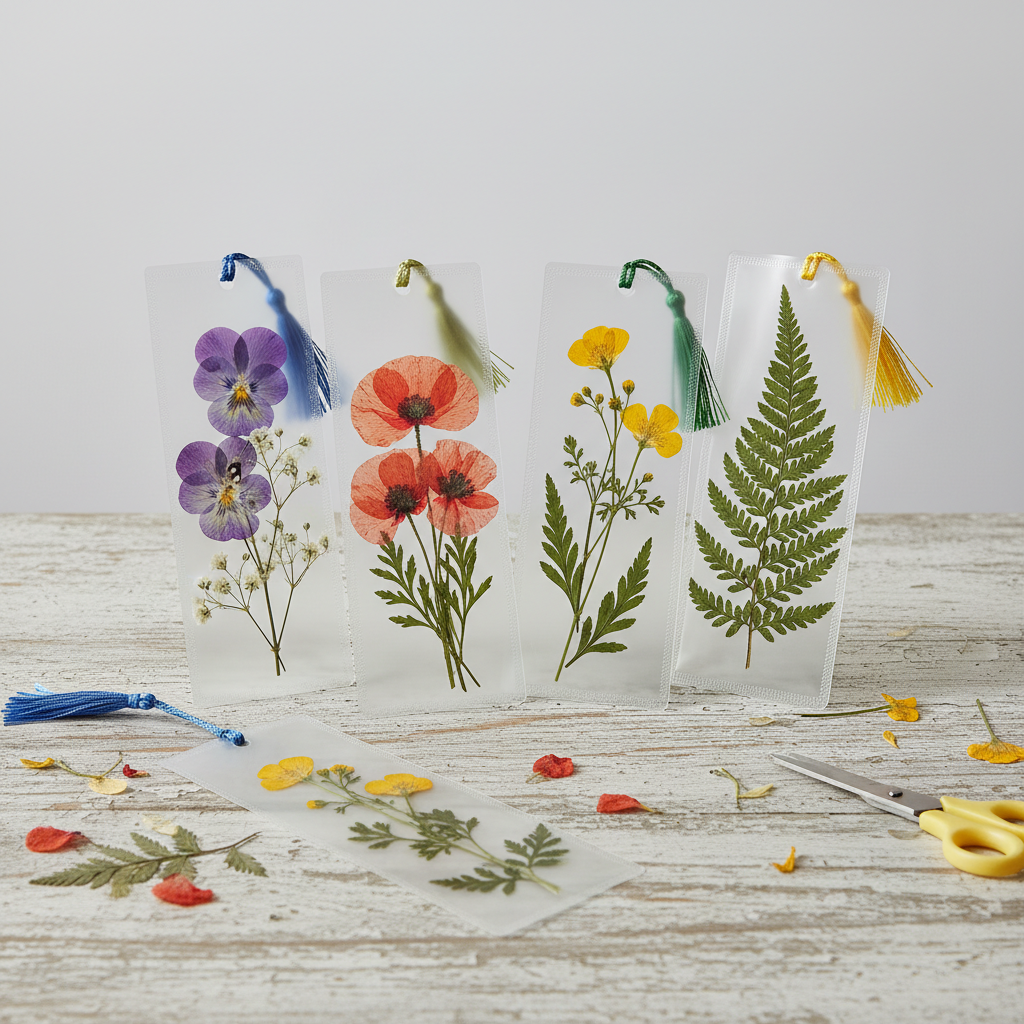
Your beautiful pressed flower art in glass is now complete and ready to be admired! Consider creating a series of these pieces in various sizes and with different floral arrangements to form a stunning gallery wall. For a more robust display, you can add a simple frame or even mount them on a stand. To protect your artwork from dust and potential damage, store it in a cool, dry place away from direct sunlight. This project is also a fantastic starting point for exploring other botanical crafts, such as creating pressed flower bookmarks or incorporating them into resin art.
Free: 10 Paper Crafts Anyone Can Make in 5 Minutes
Get our beginner guide + new craft ideas weekly.
No spam. Unsubscribe anytime.
Did you complete this activity?
Related