How to Build a Cardboard Tube Gravity Chute — Easy Step-by-Step Guide
Create an exciting gravity-powered marble run using recycled cardboard tubes. This engaging activity encourages creativity and problem-solving for the whole family.
Quick answer
To make a Cardboard Tube Gravity Chute, you need 6-8 cardboard tubes (toilet paper rolls, paper towel rolls cut in half), scissors, masking tape or packing tape, and a marble or small ball. An optional cardboard base can add stability. This beginner-friendly activity takes about 60 minutes to complete and involves 10 core steps, expandable to 15-20 for more intricate designs. It's perfect for families with kids aged 6+ and encourages creativity and problem-solving.
What you need
Shop on Amazon · As an Amazon Associate we earn from qualifying purchases. Links above are affiliate links — we may earn a commission at no extra cost to you.
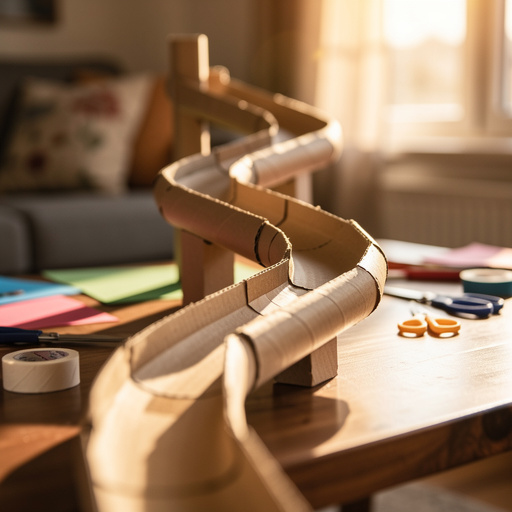
Embark on a thrilling journey of engineering and play with this easy-to-build Cardboard Tube Gravity Chute! This project transforms simple recycled materials into an exciting marble run, offering hours of entertainment and educational value. It’s a fantastic way to spark curiosity about physics, gravity, and cause-and-effect for young minds, while also providing a rewarding creative outlet for all ages. Gather your family and get ready to design, build, and test your very own gravity-powered adventure!
On this page
Step-by-Step Instructions
- 1
Gather all your materials: Ensure you have at least 6-8 cardboard tubes, a pair of scissors, plenty of tape, and your chosen marble or small ball. Having an optional cardboard base ready will also be beneficial for stability.
- 2
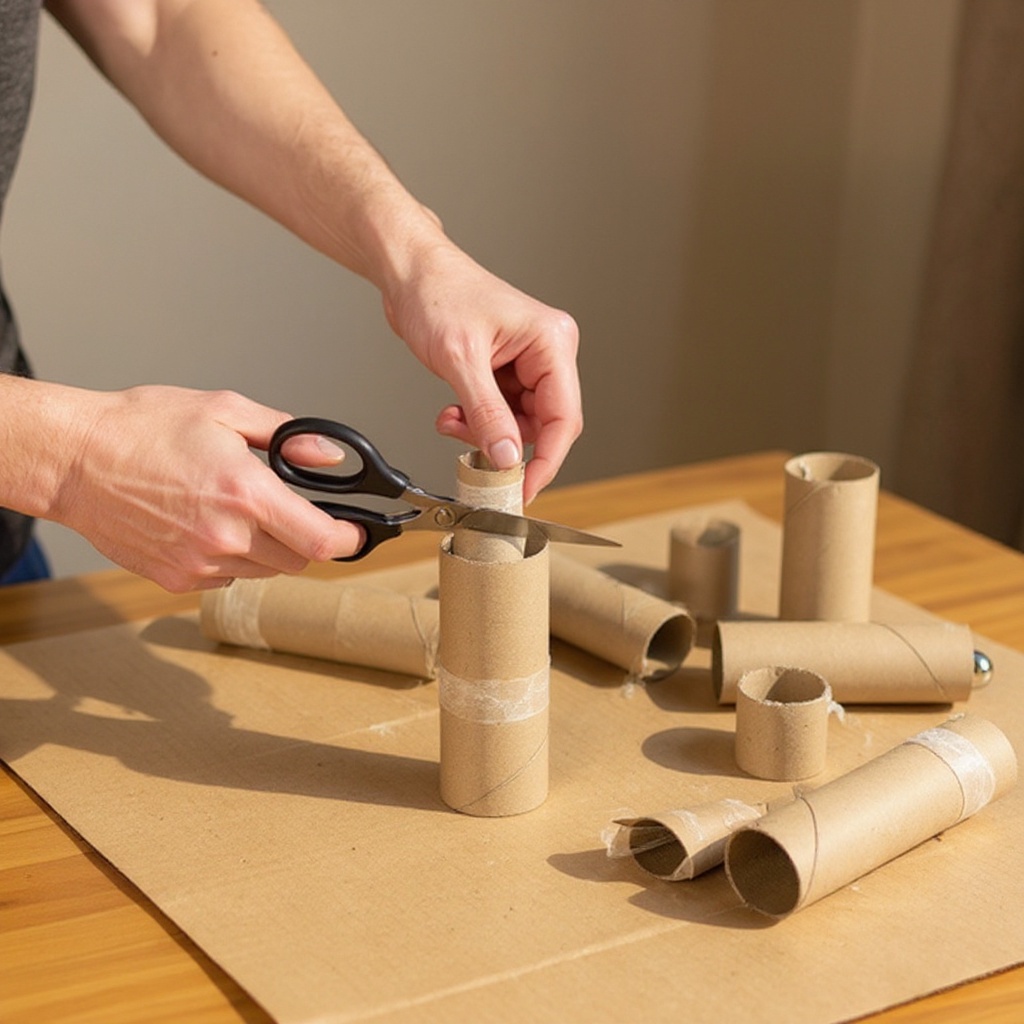
Prepare your tubes: If you are using paper towel rolls, carefully cut them in half using scissors to create shorter, more manageable tubes. This also doubles your tube count, allowing for more complex designs.
- 3
Envision your chute's path: Before you start cutting and taping, take a moment to decide on the general shape and flow of your gravity chute. Will it be a straight descent, a winding path with twists and turns, or a multi-tiered structure with several drops? Sketching a rough design on paper can be very helpful.
- 4
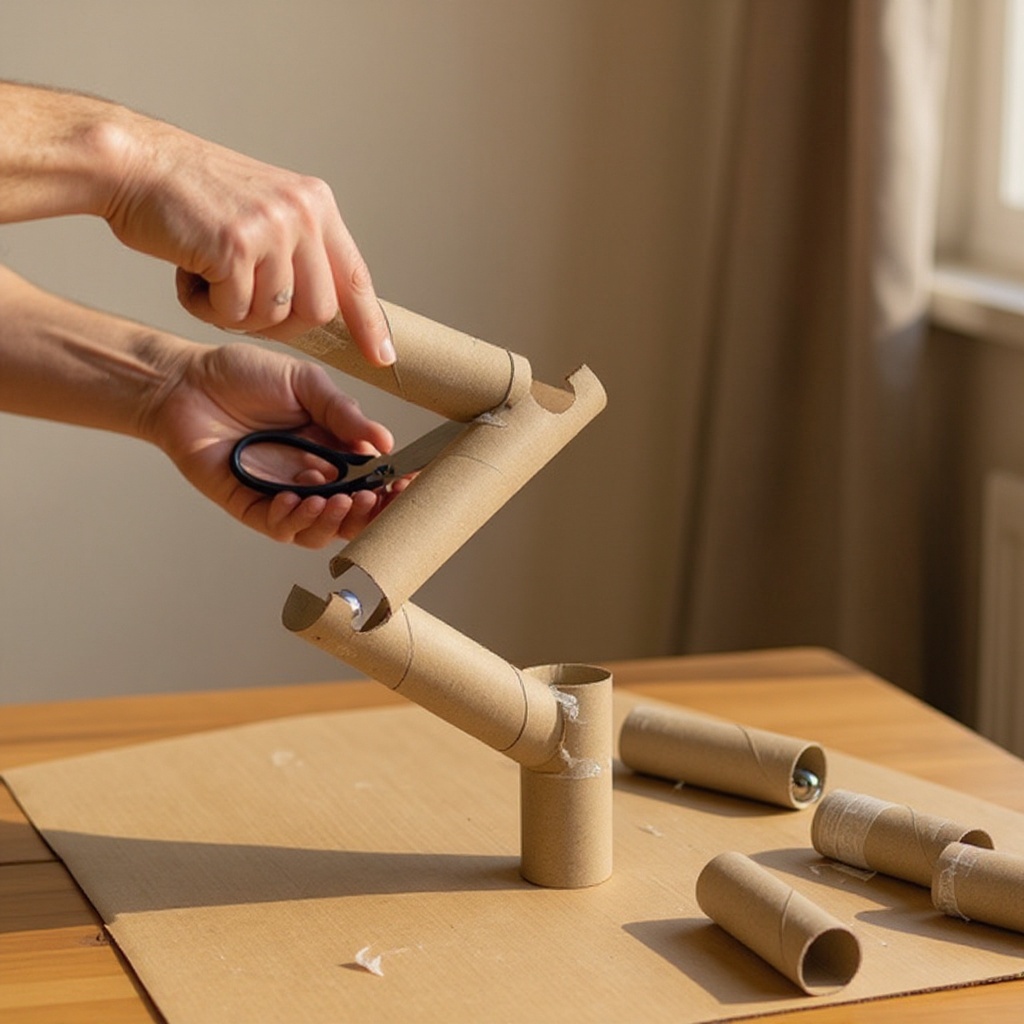
Create the ramp effect: To ensure the marble rolls smoothly, you need to create a ramp-like edge on your cardboard tubes. Carefully cut each cardboard tube lengthwise at an angle, removing a section to create an open trough. Aim for a consistent angle across all tubes for a uniform ramp.
- 5
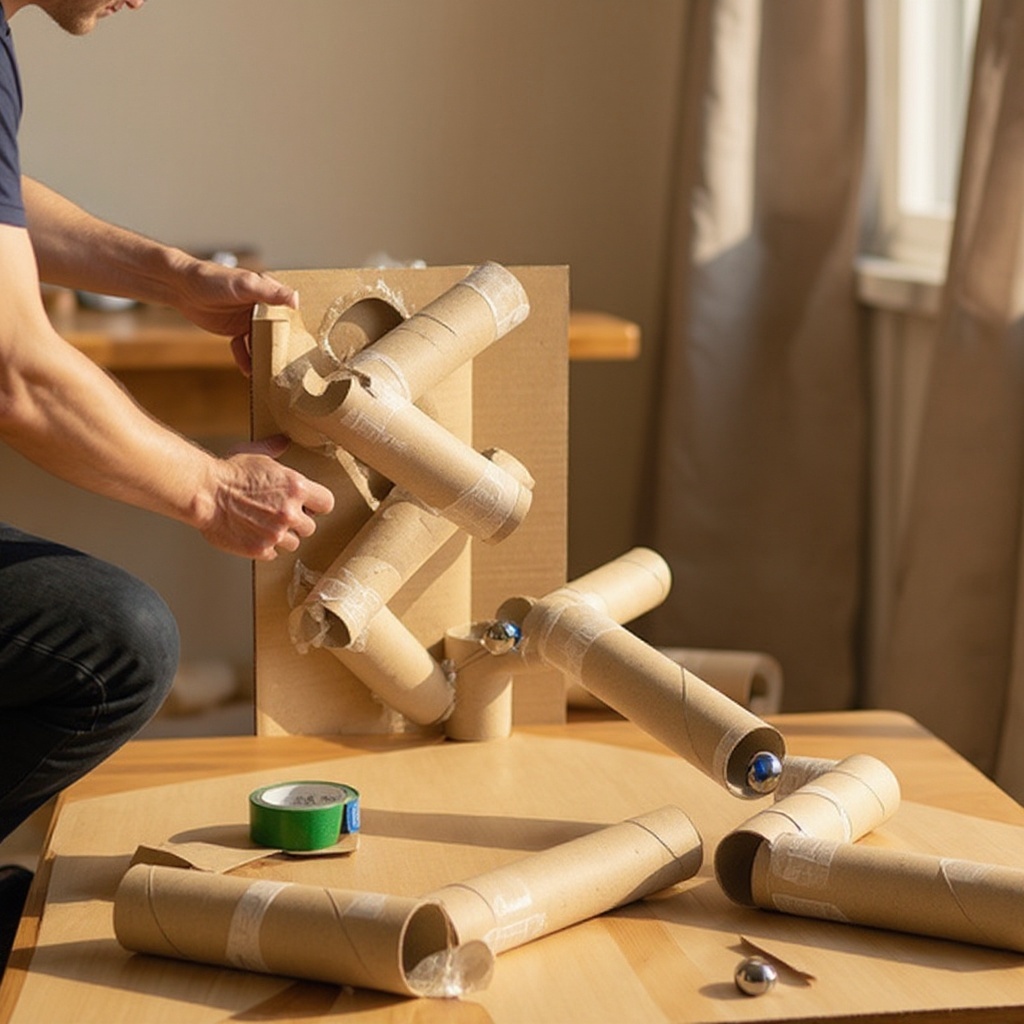
Prepare your attachment surface: Decide where your gravity chute will be built. You can attach it directly to a wall, a sturdy table leg, or a pre-prepared cardboard base. If using a cardboard base, ensure it's large enough to accommodate your design and is placed on a stable surface.
- 6
Begin attaching the first tube: Position your first cardboard tube at the starting point of your chute. Angle it downwards towards its intended exit point. Use tape to securely fasten one end of the tube to your chosen surface, ensuring it's firmly in place.
- 7
Connect the subsequent tubes: Take your next prepared cardboard tube and align its starting end with the exit end of the first tube. Ensure there's a continuous downward slope from one tube to the next, creating a seamless path for the marble.
- 8
Secure the connections with tape: Generously use masking tape or packing tape to firmly attach the second tube to the first. Overlap the ends of the tubes slightly where they connect, and wrap the tape around the join multiple times to create a strong, gap-free connection that prevents the marble from getting stuck.
- 9
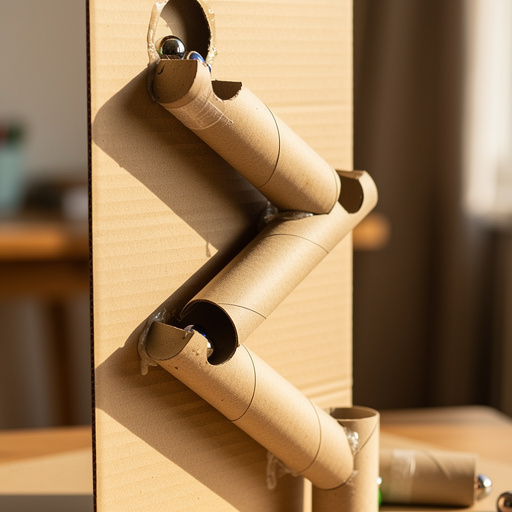
Continue building your chute: Keep adding tubes, connecting them end-to-end, and always maintaining a consistent downward angle. Experiment with creating turns by slightly angling the tubes relative to each other, or incorporate drops by connecting a higher tube to a lower one.
- 10
Test the marble's journey: Once you have a few sections connected, it's time for the first test run! Gently place your marble at the start of the chute and let it roll. Observe its path closely, noting any areas where it slows down, gets stuck, or falls off.
- 11
Adjust and refine: Based on your test run, make necessary adjustments. If the marble gets stuck, check for any kinks, sharp edges, or gaps in the tube connections and re-tape them securely. You might need to adjust the angle of a tube to improve the flow.
- 12
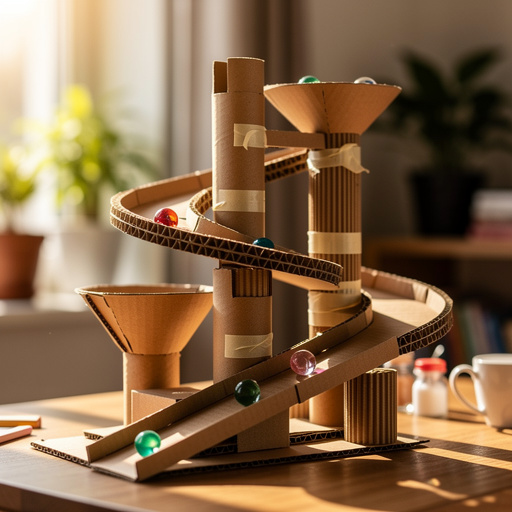
Incorporate turns and drops: As you add more tubes, think about how to create interesting turns and drops. For turns, slightly angle the connecting tubes. For drops, create a steeper angle between tubes, ensuring the marble has enough momentum to continue its journey.
- 13
Reinforce all connections: Once you are satisfied with the overall flow and the marble's journey through your chute, go back and reinforce all the taped connections. Add extra tape to any areas that seem weak or might be prone to separating, ensuring the longevity of your gravity chute.
- 14
Add decorative elements (optional): If you wish to add some flair, now is the time to decorate your cardboard tubes. You can paint them, draw designs with markers, or wrap them in colorful paper before or after assembly, depending on your chosen method.
- 15
Final testing and play: Perform a final, thorough test run with your marble. Make any last-minute tweaks to ensure a smooth and exciting ride. Now, your Cardboard Tube Gravity Chute is ready for endless hours of fun and experimentation!
Tips & Troubleshooting
- 1If your marble frequently gets stuck, meticulously inspect each connection point for any kinks, sharp edges, or small gaps where the marble could snag. Gently adjust the angle of the tubes or add more tape to create a smoother transition. Sometimes, a slight twist of a tube can open up a hidden obstruction.
- 2Experiment with different angles to control the marble's speed. Steeper angles will result in faster, more exhilarating runs, while gentler slopes will slow the marble down, allowing for more observation time. This is a great way to teach children about the relationship between incline and velocity.
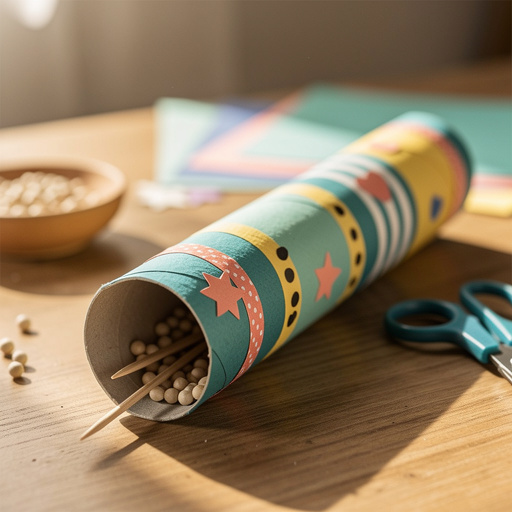
- 3Before assembly, consider decorating your cardboard tubes to make your gravity chute visually appealing. You can use paint, markers, crayons, or even wrap them in colorful wrapping paper. This adds a personal touch and can be a fun activity in itself for younger children.
- 4For a more stable and robust structure, especially if you plan on making a tall or complex chute, attach your gravity chute to a sturdy cardboard base or directly to a wall. This prevents the entire structure from wobbling or falling over during play.
- 5Don't limit yourself to just one size of marble! Try using different sized marbles or small balls to see how their weight and size affect their speed and ability to navigate the chute. This introduces concepts of mass and friction in a tangible way.
- 6If you find that your tubes are not holding their shape well, you can reinforce the inside of the tubes with a bit of extra cardboard or even some rolled-up paper before taping them together. This adds rigidity and prevents crushing.
- 7Consider adding 'catchment' areas at the end of your chute, like a small box or a bowl, to prevent marbles from rolling away once they've completed their journey. This makes cleanup much easier and keeps the play area tidy.
- 8When creating turns, avoid making them too sharp, as this can cause the marble to lose momentum or even derail. A gradual curve is usually more effective for maintaining speed and ensuring a successful run.
Related Activities You Might Enjoy
Frequently Asked Questions
Where can I find marble run instructions PDF?
While this tutorial provides step-by-step instructions for building a cardboard tube gravity chute, you can often find downloadable marble run instruction PDFs by searching online. Use terms like 'DIY marble run plans,' 'cardboard tube marble maze instructions,' or 'recycled marble run blueprints.' Many educational websites, craft blogs, and DIY enthusiast forums offer free printable plans that can provide inspiration for more complex designs or different construction methods. These PDFs can be particularly helpful if you're looking for specific structural ideas or want to replicate a particular type of marble run.
What are the best materials for a homemade marble run?
The beauty of homemade marble runs is their versatility with materials. Common and highly effective materials include cardboard tubes (toilet paper rolls, paper towel rolls), cardboard boxes (cereal boxes, shipping boxes), and sturdy paper towel or toilet paper cores. Essential tools are scissors and tape (masking tape or packing tape). For more advanced builds, consider craft glue, hot glue (with adult supervision), craft sticks, plastic cups, or even PVC pipes. Recycled materials are excellent choices for budget-friendly and eco-conscious building, allowing for endless creativity without significant cost.
How do I make a marble run that actually works?
To ensure your marble run functions smoothly, consistency and secure connections are key. Always maintain a consistent downward slope for each section of your marble run; even a slight upward angle will stop the marble. Securely tape all connections between tubes and any other components to prevent gaps where the marble can get stuck or fall out. Test and adjust angles as you build, making small adjustments to ensure the marble flows from one section to the next without hesitation. Smooth transitions are crucial for a successful run.
Can kids build a marble run by themselves?
With appropriate adult supervision, children aged 6 and up can participate significantly in building a marble run. Younger children can assist with simpler tasks like taping tubes together, decorating the components, or testing the marble's path. Older children can take on more complex roles, such as cutting tubes (with supervision), planning the design, and troubleshooting any issues. This project is an excellent opportunity for teamwork and fostering problem-solving skills between parents and children, making it a rewarding family activity.
What are some creative ways to add challenges to a cardboard tube gravity chute?
To elevate your cardboard tube gravity chute from simple to spectacular, consider incorporating various challenges. You can add 'jump' sections by creating a small gap between two tubes, requiring the marble to fly a short distance. Introduce 'loops' by carefully bending and taping tubes into circular or oval shapes, though this requires precise angling. 'Tunnels' can be made by using larger cardboard pieces or boxes, and 'switches' can be created by using Y-shaped connectors that allow the marble to choose between two paths. Experimenting with different textures or obstacles within the tubes, like small pieces of crumpled paper, can also add an element of surprise.
How can I make my cardboard tube gravity chute more durable?
To enhance the durability of your cardboard tube gravity chute, start with stronger tape, such as packing tape, which offers better adhesion and strength than masking tape. Ensure all connections are thoroughly reinforced with multiple layers of tape, paying close attention to the overlap between tubes. For added rigidity, you can reinforce the inside of the cardboard tubes with rolled-up paper or extra cardboard strips before assembly. If using a cardboard base, opt for thicker, corrugated cardboard. For a more permanent structure, consider using craft glue or a hot glue gun (with adult supervision) for attaching components, as glue can provide a stronger bond than tape alone.
What Next?
Congratulations on building your very own Cardboard Tube Gravity Chute! This project is just the beginning of your marble run adventures. Consider adding more complex elements like tunnels, bridges, or even a simple pulley system for an extra challenge. You can also create multiple chutes that connect to each other for an epic marble race. Once your masterpiece is complete, display it proudly on a wall or a dedicated shelf, or simply dismantle it and start a new design. The possibilities are endless with this versatile and fun DIY project!
Free: 10 Paper Crafts Anyone Can Make in 5 Minutes
Get our beginner guide + new craft ideas weekly.
No spam. Unsubscribe anytime.
Did you complete this activity?
Related