How to Build a Cardboard Tube Gravity Track — Easy Step-by-Step Guide
Transform recycled cardboard tubes into an exciting gravity-powered marble run! This engaging DIY project encourages creativity and problem-solving for the whole family.
Quick answer
To make a Cardboard Tube Gravity Track, you need cardboard tubes, tape, scissors, and marbles, taking about 60 minutes. Start by cutting tubes in half lengthwise. This beginner-friendly activity has 10 steps and is perfect for families with kids aged 6+.
What you need
Shop on Amazon · As an Amazon Associate we earn from qualifying purchases. Links above are affiliate links — we may earn a commission at no extra cost to you.
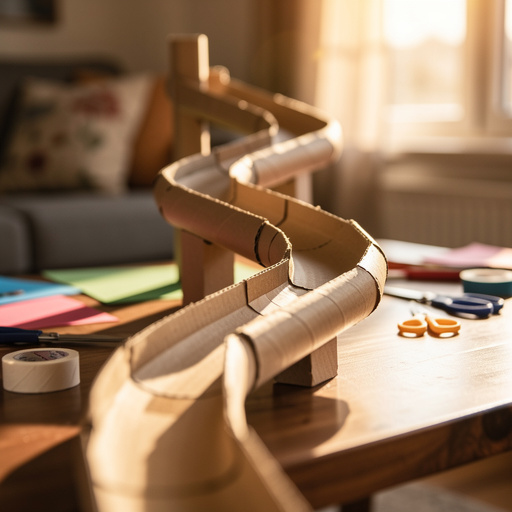
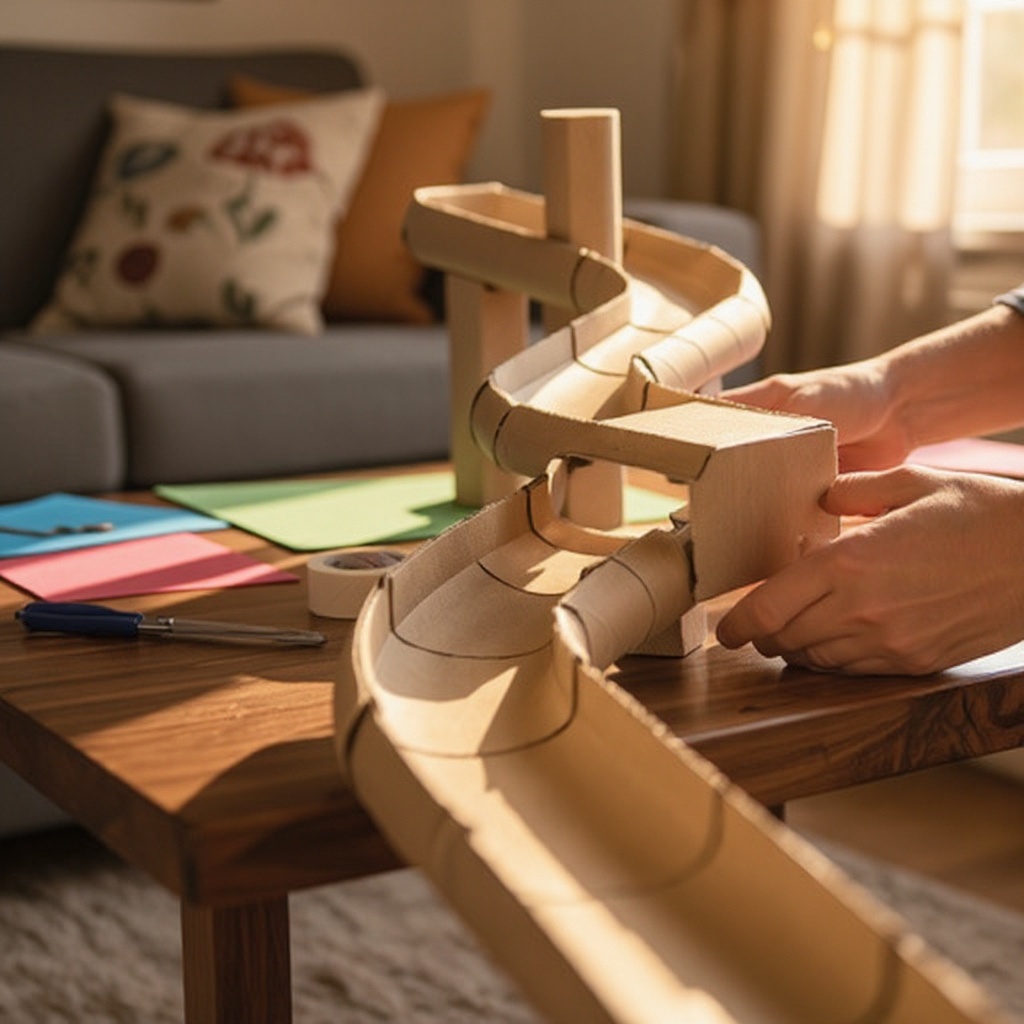
Unleash your inner engineer and transform everyday cardboard tubes into a thrilling gravity-powered adventure! Building a cardboard tube gravity track is a fantastic DIY project that sparks imagination, encourages critical thinking, and provides hours of entertainment for the entire family. It's a wonderfully accessible activity, perfect for rainy afternoons or as a fun weekend challenge, proving that incredible fun can be crafted from simple, recycled materials. Get ready to watch marbles zoom, tumble, and race down your custom-designed creation!
On this page
Step-by-Step Instructions
- 1
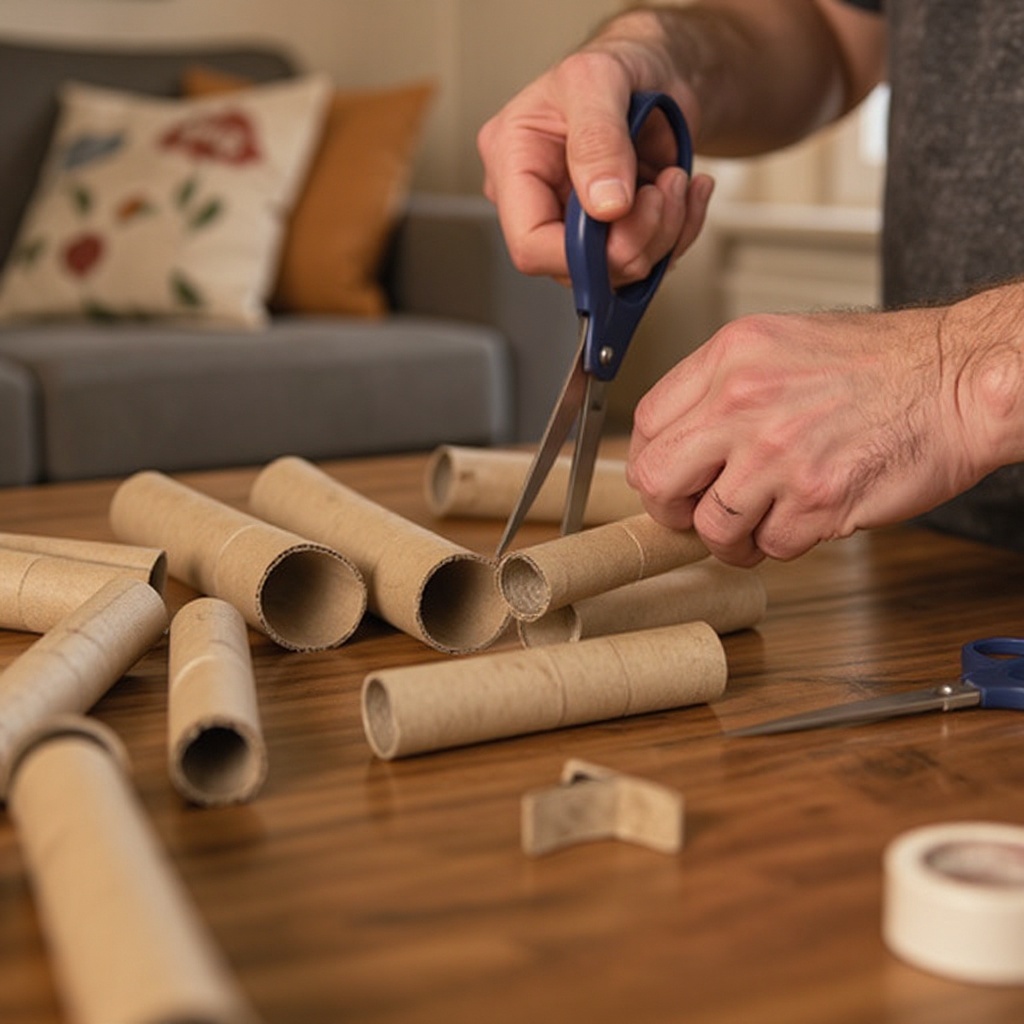
Gather all your materials: cardboard tubes, tape, scissors, and marbles. Ensure you have a clear workspace and that all your cardboard tubes are empty and clean. Having everything ready before you begin will make the building process much smoother and more enjoyable.
- 2
Begin by cutting each cardboard tube in half lengthwise using your scissors. This creates your primary track pieces, essentially forming U-shaped channels for the marbles to roll through. Be sure to cut as straight as possible to ensure the track pieces connect smoothly.
- 3
Decide on the starting point for your marble run. This could be the edge of a table, a sturdy chair, or even a stack of books. Consider the height you want your track to start from, as this will influence the overall slope and speed of your marble run.
- 4
Take your first cut cardboard tube piece and position it at your chosen starting point. Use tape to secure it firmly, ensuring it's angled downwards towards where the next piece will connect. Don't be afraid to use plenty of tape to create a stable foundation for your track.
- 5
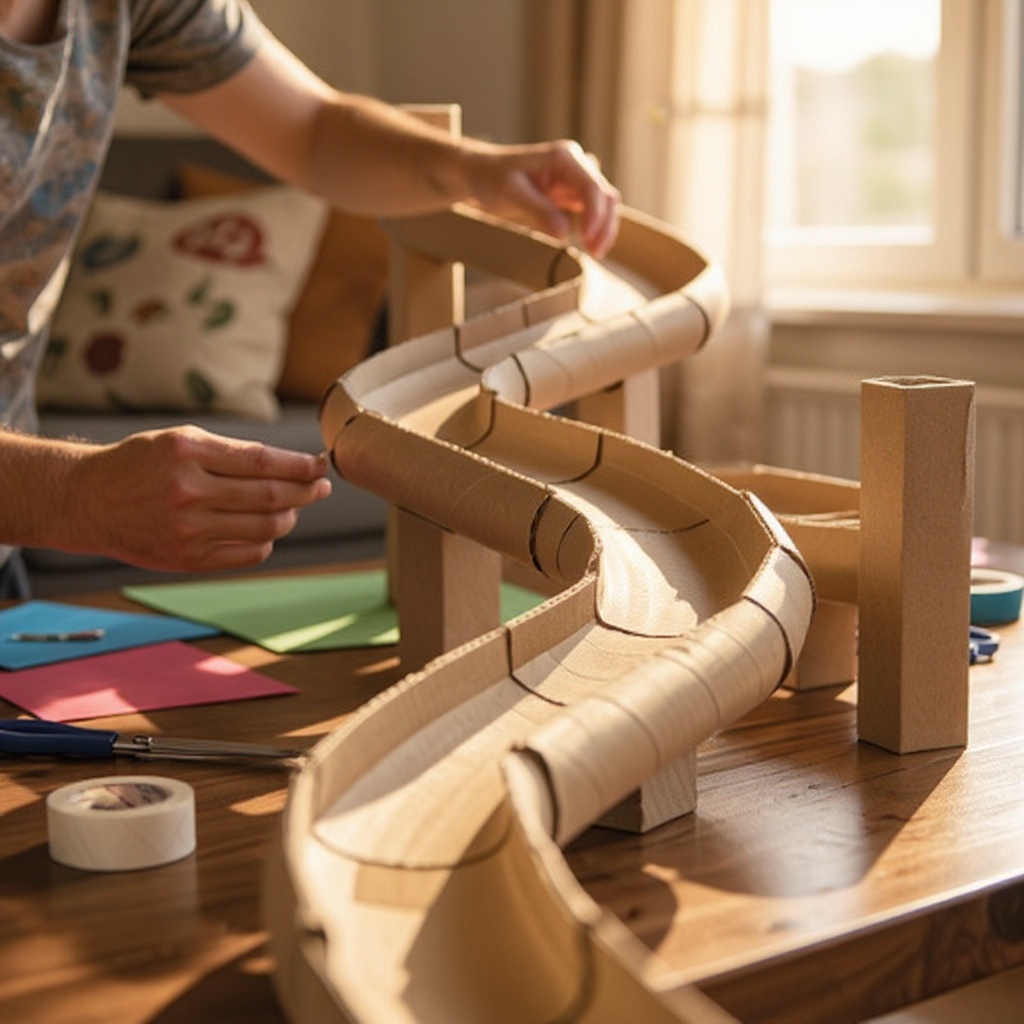
Connect the next track piece to the end of the first, maintaining a consistent downward slope. Overlap the end of the first piece slightly with the beginning of the second to create a seamless transition for the marble. If the connection feels wobbly, add more tape to reinforce it.
- 6
Continue connecting track pieces, gradually building your marble run. As you add more sections, start thinking about the path your marble will take. You can create gentle curves by slightly bending the cardboard tubes or introduce more dramatic drops and turns.
- 7
Use tape to secure all connections firmly. For maximum stability, overlap the tape on both the inside and outside of each connection point. This prevents pieces from shifting or separating as the marble rolls through, ensuring a continuous and exciting journey.
- 8
Consider adding intermediate support structures as your track grows longer or more complex. If your track is spanning a large gap, you might need to tape it to a wall, a stack of books, or use additional cardboard pieces as pillars to prevent sagging. This is crucial for maintaining the downward slope.
- 9
Create a 'catch basin' at the end of your track using a small box, a folded piece of sturdy cardboard, or even a plastic cup. This will prevent your marbles from rolling away once they reach the end of the run and make collecting them for another go much easier.
- 10
Test your marble run by gently placing a marble at the start and letting it roll. Observe its journey carefully, noting any points where it slows down, gets stuck, or falls off the track. This initial test is vital for identifying areas that need adjustment.
- 11
Adjust the angles and connections as needed to ensure a smooth and continuous flow for the marbles. If a marble gets stuck, examine the connection point for any kinks, sharp turns, or gaps. Gently widen or smooth out these areas, or add more tape to secure loose sections.
- 12
Experiment with creating different types of track elements. You can create small 'jumps' by leaving a tiny gap between two track pieces, or build 'tunnels' by taping a flattened piece of cardboard over a section of the tube. These additions add excitement and challenge to your marble run.
- 13
If you're using a wall as part of your structure, ensure it's clean and dry before applying tape. For more permanent installations, consider using strong mounting tape or even small hooks and loops to attach the track pieces securely. Always test the adhesion of your chosen method.
- 14
Decorate your cardboard tubes before assembly if you wish. Using paint, markers, crayons, or stickers can transform your functional track into a colorful and visually appealing masterpiece. Let your creativity flow and personalize your marble run!
- 15
Consider adding a 'funnel' at the start to guide marbles into the track. You can create this by cutting the bottom off a plastic cup and taping it to the beginning of your first track piece, allowing for easier marble loading.
- 16
If you're building a particularly long or intricate track, consider using craft glue in addition to tape for extra reinforcement at key connection points. Allow the glue to dry completely before testing the track.
- 17
For added stability and to prevent the entire structure from tipping over, consider attaching the base of your marble run to a larger, heavier surface like a piece of thick cardboard or a wooden board. This is especially important for taller or more elaborate designs.
- 18
Once your marble run is functioning smoothly, have a marble race! You can time different marbles or try to create a track with multiple paths for a competitive element. This adds another layer of fun and engagement to your creation.
Tips & Troubleshooting
- 1If marbles get stuck, check for any kinks or sharp turns in your track. Gently widen or smooth out these areas, or add a small piece of tape to reinforce the curve. Sometimes, a slight adjustment in the angle of the tube can resolve the issue.
- 2Experiment with different angles! Steeper angles will make the marbles go faster, while gentler slopes will slow them down. Finding the perfect balance is key to a successful and engaging marble run, and it’s a great way to learn about gravity and momentum.
- 3You can add extra challenges by creating small 'jumps' or 'tunnels' by leaving small gaps between track pieces or using other recycled materials. For jumps, a slight upward angle followed by a drop can create a thrilling effect, while tunnels can add an element of surprise.
- 4To make your marble run more visually appealing, you can decorate the cardboard tubes with paint or markers before assembly. Consider themes like a race track, a castle, or a jungle to add an extra layer of imagination to your creation.
- 5Ensure that each connection between cardboard tubes is secure and smooth. Any gaps or rough edges can cause the marble to snag or fall off the track, disrupting the flow. Overlapping the tubes slightly and using plenty of tape can prevent these issues.
- 6Consider the size and weight of your marbles. Different marbles will roll at different speeds and may behave differently on the track. Experimenting with various types of marbles can add an interesting dynamic to your gravity track.
- 7If your track is becoming very long or complex, think about adding intermediate supports. These can be made from more cardboard tubes taped vertically or horizontally to provide stability and prevent the track from sagging, which is crucial for maintaining the downward slope.
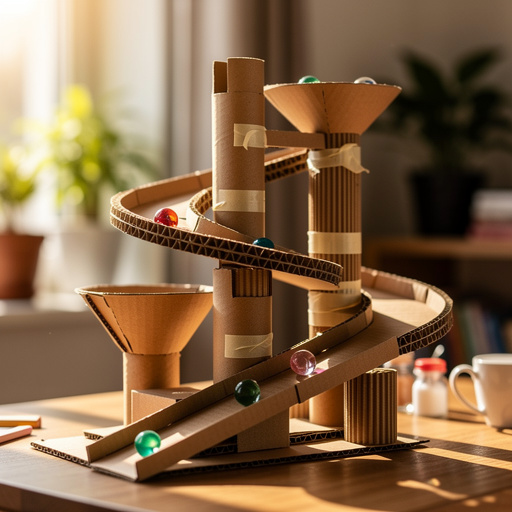
- 8Don't be afraid to get creative with your design! Incorporate loops, spirals, or even multiple branching paths. The more imaginative your design, the more engaging and fun your marble run will be for everyone involved.
Related Activities You Might Enjoy
Frequently Asked Questions
What are the best materials for a marble run?
For a simple and accessible marble run, recycled cardboard tubes are excellent. You'll also need strong tape like masking tape or packing tape for assembly and a few marbles to test your creation. Other materials like plastic bottles cut into channels, craft sticks for supports, or even sturdy paper plates can also be incorporated for more complex designs. The key is to use materials that can be easily cut, shaped, and taped together to create a continuous path with a downward slope.
How do you make a marble run stay together?
Secure connections are absolutely key to a stable marble run! Use strong tape like masking tape or packing tape to firmly attach your track pieces. Ensure there's a slight overlap between pieces to create a smooth transition for the marble, and tape them on both the inside and outside if possible for maximum stability. For longer or more complex tracks, consider adding extra support structures made from more cardboard or even craft glue at critical connection points to prevent sagging or separation.
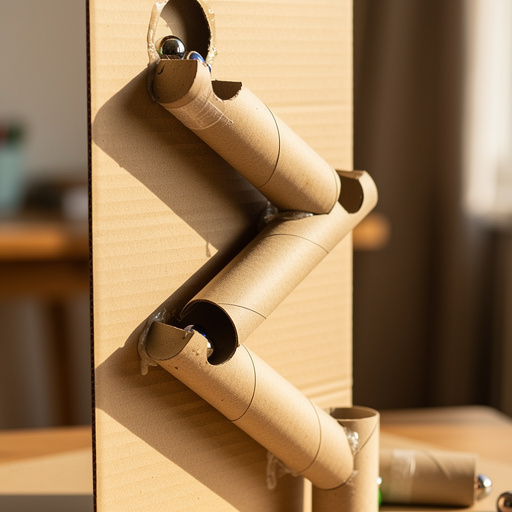
Can you build a marble run on a wall?
Yes, you can absolutely build a marble run on a wall! This can create a fantastic vertical play experience. Use strong mounting tape or command strips designed for walls to attach your cardboard tube track pieces directly to a vertical surface. Ensure the wall is clean and dry for best adhesion, and consider the weight of your structure as you build upwards. You might need to reinforce connections more thoroughly when building vertically.
What age is a marble run good for?
Marble runs are fantastic for a wide age range, typically starting around age 5 or 6. Younger children can enjoy the simple act of sending marbles down and watching them roll, which helps develop fine motor skills and understanding of cause and effect. Older children can engage in the design and engineering aspects, problem-solving challenges, and experimenting with different track configurations, fostering creativity and critical thinking. Adults often find it a fun and relaxing activity too!
How do you create different speeds and challenges in a marble run?
You can control marble speed by adjusting the angle of your track. Steeper slopes will make the marbles accelerate and move faster, while gentler slopes will slow them down. To add challenges, incorporate elements like small jumps by creating a slight upward incline followed by a drop, or build tunnels using flattened cardboard. You can also create branching paths where marbles have to make a choice, or add obstacles that the marbles must navigate around. Experimenting with different marble sizes and weights can also affect speed and how they interact with the track.
What if my marbles keep getting stuck?
If your marbles are frequently getting stuck, it's usually due to a few common issues. First, check for any kinks or sharp turns in your track that might be impeding the marble's progress; gently widen or smooth out these areas. Ensure there are no significant gaps between track pieces where the marble could fall through. Also, verify that your track has a consistent downward slope throughout its entire length; even a slight upward incline can stop a marble. Finally, make sure your connections are secure and that the inside of the tubes is relatively smooth.
Can I use other recycled materials besides cardboard tubes?
Absolutely! The beauty of a cardboard tube gravity track is its adaptability. You can easily incorporate other recycled materials to add variety and complexity. For instance, cut plastic bottles can create wider channels or funnels, egg cartons can serve as interesting obstacles, and small cardboard boxes can be used to build ramps or tunnels. Even paper towel cores can be used for longer track sections. The key is to ensure these materials can be securely attached and create a smooth path for the marbles.
What Next?
Congratulations on building your very own cardboard tube gravity track! This project is a fantastic starting point for exploring the principles of physics and engineering. For future builds, consider incorporating other recycled items like plastic cups for funnels, egg cartons for obstacles, or even small ramps made from cereal boxes. You can also challenge yourselves by building a multi-level track or one with complex branching paths. Once your masterpiece is complete, you can either disassemble it for future projects or find a creative way to display it, perhaps mounted on a wall or as a tabletop centerpiece. The possibilities for marble run fun are endless!
Free: 10 Paper Crafts Anyone Can Make in 5 Minutes
Get our beginner guide + new craft ideas weekly.
No spam. Unsubscribe anytime.
Did you complete this activity?
Related
You might also like
Cardboard Tube Gravity Chute
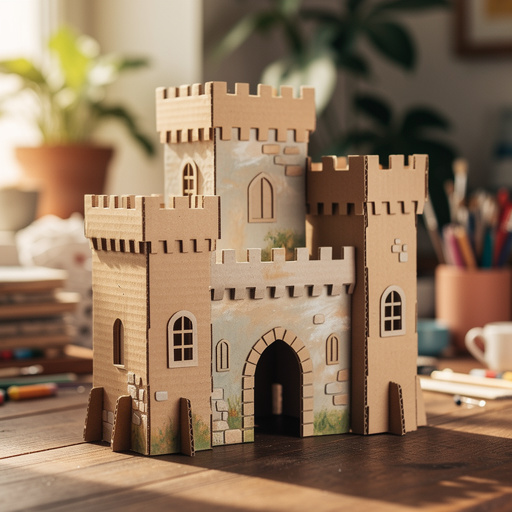
Cardboard Castle Diorama
Cardboard Marble Run
Cardboard Castle Diorama
Cozy Critter Cloud Castle