How to Make Candles at Home to Sell — Easy Step-by-Step Guide
Discover the rewarding craft of making your own soy wax candles! This guide provides a simple, step-by-step process perfect for families wanting to create beautiful candles for sale. Learn the secrets to a professional finish and a captivating scent throw that will have customers coming back for more. Whether you're looking for a creative hobby or a new business venture, this beginner-friendly tutorial will equip you with the knowledge and confidence to succeed.
Quick answer
To make candles to sell, you need soy wax, wicks, containers, and fragrance oils, taking about 60 minutes per batch for the active making process, plus curing time. Start by melting the wax and preparing your containers. This beginner-friendly activity has 12 core steps and is perfect for families with adult supervision, offering a fantastic opportunity for entrepreneurship.
What you need
Shop on Amazon · As an Amazon Associate we earn from qualifying purchases. Links above are affiliate links — we may earn a commission at no extra cost to you.
Embarking on the journey of candle making can be an incredibly fulfilling and potentially profitable endeavor. Crafting your own soy wax candles allows you to infuse your creations with unique scents and beautiful aesthetics, making them perfect for gifting or selling. This process is not only a wonderful creative outlet but also a fantastic way to connect with customers who appreciate handmade, natural products. It's an ideal project for families looking to bond over a shared activity, or for individuals seeking to launch a small business from the comfort of their home.
On this page
Step-by-Step Instructions
- 1
Gather all your supplies in a clean, well-ventilated workspace, ensuring you have ample room to move and work safely. Lay out your materials so they are easily accessible, and cover your work surface with newspaper or a protective cloth to catch any spills.
- 2
Measure out your soy wax flakes using a scale for accuracy, or by volume if a scale isn't available. For this guide, we'll use 1 lb of soy wax flakes, which will yield approximately 5-6 4oz candles, and place them into your pouring pitcher.
- 3
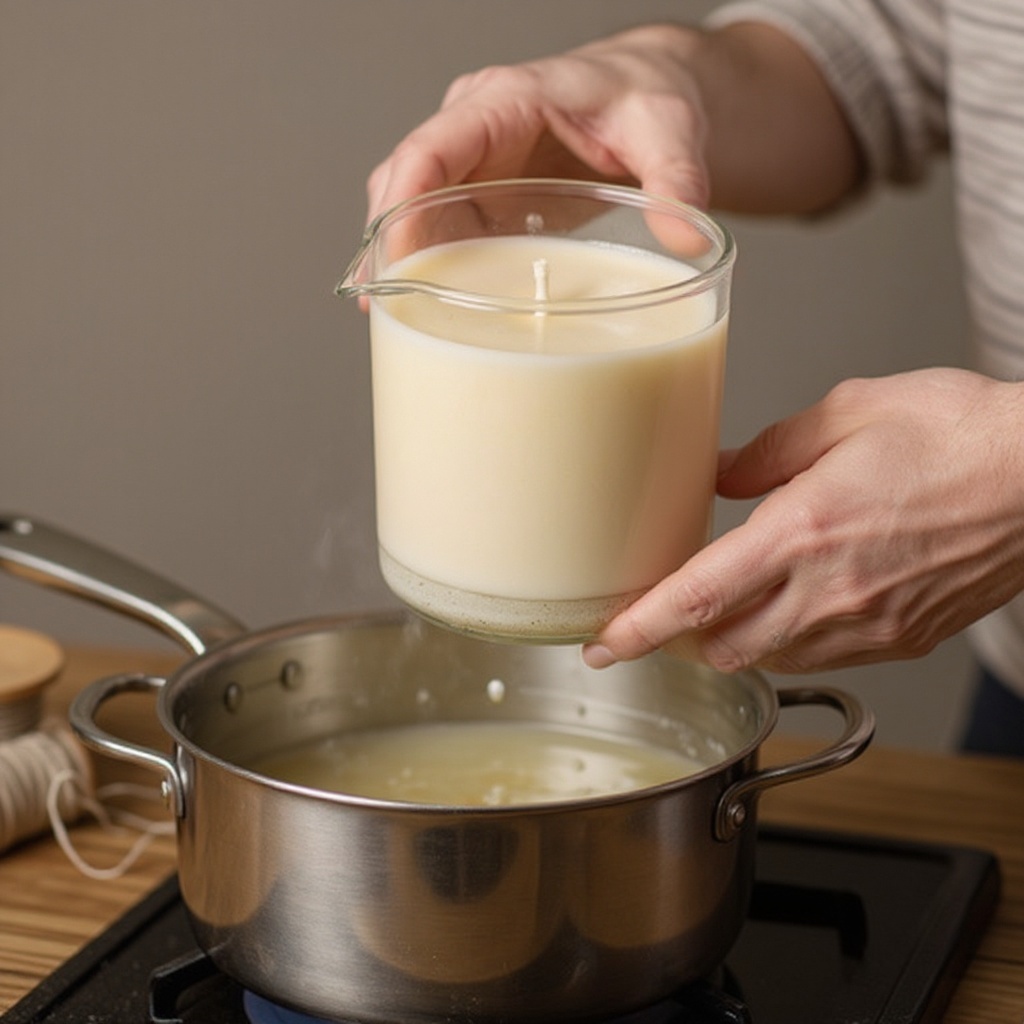
Set up your double boiler: fill the bottom pot with about 1-2 inches of water, ensuring the water level is below the rim of the pouring pitcher that will sit inside. Place the pouring pitcher containing the wax flakes into the bottom pot, creating a stable setup for gentle heating.
- 4
Heat the water on medium-low heat, stirring the wax occasionally with your stirring utensil until it is completely melted and clear. Avoid high heat, as this can scorch the wax and affect its scent throw and appearance; patience is key here.
- 5
Monitor the wax temperature closely with your thermometer. Soy wax typically melts around 120-130°F (49-54°C), but the ideal pouring temperature is crucial for a smooth finish. Aim for a pouring temperature between 130-140°F (54-60°C) for best results.
- 6
While the wax is melting, prepare your candle jars. Ensure they are clean and dry by wiping them with rubbing alcohol and paper towels; this removes any dust or residue that could interfere with adhesion. Attach a wick sticker to the metal tab of each wick, or apply a small dab of hot glue, and press it firmly onto the bottom center of each jar, ensuring it's perfectly centered.
- 7
Once the wax reaches the desired pouring temperature (130-140°F or 54-60°C), carefully remove the pouring pitcher from the double boiler using oven mitts or a towel to protect your hands from the heat. Place the pitcher on a heat-resistant surface.
- 8
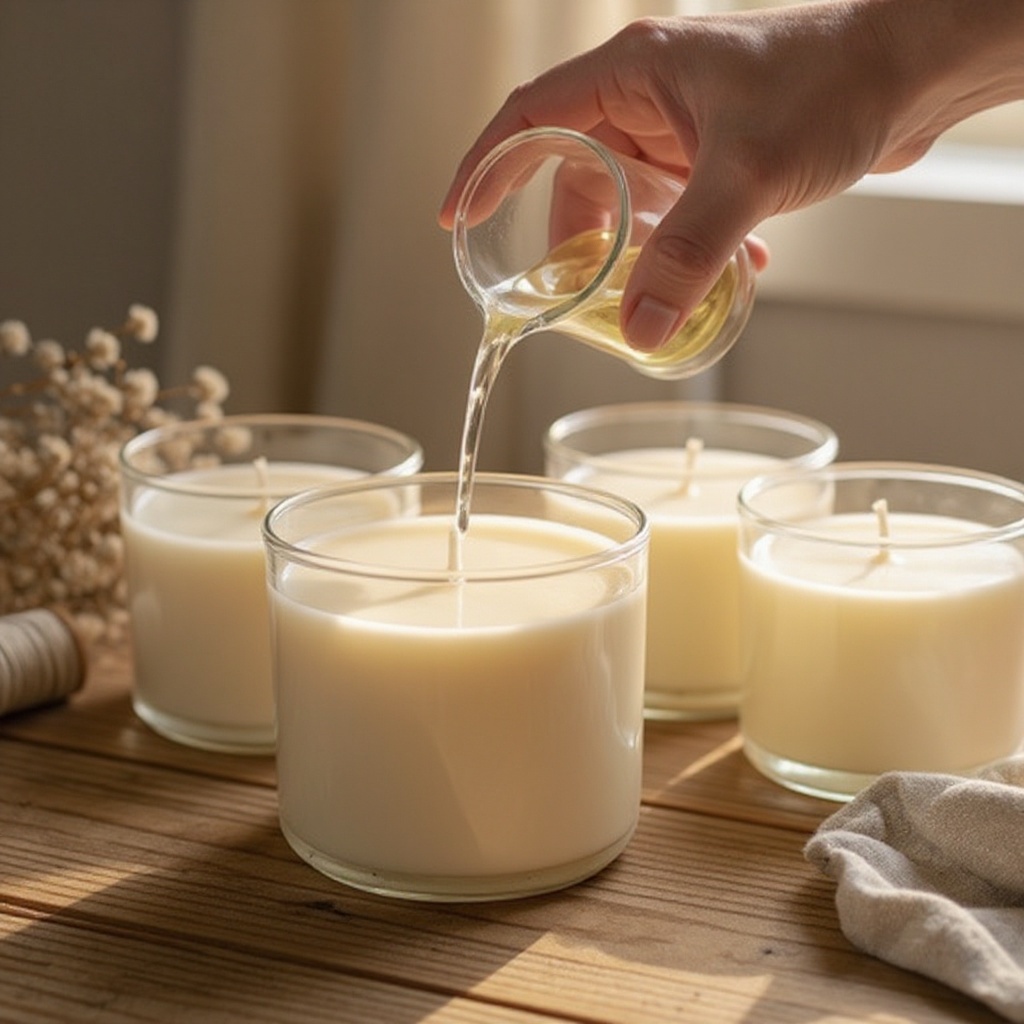
Add your chosen fragrance oil to the melted wax. For a 1 lb (16 oz) batch of wax, a good starting point for fragrance load is 1 oz (approximately 6% by weight). Stir gently but thoroughly for a full 2 minutes to ensure the fragrance oil is completely incorporated into the wax, which is vital for a strong scent throw.
- 9
Allow the wax to cool slightly to the optimal pouring temperature, which is typically around 125-135°F (52-57°C) for soy wax. Pouring at the correct temperature helps prevent issues like sinkholes, frosting, and uneven tops, contributing to a professional finish.
- 10
Carefully and slowly pour the scented wax into each prepared jar, holding the pitcher steady to avoid splashing. Fill each jar, leaving about 1/2 inch of space at the top to allow for expansion and to prevent the flame from reaching the rim of the container.
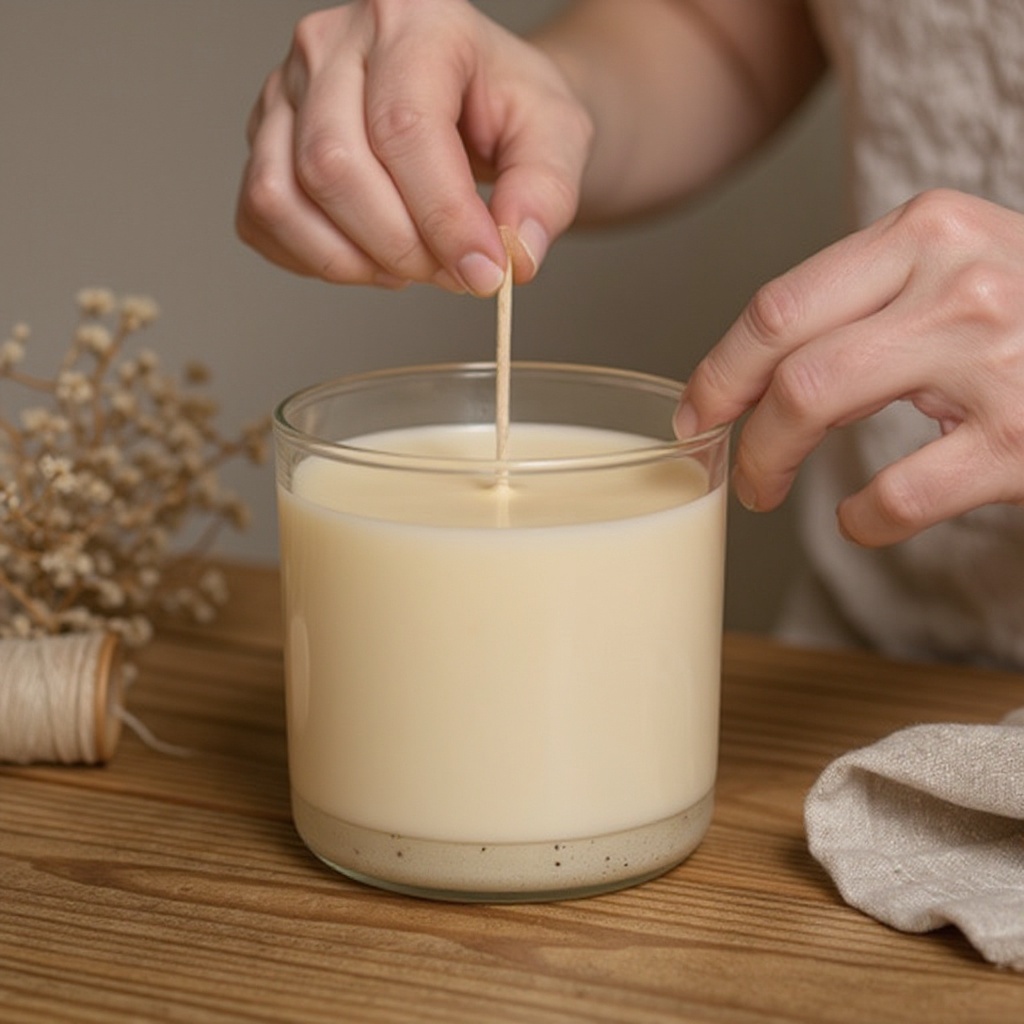
- 11
Immediately after pouring, center the wick using a popsicle stick or clothespin laid across the top of the jar. Gently press the stick or clothespin down to secure the wick upright and ensure it remains centered as the wax cools and solidifies; this is critical for an even burn.
- 12
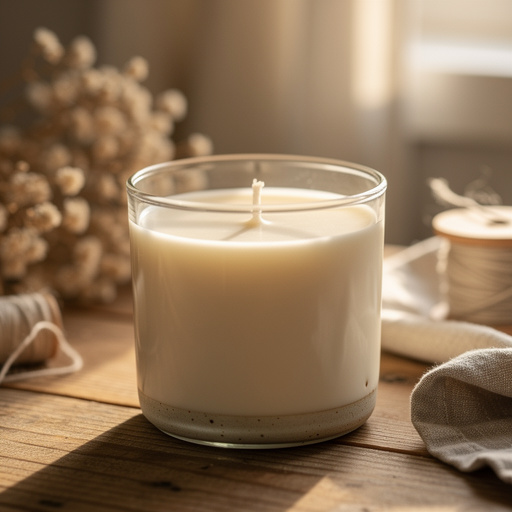
Allow the candles to cure undisturbed in a cool, stable environment for at least 24 hours, but ideally 1-2 weeks for the best scent throw. Once fully cooled and cured, trim the wicks to about 1/4 inch before burning or selling to ensure a clean and safe flame.
- 13
Optional: If you notice any sinkholes or imperfections on the surface after the initial pour, you can gently reheat the remaining wax (or a small amount of fresh wax) to around 180°F (82°C) and pour a very thin layer over the top to create a smooth finish. Allow this to cool completely.
- 14
Optional: For a professional and polished look, you can add candle dye chips to your melted wax. Add the dye chips when the wax is fully melted and stir until they are completely dissolved, ensuring an even color distribution throughout the wax.
- 15
Once your candles have cooled and cured, apply safety warning labels to the bottom of each container. These labels are crucial for informing customers about safe candle burning practices and are often a legal requirement for selling handmade candles.
Tips & Troubleshooting
- 1If your candles develop sinkholes or cracks, gently reheat the wax to 180°F (82°C), pour a thin layer over the top, and let it cool again. This 'second pour' technique can help create a smooth, professional-looking surface, masking minor imperfections from the initial cooling process.
- 2Experiment with different fragrance oils and essential oils to create unique scent blends that appeal to a wider audience. Always use candle-specific fragrance oils, as they are formulated to burn safely and provide a good scent throw, unlike some essential oils which can be volatile or have poor scent throw in wax.
- 3For a professional look, consider adding dye chips to your wax to achieve beautiful colors. Add them when the wax is fully melted and stir until dissolved, ensuring an even distribution; start with a small amount and add more until you reach your desired shade.
- 4Always use heat-resistant glass jars specifically designed for candles, such as mason jars or dedicated candle vessels. Avoid thin glass, repurposed containers, or those not tested for heat, as they could crack or shatter under the heat of the burning candle, posing a safety hazard.
- 5Properly curing your candles is crucial for the best scent throw, allowing the fragrance molecules to bind fully with the wax. Avoid moving them too much during the first 24-48 hours of cooling and curing, as this can disrupt the crystallization process and affect the scent.
- 6When measuring fragrance oil, using a scale for a precise percentage (fragrance load) is highly recommended for consistent results. A typical fragrance load for soy wax is between 6-10%, but always check the recommendations for your specific wax and fragrance oil supplier.
- 7To ensure your wicks stay centered and upright during the pouring and cooling process, use a wick centering tool, popsicle sticks with a hole in the middle, or even clothespins. This small step makes a big difference in the final appearance and burn quality of your candle.
- 8Always keep a fire extinguisher or a box of baking soda nearby when working with hot wax. In the event of a wax fire, never use water, as it can spread the flames; smothering the fire with baking soda or a lid is the safest approach.
Related Activities You Might Enjoy
Frequently Asked Questions
What is the best wax for making candles to sell?
Soy wax is a popular and excellent choice for making candles to sell due to its natural origin, clean-burning properties, and superior scent throw compared to many other waxes. It's derived from soybeans, making it a renewable resource and appealing to eco-conscious consumers. Paraffin wax is also commonly used and can offer a strong scent throw, but it's a petroleum byproduct and less environmentally friendly. Beeswax is another natural option, known for its beautiful golden hue and subtle honey scent, but it can be more expensive and sometimes trickier to work with for consistent results. For beginners and those targeting a natural product market, soy wax is generally the most recommended.
How much fragrance oil should I use in my candles?
The amount of fragrance oil, often referred to as the 'fragrance load,' is critical for achieving a good scent throw in your candles. A good starting point for soy wax is a 6-8% fragrance load by weight. For example, if you are using 1 lb (16 oz) of wax, you would use approximately 1 to 1.3 oz of fragrance oil. It's essential to check the manufacturer's recommendations for both your specific wax and fragrance oil, as some waxes can hold more fragrance than others, and some fragrance oils may be more potent. Overloading the wax can lead to scent throw issues or even safety concerns.
How do I price my homemade candles for sale?
Pricing your homemade candles involves calculating your total material costs per candle and factoring in your labor time. Start by adding up the cost of wax, wicks, containers, fragrance oil, dye, and any other embellishments for one candle. Then, estimate the time it takes you to make one candle and assign an hourly wage to your labor. A common pricing formula is to multiply your total cost (materials + labor) by 2 or 3 to cover overhead, profit, and market value. Research competitor pricing in your local market or online to ensure your prices are competitive yet profitable. Don't forget to consider the perceived value of your handmade, high-quality product.
What are the safety precautions when making candles?
Safety is paramount when making candles. Always work in a well-ventilated area to avoid inhaling fumes and ensure good airflow. Never leave melting wax unattended, as it can overheat and pose a fire risk. Keep flammable materials, such as paper towels or curtains, away from your heat source and melting wax. Use a thermometer to monitor the wax temperature accurately, preventing it from reaching its flashpoint. Have a fire extinguisher or a box of baking soda readily accessible in case of a wax fire, and remember never to use water to extinguish a wax fire. Always wear protective eyewear and gloves when handling hot wax.
What is the difference between fragrance oils and essential oils for candles?
Fragrance oils and essential oils are both used to scent candles, but they differ significantly. Essential oils are derived directly from plants, offering natural aromas and potential therapeutic benefits. However, many essential oils have low flashpoints, meaning they can evaporate quickly when heated, resulting in a weak scent throw in candles. They can also be more expensive and sometimes unstable in wax. Fragrance oils, on the other hand, are synthetic or a blend of synthetic and natural compounds specifically formulated for use in candles. They are designed to be stable at higher temperatures, provide a consistent and strong scent throw, and are generally more cost-effective for candle making. Always use oils specifically labeled as 'candle-safe'.
How long does it take to make a batch of candles?
The active making process for a batch of candles, from melting the wax to pouring into the jars, typically takes about 30-60 minutes, depending on the size of your batch and how many jars you are filling. However, this does not include the crucial curing time. Soy wax candles require a curing period of at least 24 hours, but for the best scent throw and a fully hardened candle, it's recommended to let them cure for 1-2 weeks before burning or selling. So, while the hands-on time is relatively short, the entire process from start to finish, including curing, spans several days to weeks.
What Next?
Congratulations on mastering the art of soy wax candle making! With this foundational knowledge, you're ready to explore endless creative possibilities. Consider experimenting with different container shapes and sizes, incorporating natural elements like dried flowers (ensure they are safely embedded and away from the flame), or even layering colors for a unique visual appeal. Once your candles are cured and ready, think about how you'll present them: elegant labels, simple twine, or custom packaging can elevate your brand. Store finished candles in a cool, dark place to preserve their fragrance and appearance, ready to delight your customers.
Free: 10 Paper Crafts Anyone Can Make in 5 Minutes
Get our beginner guide + new craft ideas weekly.
No spam. Unsubscribe anytime.
Did you complete this activity?