How to Decoupage Napkins onto Surfaces — Easy Step-by-Step Guide
Transform ordinary objects into unique art pieces using beautiful paper napkins and a simple decoupage technique. A fun, screen-free family craft!
Quick answer
To decoupage napkins, you need decorative napkins, Mod Podge, a brush, and your chosen surface, taking about 30 minutes. Start by separating the napkin layers. This beginner-friendly activity has 8 steps and is perfect for families and kids aged 6+. You'll need a few essential supplies to get started, including decorative 3-ply paper napkins, your preferred type of Mod Podge (matte or gloss), a foam brush or paintbrush, scissors, and the item you wish to decorate. A damp cloth or paper towel is also helpful for smoothing. The process involves carefully preparing the napkin, applying glue, adhering the napkin, and sealing it for a durable finish.
What you need
Shop on Amazon · As an Amazon Associate we earn from qualifying purchases. Links above are affiliate links — we may earn a commission at no extra cost to you.
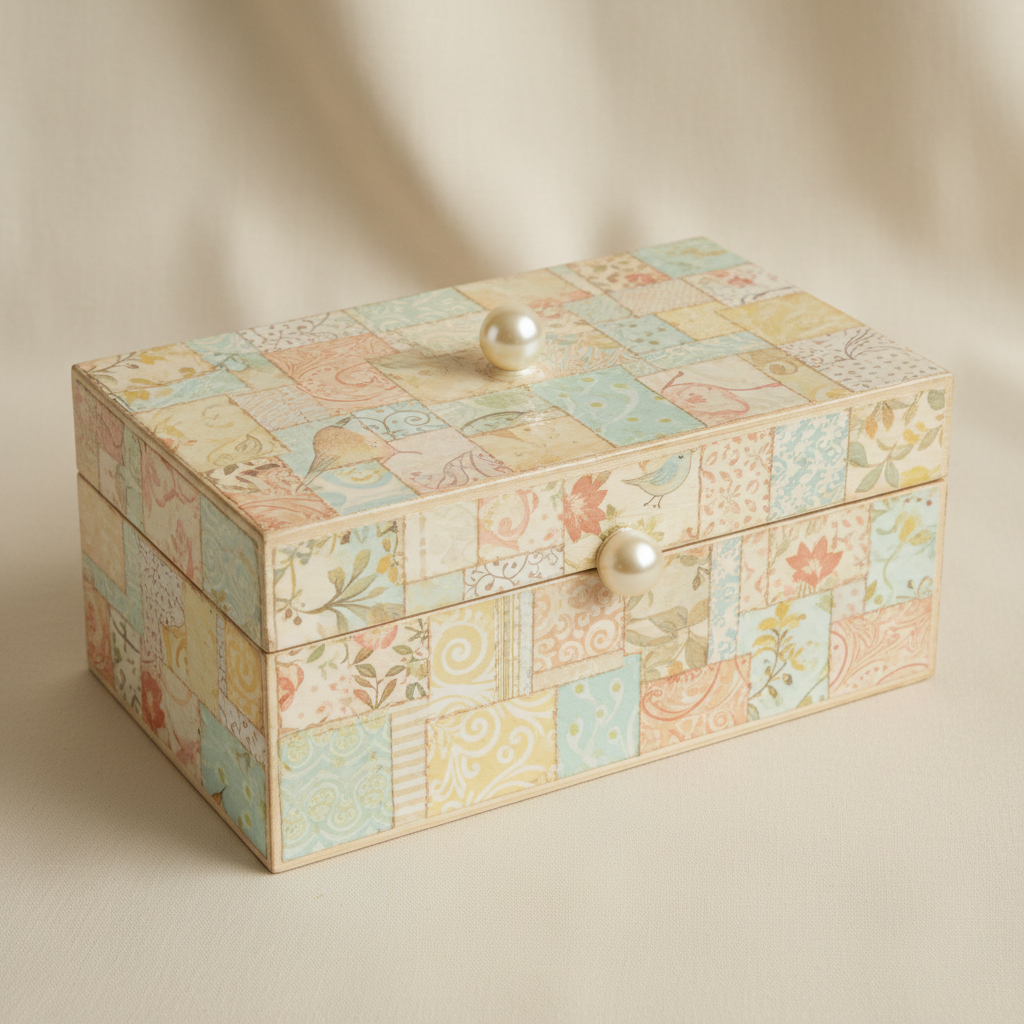
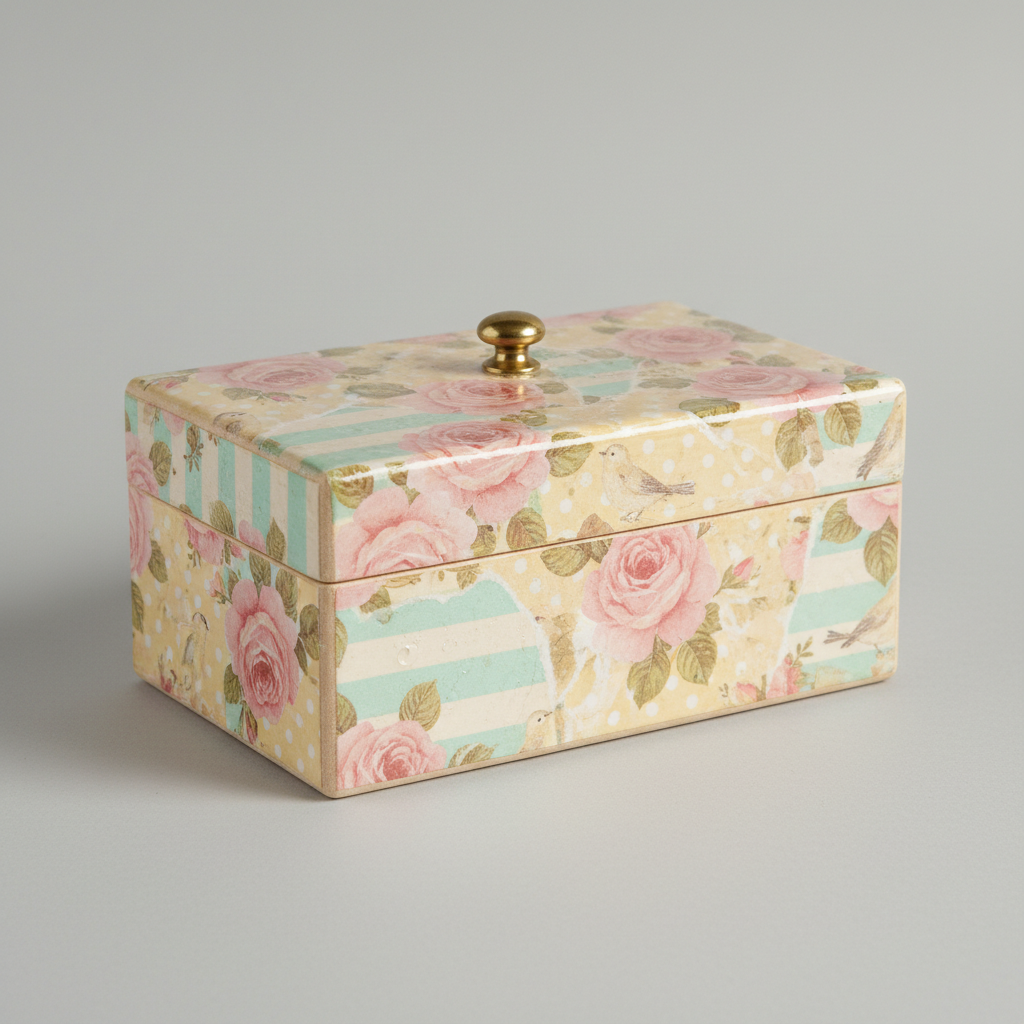
Unleash your inner artist and breathe new life into everyday items with the enchanting art of decoupage using paper napkins! This incredibly accessible craft transforms plain surfaces into personalized masterpieces, making it an ideal activity for family bonding, creative afternoons, or even a relaxing solo project. What makes decoupage with napkins so special is the sheer variety of beautiful designs available, allowing you to infuse your personality and style into everything from home decor to thoughtful handmade gifts. It's a screen-free way to engage imaginations and create something tangible and beautiful, perfect for crafters of all ages, especially children aged 6 and up.
On this page
Step-by-Step Instructions
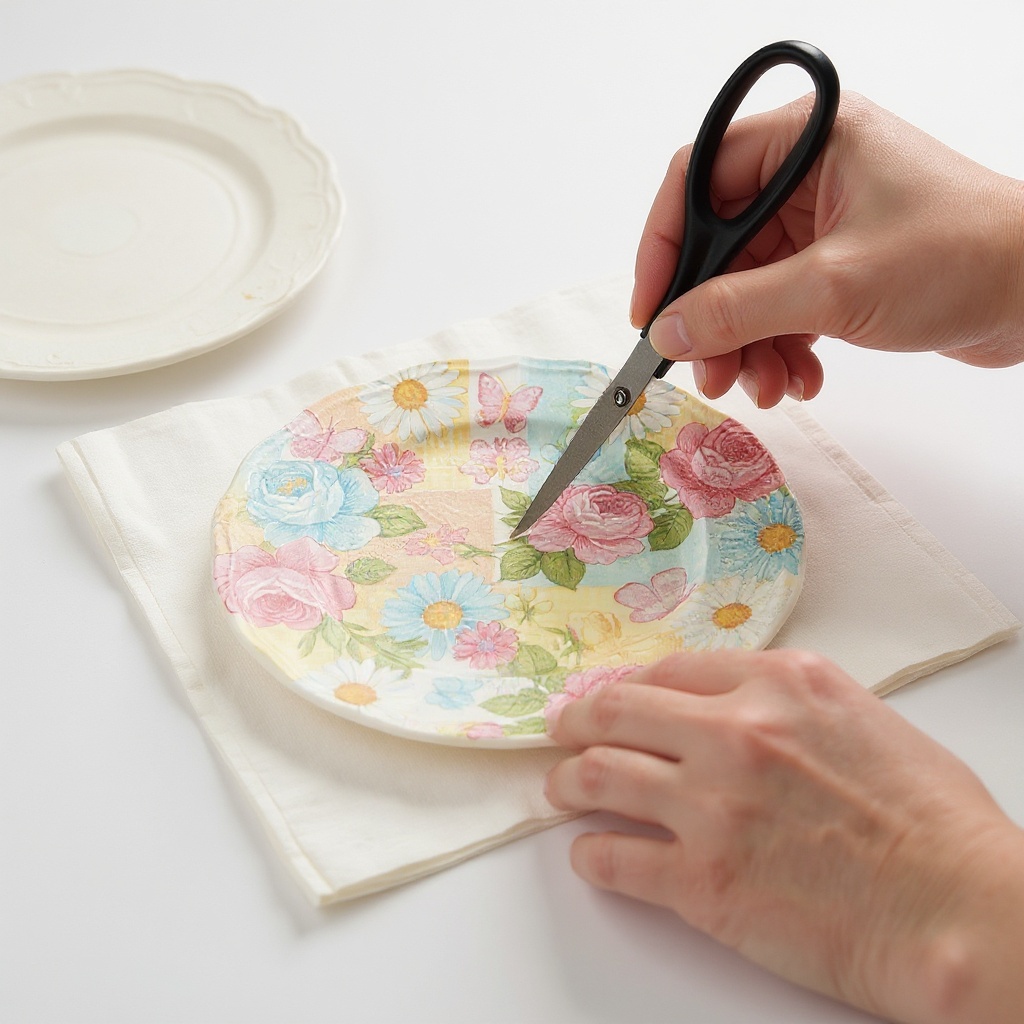
- 1
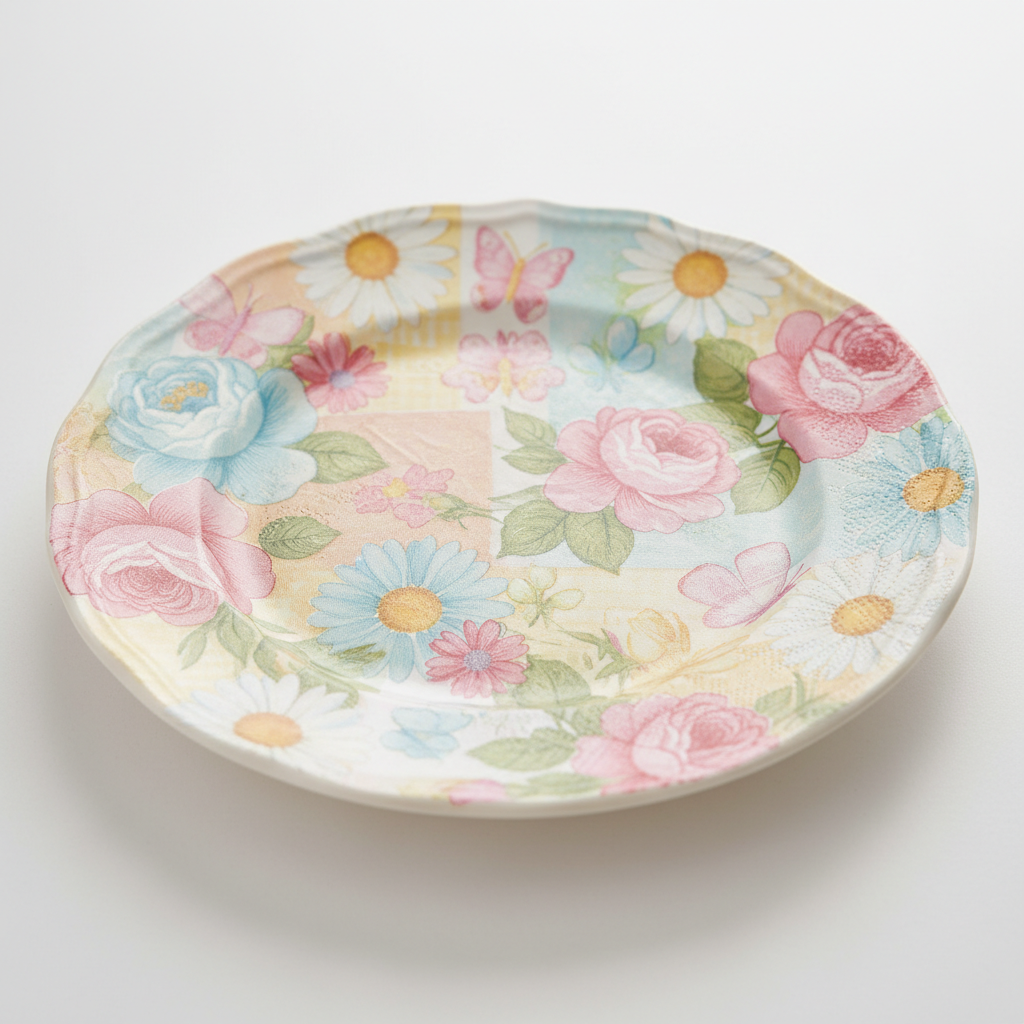
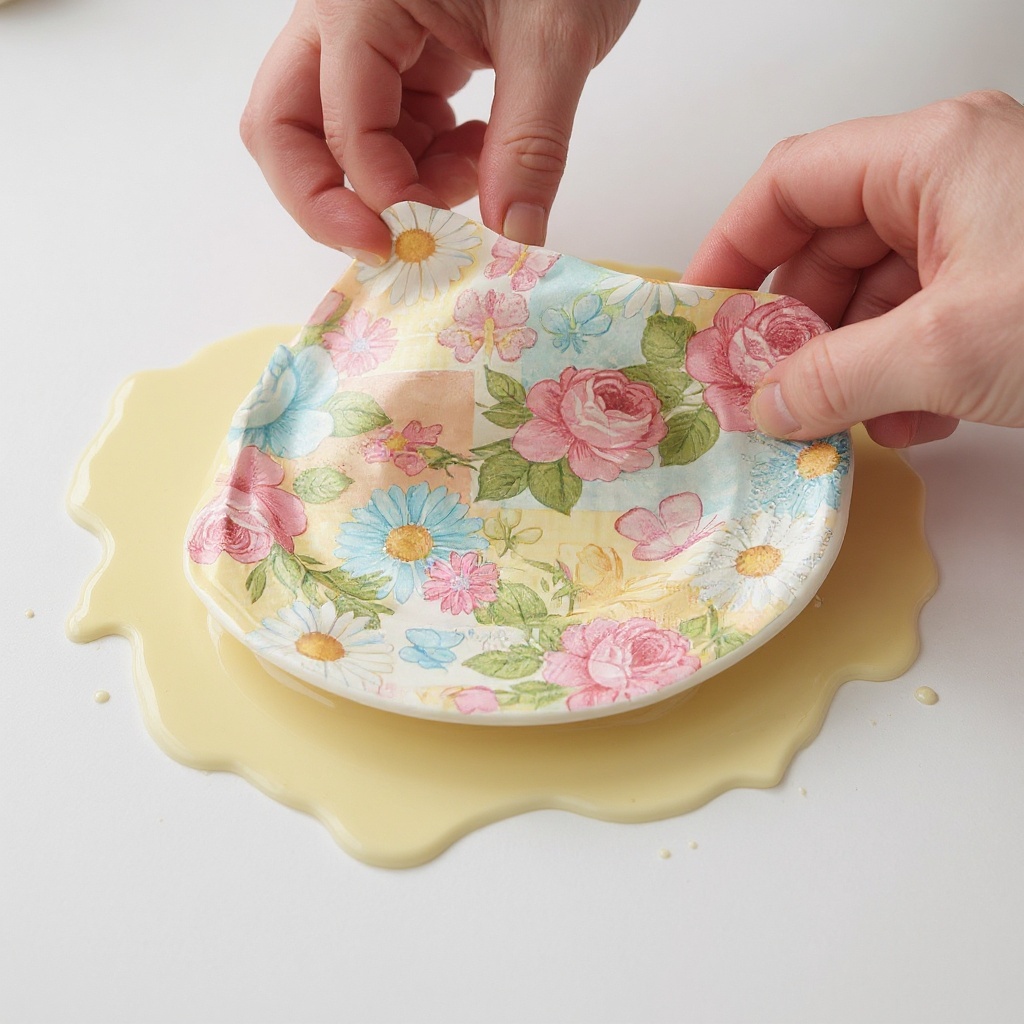
Select your decorative paper napkin and carefully cut out the desired design or section. For intricate designs, use sharp scissors to get close to the edges, or for a more organic look, you can tear the napkin carefully around the motif.
- 2
Gently peel apart the layers of the paper napkin, keeping only the top printed layer. Most 3-ply napkins have a white or plain backing that needs to be removed; be very delicate as this printed layer is fragile.
- 3
Prepare your surface by ensuring it is clean, dry, and free of dust or grease. For porous surfaces like unfinished wood, you might want to apply a base coat of paint or a sealant first and let it dry completely.
- 4
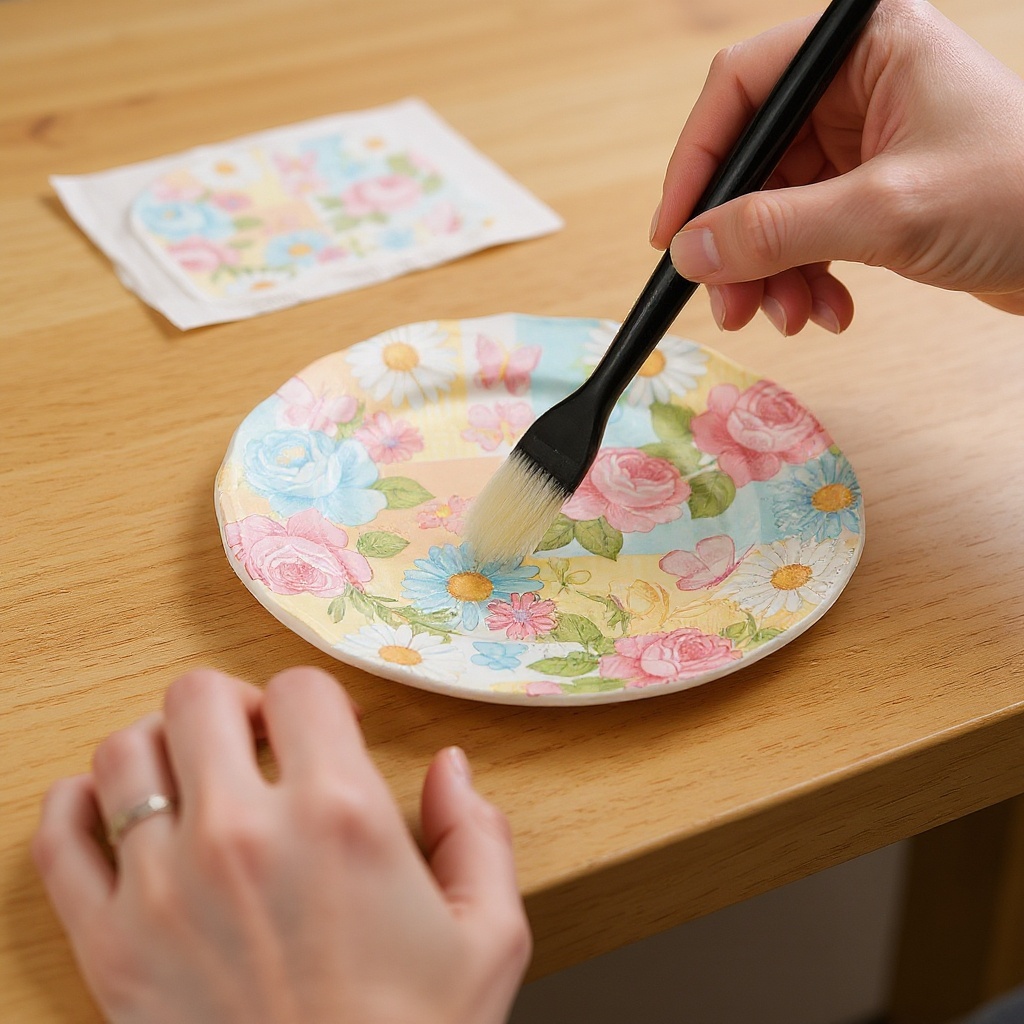
Apply a thin, even coat of Mod Podge to the area of your surface where you want to place the napkin design. Work in small sections so the Mod Podge doesn't dry before you apply the napkin.
- 5
Carefully position the single-ply napkin design onto the wet Mod Podge, starting from one edge and gently lowering it down. This helps to minimize air bubbles and wrinkles from the outset.
- 6
Using your fingers or a soft brush, lightly smooth out any wrinkles or air bubbles, working from the center outwards. Be extremely gentle to avoid tearing the delicate napkin; a light patting motion is often best.
- 7
Apply another thin, even coat of Mod Podge over the entire napkin design, sealing it to the surface. This layer also acts as a protective barrier and helps to blend the napkin into the surface.
- 8
Allow the Mod Podge to dry completely according to the product's instructions (usually 15-20 minutes). It will turn from milky white to clear as it dries.
- 9
Once the first layer of Mod Podge is completely dry, assess the smoothness of your design. If there are any small imperfections or areas that need more adhesion, you can gently sand them down with very fine-grit sandpaper.
- 10
Apply a second, and if desired, a third coat of Mod Podge over the entire piece for extra durability and a finished look. Ensure each coat is thin and even, allowing ample drying time between applications.
- 11
For added protection, especially on items that will be handled frequently or exposed to moisture, consider applying a clear acrylic sealant spray once the final Mod Podge coat is completely dry. Follow the sealant manufacturer's instructions carefully.
- 12
Clean your brushes and any Mod Podge spills immediately with water before the Mod Podge dries, as it becomes water-resistant once cured.
Tips & Troubleshooting
- 1If you encounter stubborn wrinkles, gently dab them with a slightly damp cloth after the first Mod Podge layer has dried a bit, but be very careful not to tear the delicate napkin. Sometimes, a very light touch with a fingertip can also coax out small bubbles.
- 2Experiment with different types of surfaces! Wood, glass, terra cotta, and even fabric can be decoupaged with the right preparation and sealant. For fabric, ensure you use a fabric-specific Mod Podge or a standard one and seal it with a fabric sealant for washability.
- 3For a more professional finish on glass or ceramic, ensure the surface is thoroughly cleaned and free of grease before applying Mod Podge. A quick wipe with rubbing alcohol can help remove any residue and ensure optimal adhesion.
- 4You can layer multiple napkin designs or combine them with paint for a more complex and personalized artwork. Try painting a base coat on your surface before applying the napkin for a completely custom look.
- 5Store your decoupaged items in a dry place away from direct sunlight to preserve the colors and the integrity of the Mod Podge. Direct sunlight can cause fading and can weaken the adhesive over time.
- 6When working with very thin or delicate napkins, consider applying a very thin layer of Mod Podge to the surface first, then carefully lay the napkin on top, and immediately follow with another thin layer of Mod Podge over the napkin. This 'sandwich' method can help prevent tearing.
- 7Don't be afraid to tear the napkin edges instead of cutting for a softer, more blended look, especially when covering the entire surface of an object. This technique can create a beautiful, seamless finish.
- 8For a glossy finish, choose a gloss Mod Podge and apply multiple thin coats. For a more matte, natural look, opt for matte Mod Podge. You can also use a clear acrylic sealer spray in either a matte or gloss finish for added protection.
Related Activities You Might Enjoy
Frequently Asked Questions
What kind of napkins are best for decoupage?
3-ply decorative paper napkins are ideal for decoupage. They are strong enough to handle the Mod Podge and peeling process while still being thin enough to conform to surfaces without looking bulky. The 3-ply construction means you'll separate them to use only the single printed layer, which is thin and pliable. Avoid 2-ply napkins as they can be too thin and prone to tearing, and thicker napkins or tissues will create a less smooth finish. Look for napkins with vibrant, clear designs that will stand out on your chosen surface.
Can I decoupage on fabric with napkins?
Yes, you can decoupage on fabric with napkins! For the best results and durability, it's recommended to use a fabric-specific Mod Podge formula, which is designed to remain flexible after drying and withstand washing. Alternatively, a standard Mod Podge can be used, but ensure the fabric is pre-washed and dried without fabric softener. After decoupaging, seal the finished project with a fabric sealant for washability and added protection against wear and tear. This opens up a world of possibilities for customizing tote bags, pillows, and clothing.
How do I avoid wrinkles when decoupaging napkins?
Avoiding wrinkles requires a gentle touch and careful application. Apply Mod Podge thinly and evenly to the surface, working in small sections so it doesn't dry too quickly. Carefully lay the single-ply napkin design onto the wet glue, starting from one edge and gently lowering it down to minimize initial air trapping. Then, gently smooth from the center outwards with your fingers or a soft brush, using a light patting motion rather than rubbing. Work slowly and deliberately, and don't be afraid to lift and reposition the napkin slightly if needed before the Mod Podge sets.
What is the best sealant for decoupage napkins?
Mod Podge itself acts as both the glue and sealant for decoupage projects. For most decorative items that won't be heavily handled or exposed to moisture, a few coats of Mod Podge (matte or gloss, depending on your desired finish) are sufficient. For added protection, especially on items that will be handled frequently, washed, or exposed to moisture, you can apply a clear acrylic sealant spray over the fully dried Mod Podge. Look for sealants that are non-yellowing and suitable for your specific surface material (e.g., glass, wood, fabric).
How long does Mod Podge take to dry?
Mod Podge typically takes about 15-20 minutes to dry to the touch, during which time it will change from a milky white to a clear finish. However, this is just the initial drying time. For the Mod Podge to fully cure and achieve its maximum durability and water resistance, it usually requires 24-72 hours. It's important to allow adequate drying time between coats and before using or cleaning your decoupaged item to ensure a strong and lasting bond. Avoid exposing the item to moisture or heavy use until it has fully cured.
Can I decoupage over existing paint or designs?
Yes, you can decoupage over existing paint or designs, provided the surface is properly prepared. If you're decoupaging over painted surfaces, ensure the paint is fully dry and in good condition. For a smoother finish and better adhesion, you might want to lightly sand the painted surface to create a slight 'tooth' for the Mod Podge to grip. If decoupaging over a busy or dark design, consider applying a base coat of white or light-colored paint first to make your napkin design pop and prevent the underlying pattern from showing through.
What Next?
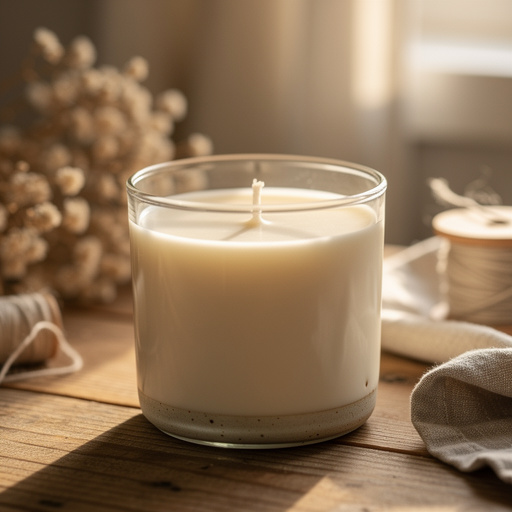
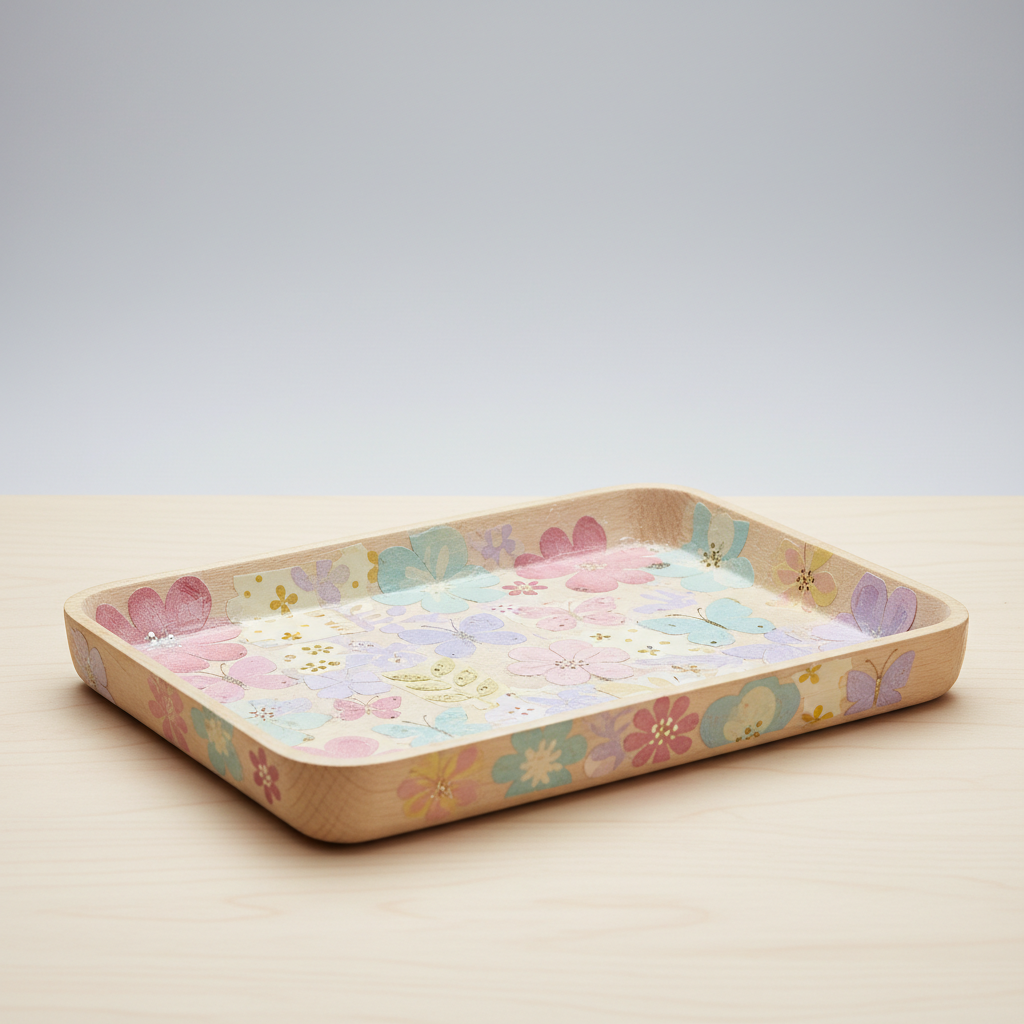
Once your decoupage masterpiece is complete and fully dry, you've created a truly unique piece! Consider displaying your newly adorned items proudly in your home, perhaps a decoupaged tray on your coffee table or a decorated jar as a charming vase. For variations, try layering different napkin designs for a more complex look, or combine decoupage with acrylic paints for an even more personalized artwork. Next projects could involve tackling larger furniture pieces or exploring different types of decorative papers. Store your creations in a dry place away from direct sunlight to ensure their longevity and vibrant colors.
Free: 10 Paper Crafts Anyone Can Make in 5 Minutes
Get our beginner guide + new craft ideas weekly.
No spam. Unsubscribe anytime.
Did you complete this activity?