Free Acrylic Painting Tutorials for Beginners — Your Questions Answered (Step-by-Step Guide)
Unlock your creativity with this comprehensive guide to free acrylic painting tutorials for beginners. Learn everything you need to know to start painting today, from essential supplies to advanced color mixing and troubleshooting common mistakes.
Quick answer
To start free acrylic painting, you need basic supplies like acrylic paints (a limited palette is recommended), brushes, a palette, and canvas. This guide covers essential techniques, troubleshooting common issues like muddy colors and streaks, and provides project ideas, taking about 90-120 minutes to read and understand.
What you need
Shop on Amazon · As an Amazon Associate we earn from qualifying purchases. Links above are affiliate links — we may earn a commission at no extra cost to you.
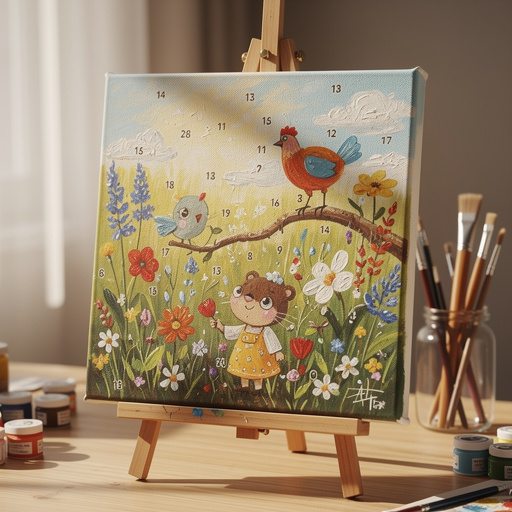
Hey there, aspiring artists! So you've been eyeing those vibrant acrylic paintings and thinking, 'I could do that!' Well, you absolutely can! This is your ultimate guide to getting started with acrylics, designed specifically for beginners who might feel a little overwhelmed. Forget those stuffy art classes; I'm here to share what I've learned through my own messy, wonderful journey. We'll dive into the nitty-gritty of acrylics – what makes them tick, the absolute must-have supplies (and what you can skip for now), how to mix colors without turning everything into a muddy mess, and crucially, how to fix those oops moments that *will* happen. Ready to ditch the screen-free time and dive into a world of color? Let's get painting!
On this page
Step-by-Step Instructions
- 1
Step 1: Set Up Your Creative Haven. Protect your workspace by laying down newspaper or a drop cloth, covering an area of at least 3x4 feet. Put on your apron or old t-shirt, and arrange your water cup, paper towels, and paints within easy reach so you don't have to interrupt your flow.
- 2
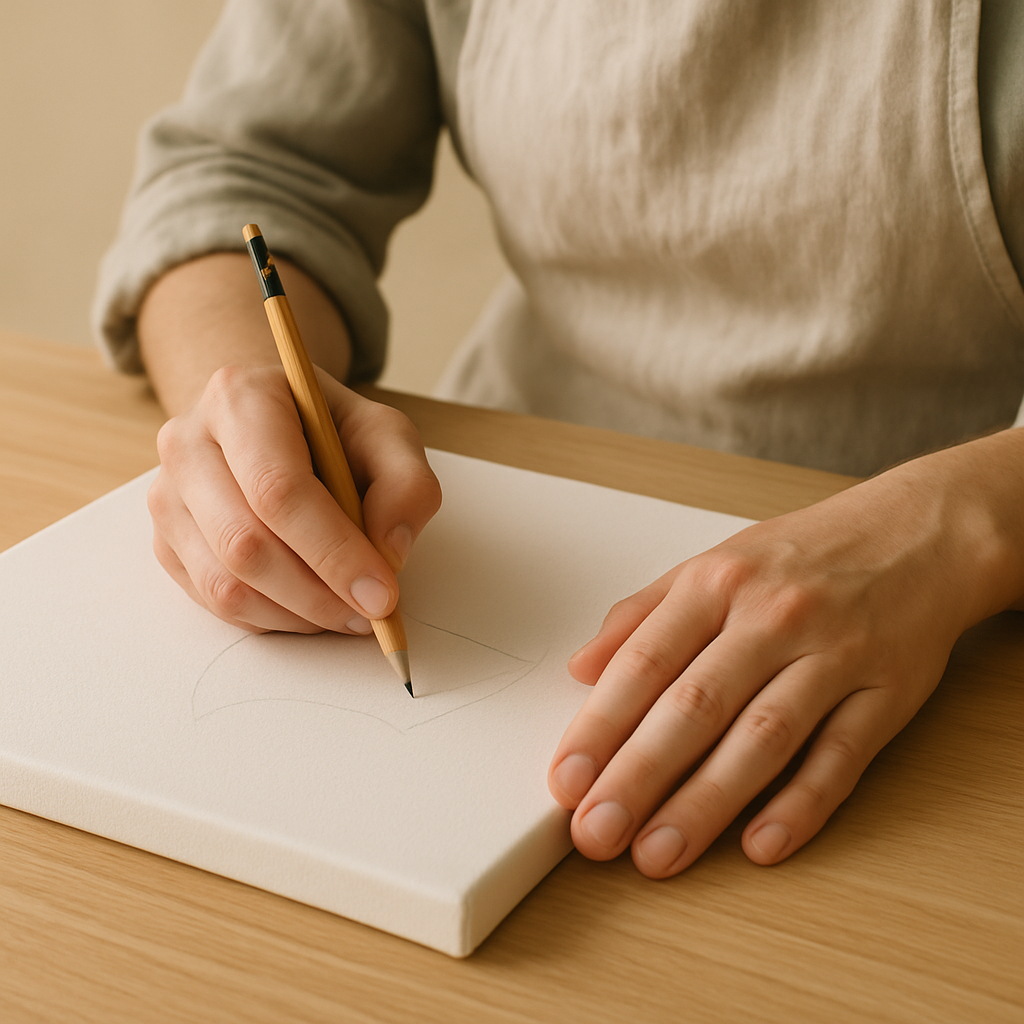
Step 2: Lightly Sketch Your Vision. Using your HB pencil, lightly sketch your design onto the canvas, focusing on simple shapes like a horizon line for a landscape or a basic outline of a fruit. Aim for lines that are visible but don't press too hard, as deep indentations can be hard to paint over and may show through lighter paint layers.
- 3
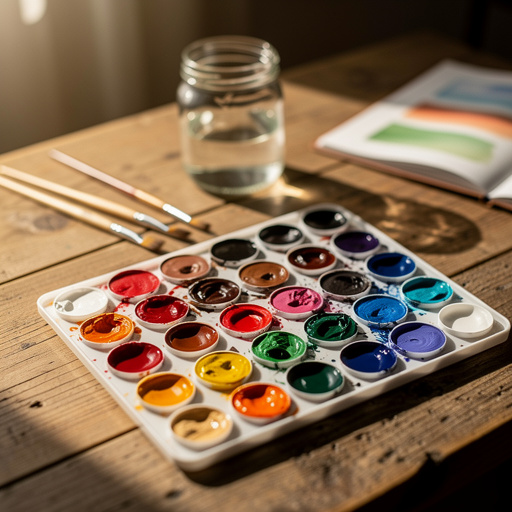
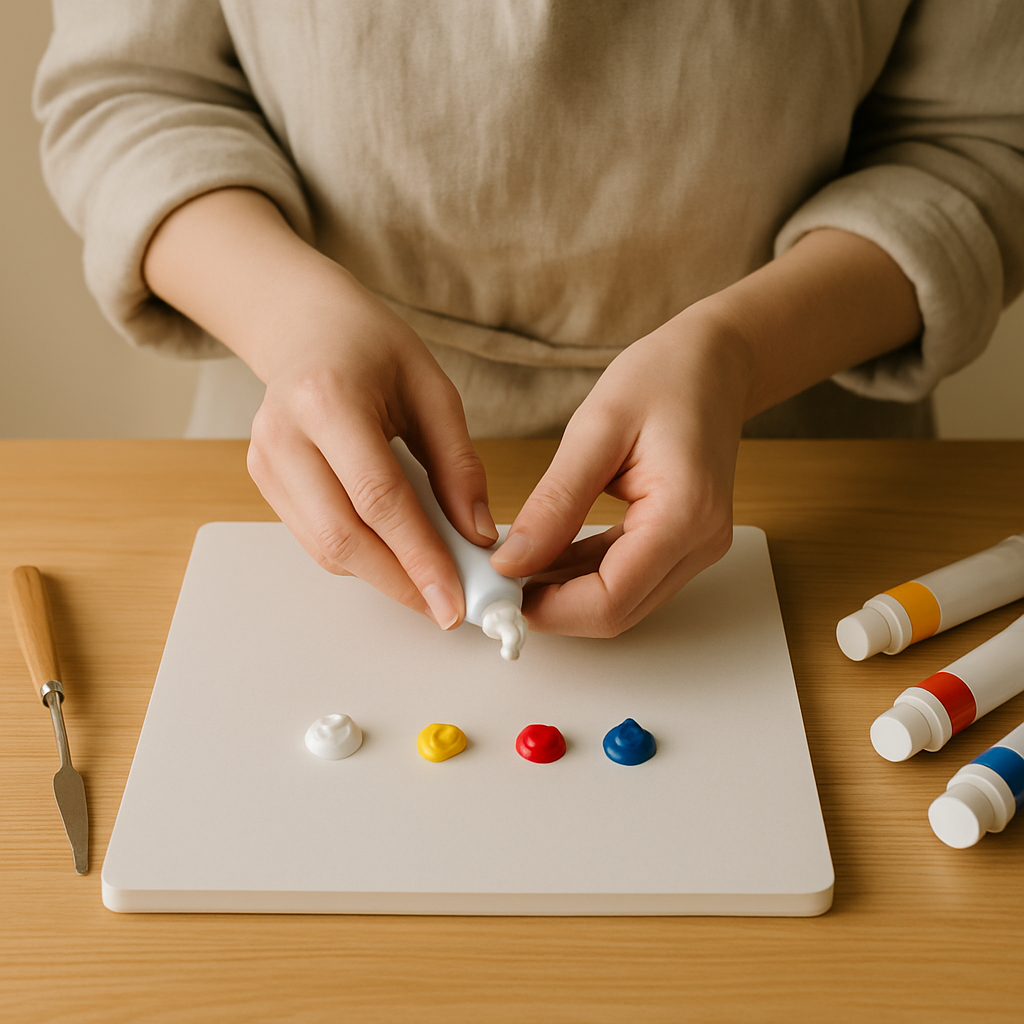
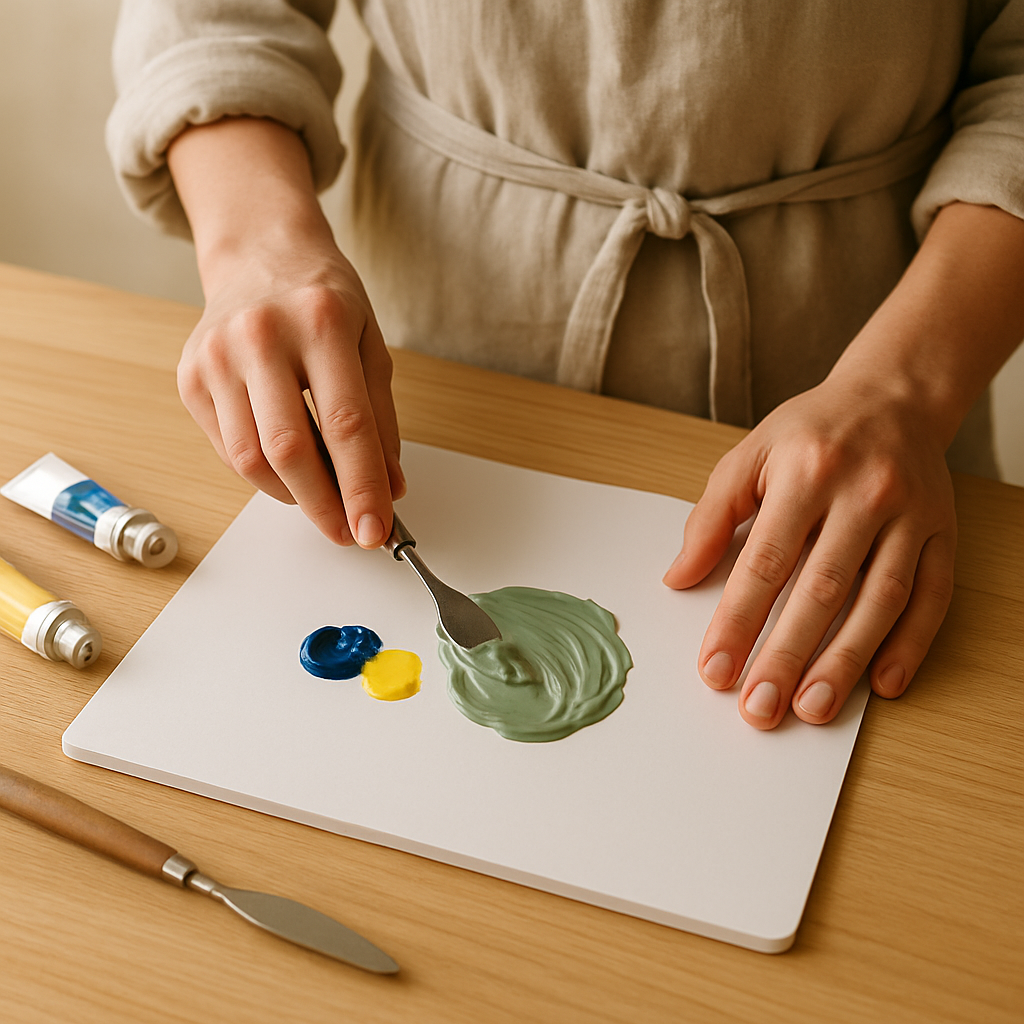
Step 3: Prepare Your Palette with a Limited Palette. Squeeze out small amounts (about a 1-inch or 2-3cm dollop) of your primary colors (yellow, red, blue) and white onto your palette. For example, to mix a sky, start with a generous amount of white and a small amount of blue. If your colors look too intense or vibrant, you can tone them down by adding a tiny touch of their complementary color (e.g., a speck of green to red) or more white.
- 4
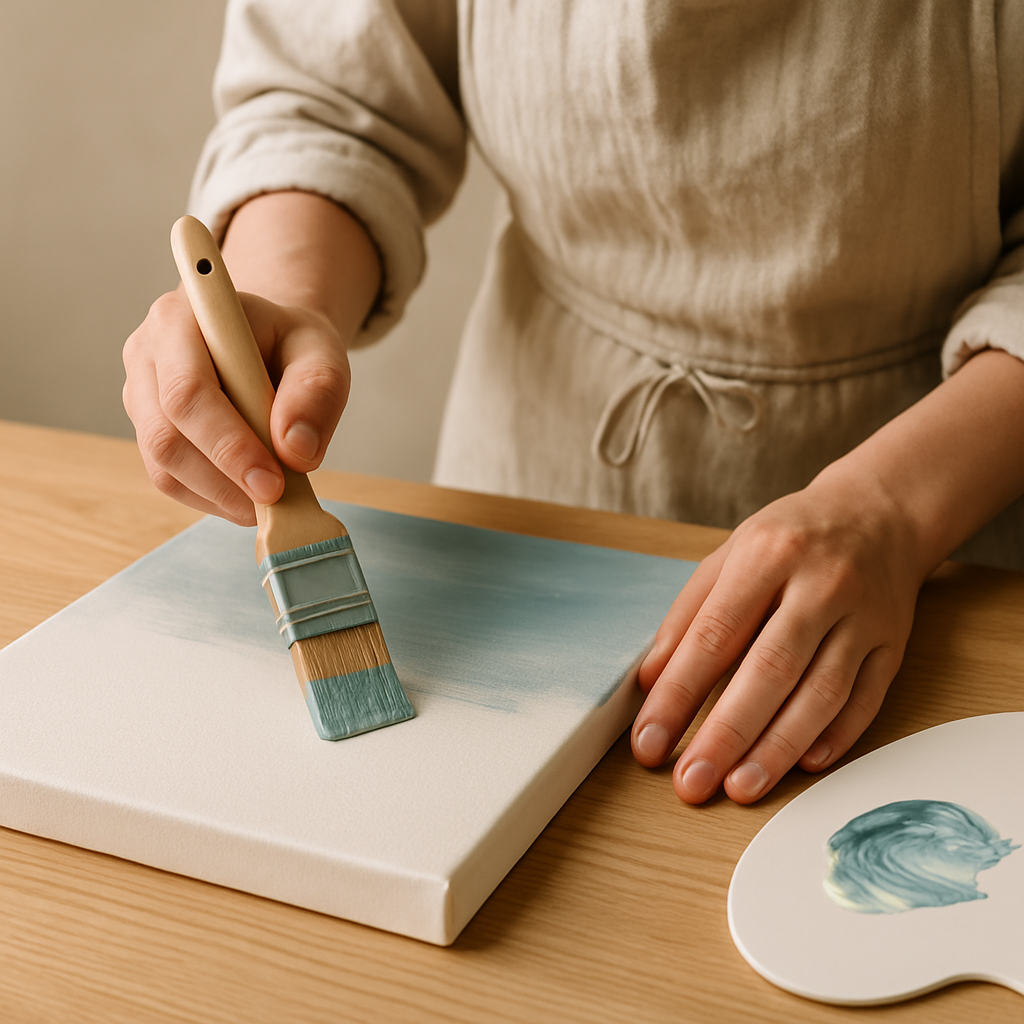
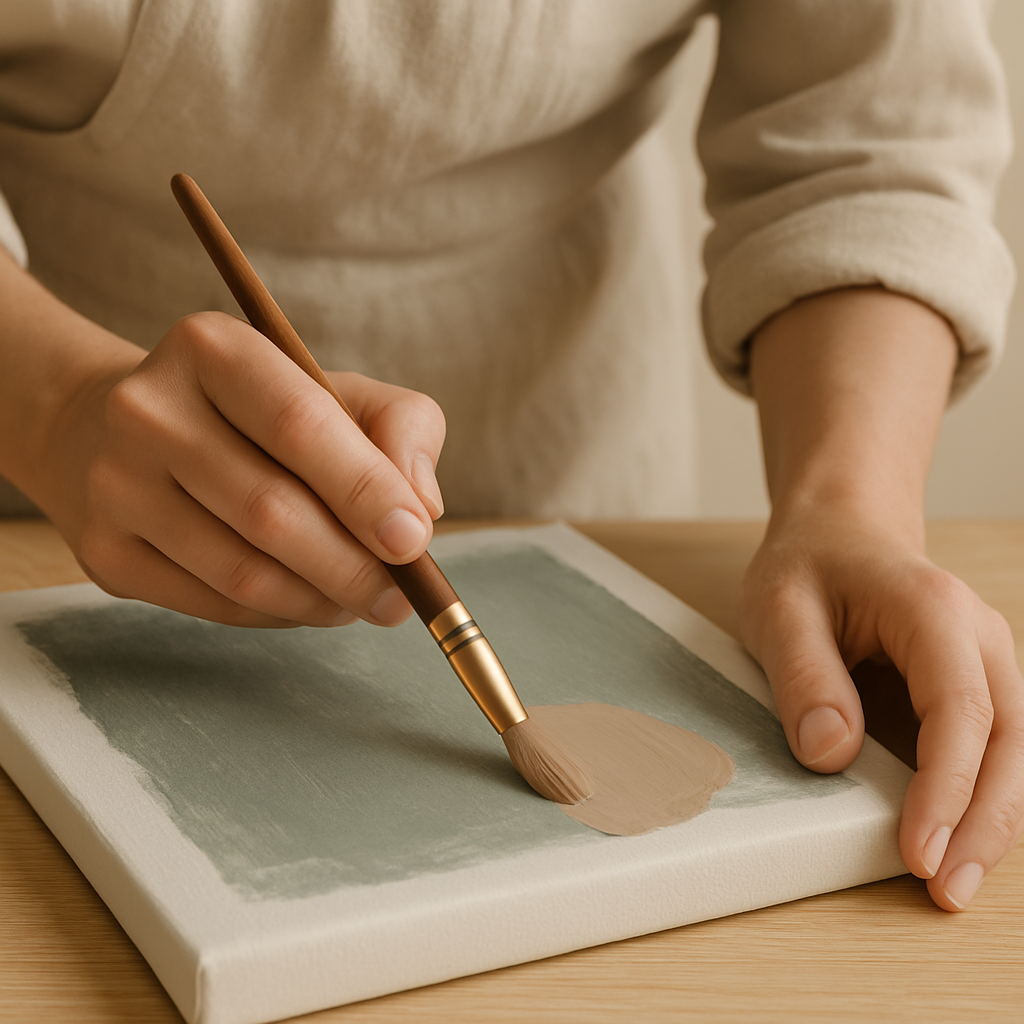
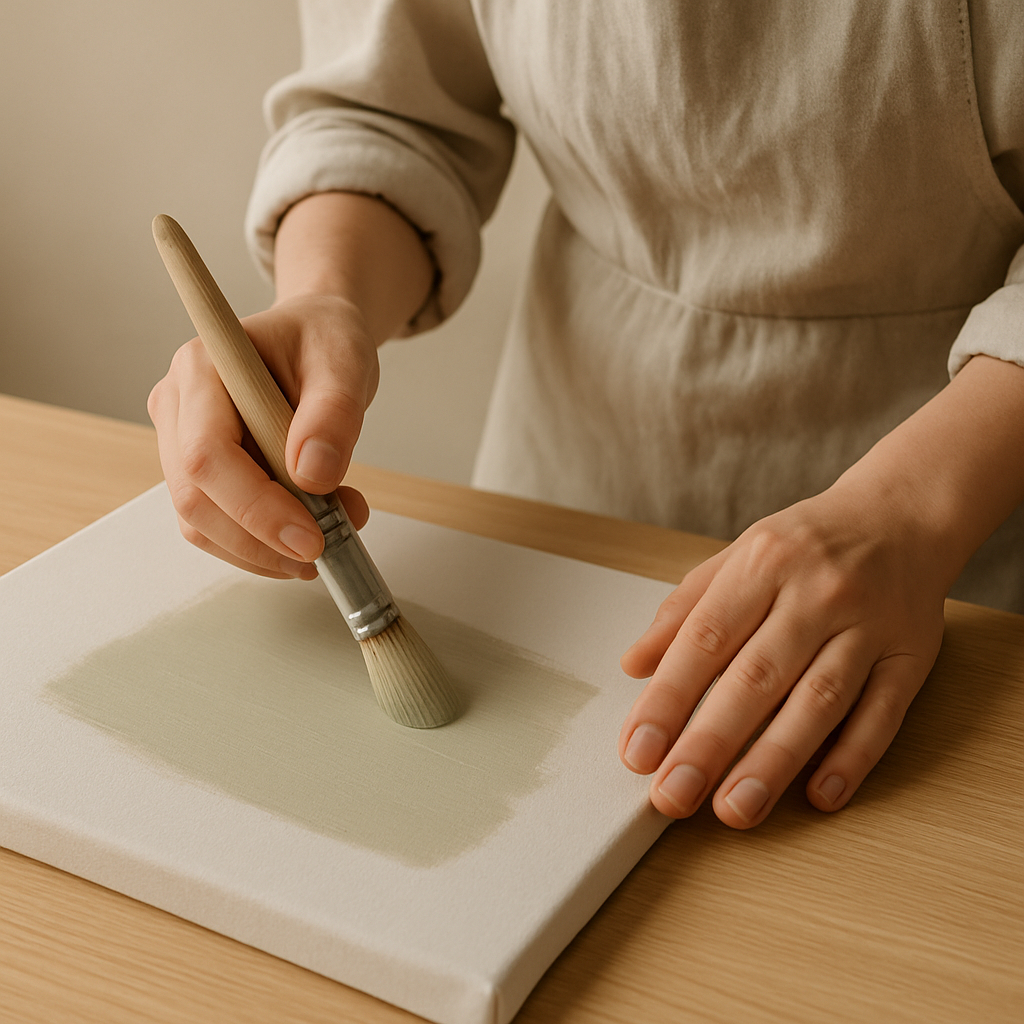
Step 4: Lay Down the Background with Smooth Strokes. Grab your 1-inch flat brush and apply your background color using smooth, even strokes, working from top to bottom for a sky or across for a landscape. If you're painting a sky, gently blend your colors while wet for a softer transition, using a clean, slightly damp brush. Let this first layer dry completely, which usually takes about 5-15 minutes depending on humidity.
- 5
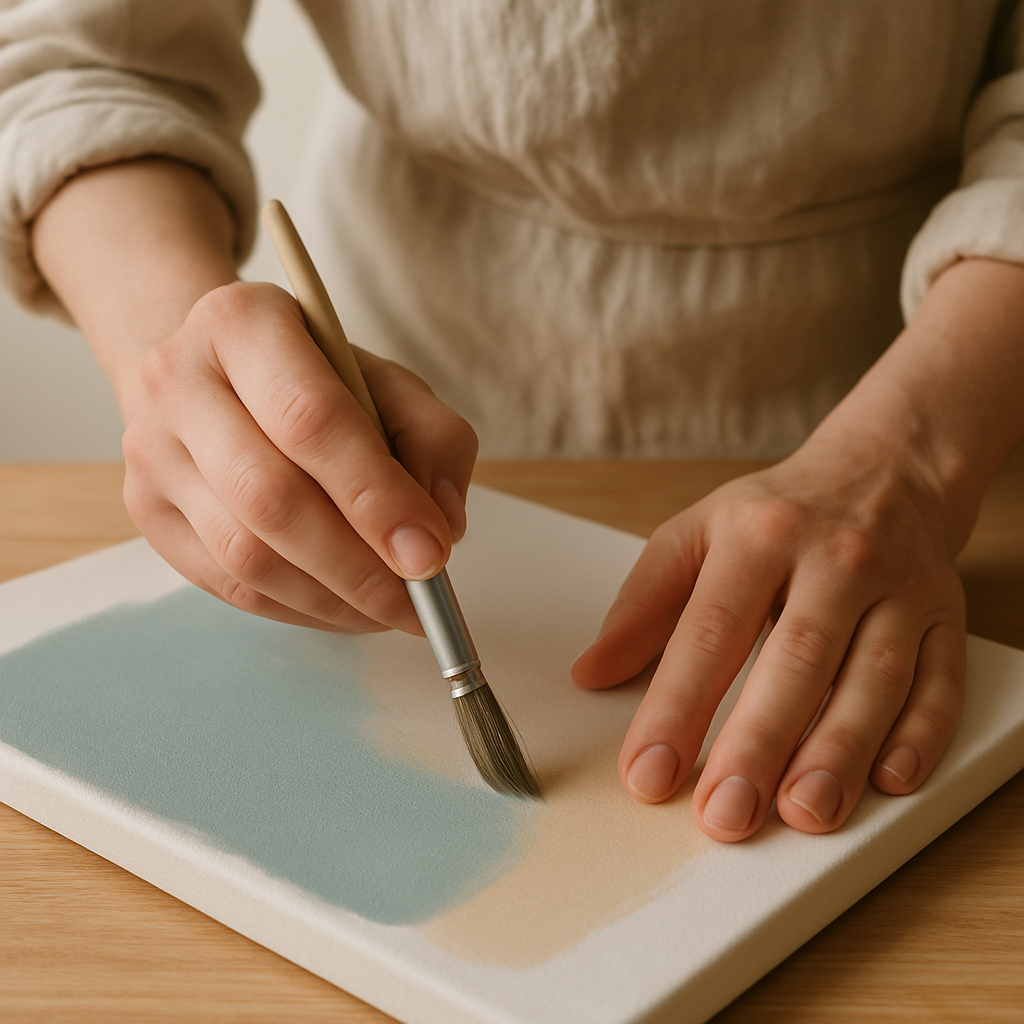
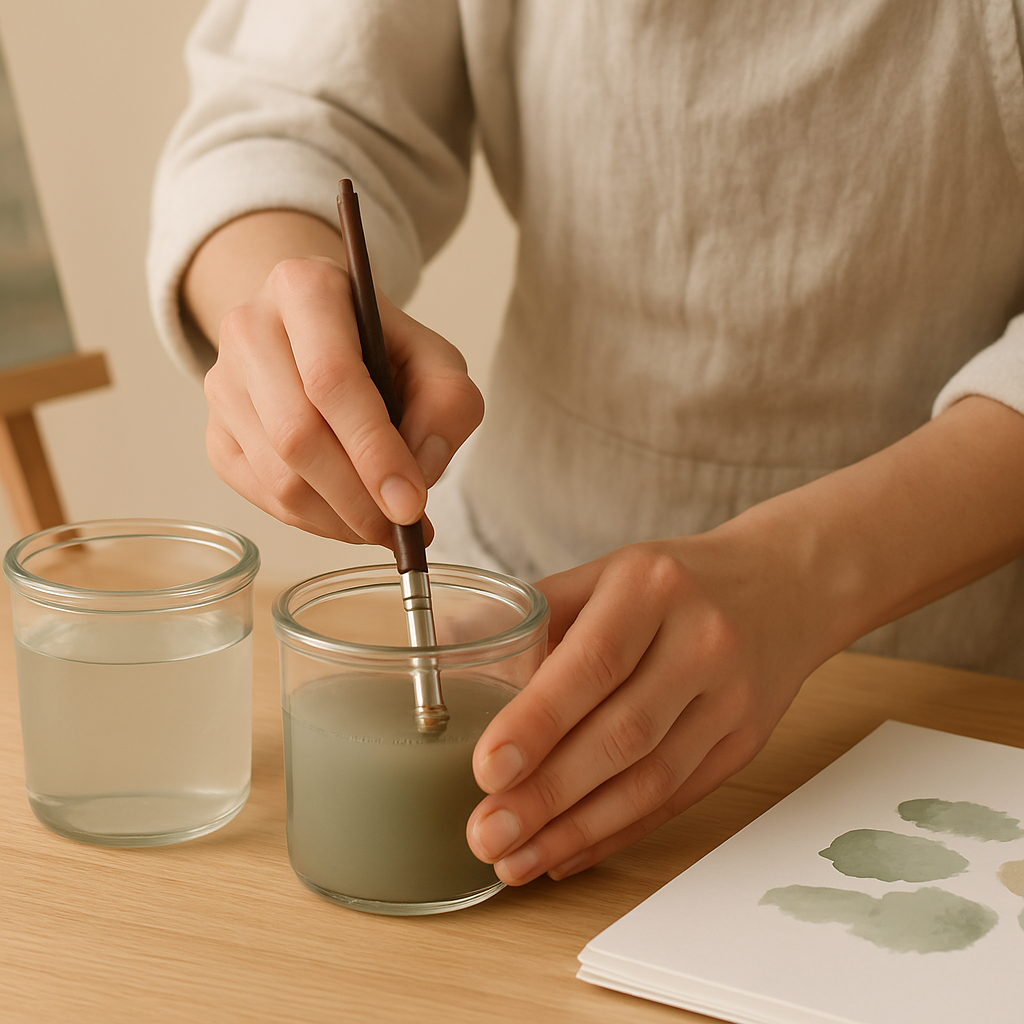
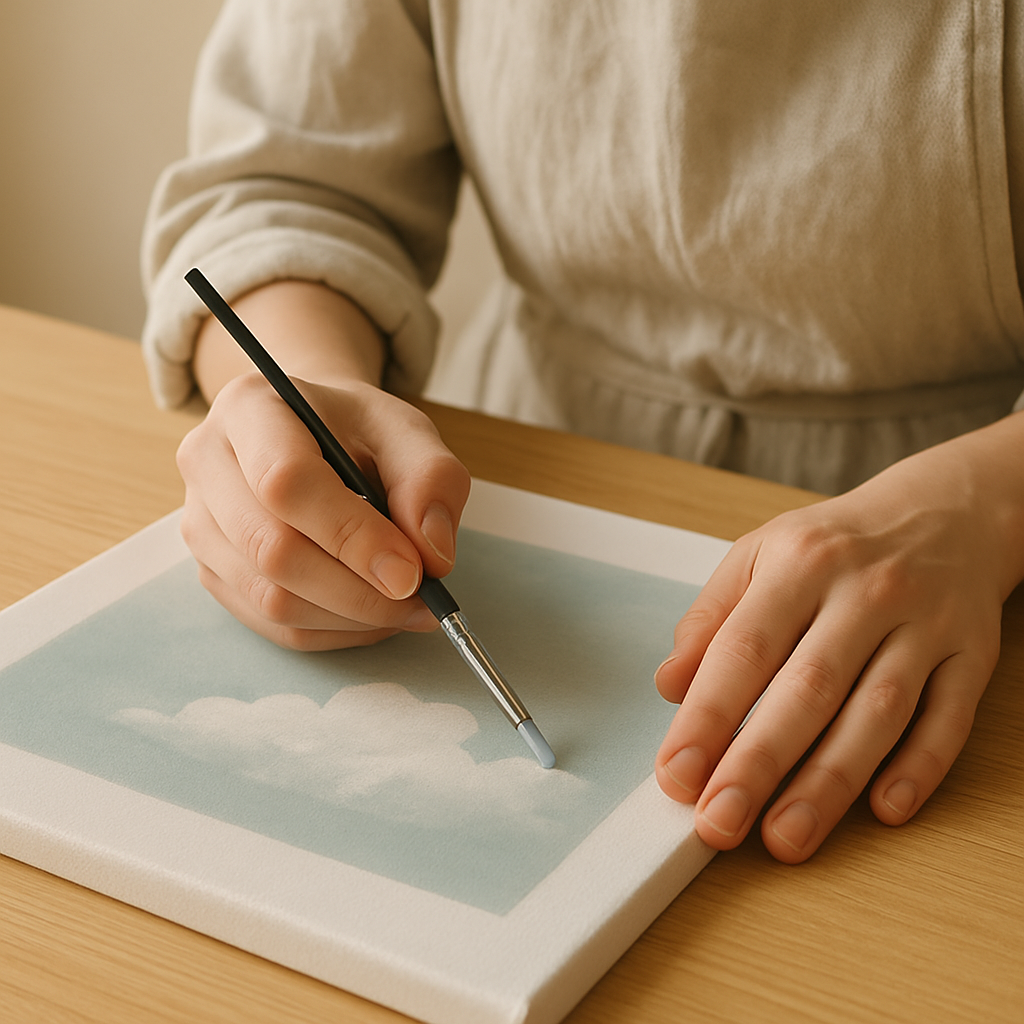
Step 5: Effortless Blending for Soft Transitions. To achieve smooth gradients, like in a sunset or soft clouds, work quickly while the paint is still wet. Use a clean, slightly damp brush (rinse and gently blot it) to softly feather the edges between two adjacent colors. Don't scrub; a light touch is key, and if you overwork it, the colors can turn muddy.
- 6
Step 6: Introduce Mid-Ground Elements with Direction. Once your background is dry to the touch, use your size 6 round brush to paint the next layer of elements, such as hills, distant trees, or buildings. Apply the paint in the direction of the form – think horizontal strokes for hills, vertical for tree trunks – to add a sense of depth and realism.
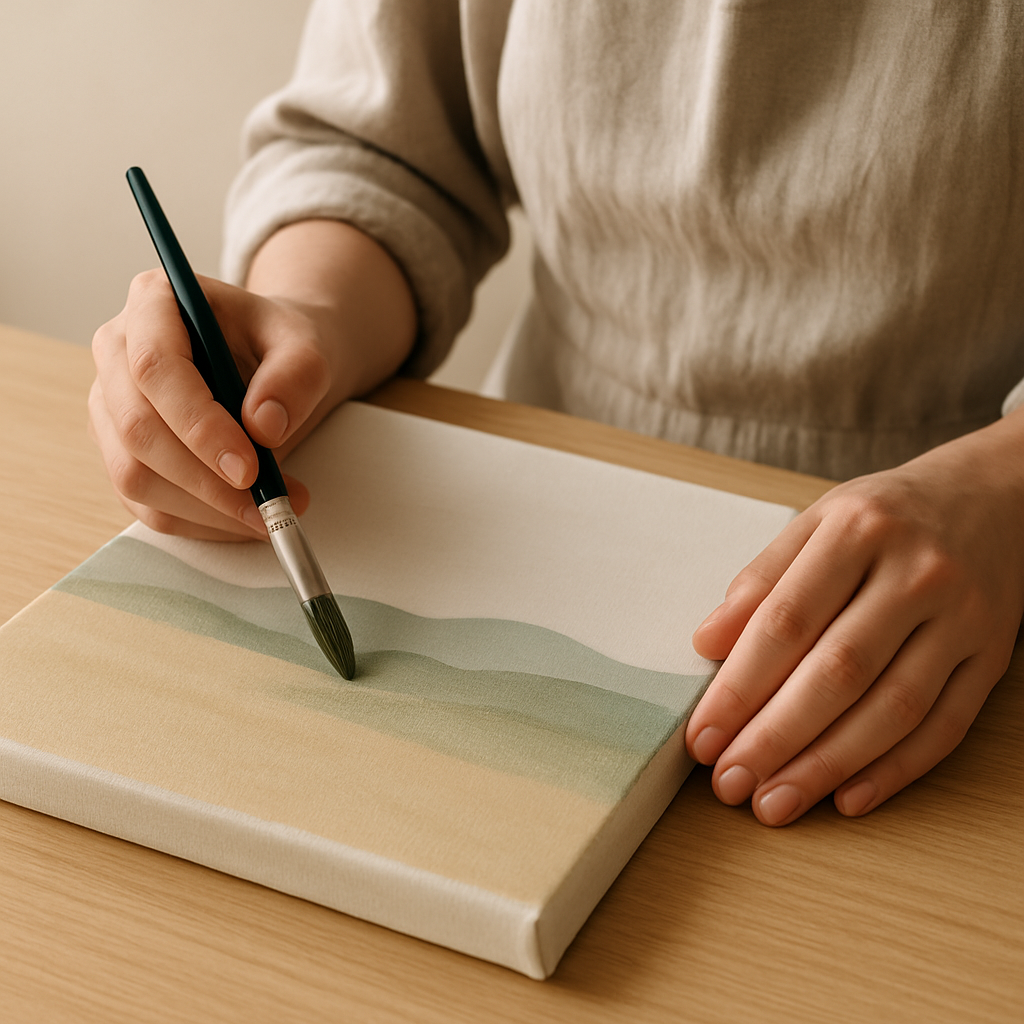
- 7
Step 7: The Magic of Layering for Corrections and Depth. Acrylics are fantastic for building up your painting; you can paint opaque colors directly over dry layers to correct mistakes or add details. For example, if you painted a dark tree trunk and want a lighter one, let the dark layer dry completely, then paint the lighter one on top. Always ensure each layer is completely dry before applying the next to prevent lifting or smudging.
- 8
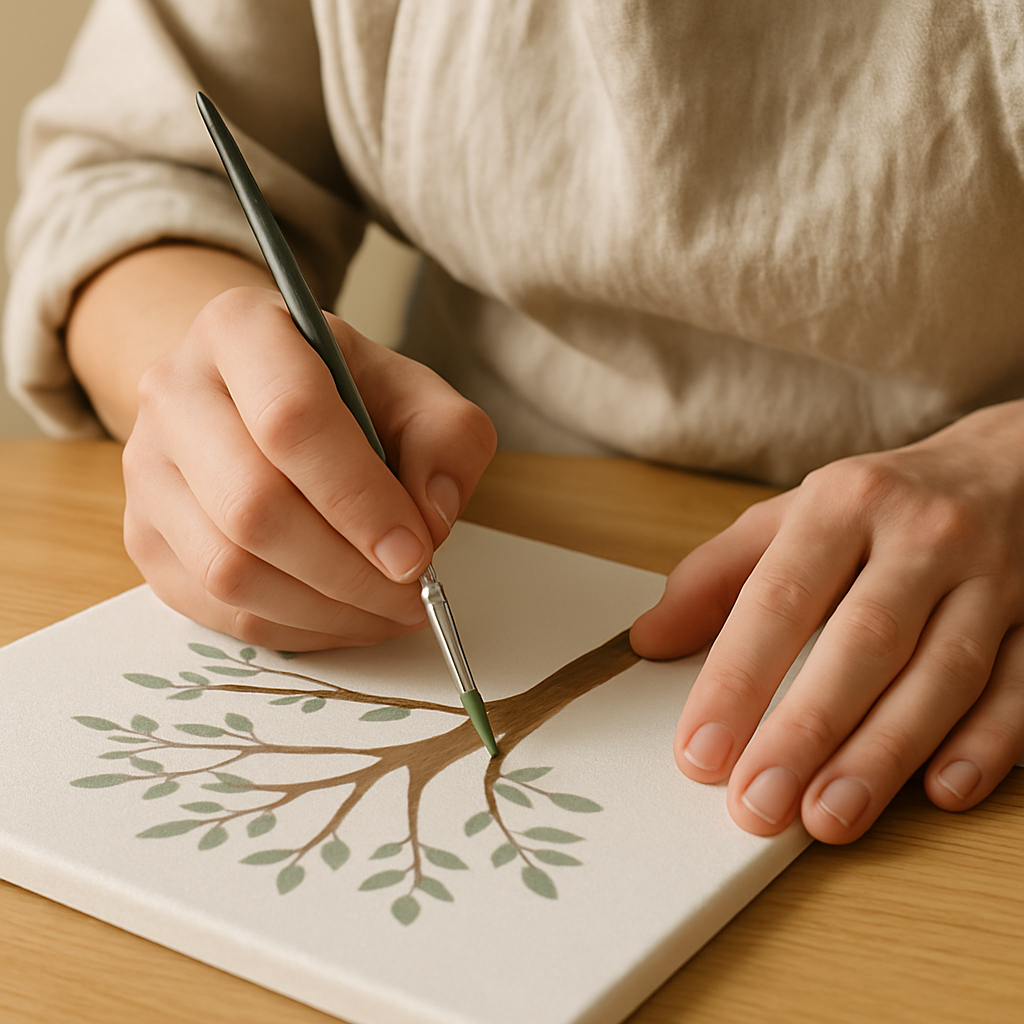
Step 8: Fine-Tuning with Precision Details. Switch to your smallest brush, the size 2 round, for all the intricate details like leaves on a tree, highlights on a piece of fruit, or fine lines in a building. Apply paint with precision and control, and if the paint feels too thick and draggy, add just a tiny drop of water to improve flow.
- 9
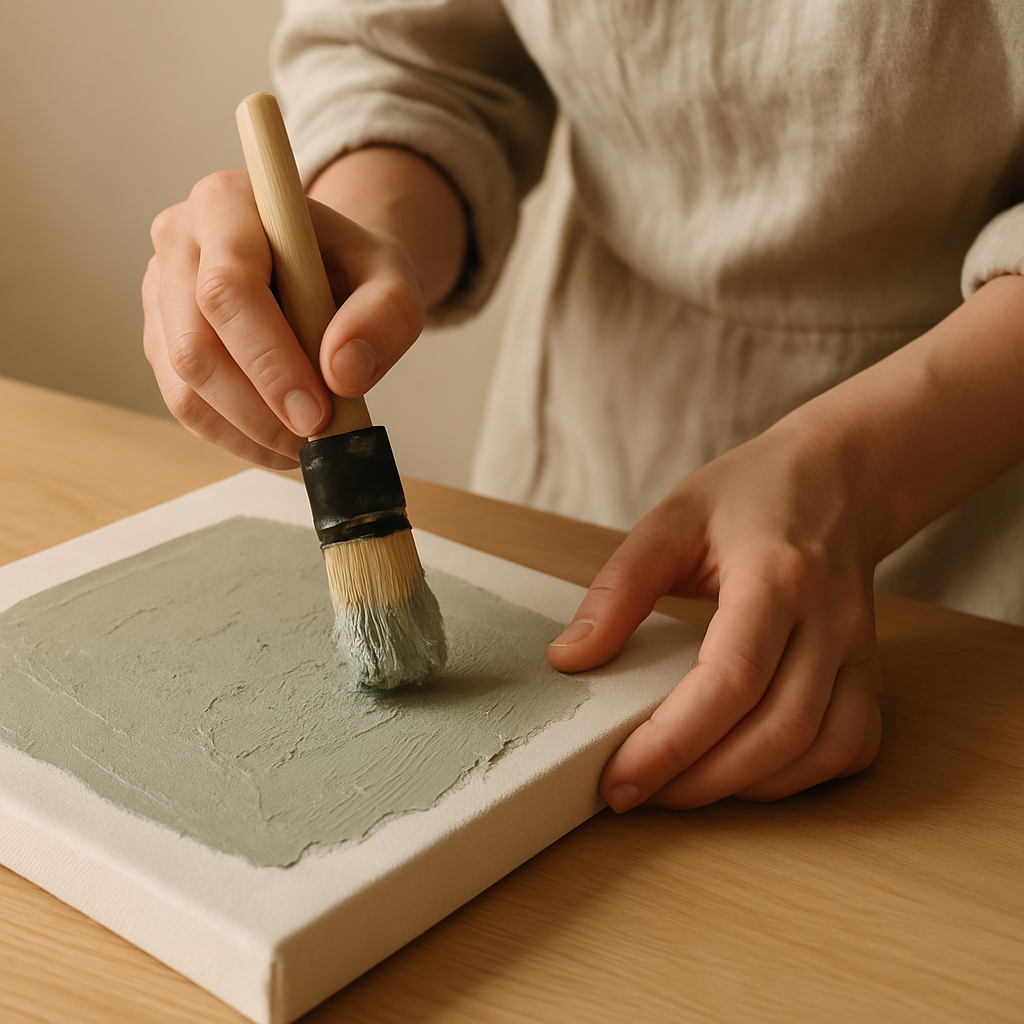
Step 9: Adding Texture and Body. Want your paint to have more presence? You can apply the paint thickly straight from the tube for an impasto effect, or use dabbing motions with your brush instead of smooth strokes. While mediums like gel medium can add body and texture, for now, focus on how the paint itself behaves when applied thickly; you can experiment with gel medium once you're comfortable.
- 10
Step 10: Mastering Color Mixing: The Limited Palette Approach. To keep your colors vibrant and avoid that dreaded muddy look, stick to your limited palette: Cadmium Yellow (hue), Alizarin Crimson (hue), and Ultramarine Blue, plus Titanium White. Mix yellow and blue for greens, red and yellow for oranges, and red and blue for purples. Always mix your colors on the palette to maintain color purity and control.
- 11
Step 11: Troubleshooting: Muddy Colors. If your colors are looking dull, it's often because you're overmixing on the canvas or using too much of a complementary color. My best advice? Clean your brush thoroughly between colors – a second rinse cup helps! Mix your colors on the palette before applying them to the canvas. If colors are still dull, double-check your pigments; try a different brand's primary colors if needed.
- 12
Step 12: Troubleshooting: Streaky Application. Streaks usually mean your paint is drying too fast on the canvas or your brush is too stiff. Try working a bit faster, or ensure your brush is clean and only slightly damp (not soaking wet). Using softer synthetic brushes and applying consistent, smooth strokes will help eliminate those unwanted lines.
- 13
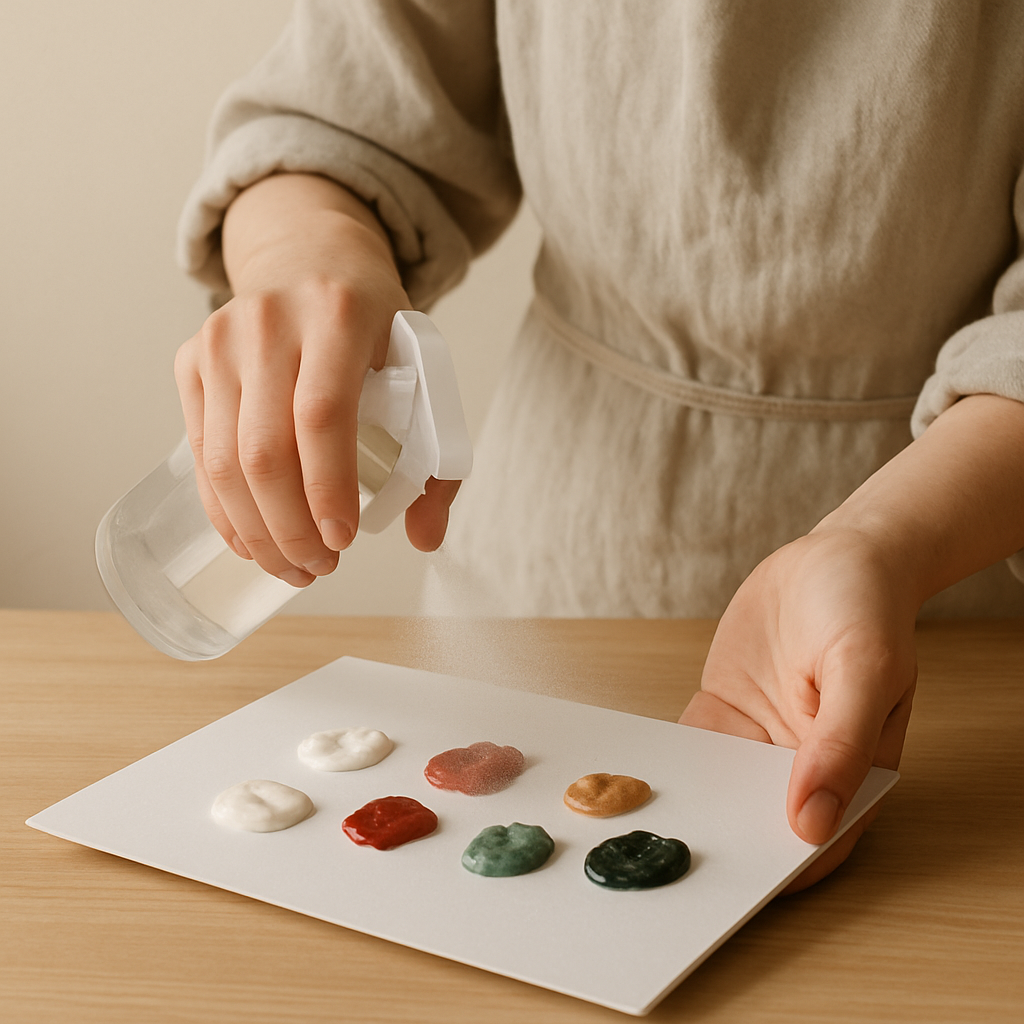
Step 13: Troubleshooting: Paint Drying Too Fast. This is the classic acrylic challenge! Keep that spray bottle handy and give your palette a light mist every 10-15 minutes to keep paints workable. You can also work in smaller sections of your painting at a time. While retarder mediums exist, for now, mastering quick work and misting is your best bet.
- 14
Step 14: Bringing it to Life with Highlights. Once your main painting is complete, step back and identify where light would naturally hit your subject. Use lighter versions of your colors (mix with white) or pure white to add highlights, applying these sparingly to edges of objects, the tops of curves, or where reflections would be brightest.
- 15
Step 15: Final Polish and Refinements. Take a good look at your artwork. Does anything need a little extra love? Maybe a shadow needs to be darker, an edge needs to be crisper, or a highlight could be brighter. Use your smallest brush (size 2 round) for these final, precise adjustments.
- 16
Step 16: Letting it Rest and Protecting Your Work. Allow your masterpiece to dry completely for at least 24-48 hours. Once bone dry, you can apply a varnish (gloss, satin, or matte) using a large, soft brush. Apply in thin, even coats, letting each coat dry before applying the next, to protect your painting and give it a unified sheen.
Tips & Troubleshooting
- 1Your Essential, Minimalist Acrylic Kit. Seriously, you don't need a million colors to start! Begin with just a red, a yellow, a blue, plus black and white. You'd be amazed at what you can mix. Pair this with a medium flat brush and a small round brush. This keeps your costs way down and makes color mixing way less intimidating for beginners.
- 2Embrace the 'Oops!' Moments: Mistake-Proof Acrylic Painting. The beauty of acrylics? They're super forgiving! Made a mistake? Just let it dry completely and paint right over it. If you get streaks, try adding a tiny bit more water to your paint or using a softer brush. Muddy colors? It's almost always overmixing on the canvas or not cleaning your brush well enough between colors. Mix on the palette!
- 3Surface Savvy: Canvas & Beyond. Most beginner canvases come pre-primed with gesso, which is perfect – you can paint right on them! But you can also paint on wood panels, thick watercolor paper (300gsm or heavier), or even sturdy cardboard. Just make sure whatever surface you choose is clean, dry, and ideally primed with gesso if it's not already.
- 4Adapting for Different Ages and Skill Levels. For younger artists (say, 4-7 years old), simplify the process. Pre-cut shapes for them to paint around, or focus on color exploration with larger brushes. For teens and adults, you can encourage more complex compositions, detailed techniques, and exploring different brushwork. The core principles remain the same, but the complexity can be scaled.
- 5Color Mixing Quick Guide: Beyond the Basics. Remember warm colors (reds, yellows, oranges) tend to pop forward, while cool colors (blues, greens, purples) recede. Mixing a color with its direct opposite on the color wheel (its complement) will neutralize it, creating earthy browns and grays. Always mix on your palette to keep your colors clean and vibrant.
Related Activities You Might Enjoy
Frequently Asked Questions
What are the essential acrylic paint properties beginners need to know?
Acrylics are water-based, which means you clean up with water! The big thing to know is they dry FAST. This is great because you can layer colors quickly without smudging, and you can easily paint over mistakes once dry. However, it also means they can dry on your palette if you're not careful. Blending requires working quickly or using a retarder, but for beginners, focusing on fast blending or layering opaque colors is key. They dry to a flexible, water-resistant finish.
What acrylic painting supplies are crucial beyond just paint and brushes?
You'll definitely need a palette for mixing – a disposable pad or even an old plate works. Have at least one water cup for rinsing brushes (two is better: one for the initial rinse, one for cleaner water). Paper towels or rags are essential for blotting brushes and wiping up spills. A spray bottle of water is a lifesaver for keeping your paints from drying out too quickly on the palette. And don't forget something to protect your clothes!
How do I troubleshoot common beginner acrylic painting problems like muddy colors or streaks?
Muddy colors usually happen when you overmix on the canvas or use too much of a complementary color. My biggest tip is to clean your brush thoroughly between colors and mix your paints on the palette. If you're getting streaks, it's likely because the paint is drying too fast or your brush is too stiff. Try adding a tiny bit of water to your paint for smoother flow, or use a softer brush and apply paint with consistent strokes. Working a little faster can also help prevent streaks.
Can you suggest a specific beginner project with a clear material list and steps?
Let's paint a simple 'Sunset Over Water'! This project is great for practicing blending and layering. You'll need: an 8x10 inch canvas, 2oz tubes of Cadmium Yellow Hue, Alizarin Crimson Hue, Ultramarine Blue, Titanium White, and a tiny bit of Black. Brushes: 1-inch flat, size 6 round, size 2 round. Palette, water cup, paper towels, spray bottle. 1. Paint the sky with a blend of yellow, crimson, and white, letting it dry. 2. Mix blue and a touch of black for the water, paint the bottom third, let it dry. 3. Softly blend the horizon line where sky meets water. 4. Use the size 2 brush to add subtle reflections of the sky colors in the water. 5. Optionally, add a dark silhouette of land or a boat using the size 6 round brush.
What Next?
Alright, you've got this! You're now armed with the knowledge to jump into the amazing world of acrylic painting. We've covered the unique quirks of acrylics, the essential gear, and how to navigate those common beginner bumps. Remember, the best way to learn is by doing. Don't be afraid to experiment, make mistakes (they're just learning opportunities!), and most importantly, have fun. I can't wait to see what incredible art you create. Share your masterpieces with us using #MyAcrylicJourney or in our community forum [Link to Forum/Community Here]!
Free: 10 Paper Crafts Anyone Can Make in 5 Minutes
Get our beginner guide + new craft ideas weekly.
No spam. Unsubscribe anytime.
Did you complete this activity?