How to Build an Epic Indoor Fort — Easy Step-by-Step Guide
Unleash your creativity and build the ultimate indoor fort! This guide provides simple steps and inspiring fort building ideas for hours of imaginative play.

Quick answer
To build an epic indoor fort, you'll need blankets, pillows, chairs, and clips, taking about 30-60 minutes. Start by gathering your materials and arranging furniture. This beginner-friendly activity has 10 steps and is perfect for families with children aged 4+.
What you need
Shop on Amazon · As an Amazon Associate we earn from qualifying purchases. Links above are affiliate links — we may earn a commission at no extra cost to you.
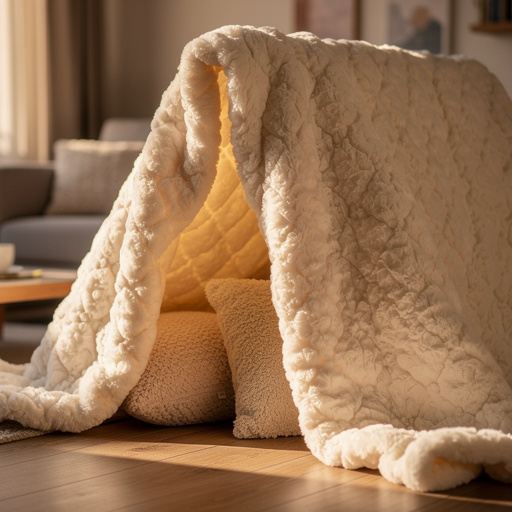
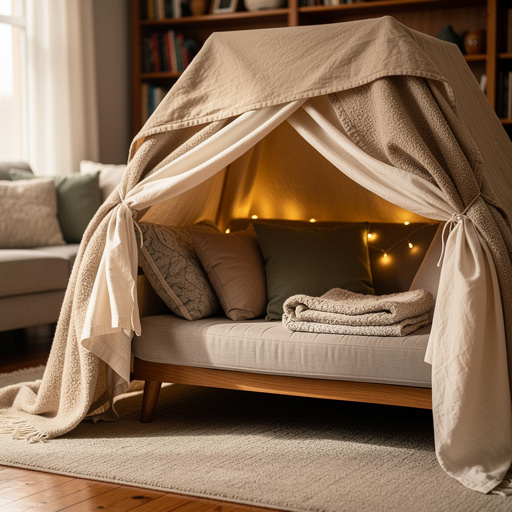
Embark on a magical adventure right in your living room with the ultimate indoor fort-building project! This isn't just about draping blankets; it's about creating a personal sanctuary, a secret hideaway, and a launchpad for boundless imagination. Perfect for rainy days, sleepovers, or just a spontaneous burst of creativity, building an indoor fort is an accessible and incredibly rewarding activity for families. It fosters teamwork, problem-solving, and provides a cozy space for reading, playing, or simply escaping into a world of make-believe. Get ready to transform your home into an epic fort!
On this page
Step-by-Step Instructions
- 1
Gather all your fort-building materials in the designated play area. Ensure you have enough space to spread out and arrange your furniture without feeling cramped. Having everything in one place beforehand will make the building process much smoother and more enjoyable for everyone involved.
- 2
Select your fort's location. A corner of a room or an area with existing furniture like a sofa can provide natural anchors and support, making your fort more stable from the outset. Clear away any fragile items or tripping hazards from the chosen space.
- 3
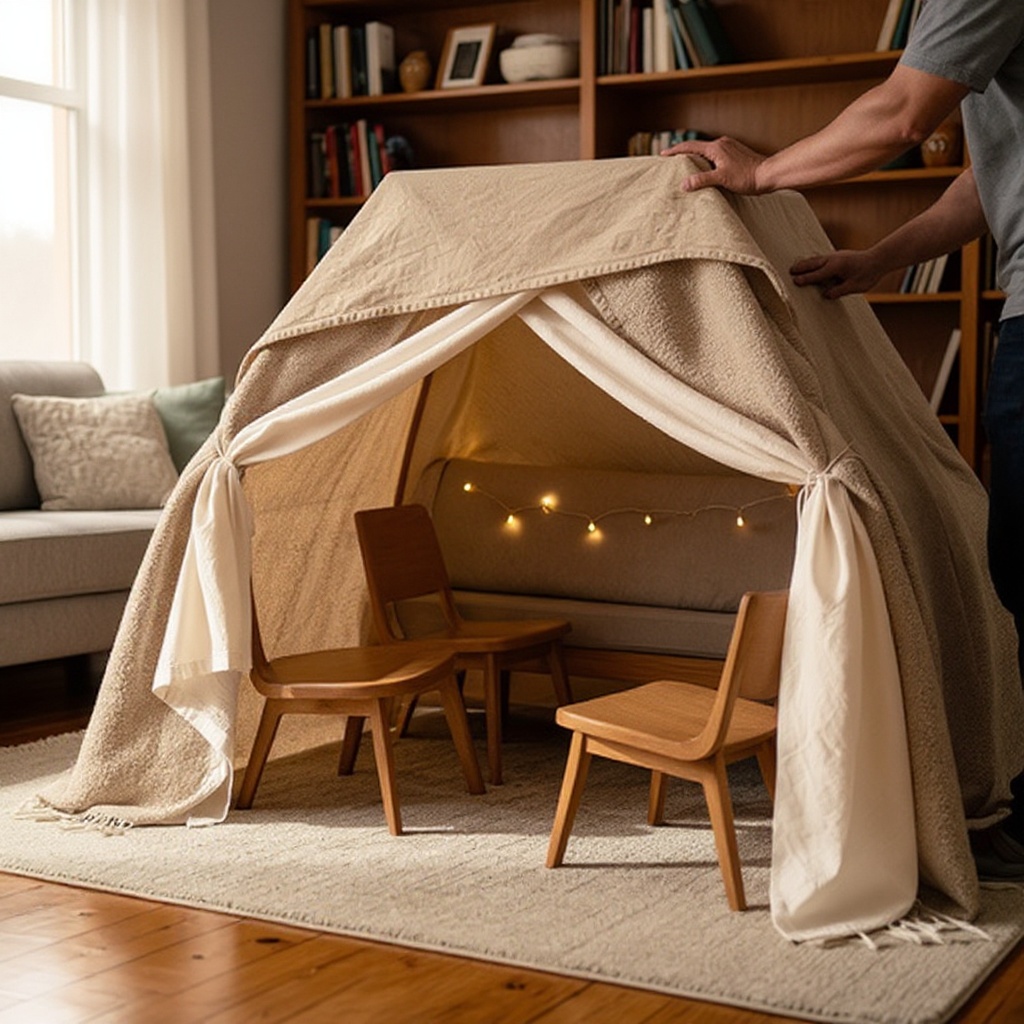
Arrange the chairs in a circle or square, facing outwards, leaving enough space between them for entry. The backs of the chairs will serve as the primary support for your fort's roof. Ensure the chairs are stable and won't easily tip over, especially when blankets are draped over them.
- 4
Position the chairs strategically to create the desired shape and size of your fort. For a more spacious fort, place them further apart; for a cozier feel, bring them closer together. Consider the height of the chair backs, as this will determine the headroom inside your fort.
- 5
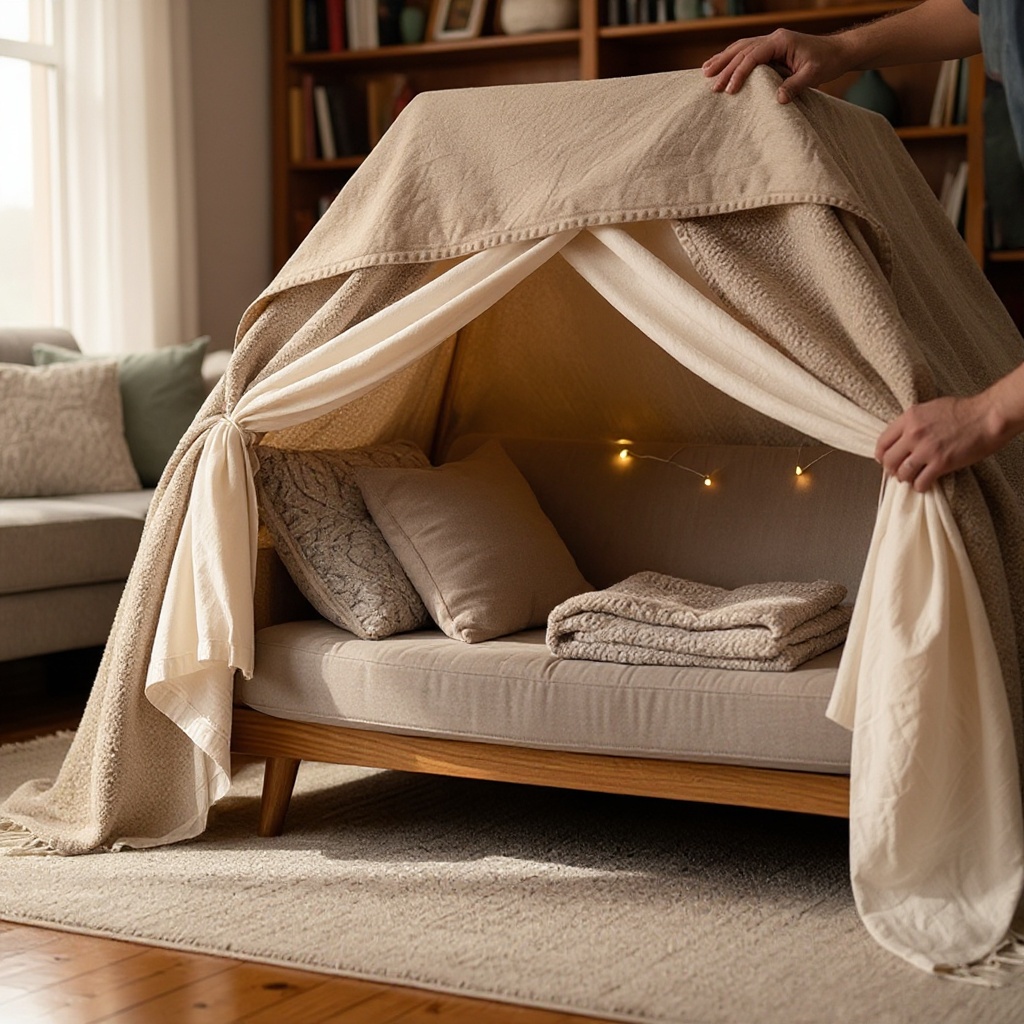
Drape the largest blanket or sheet over the backs of the chairs to create the main roof structure. Aim to cover the entire span between the chairs, allowing for some overhang on all sides. This will be the foundation of your fort's enclosure.
- 6
Ensure the roof blanket is pulled taut to prevent sagging. If your blanket isn't quite large enough, don't worry; you can overlap another blanket or sheet to extend the coverage, securing them together with clips.
- 7
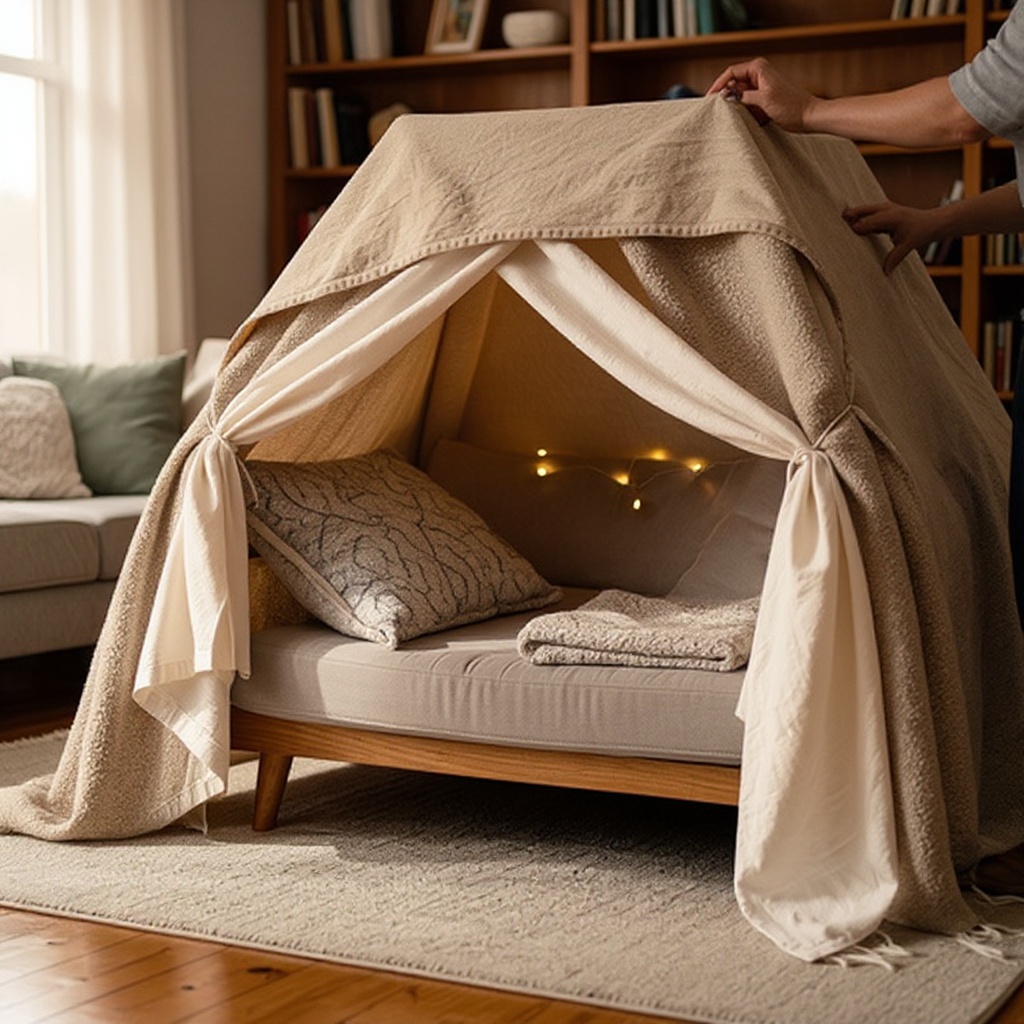
Secure the roof blanket to the chair backs using clothespins or binder clips, ensuring it's taut. Distribute the clips evenly along the chair backs to distribute the weight and prevent the blanket from slipping. Check for any loose areas that might sag or allow light to peek through.
- 8
Use additional blankets or sheets to create the fort walls, draping them from the roof blanket down to the floor. These will form the sides of your cozy enclosure, providing privacy and warmth.
- 9
Overlap the wall blankets generously to minimize gaps and create a truly cozy enclosure. This overlap is crucial for preventing drafts and ensuring the fort feels secure and enclosed. Think of it like shingling a roof, where each layer covers the one below it.
- 10
Secure the wall blankets to the roof blanket and to each other with more clips. Attach the top edge of the wall blankets to the roof blanket, and then use clips to connect adjacent wall blankets where they meet. This creates a continuous, sturdy barrier.
- 11
If you have gaps at the bottom where the wall blankets meet the floor, you can tuck them under the chairs or use extra cushions to weigh them down. This will further enhance the coziness and prevent drafts from entering the fort.
- 12
Arrange couch cushions and pillows inside the fort to create a comfortable floor and seating area. Layering pillows and cushions will make the interior soft and inviting, perfect for lounging, reading, or playing games.
- 13
Consider using a small rug or play mat on top of the cushions for an extra layer of comfort and to define the floor space. This can also help to prevent the cushions from shifting around too much.
- 14
If desired, add fairy lights, string lights, or battery-operated lanterns for ambiance. Drape them around the inside of the fort, ensuring they are safely secured and not a fire hazard. This adds a magical touch and makes the fort feel extra special.
- 15
Bring in your favorite stuffed animals, books, or board games to personalize your fort and make it a fun destination. These items will enhance the imaginative play and provide entertainment within your cozy retreat.
- 16
Test the stability of your fort by gently pushing on the walls and roof. Make any necessary adjustments to the clips or blanket placement to ensure everything is secure and won't collapse during playtime.
- 17
Create a designated 'doorway' by leaving one section of a wall blanket unclipped at the bottom or by using a separate, smaller blanket that can be easily lifted or moved aside. This allows for easy entry and exit.
- 18
If using cardboard boxes, integrate them into your fort structure by creating tunnels or additional rooms. Secure them to the main fort using tape or by tucking them under furniture for added stability.
Tips & Troubleshooting
- 1If your blankets are too short, overlap them generously and secure them well to avoid drafts. Don't be afraid to use multiple blankets for the roof and walls; the key is to create a continuous, unbroken surface.
- 2For a more stable fort, use heavier furniture like a sofa or a sturdy table as part of your structure. These larger items can act as anchors, providing a solid base for your fort and reducing the reliance solely on chairs.
- 3Consider creating a 'doorway' by leaving one section of a wall blanket unclipped at the bottom or by using a smaller, draped piece of fabric that can be easily lifted. This provides a clear entrance and exit point without compromising the fort's overall structure.
- 4Involve the kids in every step of the process to foster teamwork and ownership. Assigning age-appropriate tasks, like holding blankets or clipping them, makes them feel like integral parts of the fort-building team.
- 5Once playtime is over, encourage kids to help put away the materials to teach responsibility. Make it a fun 'clean-up mission' to reinforce good habits and ensure your fort-building supplies are ready for the next adventure.
- 6Experiment with different blanket textures and colors to add visual interest and create different moods within your fort. A sheer, sparkly blanket can create a magical canopy, while a thick, dark blanket can make it feel like a secret cave.
- 7Think about the fort's purpose: is it for reading, playing games, or having a quiet escape? Tailor the interior setup and decorations to suit the intended use, ensuring maximum comfort and enjoyment.
- 8Don't be afraid to get creative with your supports! Books stacked securely can act as small pillars, or even a laundry basket turned upside down can provide a unique structural element.
Related Activities You Might Enjoy
Frequently Asked Questions
What are some easy fort building ideas for kids?
Easy fort building ideas abound using common household items! A classic chair-and-blanket fort is a fantastic starting point, creating a simple yet effective structure. For a softer, more tactile experience, a pillow fort constructed entirely from cushions and blankets offers ultimate coziness. Tunnel forts can be made by connecting large cardboard boxes, providing an exciting pathway for exploration. You can also create a 'no-chair' fort by using the sofa as a primary anchor and draping blankets over its back and arms, securing them with pillows. The key is to utilize what you have readily available, encouraging children to see the potential in everyday objects for imaginative play.
How do you make a fort sturdy?
To make a fort sturdy, start by using heavier furniture like sofas, sturdy tables, or even the base of a bed as anchors. These larger items provide a more stable foundation than chairs alone. Ensure your supporting furniture is not wobbly. When draping blankets, pull them taut and secure them tightly with plenty of clips or clothespins, distributing them evenly. Overlapping materials generously, especially at the seams where blankets meet, adds structural integrity and prevents sagging. If your fort feels unstable, consider adding internal supports like rolled-up blankets or even strategically placed books to brace the walls and roof.
What materials are best for building a fort?
The best materials for building a fort are those that are readily available and versatile. Large blankets or sheets are essential for creating the roof and walls, offering good coverage and flexibility. Sturdy chairs, ottomans, or even sofas and tables serve as excellent supports for the structure. Plenty of pillows and couch cushions are crucial for creating a comfortable floor and seating area, making the fort inviting. Finally, clothespins or binder clips are indispensable for securing all the fabric elements together, ensuring your fort stays intact. Optional additions like fairy lights or stuffed animals can enhance the experience.
How can I make my fort more exciting?
Transform your fort from basic to brilliant with a few exciting additions! Fairy lights or battery-operated lanterns strung inside create a magical, cozy ambiance, perfect for nighttime adventures or reading. Bringing in favorite stuffed animals and beloved books instantly personalizes the space and provides entertainment. You can also add a 'secret password' for entry, making it feel like a exclusive club. Consider setting up a 'snack station' just outside the fort with pre-portioned treats and drinks. For a more interactive experience, include board games or craft supplies for activities within the fort's cozy confines.
What age group is best suited for fort building?
Fort building is a wonderfully adaptable activity that can be enjoyed by a wide range of ages, though it's particularly fantastic for children aged 4 and up. Younger children (4-6) will delight in the imaginative play and the simple act of creating a cozy hideaway, often needing more adult assistance with the structural aspects. Older children (7-10) can take on more complex designs, problem-solve structural challenges, and become more independent builders. Even teenagers and adults can find joy in creating elaborate forts for movie nights or themed parties. The key is to adjust the complexity and supervision based on the age and abilities of the participants.
How long does it typically take to build an indoor fort?
The time it takes to build an epic indoor fort can vary depending on the complexity of the design and the number of builders involved, but generally, it takes about 30 to 60 minutes for a beginner-friendly structure. This timeframe includes gathering materials, arranging furniture, draping and securing blankets, and adding interior comforts. Simpler forts might be ready in as little as 20 minutes, while more elaborate designs incorporating multiple rooms or unique structural elements could take up to an hour or slightly longer. The focus should always be on the fun and collaborative process rather than rushing the build.
What Next?
Congratulations on building your epic indoor fort! This foundational structure is just the beginning of endless possibilities. Consider adding themed elements like a pirate ship, a castle, or a space station by incorporating extra decorations. For future fort adventures, experiment with different furniture arrangements or even incorporate large cardboard boxes for added architectural flair. Once the fun is done, encourage everyone to help dismantle the fort and store the materials neatly, ready for the next imaginative construction. This simple act of building can lead to countless hours of joy and cherished family memories.
Free: 10 Paper Crafts Anyone Can Make in 5 Minutes
Get our beginner guide + new craft ideas weekly.
No spam. Unsubscribe anytime.
Did you complete this activity?
Related