How to Make Air Dry Clay Paw Print Keepsakes — Easy Step-by-Step Guide
Capture your furry friend's paw print forever with this simple air dry clay craft. A beautiful keepsake that requires no baking!
Quick answer
To make air dry clay paw print keepsakes, you need air dry clay, a rolling pin, and a pet. Start by rolling out the clay and pressing your pet's paw into it. This easy activity has 7 steps and is perfect for families with pets.
What you need
Shop on Amazon · As an Amazon Associate we earn from qualifying purchases. Links above are affiliate links — we may earn a commission at no extra cost to you.
Cherish the unique bond you share with your furry companion by creating a timeless keepsake: an air dry clay paw print. This project is incredibly rewarding, allowing you to immortalize those adorable paws that bring so much joy into your life. It's a wonderful activity for families, pet owners, and anyone looking for a heartfelt way to celebrate their pet. Unlike traditional clay projects, air dry clay requires no kiln or oven, making it accessible and safe for crafters of all ages and skill levels. Get ready to create a tangible memory that will last a lifetime.
On this page
Step-by-Step Instructions
- 1
Prepare your workspace by laying down a sheet of wax paper or parchment paper on a clean, flat surface. This prevents the clay from sticking and makes cleanup much easier.
- 2
Open your air dry clay and take out a portion, about the size of a tennis ball or slightly larger, depending on the size of your pet's paw. Knead the clay on your protected surface until it becomes soft, smooth, and pliable, much like playdough. This process helps to remove any air bubbles and ensures an even texture for your paw print.
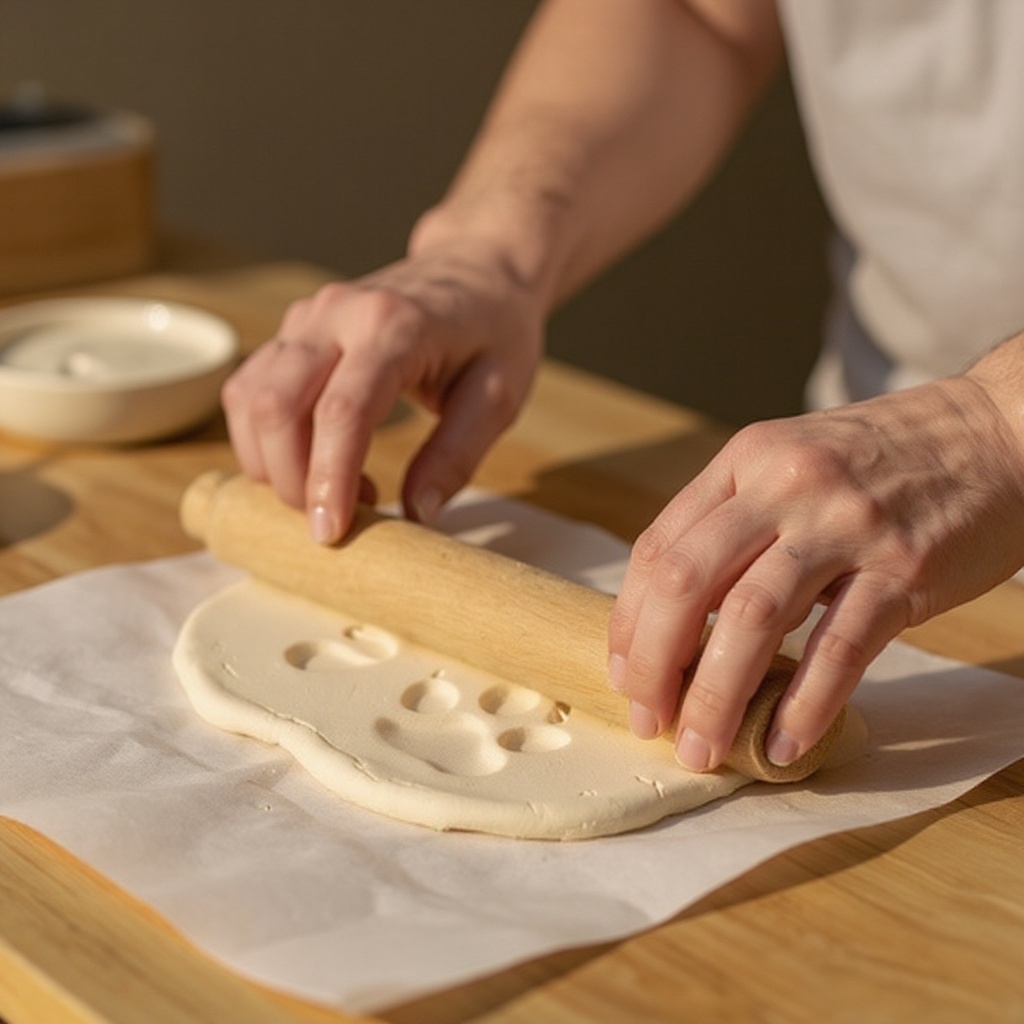
- 3
Place the kneaded clay onto the center of the wax or parchment paper. Use your rolling pin to gently and evenly roll out the clay to a thickness of approximately 1/2 inch. Aim for a consistent thickness throughout the entire piece to ensure it dries uniformly and doesn't crack.
- 4
If you desire a specific shape for your keepsake, now is the time to use your cookie cutters. Press the cookie cutter firmly into the rolled-out clay and carefully remove the excess clay from around the shape. You can also use a plastic knife to cut out simple shapes like squares or rectangles if you don't have cookie cutters.
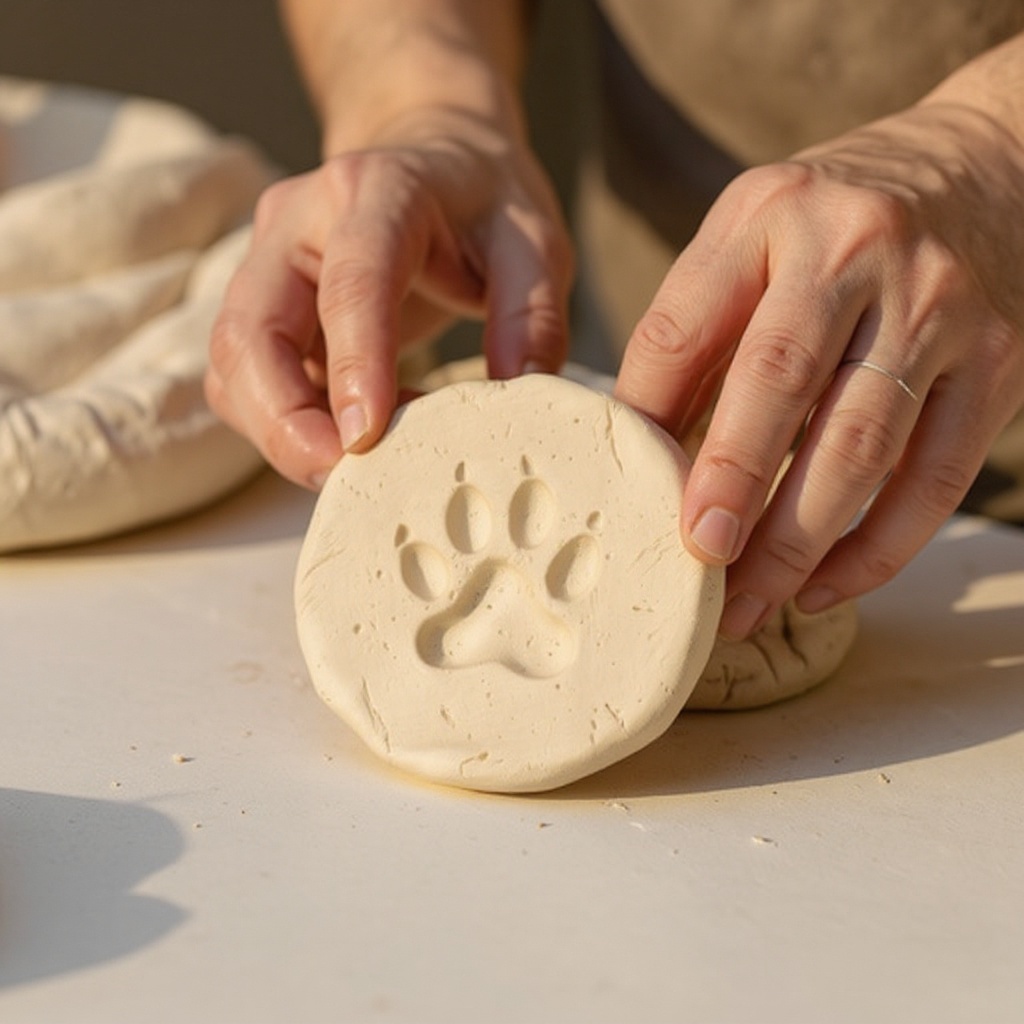
- 5
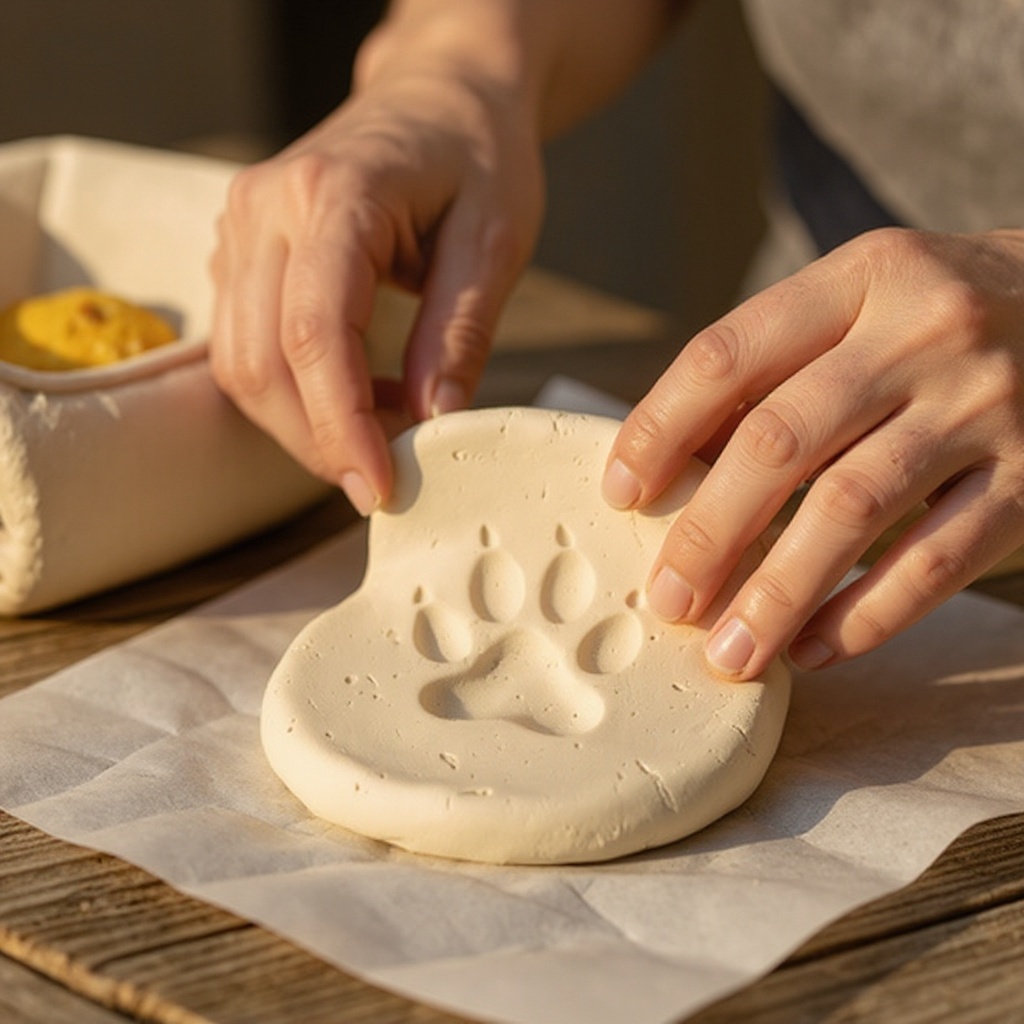
Ensure your pet's paw is clean and dry. If it's a little dirty, use a pet-safe wipe or a damp cloth to gently clean between the pads and around the nails. A clean paw will result in a clearer, more defined impression in the clay.
- 6
Gently and calmly press your pet's paw into the center of the rolled-out clay impression. Apply even pressure, ensuring all parts of the paw, including the pads and toes, make contact with the clay. You want to achieve a good depth without pushing the paw all the way through the clay.
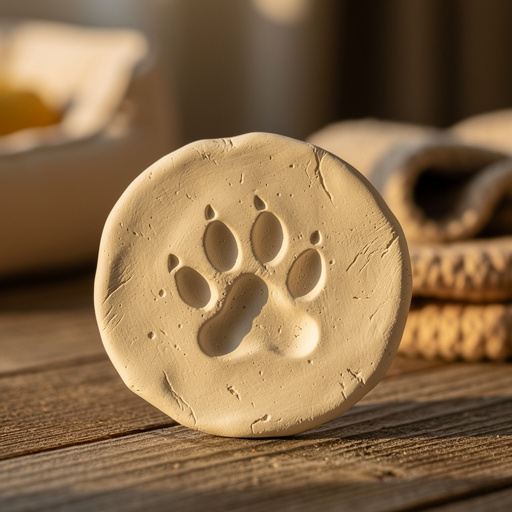
- 7
Carefully lift your pet's paw straight up and away from the clay. Avoid wiggling or twisting the paw as you lift, as this can smudge the impression. Immediately inspect the print for any imperfections.
- 8
Use a plastic knife or craft stick to gently smooth any rough edges around the perimeter of your paw print keepsake. You can also use these tools to add personalized details, such as your pet's name, the date, or even small decorative patterns. Dip the tool in a little water for a smoother finish.
- 9
If you've created a shape with a cookie cutter, you might want to smooth the edges of that shape as well. For a more rustic look, you can leave the edges as they are.
- 10
If you plan to hang your keepsake, now is the time to create a hole. Use the end of a craft stick or a straw to carefully punch a hole near the top edge of the clay. Make sure the hole is large enough for ribbon or twine to pass through later.
- 11
Allow the clay to air dry completely according to the manufacturer's instructions, which typically ranges from 24 to 72 hours. For the most even drying, it's recommended to flip the paw print halfway through the drying process, if possible. This helps prevent warping and ensures both sides dry thoroughly.
- 12
Once the clay is completely dry to the touch and feels hard, it's ready for the next step. It should no longer feel cool or damp.
- 13
If you choose to paint your paw print keepsake, now is the time. Use acrylic paints in your desired colors to decorate the clay. You can paint the entire piece, just the paw print, or add intricate designs.
- 14
Allow the paint to dry completely. This can take anywhere from a few hours to overnight, depending on the thickness of the paint and the type of acrylic paint used.
- 15
For added durability and a finished look, apply a clear sealant or varnish over the dried paint. This will protect the paint from chipping and give your keepsake a lovely sheen. Ensure the sealant is also pet-safe once cured.
- 16
Allow the sealant to dry completely according to the product's instructions before handling or displaying your finished paw print keepsake.
Tips & Troubleshooting
- 1Patience and positive reinforcement are key when working with pets. Offer plenty of treats and verbal praise throughout the process to make it a fun and rewarding experience for your furry friend. If your pet seems stressed or anxious, take a break and try again later, or consider enlisting the help of another person to gently hold your pet while you work.
- 2For the cleanest and most detailed paw print, ensure your pet's paw is clean and dry before pressing it into the clay. A quick wipe with a pet-safe wipe or a slightly damp cloth can remove any dirt or debris that might otherwise mar the impression. Avoid using too much water, as a wet paw can also lead to smudging.
- 3If you don't have traditional cookie cutters, don't worry! You can easily create a simple, modern keepsake by using a plastic knife or craft stick to cut out a neat square or rectangle from the rolled-out clay. This offers a minimalist aesthetic that still beautifully showcases the paw print.
- 4Once your air dry clay paw print is completely dry, the fun of personalization begins! You can paint it with acrylic paints in any color scheme you like. Consider using your pet's favorite colors, or colors that match your home decor. Let your creativity flow!
- 5After painting and allowing the paint to dry thoroughly, applying a clear sealant or varnish is highly recommended. This not only protects the paint from wear and tear but also gives the keepsake a professional, finished look. It can add a subtle sheen or a high-gloss finish, depending on your preference.
- 6If your pet is particularly wiggly or hesitant, try using a smaller piece of clay or focusing on just one or two toes for the impression. You can also have a helper gently hold your pet's body steady while you carefully guide their paw into the clay. Remember, the goal is a positive experience for both of you.
- 7Don't be discouraged if the first attempt isn't perfect. Air dry clay is forgiving, and you can often re-roll and try again if needed. The most important thing is to create a lasting memory with your beloved pet, and a little imperfection can add to its charm and uniqueness.
- 8Consider making multiple prints! You can create a series of paw prints from different pets, or even capture prints at different stages of your pet's life to see how they grow. This allows you to build a collection of cherished memories over time.
Related Activities You Might Enjoy
Frequently Asked Questions
How long does air dry clay take to dry for paw prints?
Air dry clay typically takes between 24 to 72 hours to dry completely. This drying time is influenced by several factors, including the thickness of the clay, the humidity levels in your environment, and air circulation. For thicker pieces, it might take longer. To ensure even drying and prevent cracking or warping, it's highly recommended to flip the paw print over halfway through the drying process if possible. You'll know it's fully dry when it feels hard to the touch and no longer cool or damp.
Can I bake air dry clay paw prints?
No, air dry clay is specifically designed to harden and cure naturally at room temperature without the need for baking. Attempting to bake air dry clay in an oven is not recommended and can lead to undesirable results. Baking can cause the clay to crack, crumble, or even explode due to trapped moisture. The beauty of air dry clay is its simplicity and accessibility, allowing you to create beautiful keepsakes without specialized equipment like a kiln or oven.
How do I get a good paw print impression?
Achieving a clear and detailed paw print impression involves a few key steps. First, ensure your pet's paw is clean and dry; a quick wipe with a pet-safe wipe or damp cloth can remove dirt. Next, when pressing the paw into the clay, apply firm and even pressure, making sure all the pads and toes make contact. Finally, lift the paw straight up and away from the clay, avoiding any twisting or wiggling motions, which can smudge the impression. A slightly damp paw can sometimes yield a clearer print, but avoid making it too wet.
What if my pet doesn't cooperate for the paw print?
Patience and a positive approach are crucial when your pet isn't cooperating. Make the experience enjoyable by offering plenty of treats and verbal praise. If your pet is showing signs of stress or anxiety, take a break and try again later. You can also try using a smaller piece of clay or focusing on just a few toes. Enlisting the help of another person to gently hold your pet can also be beneficial. Sometimes, a different day or a more relaxed environment can make all the difference.
Can I use other types of clay for paw prints?
While air dry clay is the easiest and most accessible option for this project, other types of clay can also be used. Polymer clay, for instance, requires baking in a home oven to cure, which can offer a very durable and professional finish. However, it's essential to ensure the polymer clay is non-toxic and pet-safe, and to follow the baking instructions precisely. Traditional ceramic clay also requires firing in a kiln, making it less suitable for a simple home craft. For a no-bake, beginner-friendly option, air dry clay remains the top choice.
How can I make my paw print keepsake more durable?
To enhance the durability of your air dry clay paw print, several steps can be taken. Ensuring the clay is rolled to an even thickness (around 1/2 inch) helps prevent cracking during drying. Flipping the piece halfway through the drying process also promotes uniform hardening. Once completely dry, applying a clear sealant or varnish is highly recommended. This protective layer shields the clay and any paint from moisture, chips, and general wear and tear, giving your keepsake a longer lifespan and a polished appearance.
What Next?
Once your air dry clay paw print is completely dry and decorated, you'll have a beautiful, personalized memento. Consider adding a small hole near the top before drying if you wish to hang it as an ornament or attach it to a keychain. You can also explore different display options, such as placing it in a shadow box, on a small easel, or even framing it with a photo of your pet. For future projects, try making multiple prints from different pets, or even experiment with nose prints! This simple craft opens the door to a world of personalized pet memorabilia.
Free: 10 Paper Crafts Anyone Can Make in 5 Minutes
Get our beginner guide + new craft ideas weekly.
No spam. Unsubscribe anytime.
Did you complete this activity?
Related
You might also like
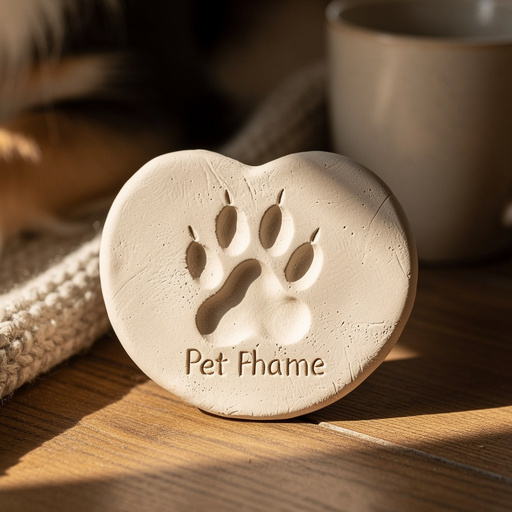
Clay Pet Paw Print Keepsakes
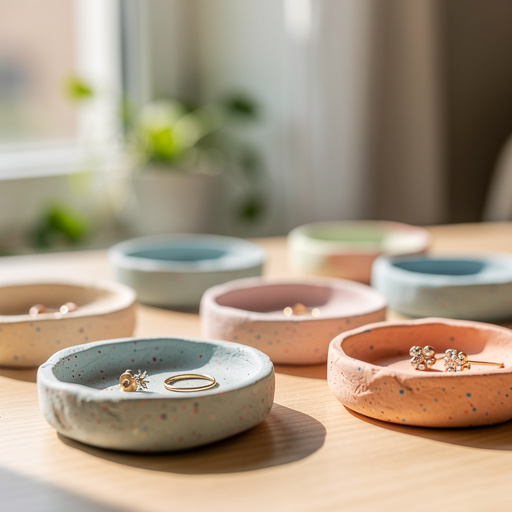
Air Dry Clay Trinket Dishes
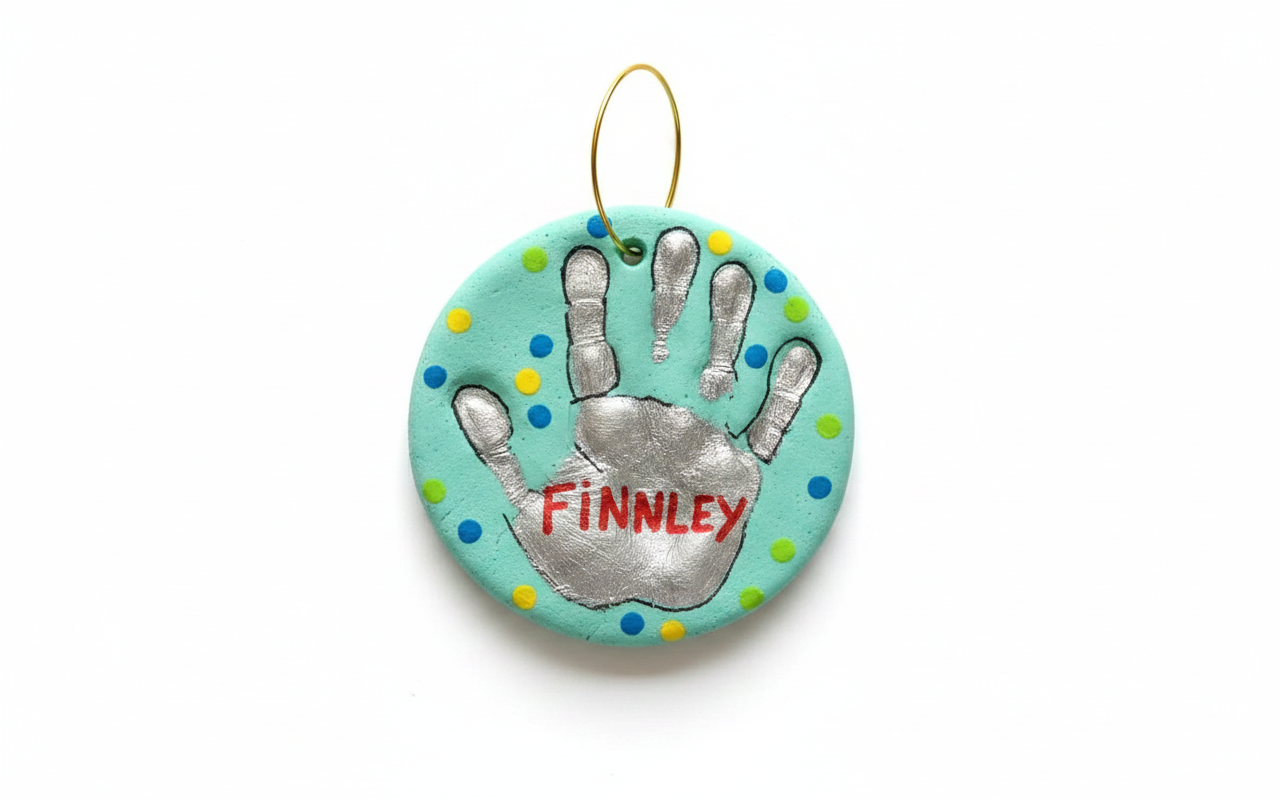
Salt Dough Handprint Keepsake Ornament
Polymer Clay Jewelry Dishes
Air Dry Clay Geometric Trinket Dish