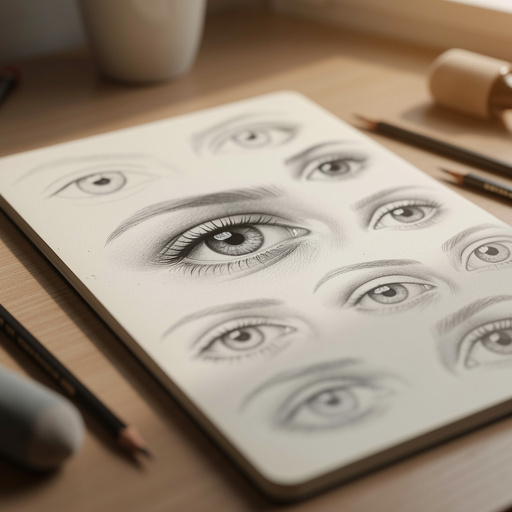
How to Draw a Realistic Eye — Easy Step-by-Step Guide
Unlock the secrets to drawing incredibly lifelike eyes with this easy-to-follow tutorial. Perfect for beginners looking to add depth and realism to their artwork.
Quick answer
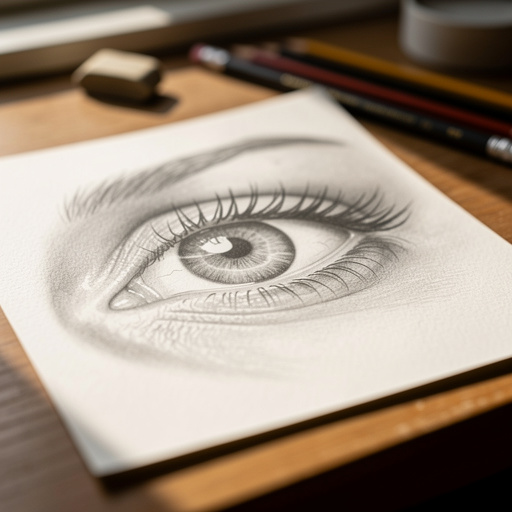
To draw a realistic eye, you need a pencil, paper, and an eraser, taking about 30 minutes. Start by sketching the basic oval shape. This beginner-friendly activity has 10 steps and is perfect for families and aspiring artists.
What you need
Shop on Amazon · As an Amazon Associate we earn from qualifying purchases. Links above are affiliate links — we may earn a commission at no extra cost to you.
Drawing a realistic eye is a fundamental skill that can elevate any portrait or character study. This tutorial breaks down the process into manageable steps, making it accessible even for absolute beginners. You'll discover how simple shapes and careful shading can transform a flat drawing into a captivating, lifelike representation. Whether you're looking to enhance your sketching abilities, create more expressive characters, or simply enjoy the rewarding process of bringing art to life, this guide is your perfect starting point. Prepare to be amazed at what you can achieve with just a few basic tools and a little patience.
On this page
Step-by-Step Instructions
- 1
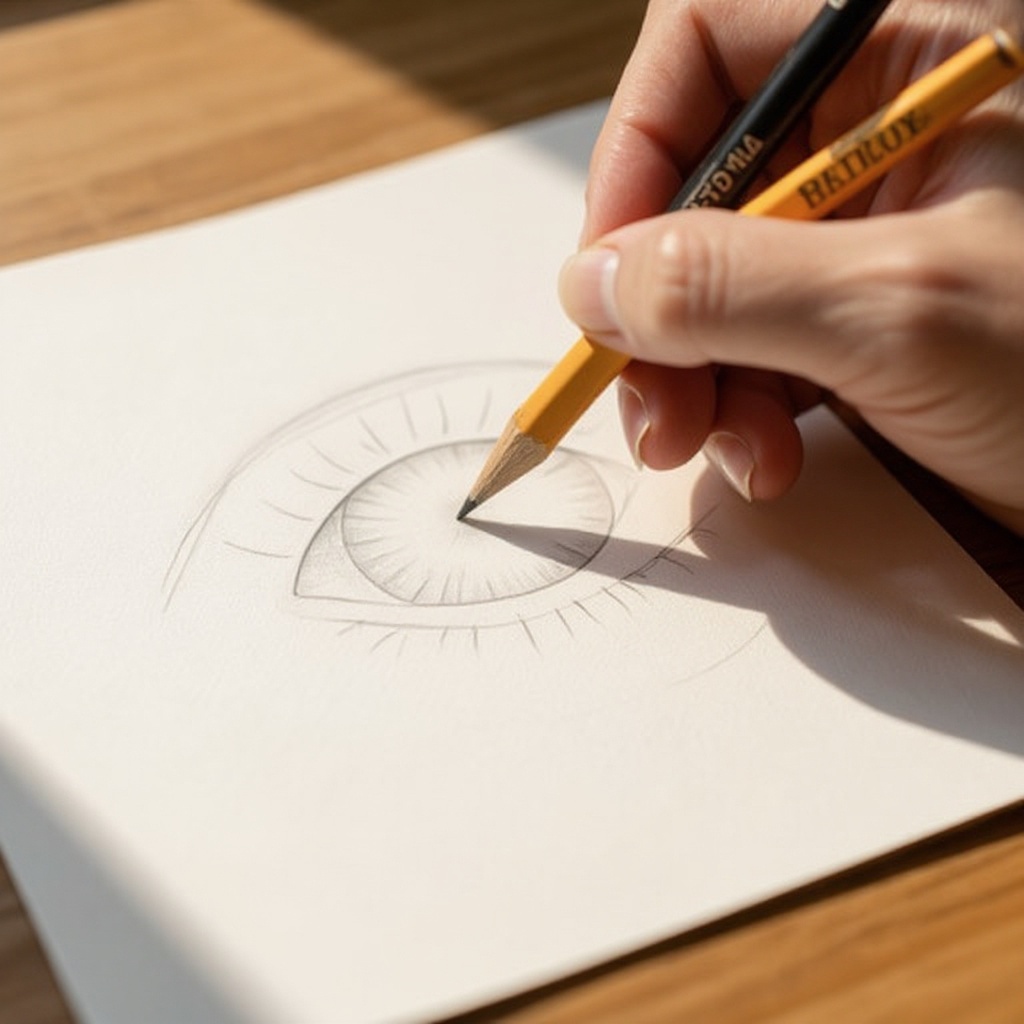
Lightly sketch an almond shape for the basic outline of the eye. Begin by drawing a gentle, elongated oval that tapers at both ends, mimicking the natural shape of an eye socket. Avoid pressing too hard, as this initial sketch is a guide and will be refined later.
- 2
Draw a circle for the iris within the almond shape, making sure it's not perfectly centered. The iris is the colored part of the eye and typically sits slightly above the center of the almond shape, often partially covered by the upper eyelid. Ensure this circle is a clean, defined shape.
- 3
Add a smaller circle inside the iris for the pupil. Make it dark. The pupil is the black center of the eye and should be a perfect circle, significantly smaller than the iris. This is where light enters the eye, so it needs to be rendered as the darkest element.
- 4
Sketch a curved line above the iris for the upper eyelid and a shorter one below for the lower eyelid. The upper eyelid line should be a smooth, slightly curved arc that follows the top edge of the iris, often extending slightly beyond it. The lower eyelid line is usually a gentler curve, positioned just below the bottom edge of the iris.
- 5
Refine the outer and inner corners of the eye. Observe your reference photo to capture the subtle angles and curves that define these areas. The inner corner often has a small tear duct shape, while the outer corner can be sharp or soft depending on the individual.
- 6
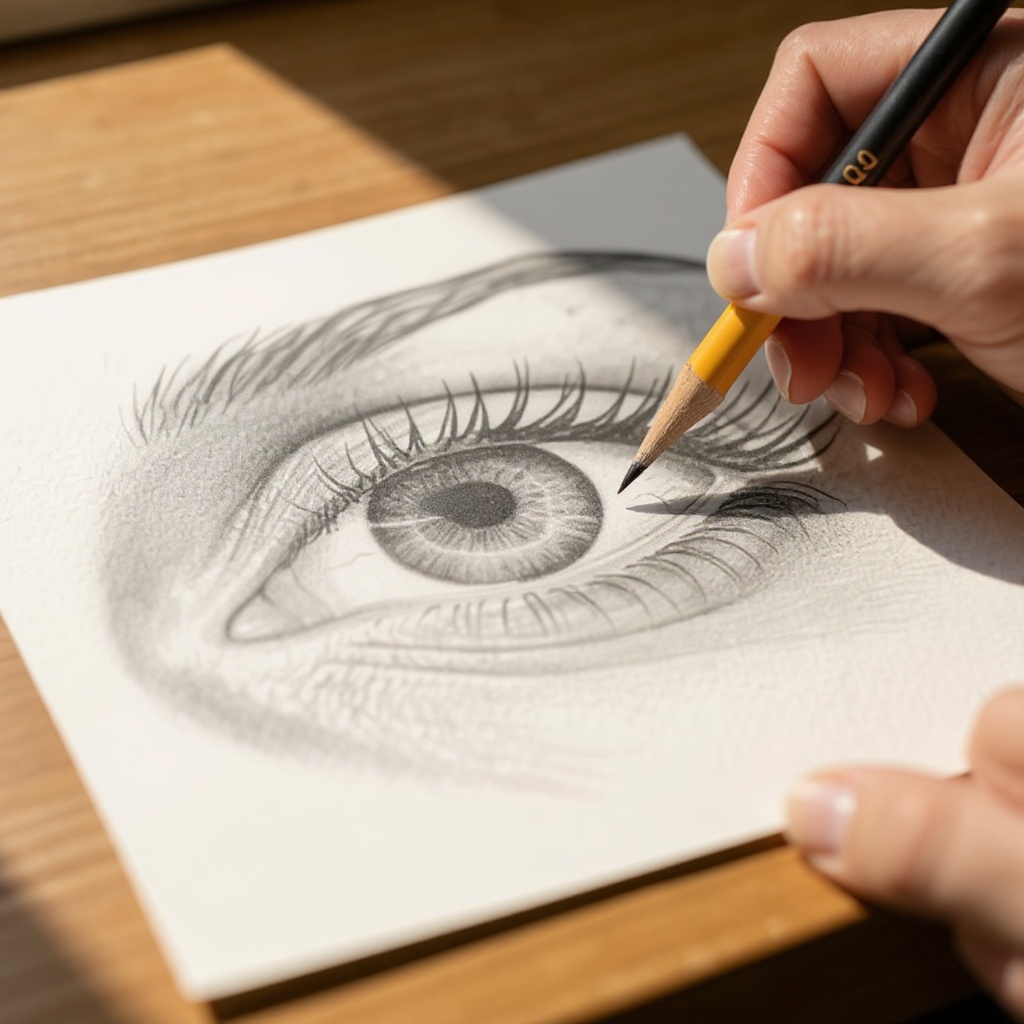
Begin lightly shading the iris with the HB pencil, leaving a small white highlight area for shine. Think of the iris as a textured surface; use small, directional strokes that follow the natural patterns of the iris. The highlight is crucial for making the eye look wet and alive, so preserve this bright spot.
- 7
Add darker shading to the pupil and the very edge of the iris. Fill the pupil with your 2B or even 4B pencil to achieve a deep, rich black. Then, use the 2B pencil to add a slightly darker ring around the outer edge of the iris, creating depth and separation from the sclera.
- 8
Use the 2B pencil to add darker shadows under the upper eyelid and in the crease above the eye. The upper eyelid casts a shadow onto the eyeball, especially towards the top. Also, sketch the subtle crease that often forms above the eyelid, adding dimension to the brow bone area.
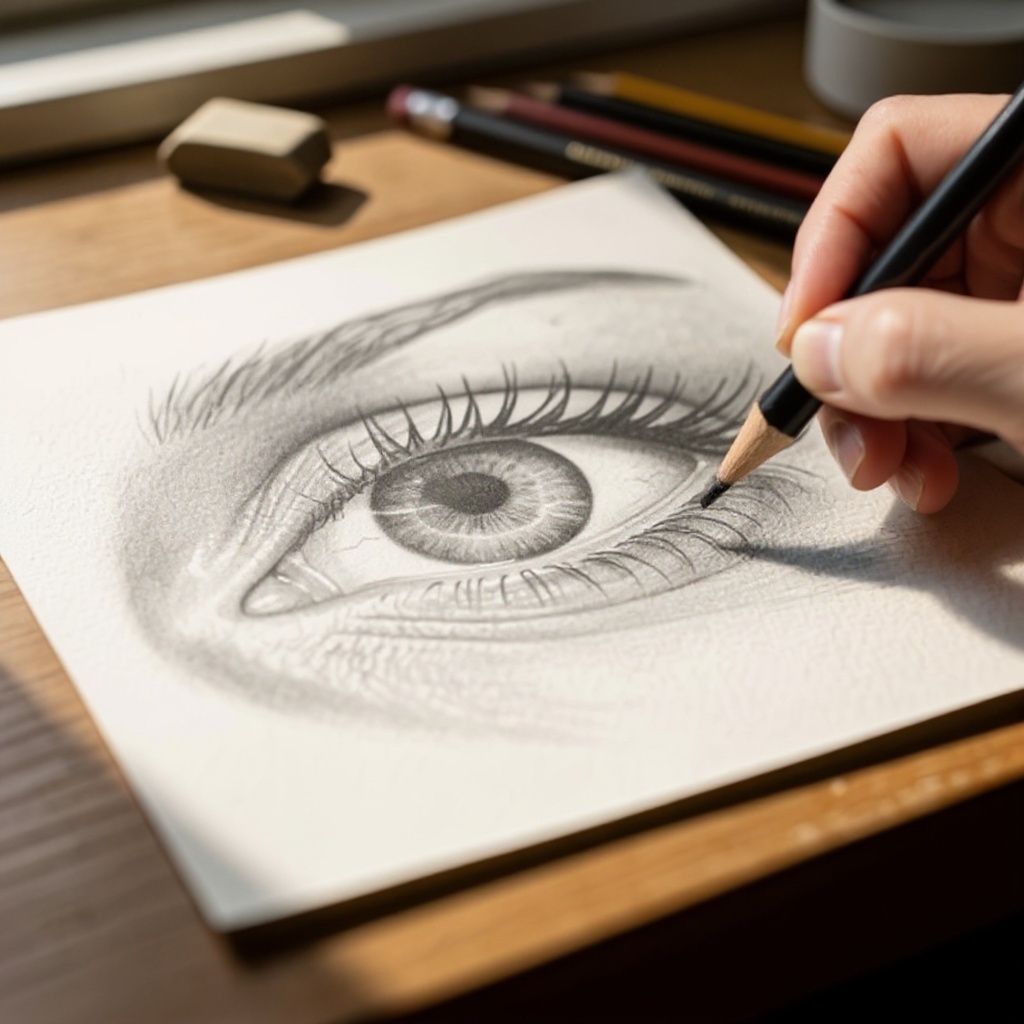
- 9
Gently shade the sclera (the white part of the eye) with the HB pencil, making it slightly darker towards the edges. The sclera is rarely pure white; it has subtle variations in tone and is typically darker where it meets the eyelids and at the outer edges of the eyeball. Use very light, smooth strokes.
- 10
Add subtle veins to the sclera if desired, using a very sharp HB pencil and light pressure. These are often faint and should not overpower the overall form of the eye. They add a touch of realism and detail.
- 11
Carefully erase the highlight in the iris to make it pop. Use a precision eraser or the corner of your kneaded eraser to lift the graphite in the highlight area, making it as bright as possible. This contrast is essential for a realistic shine.
- 12
Begin sketching the eyelashes with short, curved strokes extending from the eyelid edges. Use your HB pencil for lighter lashes and the 2B for darker ones. Vary their length, thickness, and direction to create a natural, organic look.
- 13
Add more layers of shading to the iris, building up the texture and depth. Use your blending stump or tortillon to gently smooth some of the graphite in the iris, creating softer transitions, but be careful not to over-blend and lose the texture.
- 14
Define the tear duct area with subtle shading and a small highlight. This small, often overlooked feature adds significant realism to the inner corner of the eye.
- 15
Refine the eyelids by adding subtle shading to their thickness and edges. The eyelids have a rounded form, so use shading to suggest this roundness. Pay attention to where the light hits and where shadows fall.
- 16
Add subtle skin texture around the eye, such as fine lines or creases, if appropriate for your reference. These details can greatly enhance the overall realism of the drawing.
- 17
Use your kneaded eraser to lift any smudges or unwanted graphite, and to gently soften the edges of shadows where needed. This tool is excellent for subtle adjustments and creating soft transitions.
- 18
Review your drawing, comparing it to your reference. Look for areas that need more contrast, smoother transitions, or sharper details. Make final adjustments to shading and highlights to achieve the desired level of realism.
Tips & Troubleshooting
- 1Don't press too hard with your pencil, especially in the initial sketching stages. This makes it easier to correct mistakes and allows for a greater range of tonal values in your final drawing. Light, confident strokes are key to building up form gradually.
- 2Vary your shading pressure to create depth and form. Lighter shades for the sclera and iris, darker for the pupil and shadows, and mid-tones for transitions will give your eye a three-dimensional quality. Experiment with how much pressure you apply to achieve different effects.
- 3Observe real eyes for reference! Notice how the iris has different textures, patterns, and color variations, and how the eyelids cast subtle shadows. The way light reflects off the cornea is also crucial for realism, so pay attention to highlight placement.
- 4Experiment with different pencil grades (like a 4B or 6B for deeper shadows) once you're comfortable with the basics. Higher graphite numbers create darker, richer blacks, which are essential for areas like the pupil and deep shadows, adding significant contrast.
- 5Consider the direction of light when shading. Light sources dictate where highlights and shadows will fall, so understanding this will help you create a more believable and three-dimensional eye. Imagine a light source and how it would interact with the eye's form.
- 6Don't be afraid to use your eraser as a drawing tool. Lifting graphite with an eraser can create bright highlights and subtle textures, especially in the iris and on the cornea. A kneaded eraser is particularly versatile for this purpose.
- 7Practice drawing different eye shapes and ethnicities. Each eye has unique characteristics, and studying these variations will broaden your understanding of facial anatomy and improve your ability to capture diverse features accurately.
- 8Take breaks and step away from your drawing periodically. This allows you to see your work with fresh eyes, making it easier to spot areas that need improvement or correction. It helps prevent you from getting too caught up in the details.
Related Activities You Might Enjoy
Frequently Asked Questions
How can I make my drawings look more realistic?
To make drawings more realistic, focus on accurate proportions, subtle shading to create depth and form, and paying close attention to light and shadow. Observing your subject closely is key; study the subtle nuances of texture, color, and how light interacts with surfaces. Practice rendering smooth transitions between tones, and don't shy away from using a wide range of values, from the darkest darks to the brightest whites. The more you train your eye to see these details, the better you'll be able to translate them onto paper, bringing a sense of three-dimensionality and life to your artwork.
What is the easiest way to start drawing realistically?
The easiest way to start drawing realistically is by practicing simple shapes and objects, like this eye tutorial. Focus on observation and gradually build up your skills with shading and detail. Start with subjects that have clear forms and lighting, such as spheres, cubes, or, as in this case, the human eye. Break down complex forms into simpler geometric shapes, and then focus on rendering the tonal values accurately. Consistent practice with these fundamental elements will lay a strong foundation for tackling more complex subjects and achieving a realistic style.
What materials do I need for realistic drawing?
For realistic drawing, you'll primarily need pencils of varying hardness (like HB for sketching and lighter tones, and 2B, 4B, or 6B for darker shadows and contrast), a good eraser (both a kneaded eraser for lifting and a precision eraser for sharp highlights), and smooth drawing paper. Smooth paper allows for finer detail and smoother blending. Blending tools like stumps or tortillons can also be helpful for creating soft transitions, but they are optional. A good reference photo is also invaluable for capturing accurate details and understanding light and shadow.
How long does it take to learn realistic drawing?
Learning realistic drawing is a journey that takes practice and patience. While you can achieve recognizable results relatively quickly with a good tutorial like this one, mastering the skill can take years of dedicated effort. The initial steps of understanding form, light, and shadow can be grasped within weeks or months of consistent practice. However, developing the nuanced control over your tools, the keen observational skills, and the ability to render complex textures and forms with photorealistic accuracy is a lifelong pursuit for many artists. The key is consistent, focused practice and a willingness to learn from every drawing.
What are the most important elements of a realistic eye drawing?
The most important elements of a realistic eye drawing are accurate proportions, believable shading, and convincing highlights. Proportions ensure the eye looks anatomically correct, while shading creates the illusion of form and depth, showing how light wraps around the eyeball and eyelids. Highlights, particularly the catchlight on the cornea, are crucial for making the eye appear wet and alive, reflecting light and giving it a sense of sparkle. Paying attention to the subtle variations in the iris's texture and color, as well as the delicate rendering of eyelashes and surrounding skin, also contributes significantly to realism.
How can I improve the texture of the iris?
To improve the texture of the iris, start by observing real iris patterns closely. Use a sharp pencil to draw fine, radiating lines from the pupil outwards, varying their thickness and spacing. You can also add small dots and dashes to mimic the flecks and subtle color variations found in irises. After applying some initial graphite, use a blending stump or tortillon to gently smudge some of these lines, creating softer transitions, but be careful not to over-blend. Then, use a sharp pencil to re-emphasize certain lines and add darker accents to build up depth and intricate detail, making the iris appear more complex and lifelike.
What Next?
Congratulations on drawing your realistic eye! This foundational skill opens doors to countless artistic possibilities. Experiment with different eye shapes, colors, and expressions to further hone your technique. Consider drawing a pair of eyes, or even a full portrait, as your next project. Once completed, consider framing your artwork or incorporating it into a larger piece. Remember, consistent practice is key to continuous improvement. Keep sketching, keep observing, and most importantly, keep enjoying the creative journey!
Free: 10 Paper Crafts Anyone Can Make in 5 Minutes
Get our beginner guide + new craft ideas weekly.
No spam. Unsubscribe anytime.
Did you complete this activity?