How to Create a Realistic Pencil Drawing — Easy Step-by-Step Guide
Unlock the secrets to creating stunningly realistic pencil drawings with this comprehensive guide. Learn essential techniques for shading, texture, and detail.

Quick answer
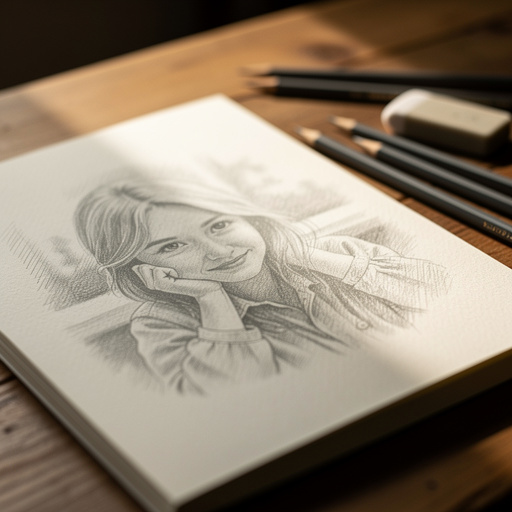
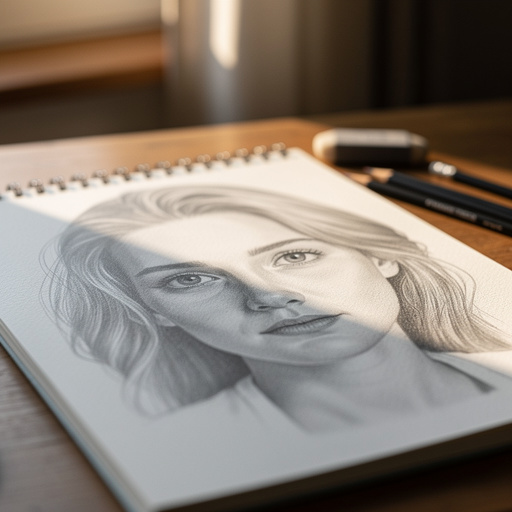
To make a realistic pencil drawing, you need graphite pencils (HB, 2B, 4B, 6B), blending tools, and smooth drawing paper, taking about 90 minutes for a basic portrait. Start by lightly sketching the outline, then gradually build up tones and details. This intermediate activity has 12-20 steps and is perfect for families aged 10+.
What you need
Shop on Amazon · As an Amazon Associate we earn from qualifying purchases. Links above are affiliate links — we may earn a commission at no extra cost to you.
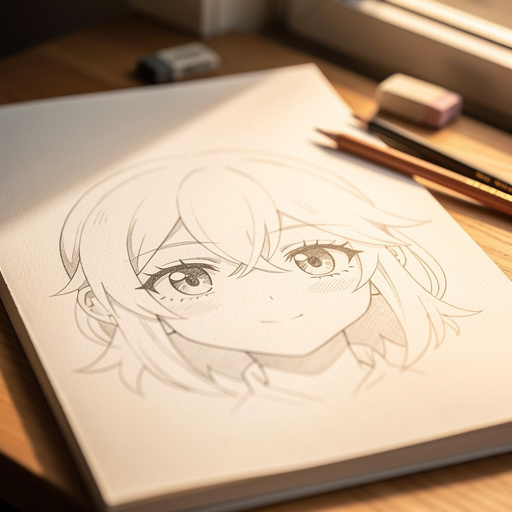
Embarking on the journey of creating a realistic pencil drawing is an incredibly rewarding artistic endeavor. It’s a process that transforms a blank page into a lifelike representation, capturing the essence of your subject with just graphite and paper. This guide is designed to demystify the techniques behind realism, making it accessible even for those who consider themselves beginners. Whether you're drawn to sketching portraits, still lifes, or landscapes, mastering these fundamental skills will elevate your artwork and provide a profound sense of accomplishment. Prepare to see the world through a new artistic lens!
On this page
Step-by-Step Instructions
- 1
Lightly sketch the basic outline of your subject (e.g., a face, an object) using an HB pencil. Focus on proportions and placement, using very faint lines that can be easily erased or blended later. Think of this as establishing the foundational structure of your drawing, ensuring that all elements are correctly positioned and sized relative to each other.
- 2
Begin to block in the darkest shadows using a 4B or 6B pencil. Don't press too hard yet; instead, use light, sweeping strokes to indicate the areas that are deepest in shadow. This initial dark mapping helps establish the overall value range and the dramatic contrast that contributes to realism.
- 3
Use a blending stump or tortillon to gently smudge the dark areas, starting to create form and depth. Work in the direction of the form you are trying to create, and be careful not to over-blend, which can make the drawing look muddy. The goal here is to soften the harsh lines and begin to suggest volume.

- 4
Gradually build up mid-tones using a 2B pencil. Apply lighter pressure and blend as you go, connecting the darkest shadows to the lighter areas. Observe your reference closely for subtle shifts in tone and apply graphite accordingly, layering it over the initial sketch and blended shadows.
- 5
Introduce lighter values and highlights using the HB pencil. Remember that white paper is your lightest value, so use it strategically for the brightest areas. For areas that are not pure white but still light, use very light pressure with your HB pencil and blend gently.
- 6
Refine the darkest areas by layering with the 4B or 6B pencil, paying attention to subtle shifts in tone. This is where you add richness and depth to your shadows, observing the nuances in your reference. Don't be afraid to go darker in specific areas to create stronger contrast and a more three-dimensional effect.
- 7
Use the kneaded eraser to lift out highlights and create soft transitions. Dab or gently rub the kneaded eraser over areas where you want to lighten the graphite, such as the edges of highlights or to soften a transition. This tool is excellent for subtle adjustments and creating a soft glow.
- 8
Employ the white plastic eraser for sharp highlights and to correct any mistakes. Use the edge or a sharpened corner of the plastic eraser to create crisp, bright highlights on surfaces like eyes, metal, or water. It's also your go-to for removing any stray marks or correcting drawing errors.
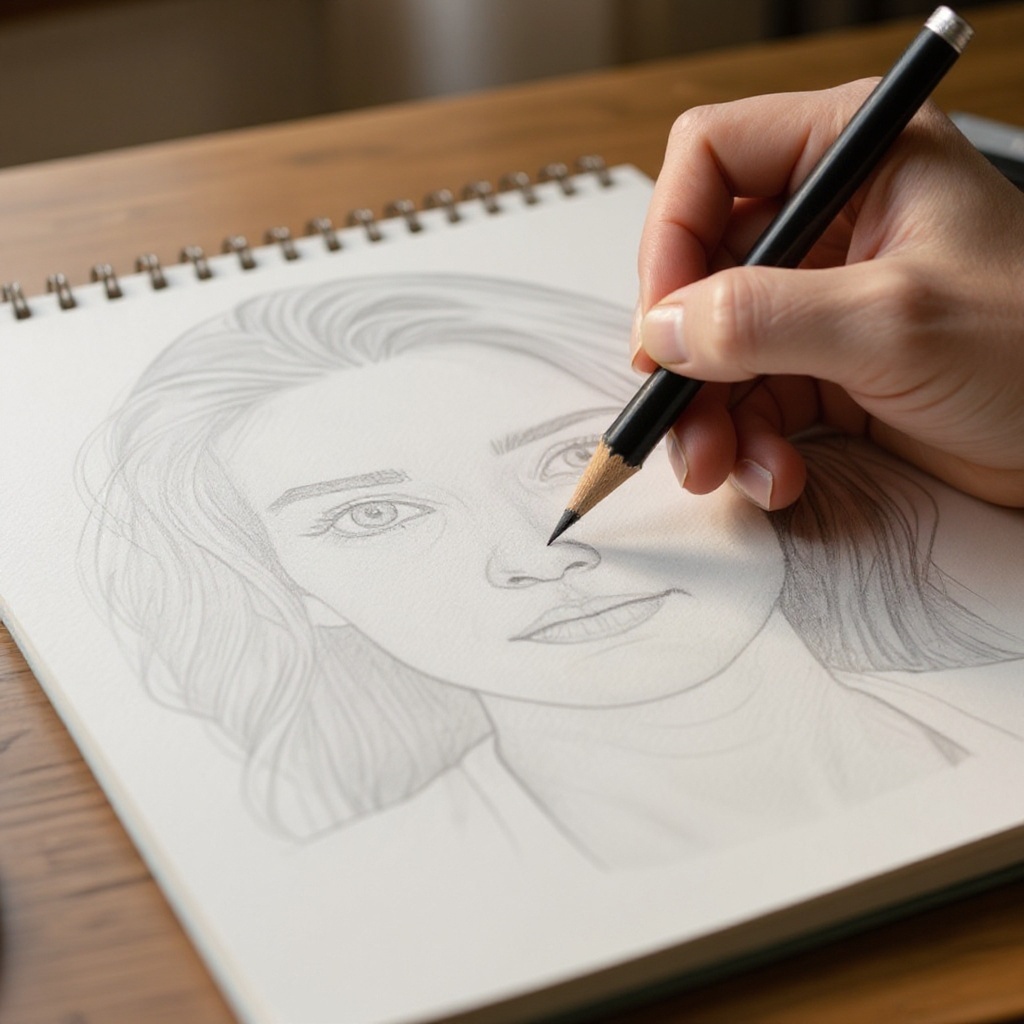
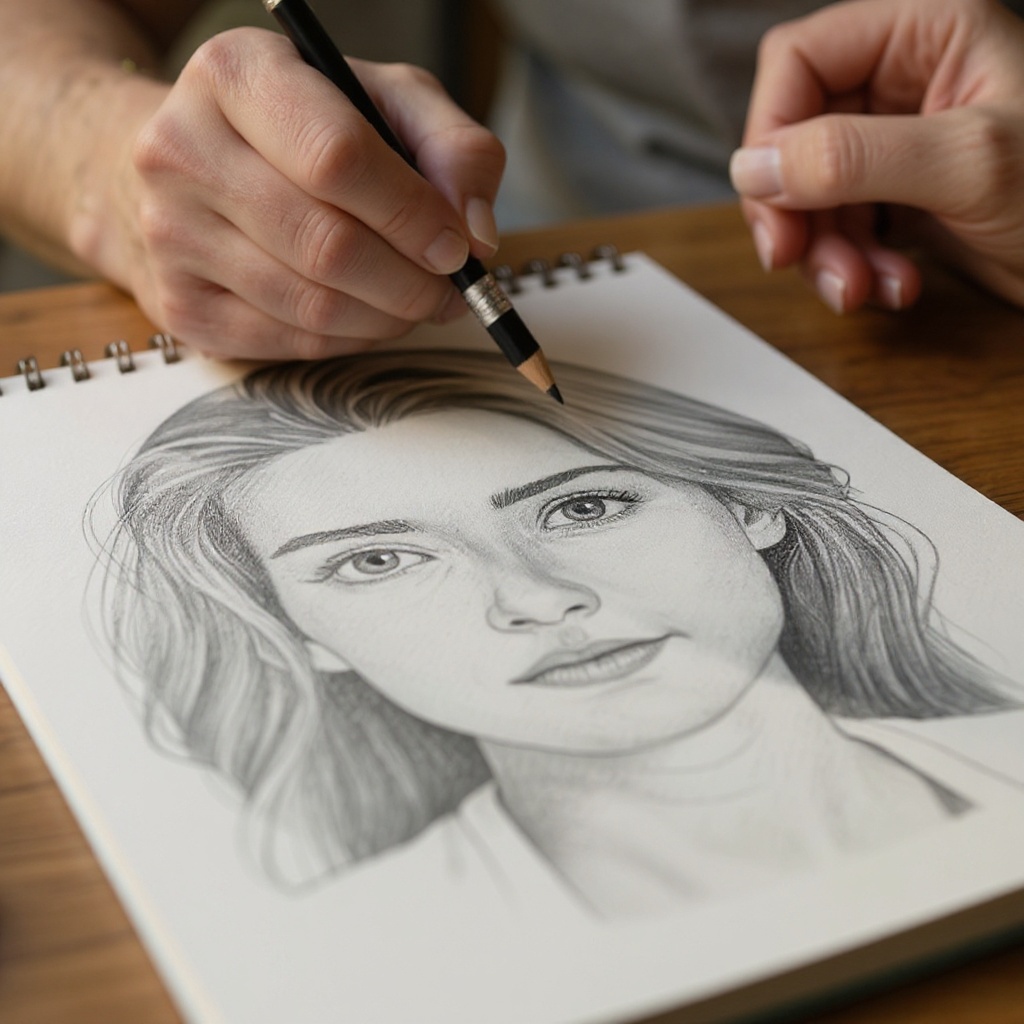
- 9
Add finer details like hair strands, textures, or subtle lines using the sharp tip of your pencils. For hair, think about the direction of growth and the play of light and shadow on individual strands. For textures, observe the surface quality of your subject and replicate it with varied mark-making.
- 10
Continue to layer and blend, constantly comparing your drawing to your reference (if using one) to ensure accuracy. This iterative process of adding graphite, blending, and observing is crucial for achieving a high level of realism. Look for areas that need more contrast, smoother transitions, or sharper details.
- 11
Pay close attention to edges – some should be sharp and defined, while others should be soft and blended. Sharp edges often indicate a direct light source or a distinct form, while soft edges suggest form turning away from the light or atmospheric perspective. This control over edges is a hallmark of realistic drawing.
- 12
Step back from your drawing periodically to assess the overall balance of light and shadow and make any necessary adjustments. This visual break allows you to see your drawing with fresh eyes, helping you identify areas that might be too dark, too light, or lacking in detail. It's a critical step for achieving a cohesive and believable final piece.
- 13
Begin to establish the form of rounded objects by using curved, directional strokes. Instead of just shading flatly, follow the contour of the object with your pencil marks. This technique helps to convey the three-dimensionality of the subject, making it appear to have volume and shape.
- 14
Introduce subtle skin tones or fabric textures by layering different pencil grades and blending techniques. For skin, consider the subtle variations in color and light. For fabric, think about the weave, the way it drapes, and how light reflects off its surface.
- 15
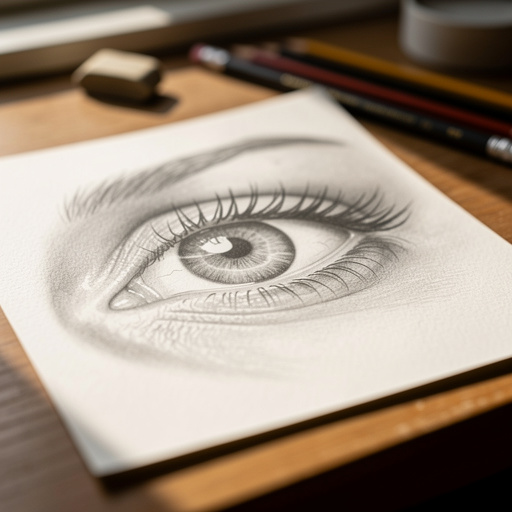
Work on the eyes and mouth with extreme care, as these are often focal points in portraits and convey a great deal of emotion. Pay attention to the reflections in the eyes, the subtle curves of the lips, and the delicate shading that defines their form.
- 16
Refine the background to enhance the subject. A well-executed background can push the subject forward and add context, while a poorly handled one can detract from your main focus. Consider a simple gradient, a softly blurred environment, or a more detailed setting depending on your subject.
- 17
Check for consistency in your light source. Ensure that highlights and shadows are falling in the same direction across all elements of your drawing. Inconsistencies here can break the illusion of realism.
- 18
Add final touches and subtle details that bring your drawing to life. This might include tiny highlights, faint textures, or the softest of smudges that create a sense of atmosphere or depth. These small additions can make a significant difference in the overall impact of your work.
Tips & Troubleshooting
- 1Don't be afraid to make mistakes! The kneaded eraser is your best friend for lifting graphite and correcting errors subtly. It can be molded into different shapes to lift graphite from large areas or sharpened to a point for precise corrections, making it an indispensable tool for achieving realism.
- 2Practice different blending techniques to achieve a variety of effects. Experiment with blending stumps for smooth transitions, cotton swabs for softer gradients, and even a soft cloth for larger areas, but always be mindful of the oils from your skin, which can alter the paper's surface.
- 3Layering is key to realism. Build up tones gradually rather than trying to achieve them in one go, which can lead to a flat or overworked appearance. Each layer of graphite and blending adds depth and complexity, mimicking the way light interacts with surfaces in the real world.
- 4Observe your subject (or reference photo) closely. Notice the subtle variations in light and shadow, and the textures present. The more you train your eye to see these nuances, the more accurately you can translate them onto paper, moving beyond simple shapes to capture true likeness.
- 5Understand the different grades of graphite pencils and their uses. HB is for general sketching and lighter tones, 2B and 4B are for building mid-tones and shadows, and 6B is for the deepest, richest darks. Having a range allows for greater control over value and contrast.
- 6Work from general to specific. Start with the overall composition and large shapes, then gradually move to smaller details and finer textures. This approach ensures that the foundational elements of your drawing are solid before you get lost in the intricate parts.
- 7Maintain a clean workspace and clean your blending tools regularly. Graphite dust can easily transfer to unwanted areas, creating smudges and muddying your drawing. Keeping your tools clean will help you maintain crisp details and clean transitions.
- 8Take breaks and view your drawing from a distance. Stepping away allows you to see your work with fresh eyes, helping you to identify areas that might be out of proportion, unbalanced in value, or lacking in detail. This objective perspective is crucial for refinement.
Related Activities You Might Enjoy
Frequently Asked Questions
What pencils are best for realistic pencil drawing?
For realistic pencil drawing, a range of graphite pencils is ideal to achieve a full spectrum of tones. Start with an HB pencil for initial sketching and for lighter mid-tones, as it offers a good balance of hardness and darkness. For building up mid-tones and adding depth, a 2B pencil is excellent. To create richer shadows and more dramatic contrast, use softer leads like 4B and 6B. A harder lead, such as a 2H, can be useful for very light initial sketches that are easily erased or blended without leaving a heavy mark, but the core of realistic drawing relies on the softer grades for shading.
How do I make my pencil drawings look more realistic?
To achieve realism, focus on accurate proportions, subtle shading, and capturing textures. Begin by carefully observing your subject and sketching its basic form with attention to detail. Layer your graphite tones gradually, building up from light to dark, and blend carefully to create smooth transitions that mimic how light falls on surfaces. Pay close attention to highlights and the smallest details, such as individual strands of hair or the glint in an eye, as these elements significantly contribute to the illusion of three-dimensionality and life. Mastering the control of edges—some sharp, some soft—is also crucial for creating depth and form.
What is the best paper for realistic pencil drawing?
Smooth, heavier-weight drawing paper is best for realistic pencil drawing because it allows for smooth blending and prevents the graphite from becoming too textured or 'scratchy.' Papers like Bristol board, which comes in vellum (slightly textured) or smooth surfaces, are excellent choices. A good quality drawing paper with a weight of 90lb or heavier is also recommended, as it can withstand multiple layers of graphite and blending without buckling or tearing. The smoother the surface, the easier it is to achieve subtle gradations of tone and fine details.
How long does a realistic pencil drawing take?
The time it takes to create a realistic pencil drawing varies greatly depending on the complexity, size, and level of detail you aim for. A simple portrait of a face with basic shading might take 1-2 hours for an intermediate artist. However, a highly detailed still life with intricate textures, a complex landscape with atmospheric effects, or a portrait with fine hair detail could take many hours, spread over several days or even weeks to complete. The process is iterative, involving layering, blending, and constant refinement, which naturally extends the time required.
What are the essential tools for realistic pencil drawing?
The essential tools for realistic pencil drawing include a range of graphite pencils (typically HB for sketching, and 2B, 4B, 6B for shading), smooth drawing paper (like Bristol board or heavy-weight drawing paper), a kneaded eraser for lifting graphite and creating soft highlights, and a white plastic eraser for sharp highlights and corrections. Blending tools such as blending stumps, tortillons, cotton swabs, or a soft cloth are also crucial for creating smooth tonal transitions. A good pencil sharpener that can maintain a fine point is also indispensable for detailed work.
How do I create realistic textures with pencils?
Creating realistic textures involves observing the specific characteristics of the surface you are drawing and replicating them with varied mark-making and layering. For instance, to draw hair, use light, directional strokes that follow the flow of the strands, varying the pressure and density to suggest volume and highlights. For rough textures like wood or stone, use a combination of hatching, cross-hatching, and stippling, with occasional smudging to soften edges. For smooth surfaces like metal or glass, focus on sharp highlights and precise reflections, using your erasers effectively to create those bright spots.
What Next?
Congratulations on completing your realistic pencil drawing! This foundational skill opens doors to countless artistic explorations. Consider trying different subjects like animals, intricate fabrics, or even abstract forms with a realistic touch. You can also experiment with different paper textures or colored pencils to add new dimensions to your work. Once finished, protect your masterpiece by framing it under glass or spraying it with a fixative to prevent smudging. Store it away from direct sunlight and humidity to ensure its longevity. Keep practicing, and your realistic pencil drawings will continue to impress!
Free: 10 Paper Crafts Anyone Can Make in 5 Minutes
Get our beginner guide + new craft ideas weekly.
No spam. Unsubscribe anytime.
Did you complete this activity?