How to Create a Bohemian Love Knot Wall Art — Easy Step-by-Step Guide
Discover the joy of macrame with this DIY kit! Create a stunning, heart-inspired wall hanging using simple knots. A perfect screen-free family activity.

Quick answer
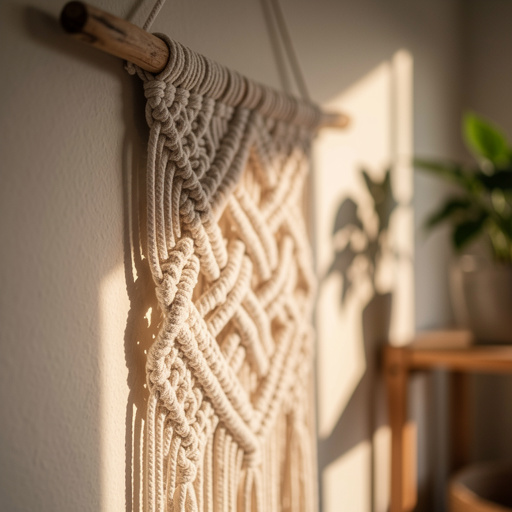
To make a Bohemian Love Knot Wall Art, you need macrame cord (approx. 100 yards of 3mm or 4mm cotton), a wooden dowel (approx. 12 inches), and scissors, taking about 60-90 minutes. Start by attaching cords to the dowel using Lark's Head knots. This beginner-friendly activity has 15 steps and is perfect for families with children aged 8+.
What you need
Shop on Amazon · As an Amazon Associate we earn from qualifying purchases. Links above are affiliate links — we may earn a commission at no extra cost to you.
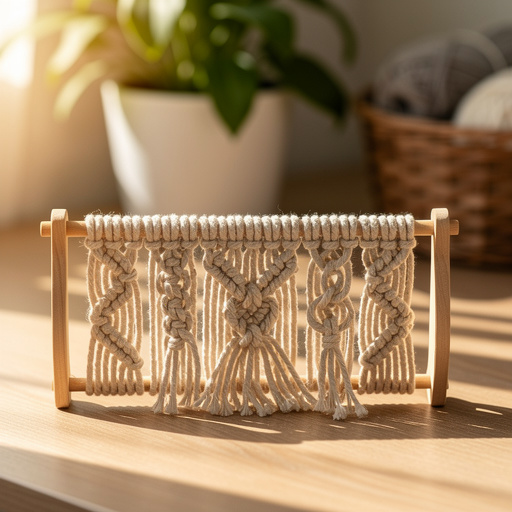
Embrace the cozy, artistic spirit of bohemian decor with this delightful Love Knot Macrame Wall Art project. This beginner-friendly craft is more than just a DIY; it's an invitation to slow down, connect, and create something beautiful with your hands. Perfect for a relaxing afternoon, a family bonding activity, or a thoughtful handmade gift, this project transforms simple cords into a charming heart-inspired masterpiece. Its accessible techniques make it ideal for anyone looking to dip their toes into the world of macrame, offering a rewarding sense of accomplishment with a stunning finished product.
On this page
Step-by-Step Instructions
- 1
Cut 10 pieces of macrame cord, each 10 feet long. Ensure your cuts are clean and straight to avoid fraying, and measure accurately to maintain consistency across all cords.
- 2
Fold each cord exactly in half, ensuring the two ends meet perfectly to create a neat loop at the top. This loop will be used to attach the cords to your dowel.
- 3
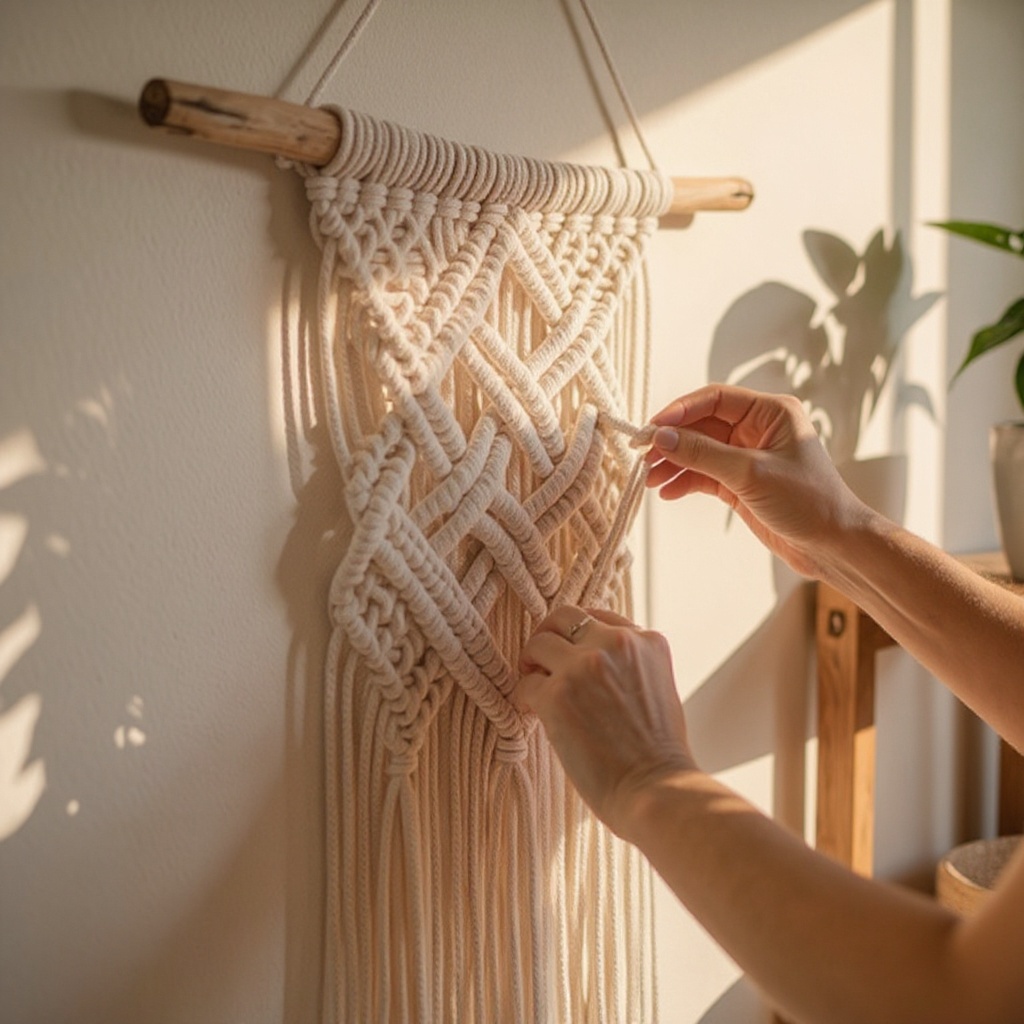
Take one folded cord and position the loop over the wooden dowel. Bring the two loose ends of the cord up through the loop and pull them down firmly. This is a Lark's Head knot, and it securely attaches your cord to the dowel. Repeat this process for all 10 folded cords, spacing them evenly along the dowel, leaving a small gap between each knot to prevent overcrowding.
- 4
Once all cords are attached, you should have 20 individual strands hanging from the dowel. Gently shake the dowel to ensure all knots are snug and the cords are hanging straight.
- 5
Separate the 20 cords into two distinct groups, with 10 cords in each group. Designate one group as the 'left' section and the other as the 'right' section. Ensure the cords within each group are evenly distributed.
- 6
Take the left group of 10 cords. Identify the four outermost cords as your 'working' cords and the six inner cords as your 'filler' cords. Begin tying a series of square knots using the working cords, working from top to bottom. A square knot involves taking the leftmost working cord over the two filler cords, then the rightmost working cord under the filler cords and up through the loop created by the left cord. Then, repeat the process in reverse: take the rightmost working cord over the filler cords, and the leftmost working cord under the filler cords and up through the loop. Pull both working cords simultaneously to tighten the knot.
- 7
Continue tying square knots down the left section, spacing each knot approximately 1 inch apart from the previous one. Maintain consistent tension for a uniform look, and ensure the filler cords remain straight and untangled.
- 8
Repeat steps 6 and 7 with the right group of 10 cords. Tie a series of square knots, spacing them about 1 inch apart, ensuring the knots are at the same level as those on the left side.
- 9
Now, bring the two knotted sections together. Identify the two innermost cords from the left group and the two innermost cords from the right group. These four cords will form your central knot.
- 10
Tie a central square knot using these four innermost cords. This knot will connect the left and right sections, beginning the formation of the heart or diamond shape. Ensure this knot is tied at the same level as the last knots on each individual section.
- 11
Continue tying square knots, alternating between the left and right sides, and working inwards towards the center. For each new row of knots, select the next two innermost cords from each side. This gradual inward movement is what creates the characteristic curves of the heart shape. Adjust the tension of each knot to subtly influence the shape; tighter knots will pull the cords closer together.
- 12
As you continue knotting, observe the shape forming. You are essentially creating two diagonal lines of square knots that converge towards the center, with additional knots bridging the gap. If you notice any cords becoming uneven, gently pull on them to adjust. The goal is to create a symmetrical and pleasing diamond or heart silhouette.
- 13
Once the desired heart or diamond shape is achieved, and you've reached the point where you want the main knotting to end, tie a simple overhand knot at the bottom of all 20 cords to secure them. Gather all cords together and tie one large knot, ensuring it's tight and snug against the last row of square knots.
- 14
Trim the excess cord at the bottom to create a fringe. Aim for a length of about 4-6 inches from the securing overhand knot. You can leave this fringe straight across for a clean look, or carefully cut it into a V-shape to further accentuate the heart design. Use sharp scissors for a clean cut.
- 15
Optional: Before tying the final overhand knot (step 13), you can thread decorative beads onto some of the fringe cords. Ensure the beads have holes large enough for your macrame cord to pass through. This adds a personalized touch and extra visual interest to your finished wall art.
Tips & Troubleshooting
- 1If your knots appear uneven or loose, don't worry! Gently pull on the individual cords to adjust the tension and straighten them out. Macrame is forgiving, and practice truly makes perfect, so don't be afraid to make minor corrections as you go.
- 2For a more personalized and bohemian look, consider threading decorative beads onto some of the fringe cords before tying the final overhand knot. Choose beads with holes large enough for your cord to pass through, and experiment with different colors and textures to complement your macrame.
- 3Don't be afraid to experiment with different knotting patterns or spacing to create unique designs. For instance, you could try a double square knot for a thicker, more substantial look, or vary the spacing between knots to create different visual effects.
- 4Ensure your wooden dowel is sturdy enough to support the weight of the macrame. If it feels flimsy or thin, consider using a thicker dowel or reinforcing a thinner one by wrapping it with additional macrame cord before you begin knotting.
- 5When tying your square knots, pay attention to the tension. Consistent tension is key to achieving a smooth and uniform look. If you find your knots are too tight, you can gently loosen them by pulling on the working cords. Conversely, if they are too loose, pull them tighter.
- 6To achieve a more pronounced heart shape, focus on bringing the cords inwards more aggressively in the middle section. You can also adjust the spacing of your square knots; slightly closer knots can create a tighter curve.
- 7If you're new to macrame, it can be helpful to watch a quick video tutorial on how to tie a Lark's Head knot and a square knot. Visual aids can make understanding the basic techniques much easier.
- 8When cutting your fringe, consider using a sharp craft knife or rotary cutter for an extra clean and precise edge, especially if you're aiming for a specific shape like a V-cut.
Related Activities You Might Enjoy
Frequently Asked Questions
What is the best type of cord for macrame wall hangings?
For macrame wall hangings, 100% cotton cord in 3mm or 4mm thickness is ideal. Cotton is a popular choice because it's soft, easy to knot, and creates a beautiful, textured look that's perfect for home decor. Its natural fibers lend themselves well to the bohemian aesthetic. Thinner cords (like 3mm) are great for intricate details, while thicker cords (like 4mm or 5mm) provide a more substantial and robust feel to your finished piece. Avoid synthetic materials if you're aiming for a classic, natural bohemian look, as they can sometimes appear shinier and less organic.
How do I make a heart shape with macrame knots?
To create a heart shape in macrame, you'll typically use a series of square knots. The key lies in how you arrange and tension your knots. You start by creating two separate knotted panels, then bring them together. By gradually bringing the cords inwards towards a central point and adjusting the spacing and tension of your square knots, you can gradually form the characteristic curves of a heart. The more you bring the sides inwards, the more pronounced the heart shape will become. It's a process of building the shape row by row, observing its development as you go.
Can children do macrame wall hangings?
Yes, children aged 8 and up can definitely create macrame wall hangings with adult supervision. This project uses simple knots like the Lark's Head and square knot, which are easy to learn and master. It's a fantastic screen-free activity that promotes fine motor skills, patience, and creativity. An adult can help with the initial cord cutting and measuring, and then guide the child through the knotting process. It's a wonderful way for families to spend quality time together, creating a beautiful keepsake they can be proud of.
How long does a macrame wall hanging take to make?
A beginner macrame wall hanging like this one typically takes about 60 to 90 minutes to complete. The time can vary depending on your speed, familiarity with macrame knots, and the complexity of the design you choose. For children, it might take a bit longer, especially if they are learning the knots for the first time. However, the process is quite meditative, and many crafters find the time flies by as they get absorbed in the rhythm of knotting. It's a project that can be completed in a single afternoon.
What is a Lark's Head knot and how do I tie it?
A Lark's Head knot, also known as a cow hitch, is a fundamental knot in macrame used to attach cords to a dowel, ring, or bar. To tie it, you first fold your macrame cord in half to create a loop at the top. Then, place this loop over your dowel. Next, bring the two loose ends of the cord up and through the loop. Finally, pull both loose ends downwards simultaneously to tighten the knot securely against the dowel. This knot creates a neat and stable attachment point for your macrame projects.
Can I use different types of wood for the dowel?
Yes, you can use different types of wood for the dowel, but it's important to choose one that is sturdy and smooth. Common choices include pine, birch, or oak. Ensure the dowel is at least 1/2 inch in diameter to adequately support the weight of the macrame cords and the finished piece. Avoid soft woods that might easily splinter or bend. You can also opt for a decorative wooden branch or a metal rod if you prefer a different aesthetic, as long as it's strong enough to hold the macrame.
How do I care for my macrame wall art?
Caring for your macrame wall art is simple. To keep it looking its best, avoid direct sunlight, which can cause the colors to fade over time. If it gets dusty, you can gently brush the cords with a soft brush or use a lint roller. If it becomes creased, you can carefully iron it on a low heat setting with a protective cloth placed between the iron and the macrame, or simply hang it for a few days to let the creases fall out naturally. For more stubborn wrinkles, a light mist of water can sometimes help relax the fibers.
What Next?
Congratulations on creating your beautiful Bohemian Love Knot Wall Art! This versatile piece can be hung in any room, adding a touch of handmade charm and bohemian flair. For variations, consider using different colored cords, incorporating wooden beads into the fringe, or even experimenting with different knot combinations for a unique texture. Once complete, display it proudly on a gallery wall, above a bed, or in a cozy reading nook. If you enjoyed this project, consider exploring more intricate macrame patterns or trying your hand at other textile crafts. Store your wall art by hanging it to prevent creasing, ensuring its beauty lasts for years to come.
Free: 10 Paper Crafts Anyone Can Make in 5 Minutes
Get our beginner guide + new craft ideas weekly.
No spam. Unsubscribe anytime.
Did you complete this activity?