Polymer Clay Tiny Succulent Plant Charms
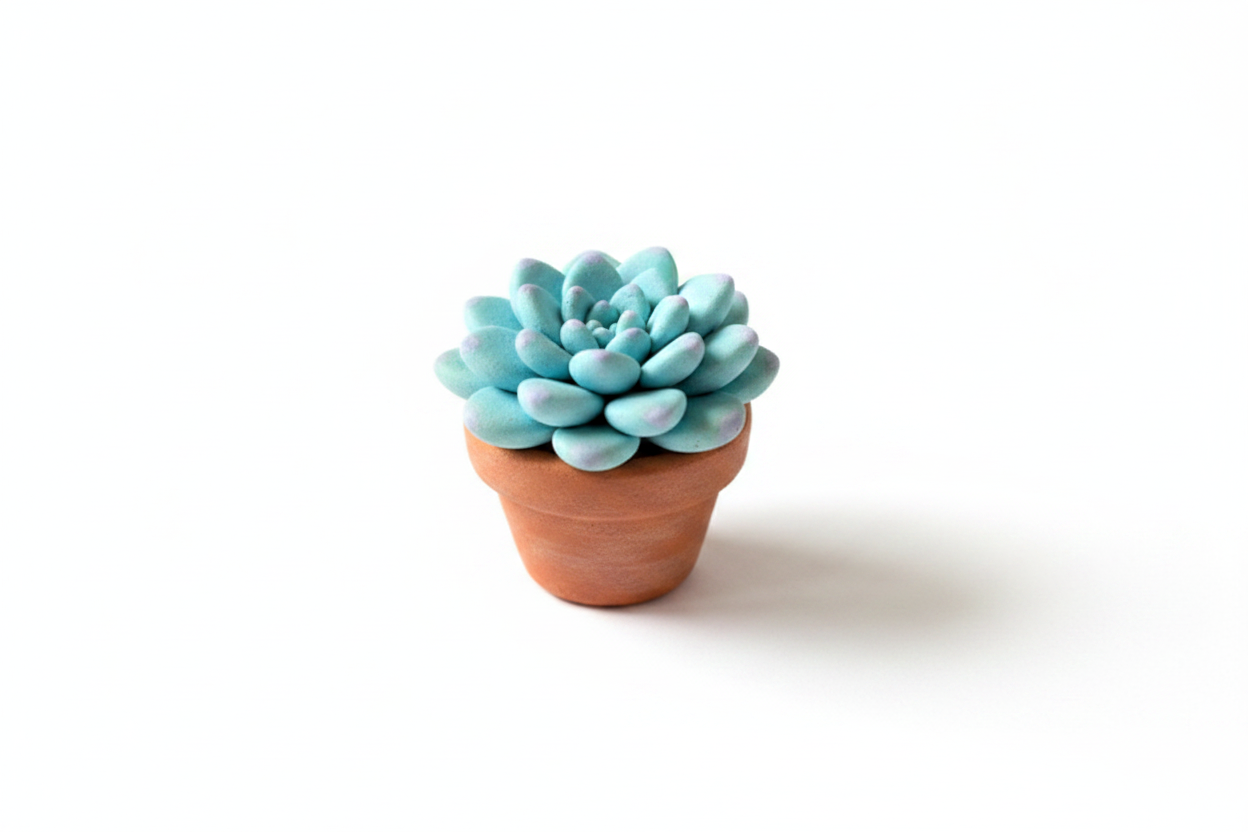
Sculpt your own miniature botanical wonders with this delightful polymer clay project. Create tiny succulent plant charms that are perfect for adding a touch of green to your accessories, crafts, or even as unique gifts. This guide breaks down the process into easy-to-follow steps, making it accessible for crafters of all levels.
Quick answer
Sculpt tiny succulent plant charms using polymer clay, a craft knife, dotting tools, and an oven. Follow detailed instructions to create realistic-looking miniature succulents for jewelry or other crafts.
What you need
Shop on Amazon · As an Amazon Associate we earn from qualifying purchases. Links above are affiliate links — we may earn a commission at no extra cost to you.
Bring the beauty of nature indoors with these incredibly charming polymer clay tiny succulent plant charms. This project is a fantastic way to explore sculpting and create miniature works of art that are both adorable and versatile. Whether you're a seasoned polymer clay artist or a curious beginner, these tiny succulents offer a rewarding and relaxing crafting experience. They're perfect for adding a unique touch to jewelry, keychains, planner charms, or even as decorative elements for miniature scenes. Get ready to cultivate your creativity and grow a collection of these delightful little green gems!
On this page
Step-by-Step Instructions
- 1
Gather your polymer clay in various shades of green. Having a few different hues will allow you to create more realistic and visually interesting succulents, mimicking the natural variations found in real plants.
- 2
For your first succulent, begin by taking a small piece of your primary green clay, about the size of a pea or a small blueberry, and roll it into a smooth, compact ball between your fingertips. This will form the base or core of your succulent.
- 3
Gently flatten the ball by pressing it between your thumb and index finger, creating a slightly wider, more stable base for attaching your leaves. Aim for a shape that's not perfectly round, perhaps a little irregular, to mimic organic growth.
- 4
Now, take a tiny piece of clay, significantly smaller than your base ball, and roll it into a small teardrop or petal shape. The size of this 'leaf' will depend on the overall size you want your succulent to be; for charms, smaller is usually better.
- 5
Using your craft knife or blade, carefully score a thin, shallow line down the center of the teardrop leaf. This indentation will mimic the natural vein or crease found in succulent leaves, adding a touch of realism.
- 6
Gently press the pointed end of the scored teardrop leaf into the flattened base of your succulent. Position it so it slightly overlaps the base and then gently bend the leaf outwards, giving it a natural, slightly curved appearance.
- 7
Repeat steps 4-6 to create more leaves, attaching them around the base of your succulent. Overlap them slightly as you go, working your way around the core, building up the layers to create a fuller, more dimensional plant shape.
- 8
Once you have a good number of leaves attached, use a dotting tool or the tip of a toothpick to gently press small indentations or subtle lines between the leaves. This technique helps to define the spaces between the petals and adds a more realistic, textured look to your succulent.
- 9
For a second type of succulent, start by rolling a small ball of clay, similar to the first step, but then press it into a shallow, concave bowl shape. This will serve as the base for a rosette-style succulent.
- 10
Roll several small teardrop or petal shapes, just as you did before, and begin attaching them around the outer edge of the shallow bowl shape. Overlap them slightly, working your way inwards towards the center of the bowl.
- 11
Continue adding these small leaves, gradually decreasing their size as you move towards the center, to create a tightly packed, blooming effect. Ensure each leaf is securely attached to the base and the leaf below it.
- 12
Use your dotting tool or toothpick to gently shape the edges of these leaves, perhaps by pressing them slightly to create a softer, more organic curve, or by adding subtle texture to mimic the surface of a real succulent.
- 13
If you plan to add a jewelry finding, such as an eye pin, gently press the loop or the flat end of the finding into the back or bottom of your succulent charm before baking. Ensure it's firmly embedded for a secure hold.
- 14
Once you are satisfied with the appearance of all your tiny succulent charms, carefully arrange them on a baking sheet lined with parchment paper or aluminum foil. Ensure they are not touching each other to prevent them from sticking together during baking.
- 15
Bake the polymer clay according to the manufacturer's instructions, paying close attention to the recommended temperature and baking time. Overbaking can cause the clay to become brittle, while underbaking will result in it remaining soft and pliable.
- 16
After baking, allow the charms to cool completely on the baking sheet before handling them. This is crucial as hot polymer clay can be very fragile and may break easily.
- 17
Once cooled, if you didn't embed an eye pin, you can now attach your jewelry findings. Use a strong craft adhesive or super glue to attach a jump ring or an earring hook to the back or bottom of your succulent charm.
- 18
Consider adding subtle color variations by mixing a tiny amount of a darker green or even a hint of brown into the base clay for some leaves, or by lightly dusting the finished charm with mica powder for a subtle sheen.
- 19
Experiment with different succulent shapes by looking at real plants for inspiration. Some succulents have more pointed leaves, while others are rounder and more plump. Adapt your leaf shapes and arrangement accordingly.
- 20
For added realism, you can use a fine brush to lightly paint a touch of darker green or even a subtle reddish-brown hue onto the tips or edges of some leaves after baking and cooling.
Tips & Troubleshooting
- 1Work with small amounts of clay at a time to maintain control and create delicate details. If the clay becomes too soft and sticky, place it in the refrigerator for a few minutes to firm it up before continuing.
- 2Use a variety of green shades to achieve a more natural and visually appealing look. Mixing in a tiny bit of brown or even a hint of purple can create depth and mimic the subtle colorations found in real succulents.
- 3When scoring lines on the leaves, use a light touch to avoid cutting all the way through the clay. The goal is to create a subtle indentation that adds texture and dimension.
- 4Experiment with different tools for adding texture. Beyond dotting tools and toothpicks, you can use the tip of a needle, a textured stamp, or even the edge of a credit card to create unique patterns on your succulent leaves.
- 5If you're making charms for jewelry, ensure your findings are securely embedded or attached. A strong adhesive or a well-placed eye pin will prevent your charms from falling off.
- 6Clean your tools and work surface regularly with rubbing alcohol to prevent color contamination between different clay shades. This is especially important when working with lighter colors.
- 7Don't be afraid to embrace imperfections. Real succulents are not perfectly symmetrical, so slight irregularities in your sculpted leaves can actually enhance the charm and realism of your creations.
- 8Consider adding a protective top coat of a clear glaze or sealant after baking and cooling. This will add a subtle sheen, protect the colors, and make your charms more durable.
Related Activities You Might Enjoy
Frequently Asked Questions
What is the best type of polymer clay to use for tiny succulent charms?
For creating tiny succulent charms, most standard polymer clays will work well. Brands like Sculpey, Fimo, and Premo are popular choices and offer a good range of colors and workability. It's beneficial to have a few different shades of green available to create depth and realism in your succulents. Consider using a clay that is known for holding fine details, as you'll be working with small pieces. If you're a beginner, a more pliable clay might be easier to manipulate. Always check the manufacturer's instructions for baking temperatures and times, as these can vary slightly between brands.
How do I make the succulent leaves look realistic?
Achieving realistic succulent leaves involves a few key techniques. Start by rolling your clay into smooth, teardrop shapes. The scoring of a central line with a craft knife is crucial for mimicking the natural crease. Gently bending the leaves outwards after attaching them adds a natural, organic curve. Overlapping the leaves slightly as you build up your succulent creates dimension. For added realism, use dotting tools or toothpicks to press subtle indentations between the leaves, defining their separation and adding texture. Looking at real succulent photos for inspiration on leaf shape and arrangement will also greatly enhance the realism of your creations.
Can I make these succulent charms into earrings or other jewelry?
Absolutely! These tiny succulent charms are perfect for creating a variety of jewelry. Once baked and cooled, you can easily attach jewelry findings. For earrings, use a jump ring to connect an earring hook to the top of the charm. For necklaces or bracelets, an eye pin can be embedded into the clay before baking, or a jump ring can be attached to the back afterwards. You can also use them as charms for keychains, zipper pulls, or to decorate bags. Just ensure your findings are securely attached, either by embedding them firmly before baking or using a strong craft adhesive.
How do I prevent the polymer clay from becoming too soft or sticky while I'm working?
Polymer clay can sometimes become too soft and sticky, especially in warmer environments or with prolonged handling. If this happens, the best solution is to chill the clay. Place the affected piece of clay in the refrigerator for about 10-15 minutes. This will firm it up considerably, making it easier to handle and sculpt without sticking to your fingers or tools. You can also try working on a cool surface, like a tile or a piece of glass. Keeping your hands clean and dry can also help minimize stickiness.
What are the best ways to add color and texture to my polymer clay succulents?
To add color and texture, start by using a variety of green polymer clay shades. Mixing in a tiny amount of brown or even a hint of purple can create subtle color variations that mimic real succulents. After baking, you can enhance the realism by lightly dusting the charms with mica powders in shades of green, gold, or even a touch of reddish-brown for the tips. For texture, use dotting tools, toothpicks, or even the tip of a needle to create fine lines, indentations, or subtle bumps on the leaves. You can also experiment with textured tools or stamps for unique patterns.
How long should I bake polymer clay charms, and what temperature should I use?
The baking time and temperature for polymer clay charms are crucial for their durability and appearance. Always refer to the specific instructions provided by the manufacturer of your polymer clay brand, as these can vary. Generally, polymer clay is baked at temperatures between 230°F (110°C) and 275°F (135°C) for approximately 15-30 minutes per 1/4 inch (6mm) of thickness. It's highly recommended to use an oven thermometer to ensure accurate temperature, as oven thermostats can be unreliable. Overbaking can make the clay brittle, while underbaking will leave it soft and prone to damage.
What Next?
Once your tiny succulent charms have cooled, you'll have a collection of miniature botanical treasures ready to be adorned. Consider turning them into earrings, bracelets, or even a unique pendant. For a different look, experiment with adding a touch of white or pink clay for subtle color variations, or even a dusting of mica powder for a subtle shimmer. These charms also make wonderful gifts for plant lovers or fellow crafters. Store your finished pieces in a cool, dry place to maintain their vibrant colors and delicate details, and get ready to embark on your next miniature sculpting adventure!
Free: 10 Paper Crafts Anyone Can Make in 5 Minutes
Get our beginner guide + new craft ideas weekly.
No spam. Unsubscribe anytime.
Did you complete this activity?
Related