How to Make No-Bake Cereal Treat Bars — Easy Step-by-Step Guide
Whip up a batch of these classic no-bake cereal treat bars in minutes! They're a simple, delicious, and fun activity for the whole family.
Quick answer
To make no-bake cereal treat bars, you need crispy rice cereal, mini marshmallows, unsalted butter, and about 15 minutes of active prep time. Start by melting butter and marshmallows together until smooth. Then, stir in the cereal until evenly coated. Finally, press the mixture into a greased pan and let it cool. This easy activity has 7 core steps and is perfect for families with kids aged 4+.
What you need
Shop on Amazon · As an Amazon Associate we earn from qualifying purchases. Links above are affiliate links — we may earn a commission at no extra cost to you.
There's a timeless charm to a perfectly crafted cereal treat bar. These no-bake wonders are more than just a dessert; they're a nostalgic trip back to childhood, a guaranteed crowd-pleaser, and an incredibly accessible DIY project. Perfect for busy weeknights, rainy afternoons, or even as a fun educational activity for little ones, this recipe requires minimal ingredients and even less fuss. Get ready to create a batch of chewy, sweet, and utterly satisfying bars that will bring smiles to everyone's faces.
On this page
Step-by-Step Instructions
- 1
Prepare your baking pan: Lightly grease a 9x13 inch baking pan with non-stick cooking spray or a thin layer of butter. This crucial step prevents the sticky marshmallow mixture from adhering to the pan, ensuring easy removal and clean-up.
- 2
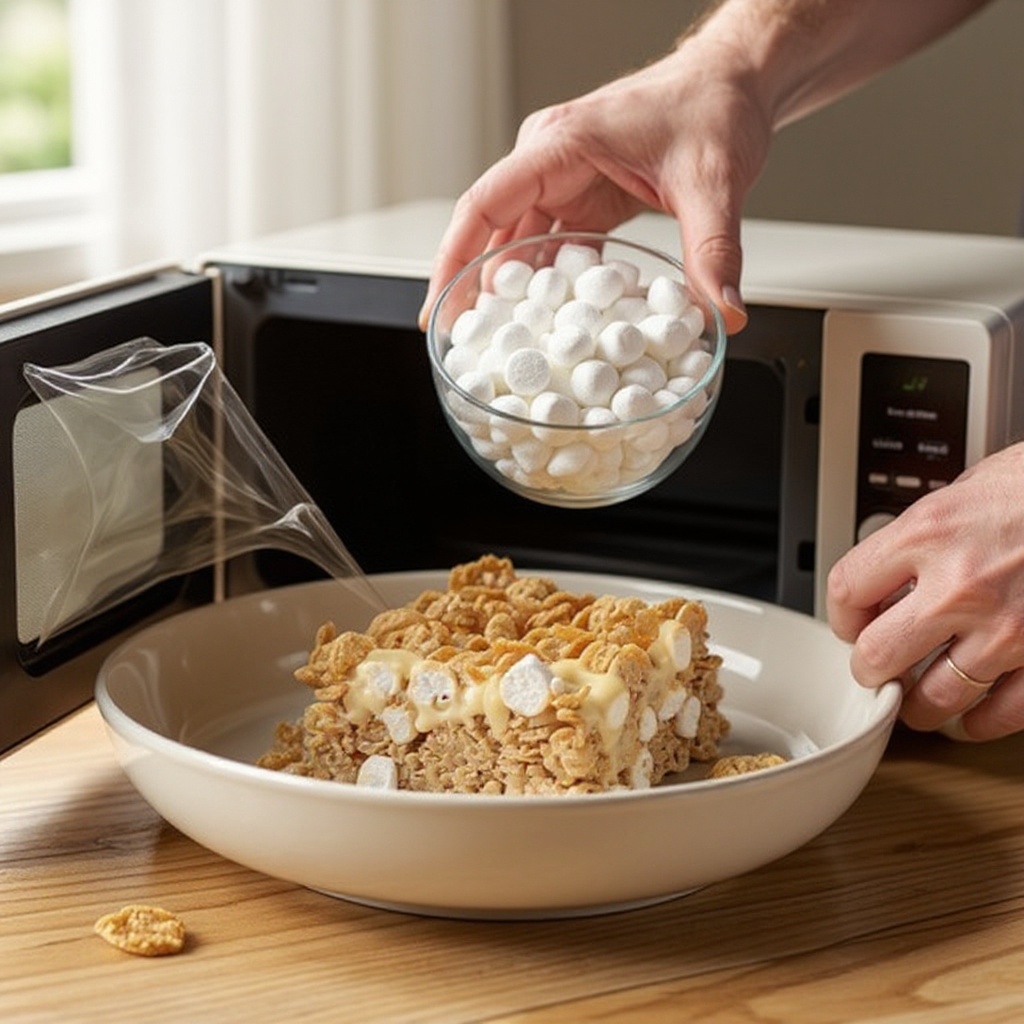
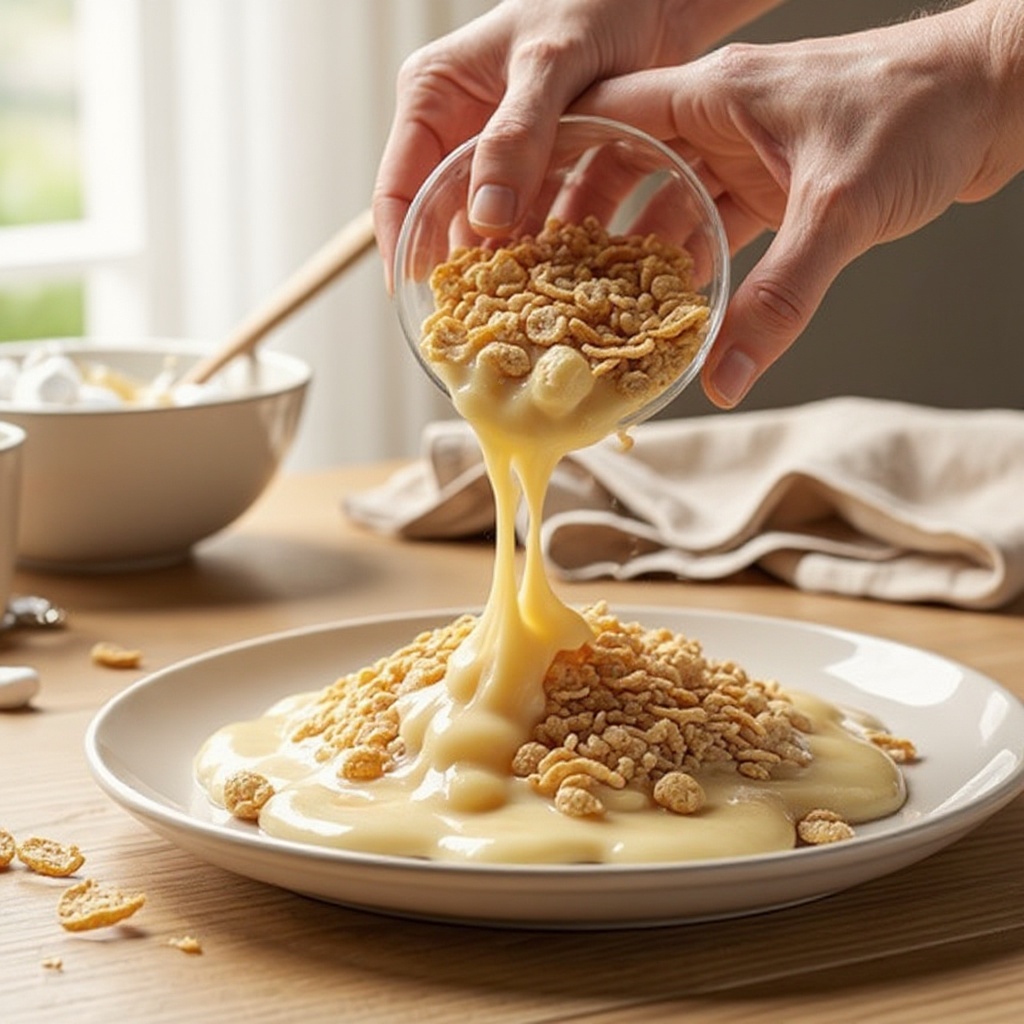
Combine marshmallows and butter: In a large, microwave-safe bowl, combine the entire bag (10 oz) of mini marshmallows and the 4 tablespoons of unsalted butter. Using mini marshmallows helps them melt more evenly and quickly.
- 3
Melt the marshmallow mixture: Microwave the bowl on high power for 1 minute. Carefully remove the bowl (it will be hot!) and stir the mixture thoroughly with a heat-resistant spatula. Continue microwaving in 30-second intervals, stirring well after each interval, until the marshmallows are completely melted and the mixture is smooth and glossy. Be careful not to scorch the marshmallows, which can result in a tough texture.
- 4
Add optional flavorings: If you're using vanilla extract, stir it into the melted marshmallow mixture now until fully incorporated. This is the best time to add it for an even distribution of flavor.
- 5
Incorporate the cereal: Add the 6 cups of crispy rice cereal to the melted marshmallow mixture. Ensure you're using a large enough bowl to comfortably accommodate all the ingredients without overflowing.
- 6
Gently coat the cereal: Stir gently with your spatula until every piece of cereal is evenly coated with the gooey marshmallow mixture. Avoid over-stirring, which can crush the cereal and lead to a denser final product.
- 7
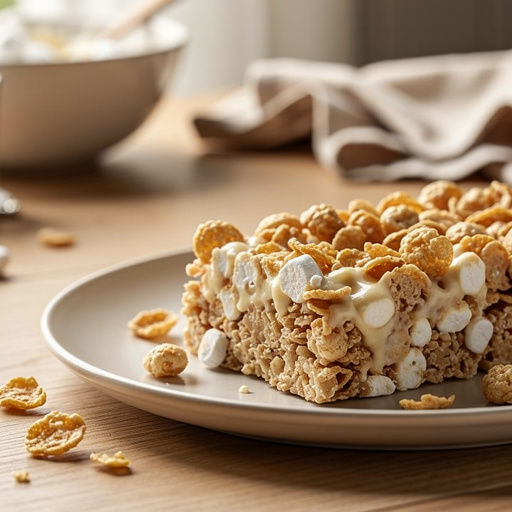
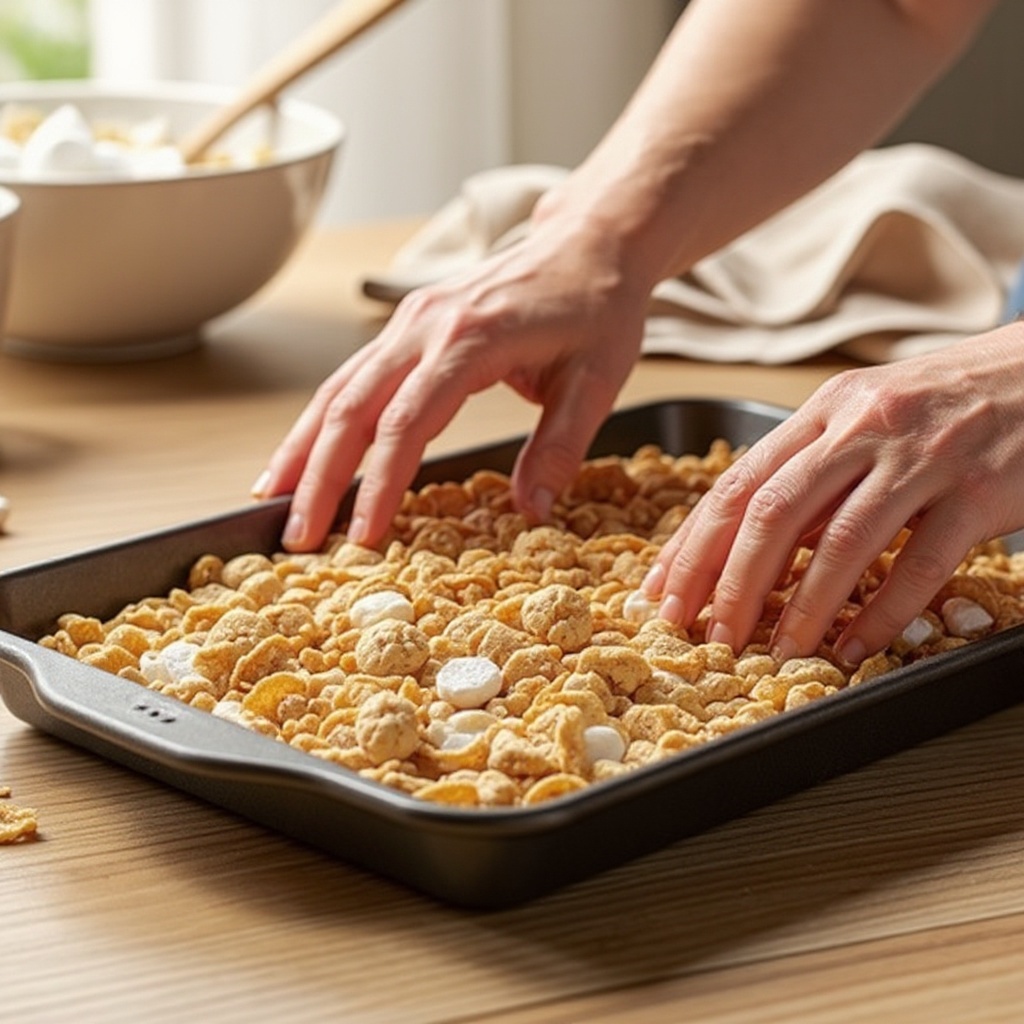
Transfer to the prepared pan: Carefully spoon the cereal mixture into the greased 9x13 inch baking pan. Spread it out as evenly as possible using your spatula.
- 8
Press the mixture into the pan: Using a spatula that has been lightly greased with non-stick spray or butter, or by lightly greasing your hands, gently press the mixture evenly into the pan. The key here is to press firmly enough to compact the bars but not so tightly that they become hard and dense. Aim for an even layer across the entire pan.
- 9
Allow to cool completely: Let the cereal treat bars cool completely at room temperature for at least 30 minutes, or until they are firm to the touch. Resist the urge to refrigerate them, as this can sometimes make them too hard.
- 10
Cut into desired shapes: Once cooled and firm, use a sharp knife or a pizza cutter to slice the treat bars into your desired shapes and sizes. You can cut them into traditional rectangles, squares, or even use cookie cutters for fun shapes.
- 11
Serve and enjoy: Arrange the freshly cut cereal treat bars on a serving platter and enjoy immediately. They are best served within a few hours of cooling for optimal texture.
Tips & Troubleshooting
- 1For easier handling and to prevent sticking, lightly grease your hands with butter or cooking spray before pressing the mixture into the pan. This will make the process much smoother and prevent the sticky marshmallow from clinging to your fingers.
- 2If you prefer a softer, chewier treat, use slightly less cereal, perhaps around 5.5 cups. Conversely, for a firmer, more structured bar, you can use up to 6.5 cups of cereal, but be mindful that too much cereal can make them crumbly.
- 3Elevate your cereal treats by adding fun mix-ins! Gently fold in 1/2 cup of mini chocolate chips, colorful sprinkles, or even small pieces of candy into the cereal mixture just before pressing it into the pan. Ensure mix-ins are added when the mixture is still warm enough to adhere.
- 4To achieve a perfectly smooth and even surface on your bars, lightly grease the bottom of a glass or a flat-bottomed measuring cup and use it to press down on the mixture in the pan. This provides a more uniform finish than a spatula.
- 5If you find the marshmallow mixture becoming too stiff to work with, you can briefly pop it back into the microwave for 10-15 second intervals to re-soften it. This is especially helpful if you're adding many mix-ins.
- 6For a touch of elegance or a festive flair, consider drizzling melted chocolate (dark, milk, or white) over the cooled and cut bars. You can also sprinkle additional toppings onto the melted chocolate before it sets.
- 7Store cooled bars in an airtight container at room temperature for up to 3 days. To prevent them from sticking together, you can place parchment paper or wax paper between layers of bars.
- 8If you're making these for a party or event, consider cutting them into smaller, bite-sized portions. This makes them easier to serve and allows guests to try other treats as well.
Related Activities You Might Enjoy
Frequently Asked Questions
What is the best cereal for no-bake treats?
Crispy rice cereal, such as the well-known brand Rice Krispies, is the classic and most recommended choice for these no-bake treats. Its light, airy texture and ability to hold its shape when coated in marshmallow make it ideal for creating those signature chewy bars. While other puffed cereals can technically be used, they might result in a slightly different texture. For instance, corn-based puffed cereals might be more brittle, and oat-based cereals could lead to a denser, less airy bar. Stick with crispy rice cereal for the most authentic and satisfying results.
How do I prevent my cereal treats from becoming too hard?
Preventing overly hard cereal treats is all about technique and timing. Firstly, ensure you don't overcook the marshmallows; melting them until just smooth and glossy is key. Overheating can cause the sugars to caramelize too much, leading to a hard texture. Secondly, avoid pressing the mixture too firmly into the pan. A gentle, even press is sufficient to compact the bars without squeezing out all the air. Finally, letting them cool at room temperature for the recommended time is crucial. Refrigerating them can sometimes make them too hard and brittle, so patience is a virtue here.
Can I make these treats vegan?
Absolutely! Making these classic cereal treats vegan is quite straightforward. You'll need to substitute the traditional marshmallows and butter with vegan alternatives. Look for vegan marshmallows, which are readily available in most grocery stores and online; they are typically made with corn syrup and sugar. For the butter, a good quality vegan butter substitute or margarine will work perfectly. Ensure your chosen crispy rice cereal is also vegan-friendly, as some cereals may contain non-vegan ingredients. With these simple swaps, you can enjoy a delicious batch of vegan no-bake cereal treats.
How long do no-bake cereal treats last?
When stored properly in an airtight container at room temperature, no-bake cereal treats will stay fresh and maintain their desirable texture for about 3 days. It's important to keep them covered to prevent them from drying out and becoming stale or hard. Avoid storing them in the refrigerator, as the cold, humid environment can negatively affect their texture, often making them tough. For longer storage, you can wrap individual bars tightly in plastic wrap and then place them in an airtight container, but they are truly best enjoyed within the first few days.
Can I use different types of marshmallows?
While mini marshmallows are generally preferred for their faster and more even melting, you can technically use large marshmallows. However, you will need to cut them into smaller pieces to ensure they melt at a similar rate to the butter. The key is to achieve a smooth, homogenous mixture. If you use large marshmallows, be prepared for a slightly longer melting time and ensure you stir very thoroughly to break up any unmelted clumps. The texture might be slightly different, but the end result will still be delicious.
What if my marshmallow mixture becomes too sticky to handle?
It's common for the marshmallow mixture to be quite sticky, which is why greasing your hands and utensils is so important. If you find it becoming unmanageably sticky, don't panic! You can re-grease your hands or spatula with a bit more butter or non-stick spray. Another trick is to lightly dampen a spatula with water, though this can sometimes make the mixture slightly less cohesive. For pressing into the pan, a greased spatula or the bottom of a greased glass are your best friends for achieving a smooth, even surface without excessive sticking.
What Next?
Once your delicious no-bake cereal treat bars have cooled and been sliced, the fun doesn't have to stop! Consider adding a swirl of melted chocolate, a sprinkle of colorful candy, or even some mini chocolate chips for an extra layer of flavor and visual appeal. These bars are best enjoyed fresh, but can be stored in an airtight container at room temperature for up to three days. For your next culinary adventure, try experimenting with different cereals or adding a hint of vanilla extract to the marshmallow mixture. These versatile bars are a fantastic foundation for countless creative variations!
Free: 10 Paper Crafts Anyone Can Make in 5 Minutes
Get our beginner guide + new craft ideas weekly.
No spam. Unsubscribe anytime.
Did you complete this activity?
Related