How to Make No-Bake Energy Bites — Easy Step-by-Step Guide
Whip up these delicious no-bake energy bites in minutes! A perfect screen-free snack for kids and adults alike, requiring just a few simple ingredients. This guide breaks down the process into easy-to-follow steps, making it ideal for beginner cooks and busy families. Get ready for a healthy and satisfying treat!
Quick answer
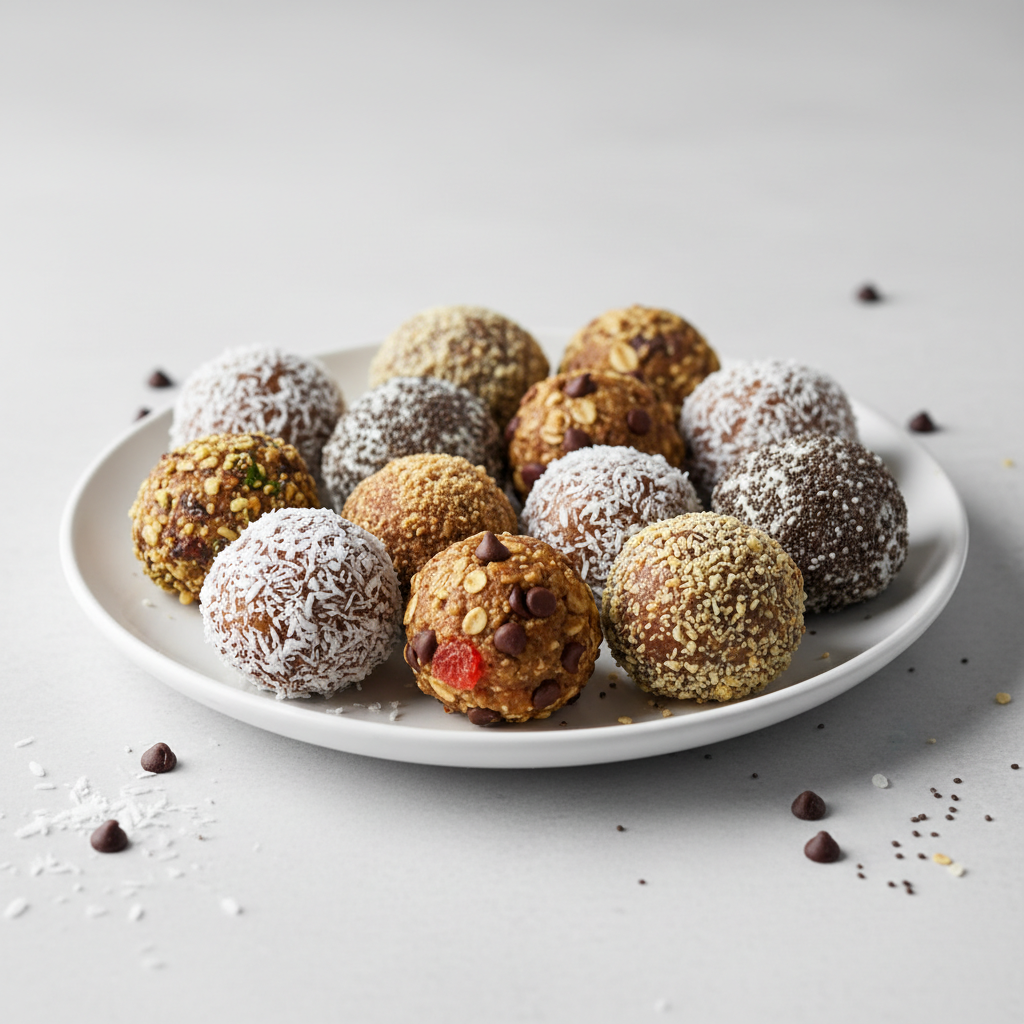
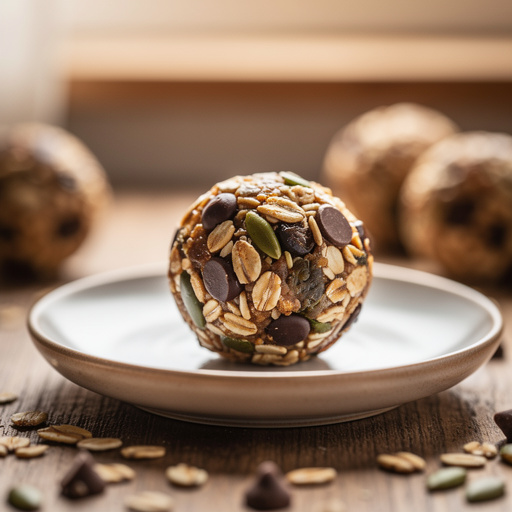
To make no-bake energy bites, you need rolled oats, creamy peanut butter, honey, and your favorite mix-ins, taking about 15 minutes. Start by combining all the ingredients in a large mixing bowl and stirring until a sticky dough forms. Then, roll the mixture into small, bite-sized balls. This beginner-friendly activity has 7 core steps and is perfect for families with kids aged 5+, offering a fun and educational kitchen experience.
What you need
Shop on Amazon · As an Amazon Associate we earn from qualifying purchases. Links above are affiliate links — we may earn a commission at no extra cost to you.
Looking for a quick, healthy, and utterly delicious snack that requires zero oven time? You've found it! These no-bake energy bites are a game-changer for busy households, offering a satisfying and nutritious treat that kids and adults will adore. Perfect for a post-school pick-me-up, a pre-workout boost, or simply a guilt-free indulgence, this recipe is incredibly versatile and customizable. It’s a fantastic way to get children involved in the kitchen, teaching them basic mixing and rolling skills while creating something they can be proud of. Say goodbye to complicated baking and hello to instant gratification!
On this page
Step-by-Step Instructions
- 1
In a large mixing bowl, combine the 2 cups of rolled oats. Ensure you are using old-fashioned rolled oats, not instant oats. Instant oats tend to break down too much, resulting in a mushy texture, whereas rolled oats provide a satisfying chew and structure to your energy bites.
- 2
Add the 1/2 cup of creamy peanut butter to the bowl. For best results, use a natural peanut butter where the oil separation is minimal, or stir it well before measuring. If you're using a different nut or seed butter, ensure it's also creamy and well-stirred.
- 3
Pour in the 1/3 cup of honey (or maple syrup). This acts as the binder and sweetener for your energy bites. You can adjust the amount slightly based on your desired sweetness level and the natural sweetness of your peanut butter.
- 4
Add the 1 teaspoon of vanilla extract. Vanilla extract is a flavor enhancer that complements the nuttiness of the peanut butter and the sweetness of the honey, adding a subtle depth to the overall taste profile.
- 5
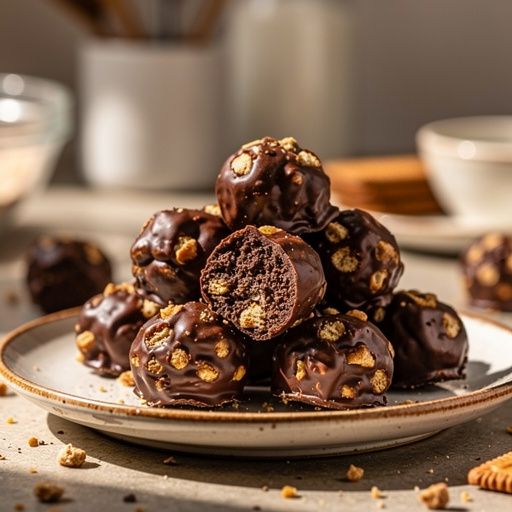
Stir in the 1/2 cup of your chosen mix-ins. This is where you can get creative! Consider mini chocolate chips for a classic treat, shredded coconut for a tropical twist, chia seeds or flax seeds for added fiber and omega-3s, or dried cranberries for a burst of tartness.
- 6
Begin mixing all ingredients thoroughly with a sturdy spoon or spatula. Continue to mix until all the ingredients are well incorporated and a sticky, cohesive dough begins to form. This might take a minute or two of vigorous stirring.
- 7
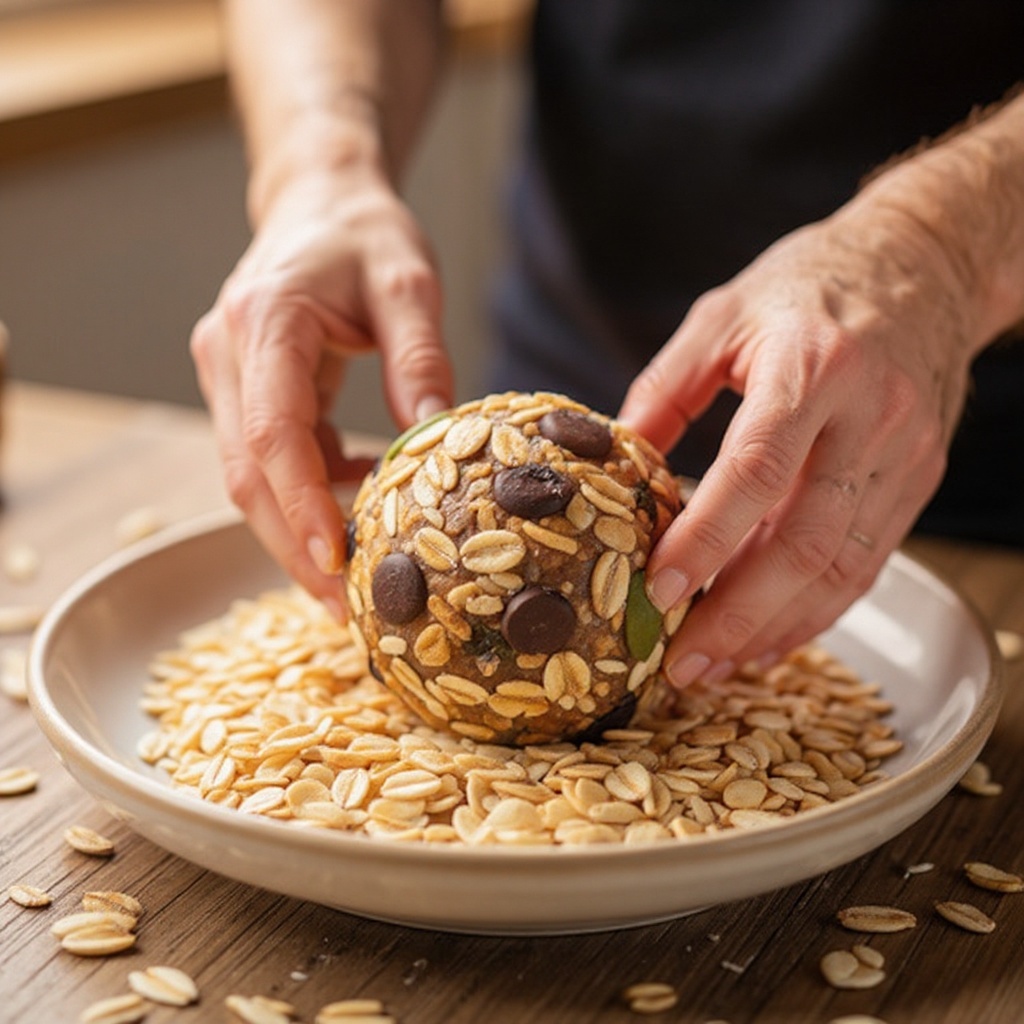
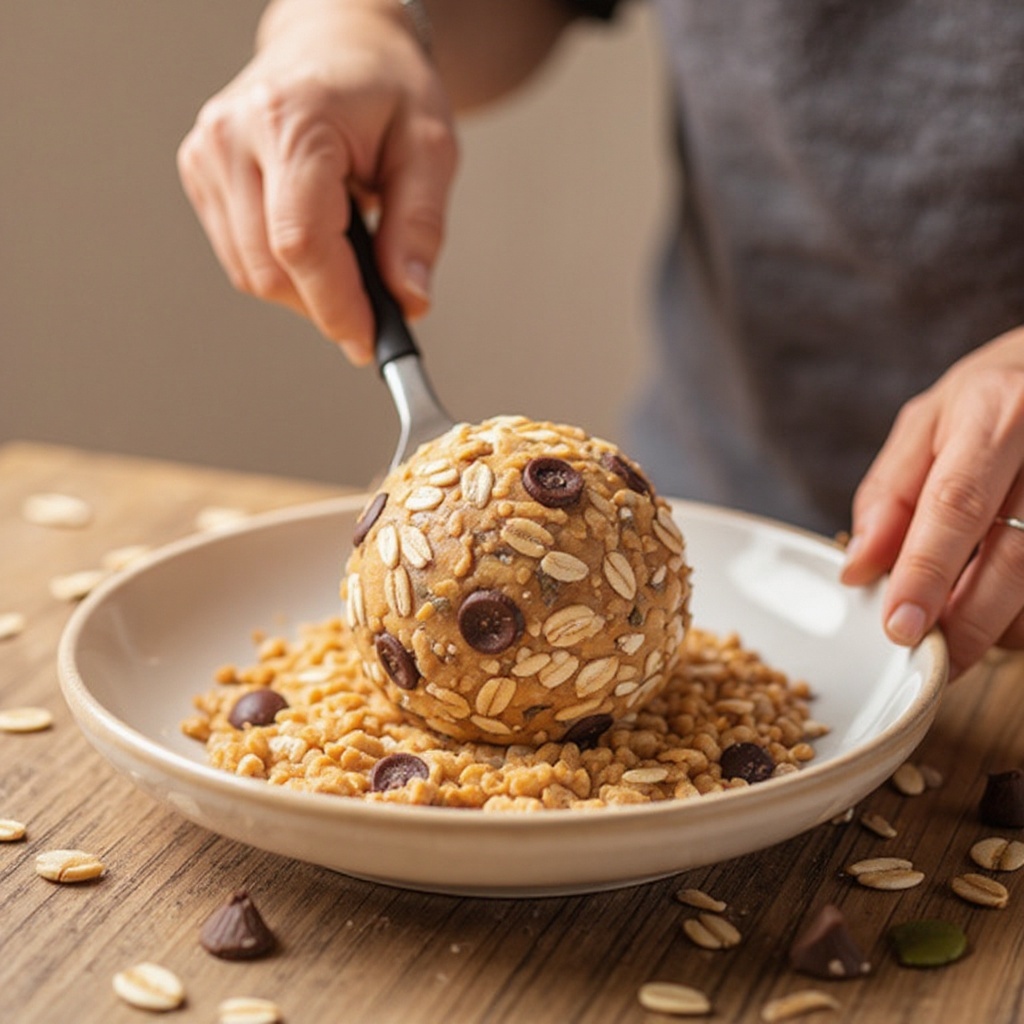
Once the mixture is well combined and has a dough-like consistency, it's time to start rolling. Take a small portion of the mixture, about one tablespoon, and roll it between your palms to form a compact ball, approximately 1-inch in diameter. Aim for consistency in size for even texture and appearance.
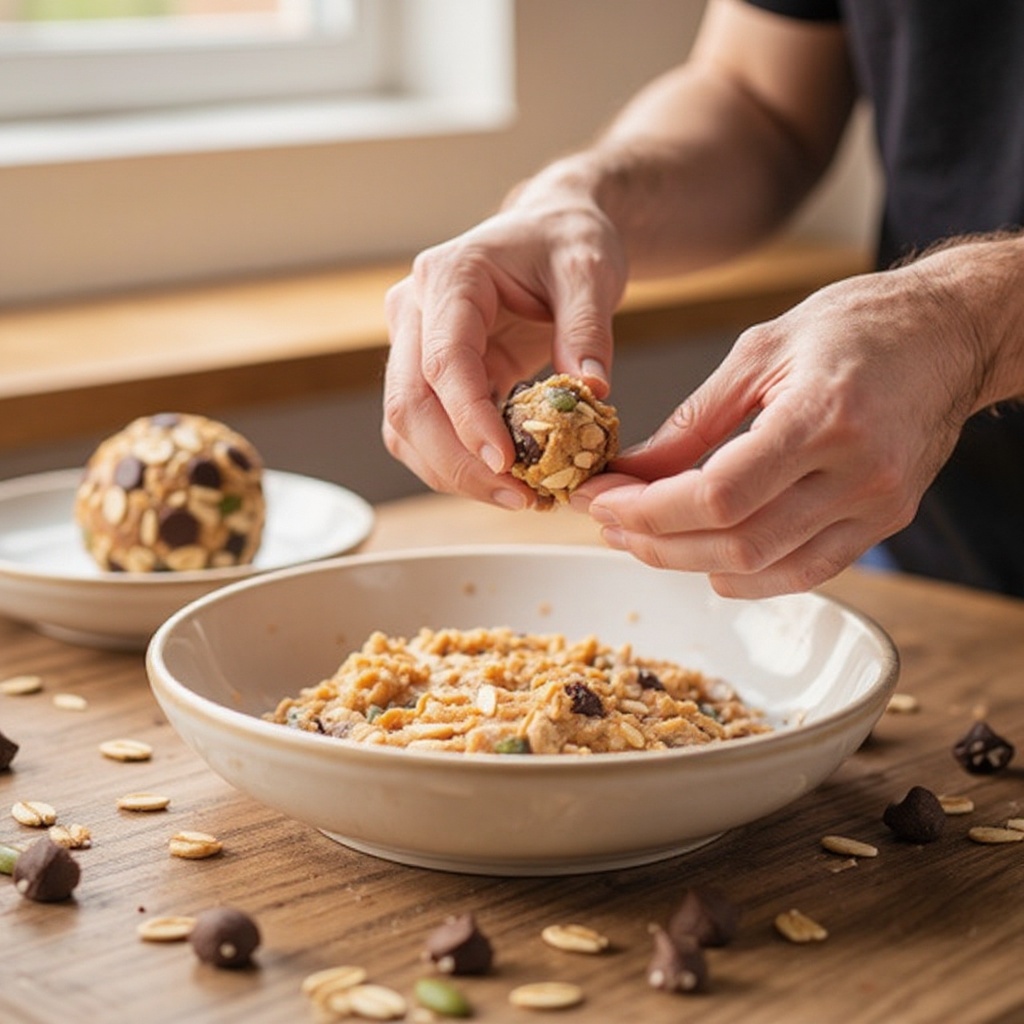
- 8
Continue rolling the mixture into small balls, about 1-inch in diameter. Try to make them as uniform as possible. If the mixture is sticking to your hands, you can lightly dampen them with water or a tiny bit of oil.
- 9
Place the rolled energy bites onto a baking sheet lined with parchment paper or wax paper. This prevents them from sticking to the surface and makes them easy to store and transport.
- 10
Once all the mixture has been rolled into balls, you can proceed to the next step. If you find the mixture is too crumbly at this stage, refer to the tips section for adjustments.
- 11
If the mixture is too sticky to handle, resist the urge to add too much extra liquid. Instead, try chilling the mixture in the refrigerator for about 10-15 minutes. This will firm it up and make it much easier to roll into balls.
- 12
After rolling all the energy bites, you can enjoy them immediately, or for a firmer texture, place the baking sheet in the refrigerator for at least 30 minutes. This allows the ingredients to meld and the bites to firm up nicely.
- 13
Once chilled, transfer the energy bites to an airtight container for storage. They are now ready to be enjoyed as a healthy and satisfying snack!
Tips & Troubleshooting
- 1If the mixture is too dry and crumbly, it means there isn't enough binder to hold the oats together. Add a tablespoon of peanut butter or honey at a time, mixing thoroughly after each addition, until the mixture starts to clump and hold its shape when squeezed. Be careful not to add too much, as this can make the bites too sticky.
- 2Conversely, if the mixture is too sticky and difficult to roll into balls, it likely has too much liquid or binder. Add a tablespoon of rolled oats at a time, mixing well after each addition, until the dough becomes more manageable and less prone to sticking to your hands. This will help create a firmer texture.
- 3Experiment with different nut butters, sweeteners, and mix-ins to create unique flavor combinations. For example, almond butter with dried cherries and dark chocolate chips offers a sophisticated flavor, while cashew butter with shredded coconut and a hint of lime zest provides a tropical delight. Don't be afraid to get creative!
- 4For a firmer bite and a more solidified texture, chill the rolled balls in the refrigerator for about 30 minutes before serving. This allows the fats in the peanut butter and honey to firm up, making the bites less likely to fall apart and giving them a pleasant chewiness.
- 5If you're making these with children, assign them specific tasks like measuring ingredients (with supervision), stirring, or rolling the balls. This makes it a fun and engaging activity that teaches them valuable kitchen skills and the importance of healthy eating.
- 6To prevent the mixture from sticking to your hands while rolling, you can lightly dampen your palms with water or a tiny bit of neutral-flavored oil. This creates a barrier that makes rolling much smoother and less messy, especially when working with a sticky dough.
- 7Consider adding a pinch of salt if your peanut butter is unsalted. A small amount of salt can actually enhance the sweetness and overall flavor profile of the energy bites, balancing the sweetness from the honey and the richness of the peanut butter.
- 8For an extra boost of nutrients, incorporate ingredients like chia seeds, flax seeds, hemp seeds, or even a tablespoon of protein powder into your mix-ins. These additions can increase the fiber, protein, and healthy fat content of your energy bites, making them even more satisfying.
Related Activities You Might Enjoy
Frequently Asked Questions
What are the easiest no-bake recipes for beginners?
No-bake energy bites are incredibly easy, making them a fantastic starting point for anyone new to the kitchen. Other simple options include no-bake cookies, which often involve combining ingredients like oats, peanut butter, and sweeteners and then chilling them. Rice Krispie treats are another classic; they require melting marshmallows and butter, then mixing in the cereal. For something a bit more decadent but still simple, a no-bake cheesecake is a great choice, typically involving a crushed cookie crust and a creamy filling that sets in the refrigerator. All these recipes require minimal ingredients, no special equipment, and most importantly, no oven time, making them perfect for quick, satisfying results.
Can I make no-bake energy bites without peanut butter?
Absolutely! You can easily make delicious no-bake energy bites without peanut butter by substituting it with other nut or seed butters. Almond butter, cashew butter, or sunflower seed butter are excellent alternatives that offer similar binding properties and a rich flavor. For a nut-free option, tahini (sesame seed paste) works wonderfully, though it has a more distinct flavor profile that pairs well with ingredients like dates or chocolate. When substituting, you might need to adjust the sweetness slightly, as different butters can vary in their natural sweetness. Always taste and adjust the honey or maple syrup as needed to achieve your desired flavor balance.
How long do no-bake energy bites last and how should I store them?
No-bake energy bites are best stored in an airtight container in the refrigerator. This helps to keep them fresh and prevents them from drying out or absorbing odors from other foods. When stored properly in the fridge, they will typically stay fresh and delicious for up to 1 to 2 weeks. For longer storage, you can also freeze your energy bites. Place them in a single layer on a baking sheet in the freezer until firm, then transfer them to a freezer-safe bag or container. Frozen energy bites can last for up to 2-3 months and can be enjoyed straight from the freezer or thawed at room temperature for a few minutes.
Are no-bake recipes generally healthy?
Many no-bake recipes can be incredibly healthy, especially when they are made with whole, unprocessed ingredients. Energy bites, for instance, are a prime example of a healthy no-bake option because they are typically packed with nutritious components like oats, nuts, seeds, and natural sweeteners. These ingredients provide a good source of fiber, protein, and healthy fats, which contribute to sustained energy release and satiety. However, it's important to be mindful of the ingredients used. Recipes that rely heavily on processed sugars, refined flours, or excessive amounts of saturated fats might not be considered as healthy. Opting for natural sweeteners, whole grains, and nutrient-dense additions will ensure your no-bake creations are both delicious and beneficial for your well-being.
What are the benefits of making no-bake energy bites?
The benefits of making no-bake energy bites are numerous, extending beyond just a tasty snack. Firstly, they are exceptionally quick and easy to prepare, requiring minimal time and effort, which is perfect for busy individuals and families. Secondly, they are a fantastic way to incorporate nutrient-dense ingredients like oats, nuts, seeds, and dried fruits into your diet, providing sustained energy, fiber, and essential vitamins and minerals. Thirdly, they are highly customizable; you can tailor the flavors and ingredients to suit dietary needs (like gluten-free or vegan) and personal preferences. Finally, they are a great activity to do with children, fostering kitchen skills and healthy eating habits in a fun, screen-free environment. They also make for a convenient, portable snack for on-the-go consumption.
Can I make these energy bites gluten-free or vegan?
Yes, you can easily adapt these no-bake energy bites to be gluten-free and vegan. For a gluten-free version, ensure you are using certified gluten-free rolled oats. Many brands offer oats that are processed in dedicated gluten-free facilities. For a vegan option, substitute the honey with pure maple syrup or agave nectar. These liquid sweeteners will act as binders and sweeteners, just like honey. When selecting your mix-ins, such as chocolate chips, make sure they are dairy-free if you are aiming for a fully vegan recipe. With these simple substitutions, you can create delicious and inclusive energy bites that cater to various dietary requirements.
What Next?
Congratulations on creating your batch of delicious no-bake energy bites! These versatile treats are perfect for on-the-go snacking, lunchbox additions, or a healthy dessert. Feel free to get creative with future batches by adding ingredients like chopped nuts, seeds, or even a sprinkle of cinnamon for a warm spice. For next steps, consider exploring other no-bake recipes like granola bars or energy balls with different flavor profiles. Store your finished bites in an airtight container in the refrigerator for up to two weeks, or freeze them for longer enjoyment. Enjoy your homemade goodness!
Free: 10 Paper Crafts Anyone Can Make in 5 Minutes
Get our beginner guide + new craft ideas weekly.
No spam. Unsubscribe anytime.
Did you complete this activity?
Related