No-Bake Energy Ball Bonanza
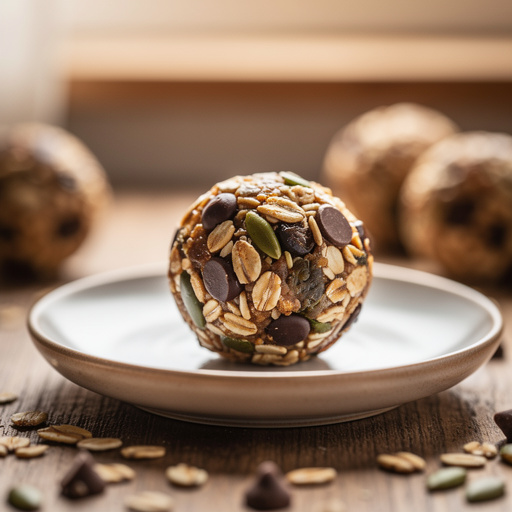
Discover the joy of creating your own homemade no-bake energy balls. This simple recipe is perfect for busy individuals, families, or anyone looking for a quick, nutritious, and satisfying snack. With minimal effort and no oven required, you'll be enjoying these delightful bites in no time!
Quick answer
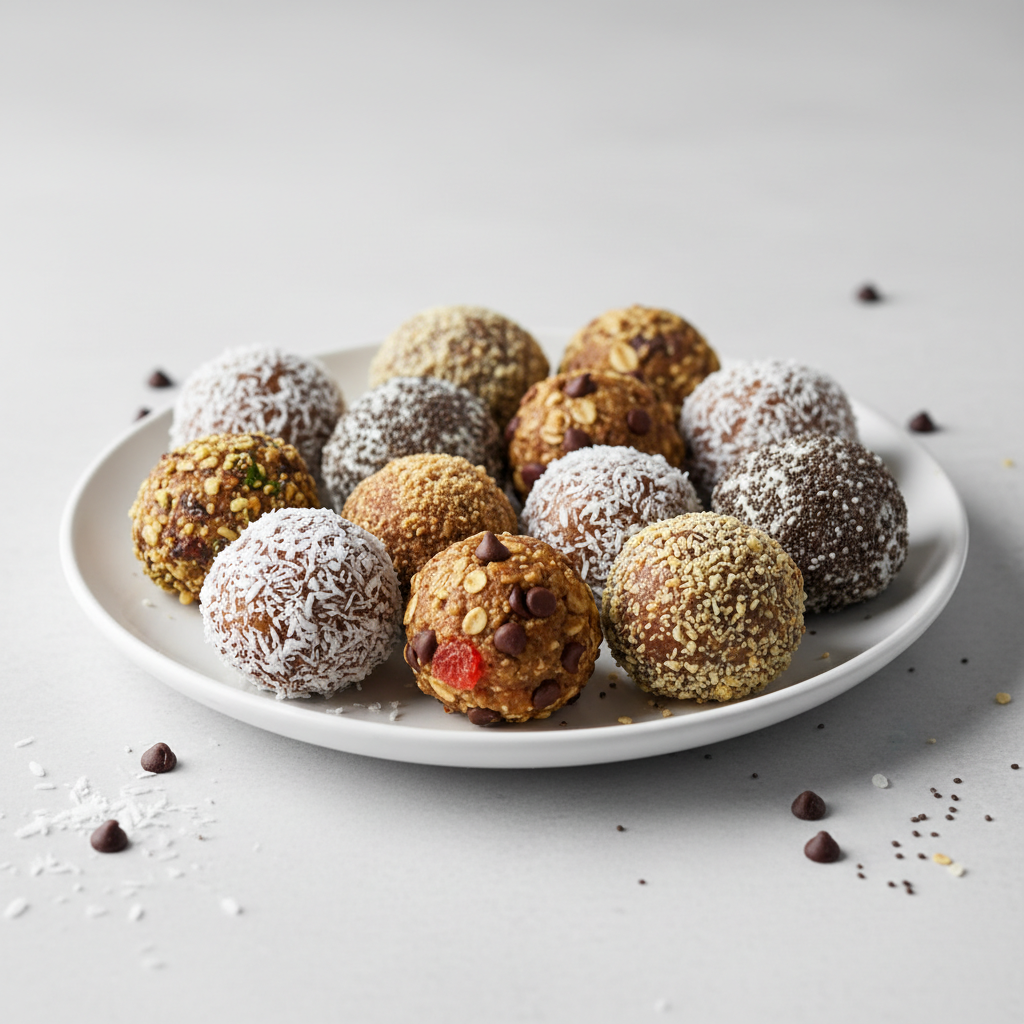
Combine rolled oats, peanut butter, honey, chocolate chips, and shredded coconut, mix well, roll into balls, and refrigerate.
What you need
Shop on Amazon · As an Amazon Associate we earn from qualifying purchases. Links above are affiliate links — we may earn a commission at no extra cost to you.
Welcome to the No-Bake Energy Ball Bonanza, your gateway to effortless, delicious, and incredibly versatile homemade treats! In today's fast-paced world, finding quick, healthy, and satisfying snacks can feel like a challenge. These no-bake energy balls are the perfect solution, requiring no culinary expertise and minimal time. They are ideal for busy parents looking for lunchbox fillers, athletes needing a pre- or post-workout boost, students seeking a brain-fueling snack, or anyone with a sweet tooth who wants to indulge guilt-free. Get ready to impress yourself and your loved ones with these delightful, customizable powerhouses!
On this page
Step-by-Step Instructions
- 1
Begin by gathering all your ingredients and essential tools on a clean, well-lit workspace. This initial step ensures a smooth and efficient preparation process, preventing any last-minute scrambling for missing items and minimizing the risk of contamination.
- 2
In your large mixing bowl, add the 1 cup of rolled oats. For the best texture and binding, opt for old-fashioned rolled oats rather than instant oats, as they hold their shape better and provide a more satisfying chew.
- 3
Next, incorporate the 1/2 cup of creamy peanut butter into the bowl with the oats. Ensure your peanut butter is at room temperature or slightly softened, as this will make it much easier to mix and distribute evenly throughout the other ingredients.
- 4
Drizzle in the 1/4 cup of honey. If you prefer a vegan option, maple syrup is an excellent substitute that offers a similar sweetness and binding quality. Adjust the amount of sweetener slightly based on your personal preference.
- 5
Add the 1/4 cup of mini chocolate chips to the mixture. Mini chips distribute more evenly and are less likely to clump together than larger chunks, but feel free to use your favorite type of chocolate for a delightful burst of flavor.
- 6
Sprinkle in the 1/4 cup of shredded unsweetened coconut. Unsweetened coconut provides a subtle tropical flavor and a pleasant chewiness without adding unnecessary sugar, complementing the other ingredients beautifully.
- 7
For an optional nutritional boost, add 1 tablespoon of chia seeds to the bowl. Chia seeds are packed with fiber, omega-3 fatty acids, and protein, and they also help to bind the mixture together.
- 8
If you desire a richer flavor profile, stir in 1 teaspoon of vanilla extract. Vanilla extract enhances the sweetness and adds a warm, comforting aroma to your energy balls, making them even more irresistible.
- 9
Using your sturdy spoon or spatula, begin to thoroughly mix all the ingredients together. This is a crucial step; ensure you scrape the bottom and sides of the bowl to incorporate everything evenly, aiming for a cohesive, slightly sticky dough-like consistency.
- 10
Continue mixing until all the ingredients are well combined and there are no dry pockets of oats or clumps of peanut butter visible. The mixture should hold together when pressed, indicating it's ready for the next stage.
- 11
Once the mixture is thoroughly combined, it's time to get your hands involved. Lightly dampen your hands with water or a tiny bit of oil to prevent sticking, especially if the mixture is particularly sticky.
- 12
Take small portions of the mixture, about 1 to 1.5 tablespoons in size, and roll them firmly between your palms to form compact, uniform balls. Aim for a size that is easy to pop into your mouth in one or two bites.
- 13
As you roll each energy ball, place it onto your prepared plate or baking sheet lined with parchment paper or wax paper. This prevents the balls from sticking to the surface and makes them easy to handle.
- 14
Continue this rolling process until all the mixture has been used to create individual energy balls. Ensure each ball is well-formed and smooth for an appealing presentation.
- 15
Once all the energy balls are rolled and arranged, carefully transfer the plate or baking sheet to the refrigerator. This chilling step is essential for allowing the ingredients to meld and the balls to firm up, making them easier to handle and enjoy.
- 16
Allow the energy balls to refrigerate for at least 30 minutes. This duration is sufficient for them to firm up considerably, achieving the perfect texture for snacking. For a firmer consistency, you can leave them in the refrigerator for a longer period.
- 17
After chilling, your No-Bake Energy Balls are ready to be enjoyed! They can be stored in an airtight container in the refrigerator for up to two weeks, making them a convenient grab-and-go snack option.
Tips & Troubleshooting
- 1Texture is key when mixing; if your mixture seems too dry and crumbly, add a tiny bit more peanut butter or honey, a teaspoon at a time, until it holds together. Conversely, if it's too sticky, add a tablespoon more oats.
- 2For a nut-free option, substitute the peanut butter with sunflower seed butter or tahini. Ensure the seed butter is creamy and well-stirred for the best results, and adjust the sweetener if needed as some seed butters can be less sweet.
- 3Experiment with add-ins! Consider adding a tablespoon of flax seeds, hemp seeds, or even a pinch of cinnamon or cocoa powder for different flavor profiles and added nutritional benefits.
- 4If you find rolling the balls difficult due to stickiness, try chilling the mixture in the refrigerator for about 15-20 minutes before rolling. This will make the dough firmer and easier to handle.
- 5For a more decadent treat, you can dip the finished energy balls in melted dark chocolate or drizzle them with chocolate. Allow the chocolate to set completely in the refrigerator before serving.
- 6Portion control is easy with these balls. Use a tablespoon or a small cookie scoop to ensure each ball is roughly the same size, making them perfect for pre-portioned snacks.
- 7These energy balls freeze exceptionally well. Place them in a single layer on a baking sheet and freeze until solid, then transfer to a freezer-safe bag or container for up to three months. Thaw in the refrigerator before eating.
Related Activities You Might Enjoy
Frequently Asked Questions
Can I make these energy balls vegan?
Absolutely! To make your No-Bake Energy Balls vegan, simply substitute the honey with an equal amount of maple syrup or agave nectar. These liquid sweeteners will provide the necessary binding and sweetness without using any animal products. Ensure that your chocolate chips are also dairy-free, as many dark chocolate varieties are naturally vegan. The rest of the ingredients, like rolled oats, peanut butter, and shredded coconut, are typically vegan. This simple swap allows you to enjoy these delicious and healthy treats while adhering to a vegan lifestyle, making them a versatile option for a wider audience.
What kind of oats are best for energy balls?
For the best texture and binding in your no-bake energy balls, old-fashioned rolled oats are highly recommended. These oats are steamed and then flattened, retaining their shape and providing a satisfying chewiness. Instant oats, while convenient, tend to break down more easily and can result in a mushy texture. Steel-cut oats are too hard and would require cooking. Rolled oats strike the perfect balance, absorbing the moisture from the other ingredients to create a cohesive mixture that holds its shape beautifully when rolled into balls.
How long do these energy balls last?
When stored properly in an airtight container in the refrigerator, your No-Bake Energy Balls will stay fresh and delicious for up to two weeks. The combination of ingredients, particularly the peanut butter and honey, acts as natural preservatives. For longer storage, you can freeze them for up to three months. To freeze, arrange the balls in a single layer on a baking sheet and freeze until solid, then transfer them to a freezer-safe bag or container. Thaw them in the refrigerator before enjoying for a convenient and healthy snack option anytime.
Can I substitute the peanut butter with something else?
Yes, you can definitely substitute the peanut butter! Almond butter, cashew butter, or sunflower seed butter are excellent alternatives that offer similar creamy textures and binding properties. If you're looking for a nut-free option, sunflower seed butter is a fantastic choice. Tahini (sesame seed paste) can also be used, though it has a distinct flavor that might alter the overall taste profile. When substituting, ensure the nut or seed butter is creamy and well-stirred for the best results, and be prepared to adjust the amount of sweetener slightly as different butters can vary in sweetness.
What are some other healthy add-ins I can include?
The possibilities for add-ins are nearly endless, allowing you to customize your energy balls to your taste and nutritional needs. Consider adding a tablespoon of flax seeds or hemp seeds for extra fiber and omega-3s. A pinch of cinnamon or nutmeg can add warmth and spice. For a chocolatey kick without extra chocolate chips, try adding a tablespoon of unsweetened cocoa powder. Dried fruits like cranberries, raisins, or chopped dates can add sweetness and chewiness. Even a small amount of finely chopped nuts or seeds can provide extra crunch and nutrients.
Why are my energy balls falling apart?
If your energy balls are falling apart, it usually means the mixture is too dry or not sticky enough to bind together properly. This can happen if there isn't enough of a binding agent like peanut butter or honey, or if you've used too many dry ingredients like oats. To fix this, try adding a little more peanut butter or honey, a teaspoon at a time, and mixing thoroughly until the dough starts to hold together. Alternatively, if you've added too much of a dry ingredient, you can try adding a tablespoon of water or milk to help moisten the mixture. Ensure you're pressing the mixture firmly when rolling to create compact balls.
What Next?
Congratulations on creating your No-Bake Energy Ball Bonanza! These little powerhouses are incredibly versatile. Feel free to experiment with different nut butters, seeds, dried fruits, or even a sprinkle of cinnamon for a unique flavor profile. Store them in an airtight container in the refrigerator for up to two weeks, or freeze them for a longer shelf life. They make fantastic edible gifts, are perfect for potlucks, or simply a delightful way to keep healthy snacks on hand. For your next project, consider exploring other no-bake recipes like granola bars or energy bites with different flavor combinations!
Free: 10 Paper Crafts Anyone Can Make in 5 Minutes
Get our beginner guide + new craft ideas weekly.
No spam. Unsubscribe anytime.
Did you complete this activity?
Related