How to Decorate Glassware with Napkin Decoupage — Easy Step-by-Step Guide
Transform plain glassware into beautiful, custom pieces using colorful paper napkins and a few simple craft supplies. A fun and easy screen-free activity for the whole family!
Quick answer
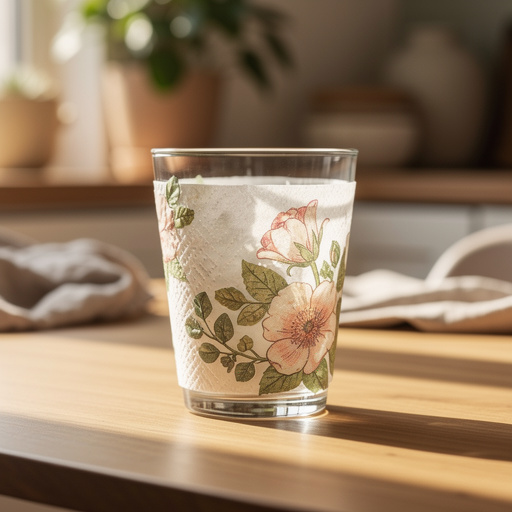
To decorate glassware with napkin decoupage, you need plain glasses, decorative napkins, decoupage glue, and a brush, taking about 30 minutes of active crafting time. Start by separating the napkin layers and applying glue to the glass. This beginner-friendly activity has 7 core steps but can be expanded with preparation and finishing, making it perfect for families with kids aged 6+ and resulting in unique, personalized decor.
What you need
Shop on Amazon · As an Amazon Associate we earn from qualifying purchases. Links above are affiliate links — we may earn a commission at no extra cost to you.
Looking for a simple yet impactful way to refresh your home decor or create thoughtful handmade gifts? Napkin decoupage on glassware is the answer! This technique breathes new life into plain tumblers, jars, and vases, turning them into personalized works of art. It’s incredibly forgiving, making it an ideal project for beginners and a fantastic screen-free activity for families. With just a few affordable supplies, you can unlock a world of creative possibilities, crafting unique pieces that reflect your style or celebrate special occasions.
On this page
Step-by-Step Instructions
- 1
Begin by ensuring your glassware is impeccably clean. Wash each piece thoroughly with soap and water, then rinse and dry completely with a clean towel. For optimal adhesion, wipe down the exterior of the glass with rubbing alcohol or glass cleaner using a paper towel; this removes any lingering oils or residues that could interfere with the glue. Allow the glass to air dry completely before proceeding to the next step.
- 2
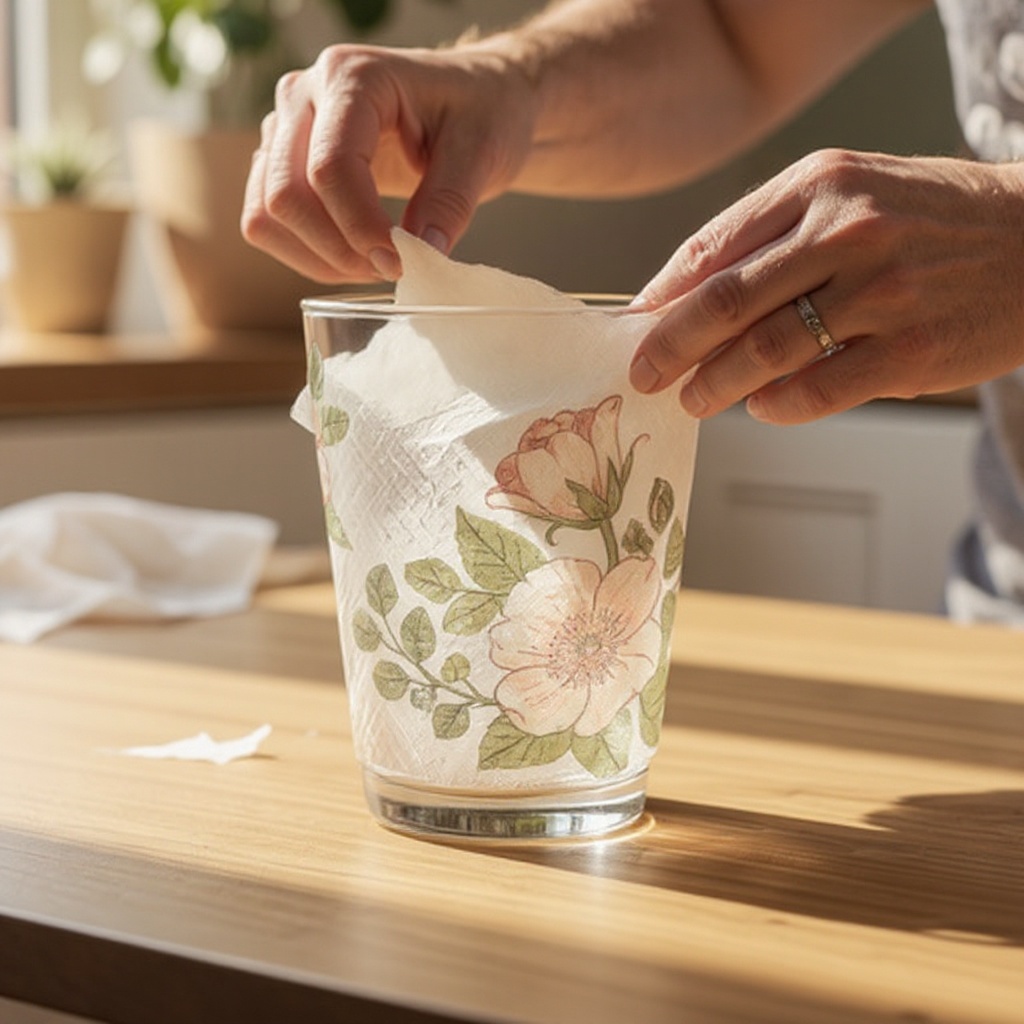
The magic of napkin decoupage lies in using only the thinnest, printed layer of your decorative napkin. Carefully peel apart the layers of your 2-ply or 3-ply napkin. You'll typically find a white or plain backing layer that needs to be discarded, leaving you with just the delicate, patterned paper.
- 3
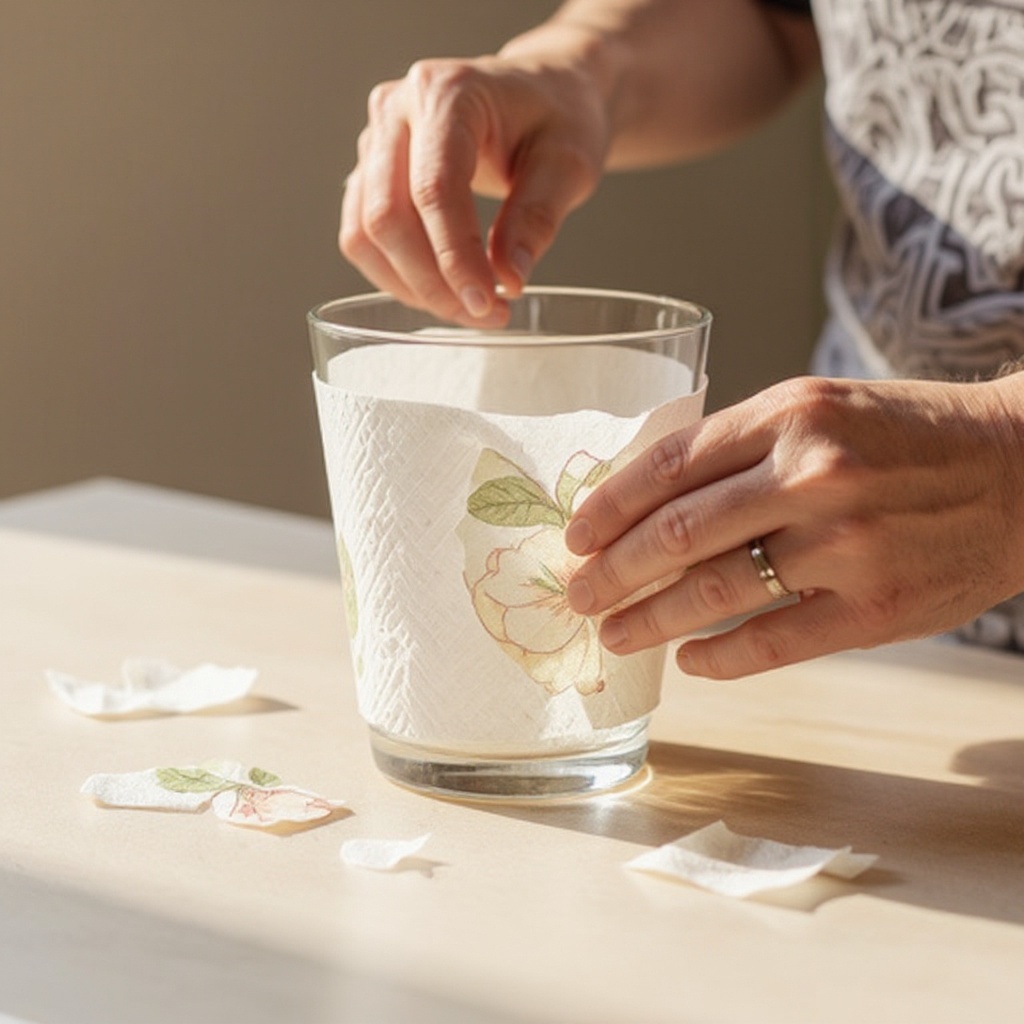
Now, it's time to prepare your napkin pieces. You can either carefully cut the printed napkin layer into specific shapes using sharp scissors, or for a softer, more organic edge, you can gently tear the napkin into smaller pieces. Smaller pieces are generally easier to manage and apply smoothly, especially when working around curves or intricate areas of the glassware.
- 4
Select a small section of your glassware to begin decorating. Using your foam brush or craft brush, apply an even, thin layer of decoupage glue directly onto the glass in the area where you intend to place your first napkin piece. Avoid applying too much glue, as this can cause the napkin to become overly saturated and tear easily.
- 5
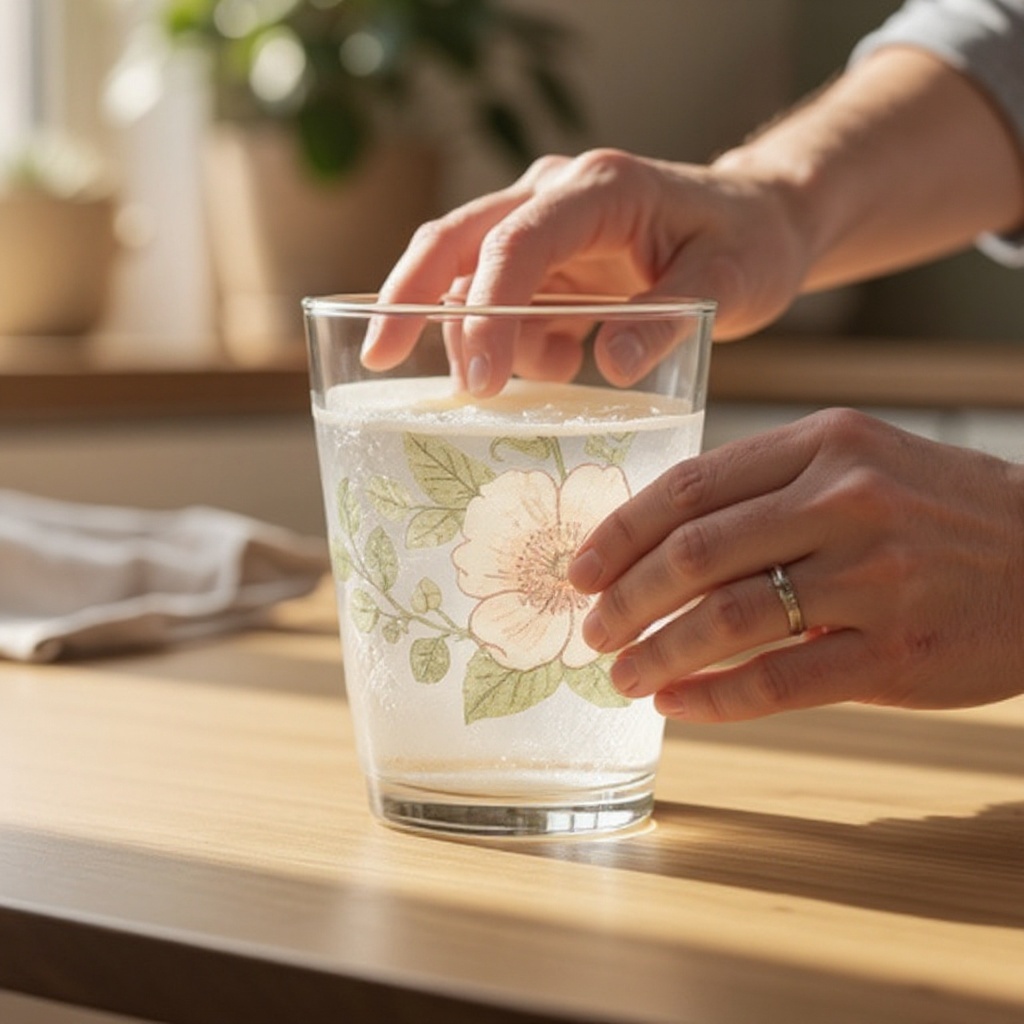
Gently pick up a prepared napkin piece and carefully place it onto the glued section of the glass. Once positioned, use your fingertip or the brush to gently smooth the napkin down onto the glass, working from the center outwards. The goal is to eliminate any wrinkles or air bubbles for a seamless finish, so be patient and meticulous during this step.
- 6
Once the napkin piece is smoothly adhered, apply another thin, even layer of decoupage glue over the top of the napkin piece. This acts as a sealant, securing the napkin to the glass and providing a protective barrier. Ensure you cover the entire surface of the napkin piece, extending slightly beyond its edges onto the glass to create a good seal. Work in small, manageable sections to prevent the decoupage glue from drying out before you can apply the napkin pieces.
- 7
Continue this process of applying glue, adhering napkin pieces, and sealing with another layer of glue, working your way around the glassware. Overlap pieces slightly if desired to create a more cohesive design. Take your time and enjoy the creative process, building your unique pattern or image on the glass.
- 8
Once you have covered the desired area of your glassware with napkin pieces and sealed them, allow the entire project to dry completely. This initial drying period is crucial for the glue to set properly. Resist the urge to touch or move the glassware during this time.
- 9
After the initial drying period (typically a few hours), inspect your decorated glassware. If you notice any small wrinkles or lifting edges, you can gently dab them down with a bit more decoupage glue and your fingertip. Small tears that occurred during application are often less noticeable once the glue dries and the final sealant is applied.
- 10
For a more uniform and professional finish, and to further enhance durability, apply a final, even coat of decoupage glue over the entire exterior surface of the decorated glassware. Ensure this top coat is smooth and consistent, covering all the napkin pieces and the exposed glass areas. This step helps to blend the edges of the napkin pieces and provides a unified surface.
- 11
Allow the final coat of decoupage glue to dry thoroughly. This is a critical step for the longevity of your project. While the glue may feel dry to the touch after a few hours, it's essential to let it cure completely for at least 24 hours, and ideally 72 hours, before exposing it to any moisture or significant handling.
- 12
If you desire an even more durable and water-resistant finish, consider applying a clear acrylic spray sealant once the decoupage glue has fully cured. Ensure you use a food-safe sealant if the glassware will be used for serving food or drinks. Follow the manufacturer's instructions for application, usually involving several light coats in a well-ventilated area.
Tips & Troubleshooting
- 1When smoothing down your napkin pieces, gentle pressure is key. If you encounter small wrinkles or bubbles that you can't fully eliminate, don't despair! You can often gently dab them down with a bit more decoupage glue and your fingertip, or accept them as part of the handmade charm. Small tears are also often less noticeable once the glue dries and the final sealant is applied, so don't let minor imperfections deter you.
- 2For a truly polished and professional appearance, consider applying a final, even coat of decoupage glue over the entire exterior of the glass after all napkin pieces are applied and have dried. This top coat not only seals the napkin pieces but also creates a smooth, uniform surface that enhances the overall look and feel of your decorated glassware.
- 3Don't be afraid to get creative with your napkin choices! Experiment with a wide variety of napkin patterns, colors, and themes to create truly unique pieces. You can achieve stunning effects like ombre gradients by blending colors, intricate geometric designs by cutting precise shapes, or a bold, all-over statement by covering the entire glass with a single vibrant pattern.
- 4To ensure the longevity of your beautiful decoupage glassware, always hand-wash it gently. Use mild dish soap and cool or lukewarm water, and avoid abrasive scrubbers, steel wool, or harsh detergents. Dishwashers, even on delicate cycles, can expose the decoupaged surface to excessive heat and moisture, which can cause the glue to break down and the napkin to peel over time.
- 5This technique isn't limited to just tumblers and jars! Consider applying napkin decoupage to other types of glassware for a cohesive decorative theme. Vases, candle holders, decorative bottles, and even glass coasters can all be transformed into stunning custom pieces, expanding your DIY decor possibilities.
- 6When cutting or tearing your napkin pieces, think about the shape of your glassware. For cylindrical jars, long strips might work well, while for stemmed glasses, smaller, more intricate pieces might be easier to manage and create a smoother finish. Planning your cuts or tears based on the glass's form will lead to a more aesthetically pleasing result.
- 7If you're aiming for a very smooth finish and are working with slightly thicker napkins or have a few stubborn wrinkles, you can very gently sand the dried decoupage glue with a fine-grit sandpaper (around 220-grit) before applying your final top coat. Be extremely careful not to sand through the napkin layer.
- 8For an extra touch of sparkle or a specific aesthetic, consider incorporating fine glitter into your final top coat of decoupage glue. Mix a small amount of craft glitter into the glue before applying it to the glassware. This can add a subtle shimmer or a more dramatic effect, depending on the amount of glitter used.
Related Activities You Might Enjoy
Frequently Asked Questions
Can I use any paper napkins for decoupage?
It's best to use 2-ply or 3-ply paper napkins for this project. These napkins have a printed layer that you'll separate from any plain backing layers, leaving you with a thin, delicate paper to adhere to the glass. Thicker napkins, such as those with a waxy coating or multiple dense layers, can be much harder to smooth onto the glass without creating significant wrinkles and air bubbles, which detracts from the final appearance. Always test a small piece if you're unsure about the napkin's thickness and texture.
How do I make my decoupage glassware waterproof?
While decoupage glue, like Mod Podge, provides a good seal and some protection against moisture, it's not entirely waterproof. For everyday use and to ensure longevity, hand-washing gently with mild soap and cool water is always recommended. If you need enhanced durability or are concerned about prolonged exposure to moisture, you can seal the finished project with a food-safe acrylic sealant after the decoupage glue has fully cured for at least 72 hours. This extra layer of protection will make the glassware more resistant to water damage.
What is the best glue for napkin decoupage on glass?
Mod Podge is a highly popular and exceptionally effective choice for napkin decoupage on glass. It's a versatile craft medium that functions as both a strong adhesive and a protective sealant, all in one product. Mod Podge comes in various finishes, including matte and gloss, allowing you to choose the aesthetic that best suits your desired look for the decorated glassware. Other craft glues specifically designed for decoupage can also work, but Mod Podge is widely available, reliable, and specifically formulated for projects like this.
How long does napkin decoupage take to dry on glass?
The drying and curing process for napkin decoupage on glass is crucial for durability. While the decoupage glue might feel dry to the touch within a few hours, this is just the initial drying phase. For the glue to fully cure and achieve its maximum strength and water resistance, it needs at least 24 hours, and ideally 72 hours (3 days). Rushing the process or using the glassware before it's fully cured can lead to premature peeling or damage, so patience is key to a long-lasting project.
Can I put my decoupage glassware in the dishwasher?
It is strongly advised not to put your decoupage glassware in the dishwasher. The high heat, prolonged exposure to water, and harsh detergents used in dishwashers can break down the decoupage glue and sealant over time. This can cause the napkin layers to lift, peel, or become discolored, ruining your hard work. Always opt for gentle hand-washing with mild soap and cool water to preserve the beauty and integrity of your decorated glassware for as long as possible.
What kind of designs can I create with napkin decoupage?
The design possibilities with napkin decoupage are virtually endless! You can create anything from simple, elegant patterns using single-color napkins to intricate, multi-layered designs with patterned napkins. Consider creating floral arrangements, geometric mosaics, whimsical scenes, or even personalized designs featuring photos or text printed on special decoupage paper. You can cover the entire glass for a bold statement, create a band of decoration around the middle, or apply individual motifs strategically. The flexibility of cutting or tearing the napkins allows for both precise and organic artistic expressions.
How do I store my finished decoupage glassware?
Proper storage will help maintain the beauty of your decoupage glassware. When not in use, store the pieces carefully to avoid scratching or chipping. If stacking, place a soft cloth or paper towel between each piece to prevent the decoupaged surfaces from rubbing against each other. Avoid storing them in damp or humid environments, as this can eventually affect the adhesive. Displaying them on a shelf or in a cabinet is ideal, allowing them to be admired while being protected from dust and potential damage.
What Next?
Once your beautiful napkin-decoupaged glassware has fully cured, it's ready to be admired and used! Consider displaying your creations on a shelf, using them as unique vases for fresh flowers, or even as charming candle holders. For variations, explore different napkin themes like holidays, florals, or abstract patterns. You could also try layering multiple napkin pieces for a more complex design or even incorporate glitter into your final sealant coat for extra sparkle. Next projects could include decoupaging wooden trays or ceramic tiles, expanding your crafting horizons with this versatile technique.
Free: 10 Paper Crafts Anyone Can Make in 5 Minutes
Get our beginner guide + new craft ideas weekly.
No spam. Unsubscribe anytime.
Did you complete this activity?
Related