How to Make Fluffy Glue Slime — Easy Step-by-Step Guide
Whip up a batch of super-stretchy, delightfully fluffy slime with this easy-to-follow guide. Perfect for sensory play and creative fun!
Quick answer
To make fluffy slime, you need glue, shaving cream, contact lens solution, and baking soda, taking about 15 minutes. Start by mixing glue and shaving cream. This beginner-friendly activity has 8 steps and is perfect for kids aged 6+.
What you need
Shop on Amazon · As an Amazon Associate we earn from qualifying purchases. Links above are affiliate links — we may earn a commission at no extra cost to you.
Get ready for a tactile adventure with this incredibly easy fluffy glue slime recipe! What makes this slime so special is its unique airy texture, achieved by incorporating shaving cream, which gives it an irresistibly soft and cloud-like feel. It's not just fun to make; it's even more enjoyable to squish, stretch, and play with. This project is perfect for budding scientists, creative kids, or anyone looking for a simple, satisfying DIY activity that provides hours of entertainment and sensory exploration. Prepare for a delightful mess and even more delightful fun!
On this page
Step-by-Step Instructions
- 1
In a medium-sized mixing bowl, carefully pour 1/2 cup of white school glue. Ensure you use a PVA-based glue, as this is crucial for the slime's chemical reaction. Avoid using craft glue or wood glue, as they may not activate properly.
- 2
Now, add a generous 1/2 cup of foaming shaving cream to the glue. It's important to use foaming shaving cream, not shaving gel, as the foam is what creates the signature fluffy texture. Gently stir these two ingredients together with a spatula or spoon until they are just combined. Overmixing at this stage can deflate the fluffiness.
- 3
If you're looking to add some color to your slime, this is the perfect moment. Add a few drops of your chosen food coloring to the mixture. For a more vibrant hue, gel food coloring is recommended, but a few drops of liquid coloring will also work. Stir slowly and deliberately until the color is evenly distributed throughout the glue and shaving cream mixture, ensuring no streaks remain.
- 4
Next, sprinkle in 1/4 teaspoon of baking soda. Baking soda acts as a secondary activator and helps to firm up the slime, giving it a better texture. Stir this in thoroughly, making sure it's fully incorporated into the mixture. Inadequate mixing of the baking soda can lead to a sticky or unset slime.
- 5
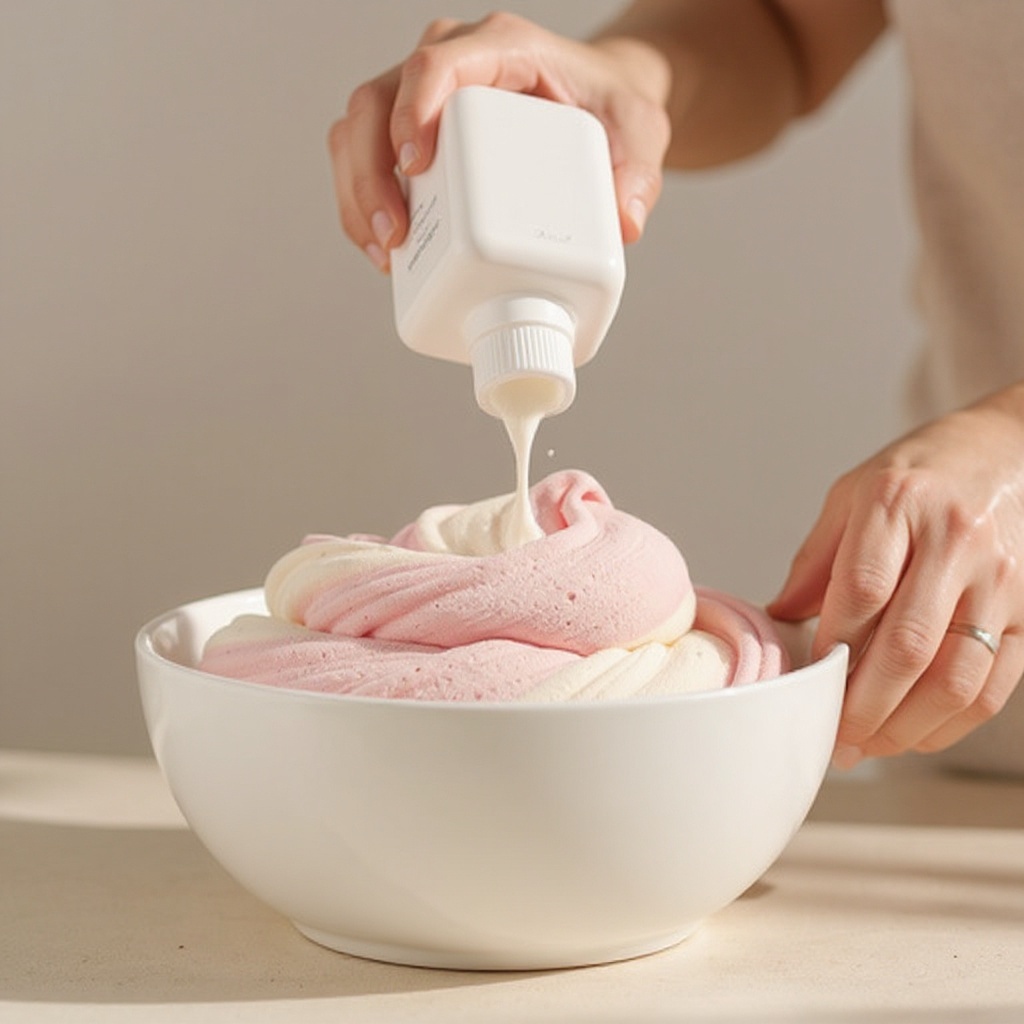
Begin the activation process by gradually adding the contact lens solution. Start with 1 tablespoon, pouring it slowly into the bowl while stirring continuously. The contact lens solution contains the key ingredients (boric acid and sodium borate) that react with the glue to form the slime polymer. It's essential to use a solution that explicitly lists these ingredients; plain saline solution will not work.
- 6
Continue stirring the mixture vigorously. You'll notice the slime starting to transform from a liquidy mess into a more cohesive substance. Keep stirring until the mixture begins to pull away from the sides of the bowl, forming a large, unified blob. This indicates that the activation process is well underway.
- 7
Once the slime has mostly formed and is pulling away from the bowl, it's time to get your hands involved. Carefully take the slime out of the bowl. It might still feel a little sticky at this point, which is perfectly normal. Begin kneading the slime with your hands for about 2-3 minutes. This kneading process is crucial for developing the slime's elasticity and smooth texture.
- 8
As you knead, the slime will become less sticky and more pliable. If, after a couple of minutes of kneading, the slime is still excessively sticky and clinging to your hands, you can add a tiny bit more contact lens solution, just a teaspoon at a time, and continue kneading. Be cautious not to add too much, as this can make the slime stiff.
- 9
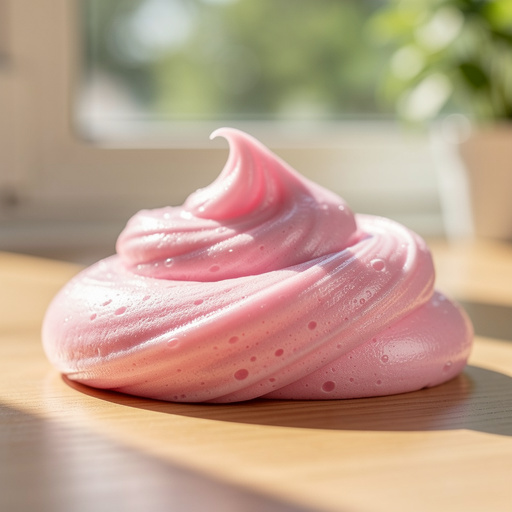
Your fluffy slime is now ready to stretch, squish, and play with! Enjoy the satisfying sensory experience of its soft, airy texture and its ability to be stretched and molded into various shapes. Remember to keep it away from fabrics and carpets, as it can be difficult to remove.
- 10
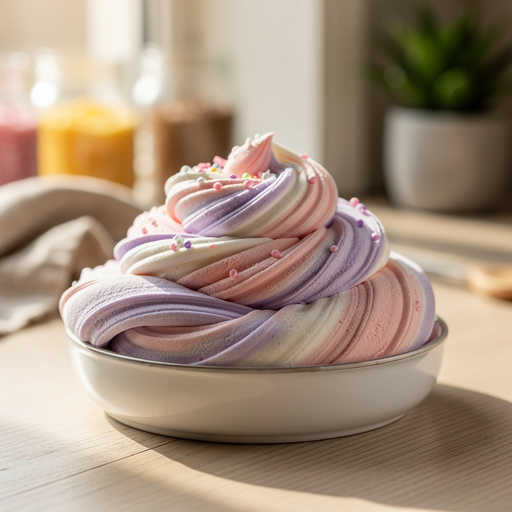
For an extra touch of magic, consider adding glitter at this stage. Gently fold the glitter into the slime as you knead it. You can use fine glitter for a subtle shimmer or chunky glitter for a more dramatic effect. Experiment with different colors and sizes of glitter to create unique slime designs.
- 11
If you wish to add a pleasant scent to your slime, now is the time. Add a few drops of your favorite scented oil, such as lavender for relaxation or vanilla for a sweet aroma. Knead the oil into the slime until the scent is evenly distributed. Be mindful not to add too much oil, as it can make the slime greasy.
- 12
Once your slime is perfectly kneaded and has reached your desired consistency, it's time to store it properly. Place the slime in an airtight container or a zip-top bag. This will prevent it from drying out and maintain its fluffy texture for future play sessions. Store it at room temperature, away from direct sunlight or extreme heat.
- 13
If you find your slime is a bit too stiff after kneading, don't despair! You can try adding a small amount of warm water, just a teaspoon at a time, and kneading it in. This can help to rehydrate the slime and make it more pliable. Alternatively, a tiny bit more shaving cream can also help to soften it.
- 14
Conversely, if your slime is too sticky even after kneading, the most effective solution is to add a little more contact lens solution. Add it very gradually, a few drops at a time, and knead it in thoroughly. This will help the slime to form its bonds more effectively and reduce stickiness.
- 15
Experiment with different colors and combinations! You can create marbled slime by making separate batches of different colors and then twisting them together. Or, try layering colors for a rainbow effect. The creative possibilities are truly endless with this versatile slime recipe.
- 16
For a truly unique sensory experience, consider adding small, soft objects into your slime. Tiny pom-poms, small foam beads, or even soft plastic charms can add an interesting texture and visual appeal. Ensure any additions are safe and not choking hazards for younger children.
- 17
If you're making slime with multiple children, consider portioning out the glue and shaving cream into individual bowls beforehand. This helps to manage the mess and allows each child to customize their own slime with colors and glitter, making it a more personalized and enjoyable experience.
- 18
Before you begin, ensure your workspace is protected. Cover your table or counter with newspaper, a plastic tablecloth, or parchment paper. This will make cleanup much easier, especially if you're using food coloring or glitter, which can sometimes be a bit messy.
- 19
When adding the contact lens solution, it's important to do so slowly and incrementally. Adding too much at once can cause the slime to become rubbery and break easily. It's better to add a little, knead, and then add more if needed, rather than over-activating it from the start.
- 20
The kneading process is arguably the most important step for achieving the perfect slime texture. Don't rush it! Spend those 2-3 minutes (or even a bit longer) really working the slime. This develops the polymer chains and transforms the sticky mess into smooth, stretchy slime.
Tips & Troubleshooting
- 1If your slime is too sticky, add a tiny bit more contact lens solution, a teaspoon at a time, and knead it in thoroughly. Continue this process until the slime reaches your desired consistency, but be careful not to add too much, as this can make it stiff and less stretchy.
- 2If your slime is too stiff or breaks easily, try adding a little more shaving cream and kneading it through. The shaving cream adds air and moisture, which can help to make the slime softer and more pliable. You can also try adding a tiny bit of warm water, a teaspoon at a time, to help rehydrate it.
- 3Experiment with different food colorings or add glitter for a sparkly effect. You can create vibrant, opaque colors with gel food coloring or subtle pastel shades with liquid food coloring. For a dazzling finish, mix in fine glitter for a shimmer or chunky glitter for a more pronounced sparkle.
- 4Store your slime in an airtight container or zip-top bag at room temperature to keep it from drying out. Ensure the container is completely sealed to prevent air from getting in, which is the primary cause of slime drying out and becoming hard.
- 5Always use a contact lens solution that specifically contains boric acid and sodium borate. These are the essential activators that cause the glue to polymerize and form slime. Solutions without these ingredients, such as plain saline, will not work for slime making.
- 6Wash your hands thoroughly before and after playing with slime. While the ingredients are generally safe, it's always good practice to maintain good hygiene, especially when crafting with children. This also helps to keep your slime clean and free from contaminants.
- 7If your slime starts to feel a bit dry or less stretchy over time, you can often revive it by adding a small amount of lotion or a few drops of warm water and kneading it in. This can help to reintroduce moisture and elasticity to the slime.
- 8Be mindful of where you play with your slime. It's best to play on a protected surface like a table covered with newspaper or a plastic mat, as slime can stick to carpets, upholstery, and clothing. If it does get on fabric, act quickly to clean it before it dries.
Related Activities You Might Enjoy
Frequently Asked Questions
Why is my slime not stretchy?
If your slime isn't as stretchy as you'd like, it often comes down to the kneading process or the activator ratio. Ensure you've kneaded the slime thoroughly for at least 2-3 minutes, as this develops the polymer bonds that give it its stretch. Sometimes, a tiny bit more glue can help improve stretchiness by providing more material for the activator to work with. Conversely, if you've added too much contact lens solution, the slime can become stiff and brittle, reducing its stretch. In such cases, try adding a small amount of lotion or a teaspoon of warm water and kneading it in to reintroduce flexibility.
What kind of contact lens solution should I use for slime?
The key to a successful slime recipe lies in the contact lens solution. You absolutely need a solution that contains boric acid and sodium borate. These are the chemical components that act as the 'activator,' causing the PVA glue to cross-link and form the slime's structure. Always check the ingredients list on the bottle. Generic saline solutions or contact lens cleaners that do not list boric acid and sodium borate will not work for making slime, and you'll end up with a sticky, unformed mess.
Can I make slime without shaving cream?
Yes, you can certainly make slime without shaving cream, but it won't be 'fluffy' slime. Omitting the shaving cream will result in a more traditional, stretchy, and slightly glossy slime. You'll follow a similar process but will likely need to adjust the ratios slightly. Without the air incorporated by the shaving cream, the slime will be denser and less voluminous. If your goal is fluffy slime, shaving cream is an essential ingredient for achieving that signature airy texture.
How long does homemade slime last?
Homemade slime typically lasts for about 1-2 weeks if stored properly in an airtight container at room temperature. After this period, it may start to dry out, become less stretchy, or even develop an unpleasant odor, which indicates that it's time to make a fresh batch. Factors like exposure to air, heat, and contaminants can shorten its lifespan. Proper storage in a sealed container is crucial for maximizing its longevity and maintaining its desirable texture for play.
My slime is too stiff and breaks easily. What can I do?
A stiff, breakable slime is usually a sign of too much activator (the contact lens solution). Don't worry, it's often salvageable! Try adding a small amount of warm water, just a teaspoon at a time, and kneading it in thoroughly. The water can help to rehydrate the slime and make it more pliable. Alternatively, a bit of lotion can also work wonders to soften stiff slime. If those don't work, you might need to add a little more glue and knead it in to create a better balance.
Can I use different types of glue for fluffy slime?
For fluffy slime, white school glue (PVA-based) is highly recommended and is the standard for this recipe. While some clear glues might work, they can sometimes result in a slightly different texture or clarity. It's best to stick with white school glue for the fluffiest and most reliable results. Avoid glues that are not PVA-based, such as wood glue or craft glues, as they are unlikely to activate properly and form slime.
Is it safe for kids to play with homemade slime?
Yes, homemade slime made with common household ingredients like school glue, shaving cream, baking soda, and contact lens solution is generally safe for children aged 6 and up, provided they are supervised. It's important to ensure that children do not ingest the slime, as it is not edible. Always supervise young children during slime-making and play to prevent accidental consumption and ensure they handle the materials safely. Wash hands thoroughly before and after playing.
What Next?
Congratulations on creating your own batch of amazing fluffy slime! The possibilities for customization are endless – consider adding glitter for sparkle, foam beads for extra texture, or even a few drops of essential oil for a pleasant scent. Once you've mastered this basic recipe, why not explore other slime variations like clear slime or butter slime? Store your creation in an airtight container to maintain its fluffy texture and prevent it from drying out, ensuring it's ready for your next play session. Enjoy your squishy, stretchy masterpiece!
Free: 10 Paper Crafts Anyone Can Make in 5 Minutes
Get our beginner guide + new craft ideas weekly.
No spam. Unsubscribe anytime.
Did you complete this activity?
Related
You might also like
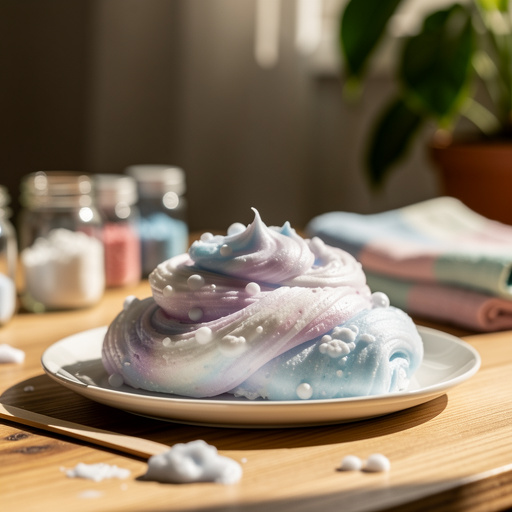
Cloud Dough Slime Creation
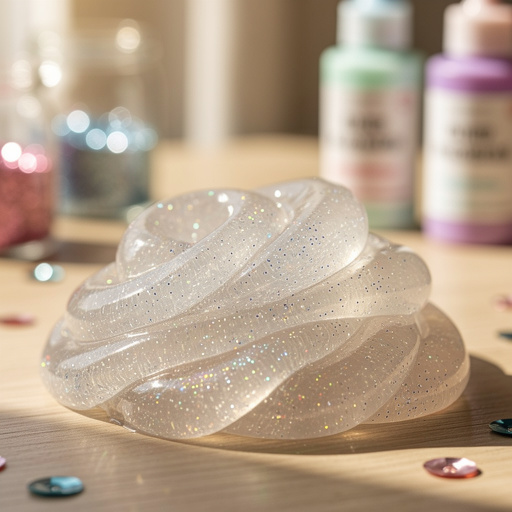
Super Fluffy Cloud Slime
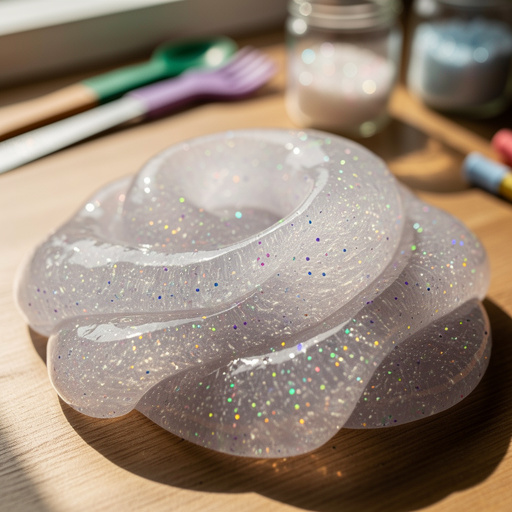
Sparkly Glue Slime Fun
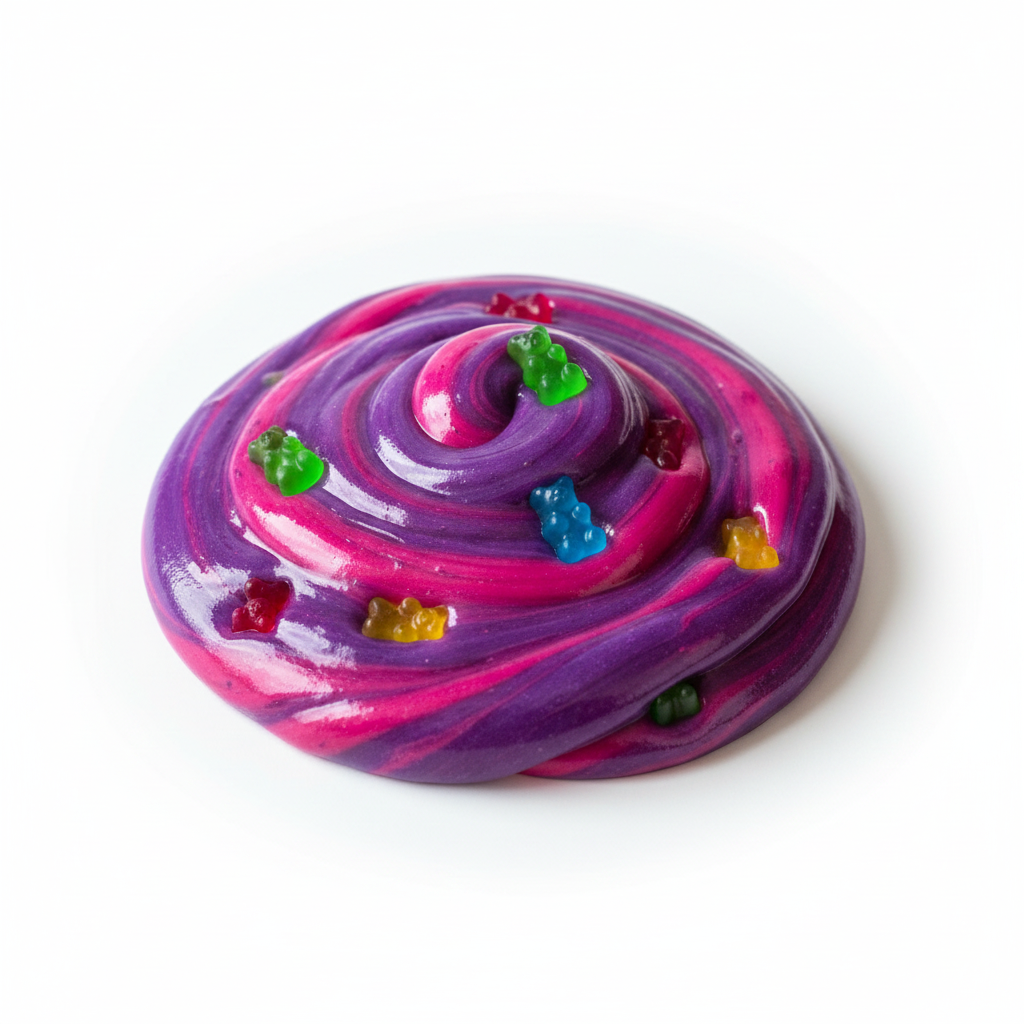
Edible Gummy Bear Slime
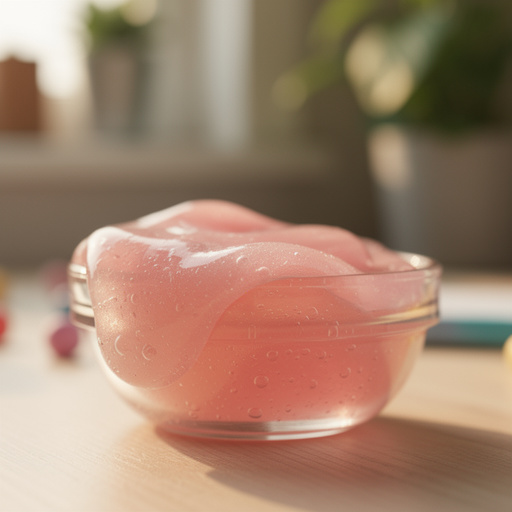
Simple Glue and Water Slime