Homemade Kinetic Sand: A Sensory Play Sensation
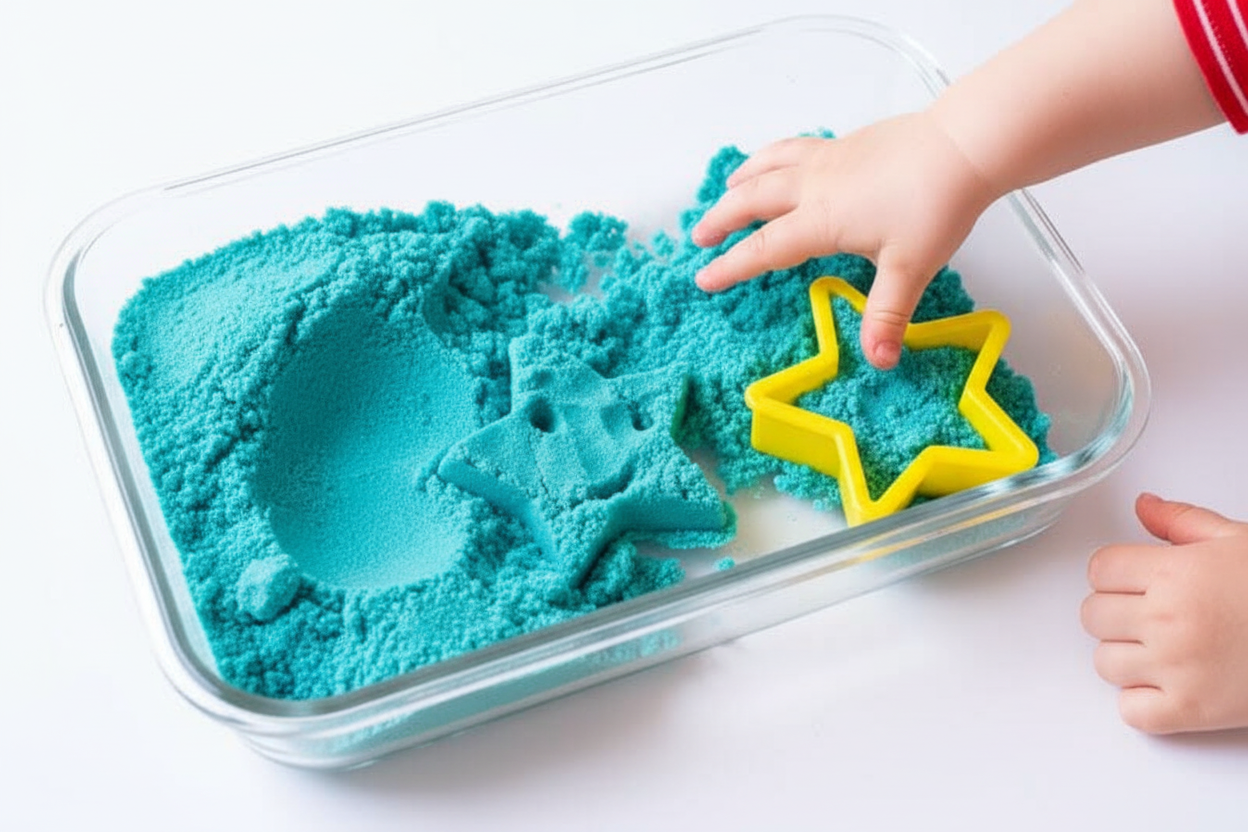
Create your own magical kinetic sand for endless hours of sensory fun! This simple DIY recipe uses common household ingredients to craft a unique play material that flows like liquid but holds its shape like a solid. Ideal for children's activities, stress relief, and creative exploration.
Quick answer
Mix fine sand and cornstarch with a touch of dish soap and water to create moldable, flowing kinetic sand at home.
What you need
Shop on Amazon · As an Amazon Associate we earn from qualifying purchases. Links above are affiliate links — we may earn a commission at no extra cost to you.
Dive into the captivating world of sensory play with your very own homemade kinetic sand! This DIY project is a fantastic way to engage young minds and provide a calming, tactile experience for all ages. Unlike regular sand, kinetic sand possesses a unique property that allows it to flow and be molded simultaneously, offering a truly mesmerizing play experience. It’s incredibly satisfying to watch it cascade through your fingers while still holding its shape for building and sculpting. This recipe is perfect for parents looking for screen-free entertainment, educators seeking engaging science activities, or anyone who simply enjoys the therapeutic benefits of tactile exploration.
On this page
Step-by-Step Instructions
- 1
Gather all your materials: You'll need fine sand, cornstarch, liquid dish soap, water, a large mixing bowl, measuring cups, and measuring spoons. Having everything ready before you begin will ensure a smooth and enjoyable crafting process.
- 2
Measure and combine the dry ingredients: In your large mixing bowl, accurately measure out 2 cups of fine sand and 1 cup of cornstarch. It's important to use fine sand as coarser grains can make the kinetic sand feel gritty and less cohesive.
- 3
Add the dish soap: Carefully measure and add 1 tablespoon of liquid dish soap to the dry sand and cornstarch mixture. The dish soap acts as a binder, helping the sand particles stick together without making the mixture overly wet or sticky.
- 4
Introduce the water: Pour in 1/4 cup of water to begin the mixing process. Start with this amount, as it's easier to add more water if needed than to correct an overly wet mixture.
- 5
Begin mixing by hand: Start mixing the ingredients with your hands, gently breaking up any clumps that form. This initial mixing helps distribute the liquid evenly throughout the dry components.
- 6
Knead the mixture: Continue to mix and knead the ingredients thoroughly. As you work the mixture, you'll notice it starting to clump together and form a cohesive mass, resembling damp sand.
- 7
Assess the consistency: At this stage, the mixture might still be a bit crumbly. This is normal, and it indicates that it's time to adjust the moisture level.
- 8
Gradually add more water if needed: If your mixture is too dry and continues to crumble excessively, it's time to add more water. Add water very gradually, just one tablespoon at a time, mixing thoroughly after each addition.
- 9
Mix and knead until cohesive: Continue to mix and knead the ingredients after each small addition of water. The goal is to achieve a consistency where the sand holds its shape when squeezed firmly.
- 10
Test the texture: Squeeze a handful of the mixture firmly. It should hold its shape, allowing you to form a ball or a shape. However, when you gently poke it or let it fall, it should easily crumble and flow.
- 11
Achieve the perfect flow: The ideal kinetic sand will feel slightly damp but not wet, and it should flow like liquid when you let it trickle through your fingers, yet be moldable when pressed.
- 12
Adjust for desired texture: If the sand feels too sticky, you can try adding a tiny bit more cornstarch, a teaspoon at a time, and kneading it in. If it's still too dry, add water in very small increments.
- 13
Final kneading and play: Once you've achieved the desired consistency, give the kinetic sand a final thorough kneading to ensure all ingredients are well incorporated and the texture is uniform.
- 14
Your homemade kinetic sand is now ready for play! Enjoy the unique tactile experience and let your creativity flow.
- 15
Store properly for longevity: To keep your kinetic sand from drying out, store it in an airtight container when not in use. This will preserve its unique properties for future play sessions.
- 16
Optional: Add color for visual appeal: If you wish to add color, mix a few drops of food coloring into the 1/4 cup of water before adding it to the sand and cornstarch mixture. Knead thoroughly to distribute the color evenly.
Tips & Troubleshooting
- 1Use the right kind of sand: Fine sand, such as craft sand or play sand, is crucial for achieving the best kinetic sand texture. Coarser sands can result in a gritty feel and may not bind as well.
- 2Don't over-water: It's tempting to add more water when the mixture seems dry, but add it very gradually, a tablespoon at a time. Too much water will make the kinetic sand sticky and difficult to handle.
- 3Kneading is key: Thorough kneading is essential for binding the ingredients and developing the unique kinetic properties. Spend time working the mixture until it feels cohesive and moldable.
- 4Test the consistency frequently: Regularly test the sand's texture by squeezing it and letting it fall. This will help you determine when you've reached the perfect balance of moldability and flow.
- 5Experiment with ratios: While the provided recipe is a great starting point, feel free to experiment with slight adjustments to the sand and cornstarch ratio to find your preferred texture.
- 6Clean up is easy: Kinetic sand is generally easy to clean up. It tends to clump together, so sweeping or vacuuming is usually effective. Avoid getting it wet, as this can make it harder to manage.
- 7Consider adding glitter: For an extra touch of magic, you can mix in some fine glitter with the dry ingredients. This will create a sparkly kinetic sand that's even more captivating.
- 8Supervise young children: While kinetic sand is generally safe, always supervise young children during play to ensure they don't ingest it and to help with any cleanup.
Related Activities You Might Enjoy
Frequently Asked Questions
Why is my homemade kinetic sand too dry and crumbly?
If your homemade kinetic sand is too dry and crumbly, it means it needs more moisture. The key is to add water very gradually, one tablespoon at a time, and to knead thoroughly after each addition. The dish soap acts as a binder, and the cornstarch helps absorb moisture, but without enough liquid, the sand particles won't adhere properly. Continue adding small amounts of water and kneading until the sand holds its shape when squeezed but still crumbles easily when poked. It's better to add too little water and build up than to add too much at once, which can make the sand sticky and unmanageable.
My kinetic sand is too sticky. How can I fix it?
A sticky kinetic sand mixture usually indicates that too much water has been added. To fix this, try adding a small amount of additional cornstarch, about a teaspoon at a time, and kneading it thoroughly into the mixture. Cornstarch is excellent at absorbing excess moisture. Continue adding cornstarch and kneading until the stickiness subsides and the sand becomes moldable without clinging excessively to your hands. You can also try adding a little more dry sand if you have extra, but cornstarch is usually the most effective solution for stickiness.
What is the best type of sand to use for homemade kinetic sand?
The best type of sand to use for homemade kinetic sand is fine-grained sand. Options like craft sand, play sand, or even aquarium sand are excellent choices. The finer the sand particles, the smoother and more cohesive your kinetic sand will be. Coarser sands, such as builder's sand or beach sand with larger grains, can result in a gritty texture and may not bind as effectively, leading to a less satisfying play experience. Avoid sands with sharp edges or impurities, as these can also affect the feel and moldability of your creation.
Can I add food coloring to my kinetic sand?
Absolutely! Adding food coloring is a fantastic way to personalize your homemade kinetic sand and make it even more visually appealing. The best time to add food coloring is when you add the water. Mix a few drops of your desired food coloring into the 1/4 cup of water before pouring it into the sand and cornstarch mixture. Then, knead thoroughly to ensure the color is evenly distributed throughout the sand. You can create solid colors, or even swirl multiple colors together for a marbled effect. Remember that food coloring can stain, so wear old clothes and protect your work surface.
How long does homemade kinetic sand last?
When stored properly in an airtight container, homemade kinetic sand can last for several weeks to a few months. The key to its longevity is preventing it from drying out. Exposure to air will cause the moisture to evaporate, and the sand will become crumbly and lose its unique properties. If it does start to dry out over time, you can sometimes revive it by adding a tiny bit more water and kneading it thoroughly, but this may not always restore its original texture perfectly. Always ensure the container is sealed tightly after each play session.
Is homemade kinetic sand safe for young children?
Homemade kinetic sand is generally considered safe for young children, provided it is made with non-toxic ingredients and supervised during play. The primary ingredients – sand, cornstarch, and dish soap – are common household items. However, it's important to ensure that children do not ingest the sand, as it is not meant for consumption. Supervise young children closely during play to prevent them from eating it and to assist with any potential messes. If your child has sensitive skin, you might want to test a small batch first or use a hypoallergenic dish soap.
What Next?
Congratulations on creating your own batch of homemade kinetic sand! The possibilities for play are truly endless, from building intricate castles to simply enjoying the soothing sensation of its flow. For variations, consider adding a few drops of food coloring to the water before mixing to create vibrant, multi-colored kinetic sand, or even experiment with glitter for a touch of sparkle. Once your play sessions are complete, remember to store your kinetic sand in an airtight container to maintain its optimal consistency. This project is a gateway to further sensory exploration; perhaps your next adventure could be making slime or cloud dough!
Free: 10 Paper Crafts Anyone Can Make in 5 Minutes
Get our beginner guide + new craft ideas weekly.
No spam. Unsubscribe anytime.
Did you complete this activity?
Related
You might also like
Edible Gummy Bear Slime
Cloud Dough Slime Creation
Fluffy Glue Cloud Dough
Rainbow Layered Slime Jar
Simple Glue and Water Slime