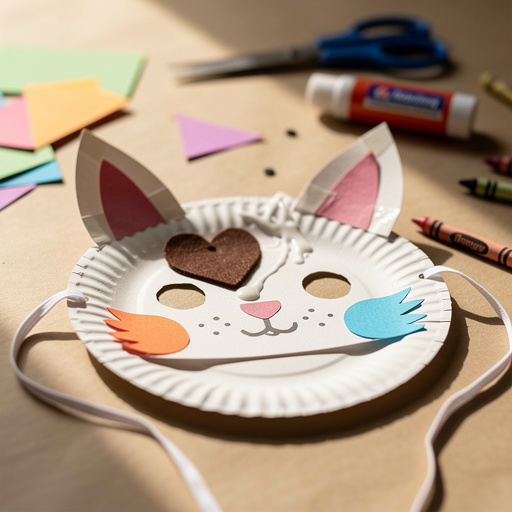
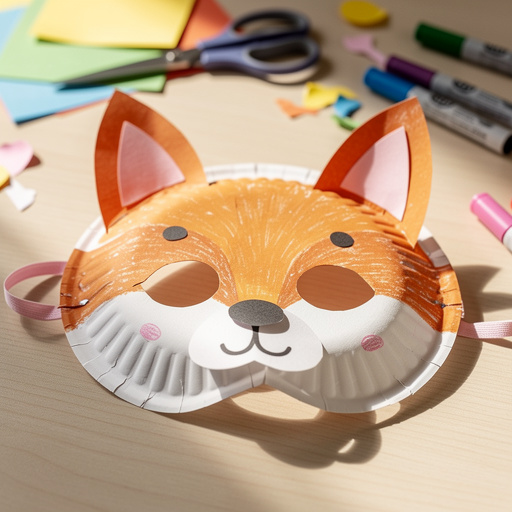
How to Make Paper Mache Animal Masks — Easy Step-by-Step Guide
Unleash your creativity and transform simple materials into amazing animal masks with this fun paper mache craft tutorial. Perfect for imaginative play!

Quick answer
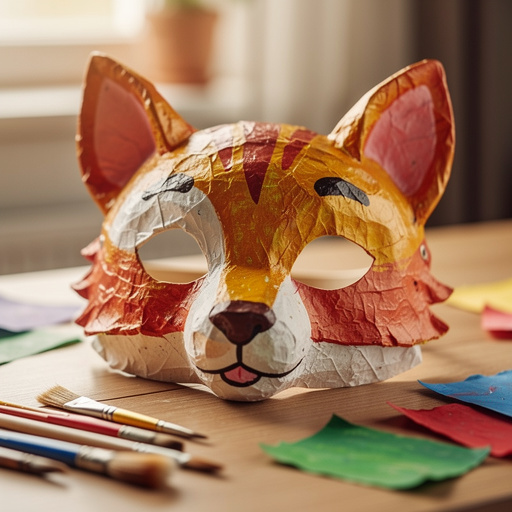
To make paper mache animal masks, you need newspaper strips, flour, water, and a balloon, taking about 90 minutes of active work plus drying time. Start by inflating a balloon and covering it with paper mache paste. This beginner-friendly activity has 10 steps and is perfect for families with kids aged 6+.
What you need
Shop on Amazon · As an Amazon Associate we earn from qualifying purchases. Links above are affiliate links — we may earn a commission at no extra cost to you.
Dive into the whimsical world of mask-making with this engaging paper mache animal mask tutorial! This project is a fantastic way to spark imagination, encourage artistic expression, and create truly unique wearable art. Whether you're planning a costume party, a school play, or simply looking for a fun family activity, these masks offer endless possibilities for customization. It’s a rewarding process that transforms everyday materials into something extraordinary, making it perfect for crafters of all ages, especially children aged 6 and up who can easily grasp the techniques.
On this page
Step-by-Step Instructions
- 1
Inflate the balloon to your desired mask size and tie it off securely. Ensure it's firm but not so taut that it might pop during the paper mache process; a slightly softer balloon can be easier to work with.
- 2
In a bowl, whisk together 1 cup of all-purpose flour and 1/2 cup of water to create a smooth paste. Aim for a consistency similar to pancake batter or thin glue; add a little more water, a tablespoon at a time, if it's too thick, or a bit more flour if it's too runny.
- 3
Lightly coat the top half of the balloon with petroleum jelly or a quick spray of cooking oil. This acts as a release agent, preventing the dried paper mache from sticking to the balloon and making it easier to remove later.
- 4
Dip a newspaper strip into the flour paste, ensuring it's fully saturated, then gently run your fingers along the strip to wipe off excess paste. Too much paste can make the drying process longer and the mask weaker.
- 5
Lay the paste-covered strip onto the petroleum jelly-coated part of the balloon, smoothing out any wrinkles or air bubbles with your fingers. Start from the center and work outwards to ensure a smooth surface.
- 6
Continue layering newspaper strips, overlapping them slightly with each new strip, until the entire top half of the balloon is covered. Aim for at least 3-4 layers for adequate sturdiness, ensuring each layer is applied smoothly.
- 7
Allow the paper mache to dry completely in a well-ventilated area. This is a crucial step for strength and can take 24-48 hours depending on humidity and the number of layers. You can speed this up slightly by placing the balloon near a fan on a low setting.
- 8
Once the paper mache shell feels completely dry and hard to the touch, carefully pop the balloon by poking it with a pin or scissors. Gently pull the deflated balloon out from the inside of the paper mache shell.
- 9
Use sharp scissors to carefully trim the edges of your mask to create a desired animal shape, such as a rounded face or a more angular profile. Mark and cut out eye holes that are appropriately sized for your face, ensuring you can see clearly.
- 10
For added features like ears, horns, or a snout, cut these shapes from cardboard. Attach them securely to the mask using more paper mache strips, ensuring they are well-adhered and integrated into the mask's structure.
- 11
Allow any attached cardboard details to dry completely before proceeding. This ensures they are firmly fixed and won't detach during painting or handling.
- 12
Once all paper mache elements are dry, it's time to paint your mask! Use craft paints to bring your chosen animal to life, applying base colors first and then adding details like stripes, spots, or fur patterns. Let the paint dry completely between coats.
- 13
Add any final decorative touches. This could include gluing on yarn for fur, adding glitter for sparkle, attaching feathers for a bird mask, or even sewing on beads for eyes. Ensure all embellishments are securely attached.
- 14
To make your mask wearable, carefully punch small holes on the sides of the mask, just above the eye level. Thread elastic string or ribbon through these holes and tie securely to create a headband.
- 15
Alternatively, for a handheld mask, you can attach a craft stick or a sturdy cardboard tube to the back of the mask using strong glue or more paper mache strips. Ensure it's firmly attached for comfortable holding.
Tips & Troubleshooting
- 1For a smoother finish, use fewer, thinner layers of newspaper and ensure each layer is well-smoothed. Tearing the newspaper into smaller pieces can also help achieve a more uniform surface, especially around curved areas.
- 2If you want to add more complex features like a snout or horns, build them up with crumpled newspaper and tape before applying the paper mache layers. This creates a solid base that the paper mache can adhere to, allowing for more intricate sculpting.
- 3To make your mask wearable, punch small holes on the sides and tie elastic string through them. Alternatively, you can attach a craft stick to the back for a handheld mask. Ensure the attachment method is secure and comfortable for the wearer.
- 4Experiment with different animal features by looking at pictures of animals for inspiration. You can add yarn for fur, glitter for sparkle, or even feathers! Don't be afraid to mix and match materials to create a truly unique creature.
- 5Consider using a combination of flour and water paste with a bit of white craft glue (about 3 parts paste to 1 part glue) for added strength and durability, especially if your mask will be handled frequently or used outdoors.
- 6When cutting eye holes, it's helpful to hold the mask up to your face (or the intended wearer's face) to gauge the correct placement and size before cutting. You can use a pencil to lightly mark the spots.
- 7For a professional-looking finish, once the paint is completely dry, you can apply a coat of Mod Podge or a clear acrylic sealant. This will protect the paint, add a subtle sheen, and make the mask more resistant to moisture.
- 8Don't discard leftover paper mache paste immediately. You can store it in an airtight container in the refrigerator for a day or two, or freeze it for longer storage. Re-whisk before use if it separates.
Related Activities You Might Enjoy
Frequently Asked Questions
How long does paper mache take to dry?
Paper mache typically takes 24 to 48 hours to dry completely. Drying time can vary based on the number of layers, humidity, and air circulation. Using a fan can help speed up the process. For best results and maximum strength, ensure the mask is bone dry before painting or adding embellishments. If you live in a very humid climate, it might take even longer. You can test for dryness by gently pressing on the surface; it should feel hard and sound hollow when tapped.
What is the best paste for paper mache?
A simple flour and water paste is excellent for paper mache and is the most common and cost-effective option. Mix 1 cup of all-purpose flour with 1/2 cup of water until smooth, aiming for a consistency similar to pancake batter. Some people add a pinch of salt to prevent mold, but it's not essential for short-term projects. For added strength and a smoother finish, you can also incorporate a small amount of white craft glue (PVA) into the paste, using a ratio of approximately 3 parts flour paste to 1 part glue.
How do I make my paper mache mask strong?
To make your paper mache mask strong, ensure you apply at least 3-4 layers of newspaper strips. Overlap the strips well and smooth out any air bubbles or wrinkles with each application. Allowing each layer to dry partially before adding the next can also increase strength, though complete drying between every single layer might be impractical. Using a slightly thicker paste or adding white craft glue to your paste mixture will also contribute to a more robust final product. Ensure the balloon is fully removed and the mask is completely dry before handling extensively.
Can I paint paper mache before it's completely dry?
It's best to wait until your paper mache is completely dry before painting. Painting on damp paper mache can lead to uneven color distribution, peeling paint, and can prolong the drying process significantly. The moisture from the paint can also reactivate the paste, potentially causing the paper mache to soften or warp. Once the mask is hard and dry to the touch, it provides a stable surface for your paints, allowing for vibrant colors and crisp details.
How do I get a smooth finish on my paper mache mask?
Achieving a smooth finish involves several techniques. Firstly, use thinner strips of newspaper and ensure each strip is well-saturated with paste, then smoothed down meticulously, pressing out all air bubbles and wrinkles. Applying more, but thinner, layers can be more effective than fewer, thicker layers. You can also use plain white paper or even tissue paper for the final layer, as these materials tend to create a smoother surface than newsprint. Sanding lightly with fine-grit sandpaper after the mask is completely dry and before painting can also help smooth out any imperfections.
What kind of paint should I use for paper mache masks?
Acrylic craft paints are the best choice for paper mache masks. They adhere well to the dried paper surface, offer vibrant colors, and dry relatively quickly. They are also water-based, making cleanup easy. For added durability and a protective finish, consider applying a coat of Mod Podge or a clear acrylic sealant over the dried paint. This will help protect the mask from moisture and wear, and can also give it a matte, satin, or glossy finish depending on the sealant you choose.
What Next?
Once your magnificent paper mache animal masks are complete, the fun doesn't have to stop! Consider creating a whole menagerie of creatures for a dramatic display or a parade of characters. These masks can be hung as decorative pieces on a wall, adding a touch of handmade charm to any room. For future projects, explore different base shapes like bowls or even full head forms for more elaborate creations. You could also experiment with different types of paper, like tissue paper for a delicate look or brown paper bags for a rustic texture. Store your finished masks carefully to protect them from moisture and dust, ensuring they remain a cherished part of your creative endeavors for years to come.
Free: 10 Paper Crafts Anyone Can Make in 5 Minutes
Get our beginner guide + new craft ideas weekly.
No spam. Unsubscribe anytime.
Did you complete this activity?
Related