How to Make 25 Easy DIY Macrame Projects for Beginners
Explore a collection of 25 simple macrame projects perfect for beginners. Learn essential knots and create charming handmade items for your home and gifts. This beginner-friendly activity has 25 variations and is perfect for families looking for screen-free fun.

Quick answer
To make 25 easy DIY macrame projects, you'll need macrame cord, scissors, and a dowel or ring. Start by learning basic knots like the square knot and half hitch. This beginner-friendly activity has 25 variations and is perfect for families looking for screen-free fun.
What you need
Shop on Amazon · As an Amazon Associate we earn from qualifying purchases. Links above are affiliate links — we may earn a commission at no extra cost to you.
Embark on a creative journey with this collection of 25 easy DIY macrame projects, designed specifically for absolute beginners. Macrame, the art of knotting cords to create decorative items, offers a wonderfully tactile and rewarding crafting experience. These projects are perfect for anyone looking to add a touch of bohemian charm to their home decor, create thoughtful handmade gifts, or simply unwind with a screen-free, engaging hobby. Gather your materials and prepare to transform simple cords into beautiful, functional pieces with these straightforward tutorials.
On this page
Step-by-Step Instructions
- 1
Gather your macrame cord, scissors, and measuring tape. Ensure you have a clean, well-lit workspace to begin your crafting adventure.
- 2
Cut your cord into desired lengths for your first project. For a simple coaster, a good starting point is to cut 4 cords, each approximately 3 feet long, ensuring they are all the same length for even knotting.
- 3
For projects that will be attached to a dowel, ring, or branch, fold each cord precisely in half. Then, loop the folded end over the chosen base and pull the loose ends through the loop to create a secure Lark's Head knot.
- 4
Learn the Square Knot: Take two adjacent cords, typically the two outer cords of a group of four. Cross the leftmost cord over the middle two cords, then bring the rightmost cord over the left cord and through the loop created. Pull both working cords tight to form the first half of the knot. Repeat this process in reverse: cross the rightmost cord over the middle two, then bring the leftmost cord under and through the loop. Pull both working cords tight again to complete the symmetrical Square Knot.
- 5
Learn the Half Hitch Knot: Select one working cord and another cord to tie around, often referred to as the filler cord. Take the working cord and wrap it around the filler cord, creating a loop. Then, bring the working cord up and through the loop you just formed. Pull the working cord tight to secure the Half Hitch knot against the filler cord.

- 6
Practice these basic knots repeatedly until you feel comfortable and confident in their execution. Try making several rows of square knots and a series of half hitch knots on scrap cords to get a feel for the tension and rhythm.
- 7
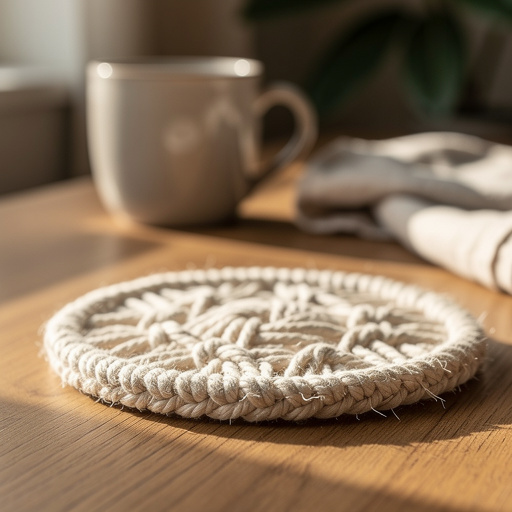
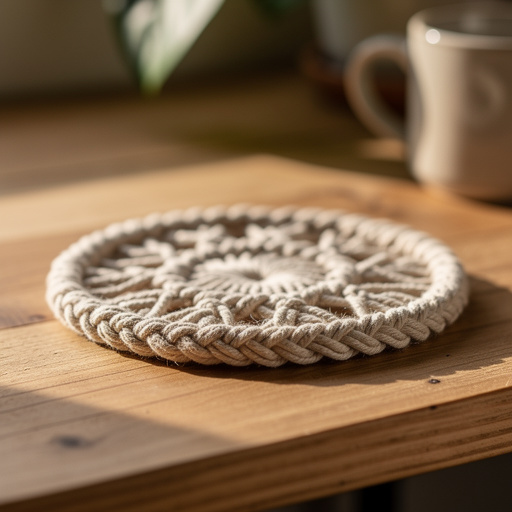
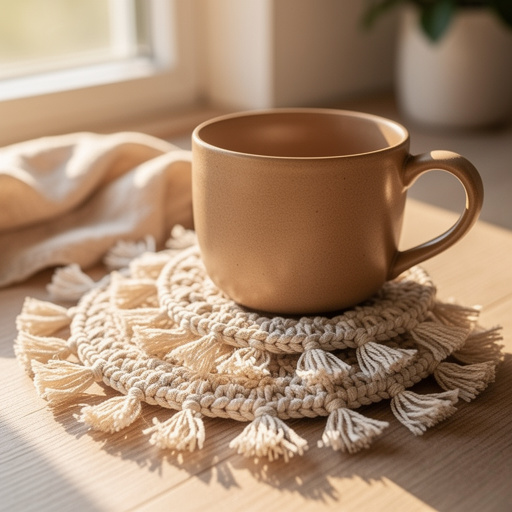
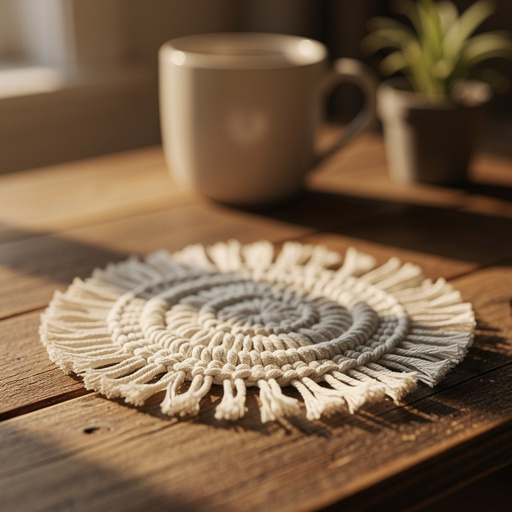
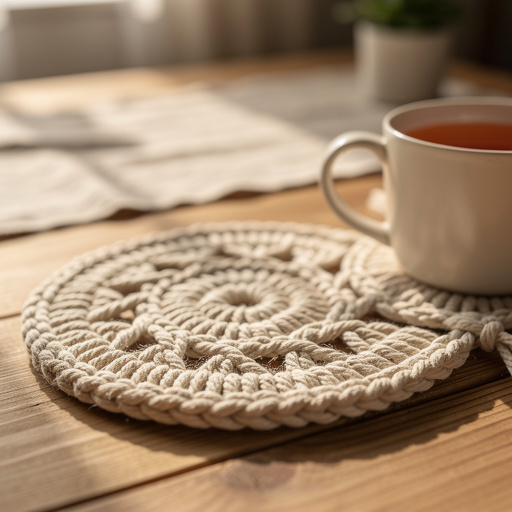
Follow the specific instructions for each of the 25 projects, applying the knots you've learned. For a coaster, you might create a pattern of square knots in horizontal rows, gradually building up the surface area.
- 8
For projects like keychains or bag charms, you'll often tie off the ends with a gathering knot to create a neat finish, or you can simply trim the cords and gently fray them for a bohemian look.
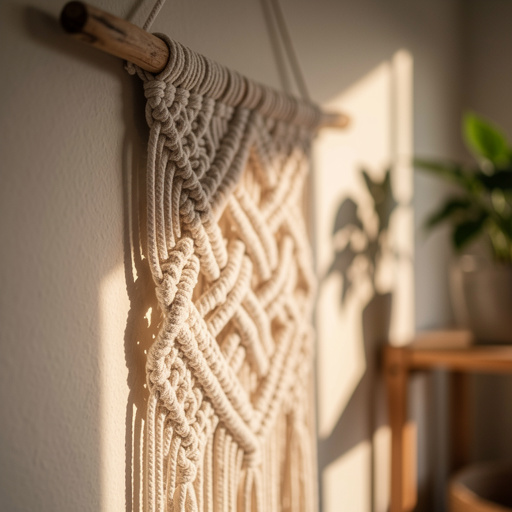
- 9
For wall hangings, use your dowel, ring, or branch as a base. Attach your cords using the Lark's Head knot, ensuring they are evenly spaced, and then begin building your design with various knotting patterns.
- 10
For plant hangers, you'll typically create a basket-like structure. This involves using a series of square knots to form a net that will cradle your plant pot, often finished with a gathering knot at the top for hanging.
- 11
For bracelets, carefully measure your wrist to ensure a comfortable fit. Create a repeating pattern of knots, and as you progress, you can easily incorporate beads by threading them onto the filler cords before tying the next knot.
- 12
For bookmarks, you can create a simple knotted design, such as a series of square knots or a decorative knot pattern, and then trim the ends neatly for a clean and elegant finish.
- 13
For small pouches, you'll create a rectangular knotted panel first. Once the panel is the desired size, you'll fold it and knot the sides together to form the pouch shape.
- 14
For decorative tassels, cut multiple strands of cord to your desired length, fold them in half, and then tie them together securely at the top with a separate piece of cord or a gathering knot to create a full, lush tassel.
- 15
For simple plant pot covers, you'll create a net-like structure using a series of knots, allowing the pot to peek through while adding a decorative macrame element.
- 16
For hanging ornaments, create small, intricate knotted shapes or simple knot clusters, and then attach a loop of cord at the top for easy hanging on a tree or display.
- 17
For coasters, focus on creating a flat, dense knot pattern, such as tightly spaced square knots or a combination of square knots and half hitch knots, to ensure a sturdy and absorbent surface.
- 18
For simple earrings, create small knotted elements, perhaps a tiny square knot or a series of half hitch knots, and then attach them to earring hooks using a jump ring or by directly knotting them to the hook.
- 19
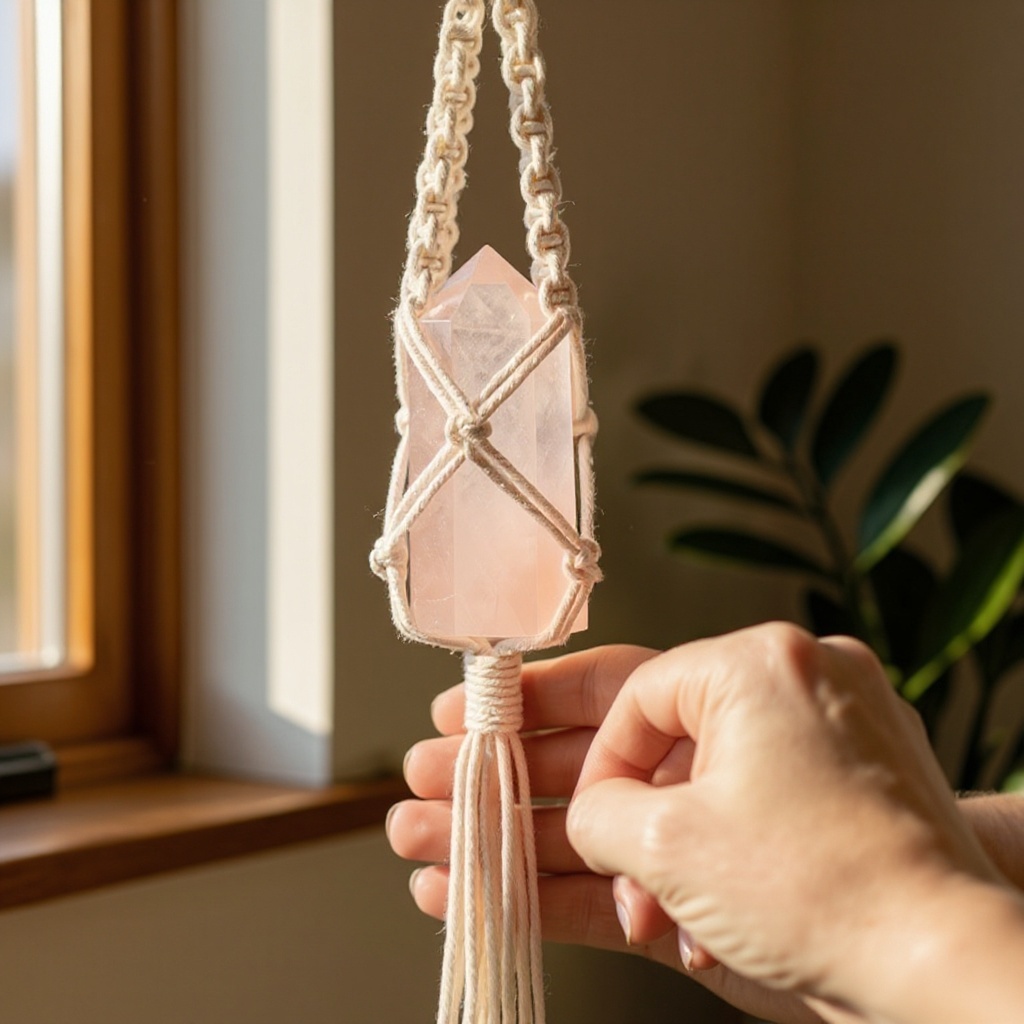
For bag charms, create small, eye-catching knotted designs and then attach a clasp or a sturdy jump ring to the top for easy attachment to your favorite bag or purse.
- 20
For pet toys (ensure all materials are safe and non-toxic for your pet), create durable knotted structures that can withstand chewing and play, such as tightly knotted balls or braided ropes.
- 21
For simple garlands, create repeating knotted motifs, like small square knot panels or decorative knot clusters, and then string them together with additional cord or thread to create a festive decoration.
- 22
For decorative knots, don't be afraid to experiment with different combinations and patterns of the basic knots you've learned. Explore how varying the tension and spacing can create unique textures and designs.
- 23
For fringe, unravel the ends of your macrame cords by gently separating the plies. You can then comb them out for a soft, feathery look or leave them slightly untwisted for a more rustic appearance.
- 24
Trim all excess cord neatly at the end of each project using your sharp scissors. Ensure your cuts are clean and even to maintain a professional and polished look.
- 25
Display or gift your finished macrame creations! Share your handmade treasures with friends and family, or use them to add a personal touch to your living space.
Tips & Troubleshooting
- 1If your knots appear uneven or too loose, don't worry! Gently pull and adjust the cords until they look consistent and symmetrical. Sometimes, carefully re-tying a knot can significantly improve its appearance and tightness.
- 2Experiment with different cord colors and textures to personalize your projects and create unique aesthetics. You can also add wooden beads, metal charms, or other embellishments to enhance the visual appeal and add dimension.
- 3Store your macrame projects properly to maintain their shape and prevent creasing. Hanging delicate wall hangings or plant hangers is ideal, while smaller items like coasters or keychains can be laid flat in a drawer or box.
- 4Always use sharp scissors for clean cuts. Dull scissors can snag and fray the cord unevenly, leading to a messy finish that is difficult to correct. Invest in a good pair of crafting scissors for the best results.
- 5When starting a project, it's always better to cut your cords a little longer than you think you'll need. It's much easier to trim excess cord than to add more if you run short, especially for beginners.
- 6Pay attention to the tension of your knots. Consistent tension is key to achieving a uniform and professional-looking macrame piece. Practice maintaining a steady hand and even pressure as you tie each knot.
- 7Don't be afraid to make mistakes! Macrame is a forgiving craft, and most errors can be undone by carefully untying the knots. Embrace the learning process and view any imperfections as part of the handmade charm.
- 8Consider using a clipboard or tape to secure your starting point when working on larger projects like wall hangings or plant hangers. This will help keep your cords organized and prevent them from tangling as you work.
Related Activities You Might Enjoy
Frequently Asked Questions
What are the basic knots for macrame beginners?
The two most fundamental knots for beginners are the Square Knot and the Half Hitch Knot. Mastering these two knots will unlock the ability to create a vast array of macrame designs, from simple patterns to more intricate creations. The Square Knot forms the basis for many flat and decorative elements, while the Half Hitch Knot is excellent for creating lines, outlines, and securing other knots. Practicing these until they become second nature is the best way to build confidence and proficiency in macrame crafting.
How much macrame cord do I need for a beginner project?
The amount of cord needed varies greatly depending on the specific project and its size. For small items like keychains or coasters, starting with cords around 3-5 feet long per cord is a good rule of thumb. It's always recommended to cut a little extra cord than you think you'll need to be safe, as it's much easier to trim excess than to add more if you run short. For larger projects like plant hangers or wall hangings, you'll need significantly more cord, often in lengths of 10-20 feet or even longer, depending on the desired finished size and complexity.
Where can I find patterns for these 25 easy macrame projects?
While this tutorial provides general guidance and instructions for creating a variety of macrame items, you can find specific, detailed step-by-step patterns for each of the 25 projects online. A simple internet search for the project type, such as 'easy macrame coaster pattern,' 'beginner macrame plant hanger tutorial,' or 'DIY macrame keychain instructions,' will yield numerous results. Many craft blogs, YouTube channels, and online craft stores offer free and paid patterns with visual aids and precise measurements, which can be incredibly helpful for beginners.
Can children do these macrame projects?
Yes, with adult supervision, children aged 8 and up can absolutely enjoy many of these easy macrame projects. Macrame is a fantastic activity for developing fine motor skills, hand-eye coordination, and creativity in young crafters. Projects like simple coasters, keychains, or small decorative knots are particularly well-suited for children. Ensure you choose age-appropriate projects and provide clear, patient guidance. It's a wonderful way for families to spend quality time together and create something beautiful without relying on screens.
What is the best type of macrame cord for beginners?
For beginners, 3mm or 4mm 100% cotton macrame cord is generally the best choice. Cotton is soft, easy to handle, and forgiving, making it ideal for learning basic knots without causing hand strain. It also frays beautifully if you wish to create fringe. Avoid cords that are too thin, as they can be difficult to grip and knot, or cords that are too thick, which can be cumbersome for smaller projects. As you gain experience, you can experiment with other materials like jute, hemp, or synthetic cords.
How do I ensure my macrame projects are consistent in size and appearance?
Consistency in macrame projects comes down to careful measurement and even knot tension. Always measure and cut your cords to the exact same length for each project unless a pattern specifies otherwise. When tying knots, strive for uniform tension; this means pulling each knot with roughly the same amount of force. If you notice a knot is too loose or too tight compared to others, you can often gently adjust it by pulling on the surrounding cords. Practicing on scrap cords before starting your main project can also help you develop a consistent knotting technique.
What Next?
Congratulations on exploring the world of macrame! With these 25 beginner-friendly projects, you've gained the foundational skills to create a wide array of beautiful items. Don't be afraid to experiment with different cord colors, textures, and embellishments to make each piece uniquely yours. Consider displaying your macrame creations as wall hangings, plant hangers, or even as decorative accents on furniture. For storage, hang delicate pieces to prevent creasing or lay them flat in a drawer. As you grow more confident, explore more complex knotting techniques and larger projects to further expand your macrame repertoire.
Free: 10 Paper Crafts Anyone Can Make in 5 Minutes
Get our beginner guide + new craft ideas weekly.
No spam. Unsubscribe anytime.
Did you complete this activity?
Related