How to Make a Handprint Turkey Thankful Tree — Easy Step-by-Step Guide
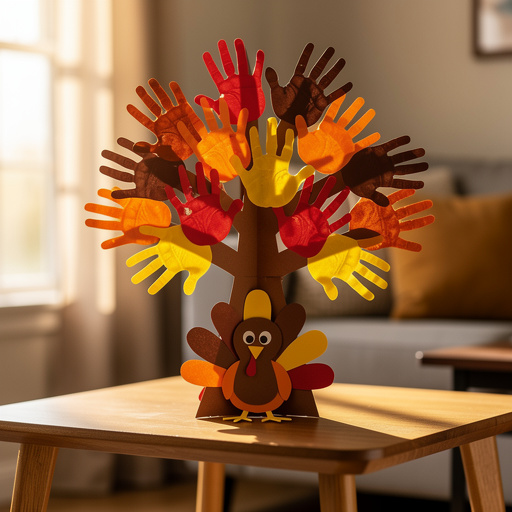
Celebrate Thanksgiving by creating a charming Handprint Turkey Thankful Tree. This screen-free craft is perfect for little hands to express what they're thankful for. It's a wonderful way to foster gratitude and create a beautiful keepsake.
Quick answer
To make a Handprint Turkey Thankful Tree, you need brown construction paper for the handprint turkey body, a large sheet of white or cream paper for the tree, child-safe scissors, glue, assorted construction paper scraps for leaves, and a black marker. Start by tracing and cutting out your child's handprint to form the turkey's body. Then, draw a tree trunk on the large paper, glue the handprint above it, and cut out small leaf shapes from colored paper. Have your child write or draw what they are thankful for on each leaf and then glue them around the turkey and on the tree. This beginner-friendly activity has 12 steps and is perfect for preschoolers and young children, fostering creativity and gratitude.
What you need
Shop on Amazon · As an Amazon Associate we earn from qualifying purchases. Links above are affiliate links — we may earn a commission at no extra cost to you.
Gather your little ones and get ready for a heartwarming Thanksgiving tradition! The Handprint Turkey Thankful Tree is more than just a craft; it's a beautiful way to visually represent the spirit of gratitude that defines this special holiday. This screen-free activity is designed for little hands, encouraging fine motor skill development as they trace, cut, and glue. It's the perfect project for preschoolers and young children to express their feelings of thankfulness in a tangible and creative way, resulting in a cherished keepsake that families will adore.
On this page
Step-by-Step Instructions
- 1
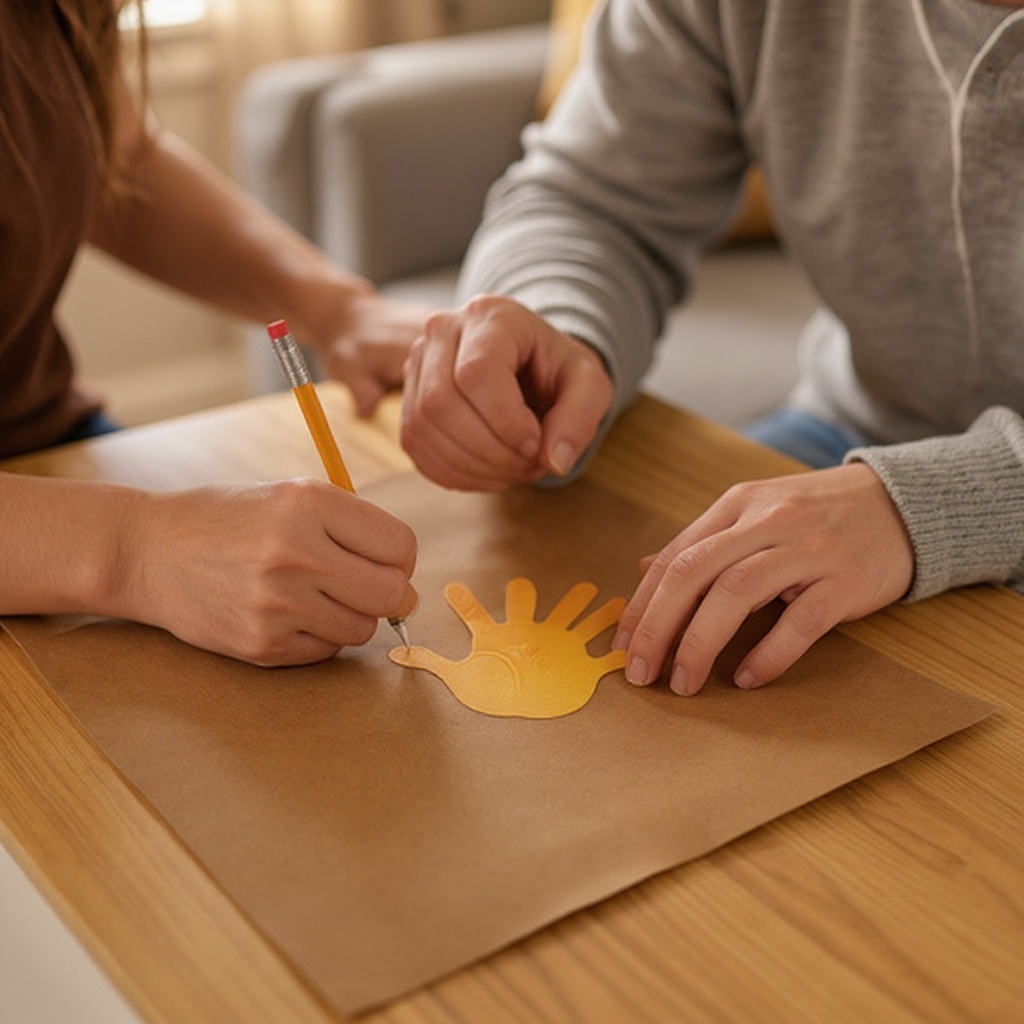
**Step 1: Prepare the Turkey Body.** Take the sheet of brown construction paper and have your preschooler place their hand flat on it, fingers spread slightly apart. Ensure their palm and fingers cover a good portion of the paper, as this will form the main body of your turkey.
- 2
**Step 2: Trace the Handprint.** Using a pencil, carefully trace around your child's hand. Encourage them to keep their fingers as still as possible, but don't worry about perfection; slight wiggles add character. Make sure to trace all five fingers and the palm area.
- 3
**Step 3: Cut Out the Handprint.** With child-safe scissors, carefully cut along the pencil lines you've drawn. This is a great step for adults to assist with, especially for younger children who may struggle with precise cutting. The resulting shape will be the foundation of your turkey's body, with the fingers becoming its tail feathers.
- 4
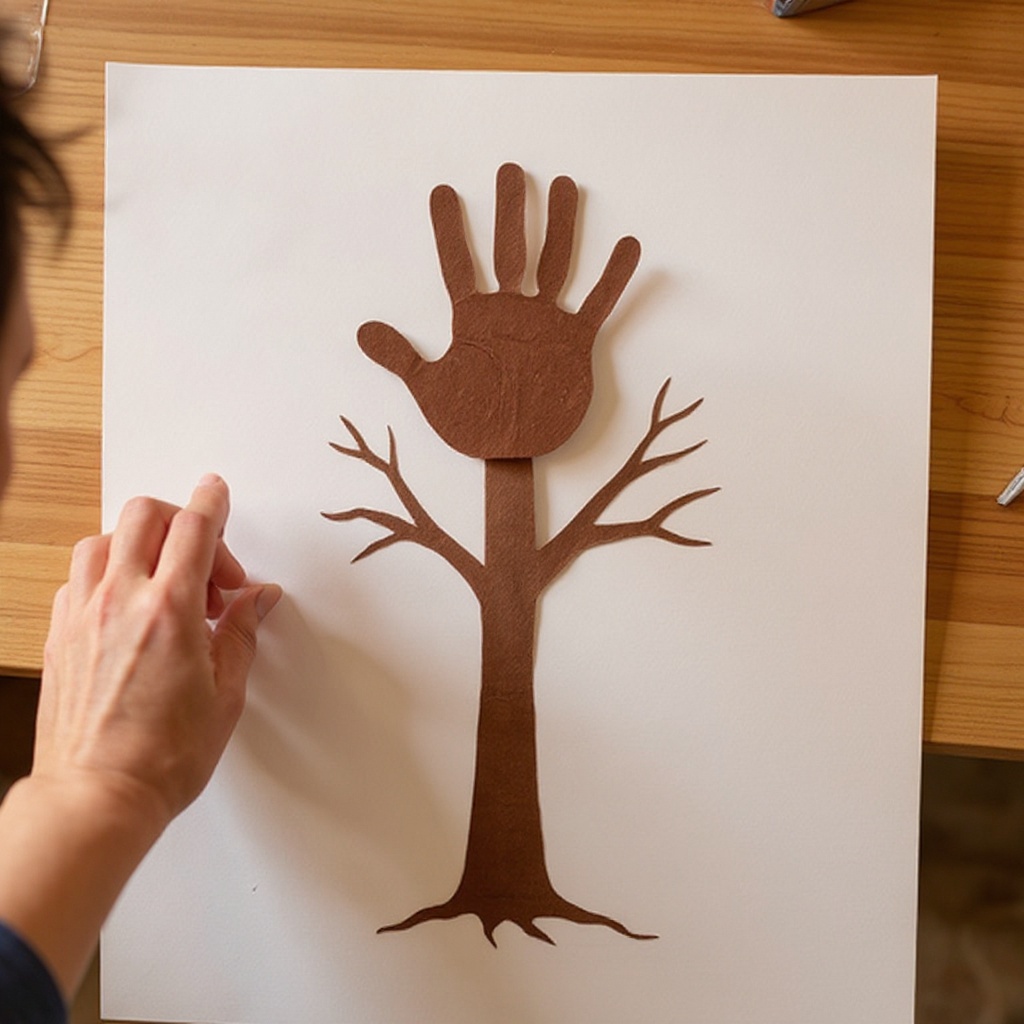
**Step 4: Draw the Tree Trunk.** On the large sheet of white or cream construction paper, use a black marker or crayon to draw a simple, sturdy tree trunk extending upwards from the bottom center of the paper. You can make it as wide or narrow as you like, and even add a few simple root-like lines at the base for stability.
- 5
**Step 5: Position and Glue the Turkey Body.** Take the cut-out brown handprint and position it on the large paper, directly above the drawn tree trunk. The palm of the hand should rest just above the trunk, with the fingers pointing upwards, ready to become the turkey's magnificent tail feathers. Apply glue to the back of the handprint and press it firmly onto the large paper.
- 6
**Step 6: Add the Turkey's Head and Features (Optional but Recommended).** To give your turkey a distinct head, cut a small oval or circle from a scrap of brown construction paper and glue it to the base of the handprint, where the thumb meets the palm. Then, cut a small triangle for a beak from orange construction paper and a small, wavy shape for a wattle from red construction paper, and glue these onto the head.
- 7
**Step 7: Add Googly Eyes (Optional).** For an extra touch of personality, glue two small googly eyes onto the turkey's head. This step is particularly engaging for younger children and adds a fun, whimsical element to the craft.
- 8
**Step 8: Prepare the Thankful Leaves.** Now, gather your assorted colors of construction paper scraps. These will become the 'leaves' of your thankful tree. Cut out various small shapes such as circles, ovals, teardrops, or simple leaf outlines. Aim for a variety of colors and sizes to create a visually appealing display.
- 9
**Step 9: Write or Draw Thankful Thoughts.** This is the heart of the project! Hand one or more of the cut-out 'leaves' to your preschooler. Using markers or crayons, have them write or draw something they are thankful for on each leaf. For very young children, you can help them write their words or draw simple pictures for them, like a sun, a house, or a family member.
- 10
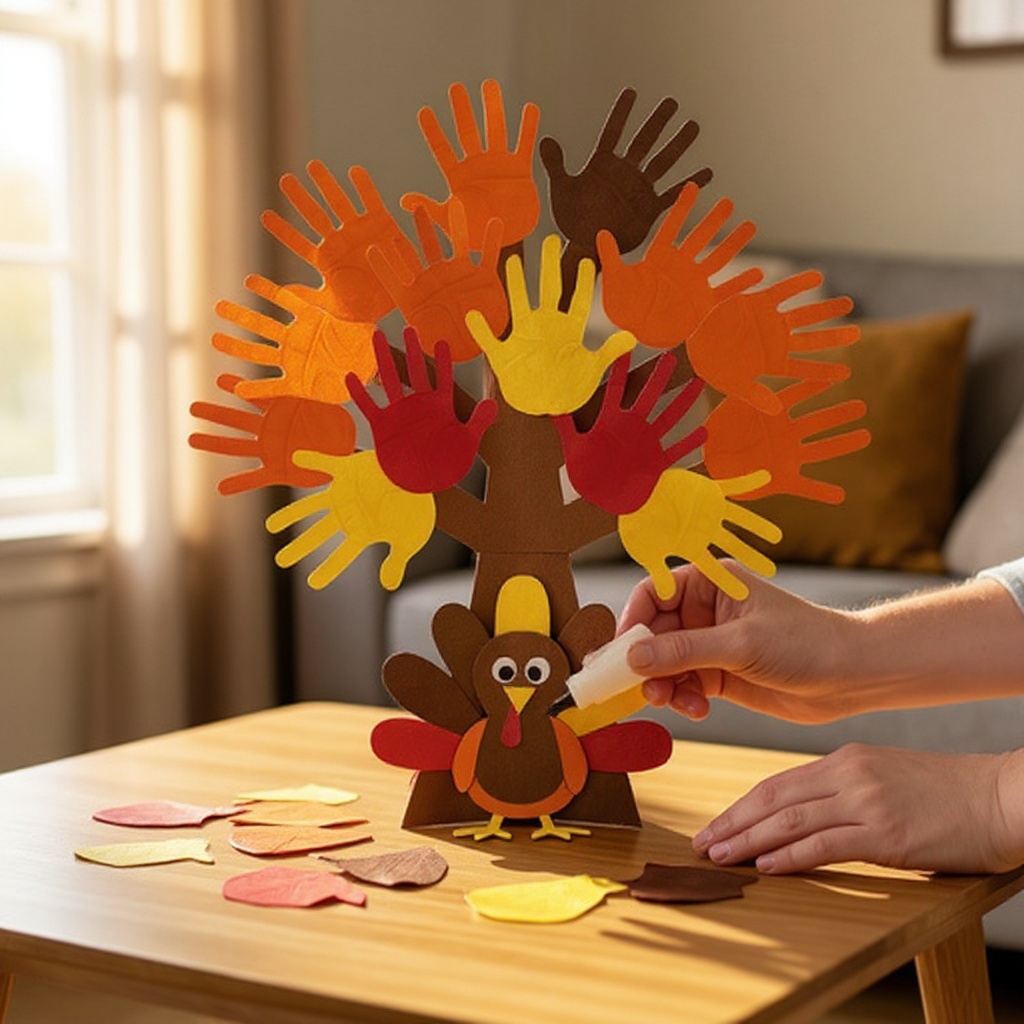
**Step 10: Attach the Thankful Leaves to the Turkey's Tail.** Begin by gluing the 'thankful leaves' onto the spread-out fingers of the brown handprint. Overlap them slightly to create a full, vibrant tail for your turkey. Encourage your child to place their 'thankful' leaves where they feel they fit best.
- 11
**Step 11: Expand the Thankful Tree.** Continue gluing the remaining 'thankful leaves' around the handprint turkey and onto the branches of the tree trunk you drew. Scatter them throughout the composition, creating the appearance of a bountiful, gratitude-filled tree.
- 12
**Step 12: Final Touches and Drying.** Once all the elements are glued in place, gently press down on each piece to ensure it's securely attached. Allow the entire artwork to dry completely. You can add a border around the large paper with a marker or crayon if desired, or even draw some simple branches extending from the trunk for a more elaborate tree effect.
Tips & Troubleshooting
- 1**Steady Hands for Tracing:** If your child has trouble holding their hand perfectly still for tracing, try gently holding their wrist or the base of their fingers to keep it steady. You can also try tracing their hand while they are distracted by a story or song.
- 2**Colorful Turkey Variations:** For a more visually dynamic turkey, consider using different colored construction paper for the handprint body itself. Alternatively, before gluing, let your child decorate the brown handprint with crayons or colored pencils, adding patterns or colors to their turkey.
- 3**Beyond Leaves for Gratitude:** Don't limit yourself to just leaf shapes for expressing thankfulness. You can also cut out small heart shapes, star shapes, or even simple cloud shapes to represent what your child is grateful for. This adds another layer of creativity and personalization to the project.
- 4**Displaying Your Masterpiece:** Once your Handprint Turkey Thankful Tree is complete and dry, find a prominent place to display it. The refrigerator door is a classic choice, but consider a bulletin board, a mantelpiece, or even framing it for a more formal presentation. It serves as a beautiful and constant reminder of gratitude throughout the Thanksgiving season.
- 5**Pre-Cutting for Younger Hands:** For very young toddlers or children with limited fine motor skills, you can significantly simplify the process by pre-cutting the handprint shape and all the 'thankful' leaf shapes. This allows them to focus on the enjoyable parts of the craft: applying glue and sticking the pieces onto the paper, fostering a sense of accomplishment.
- 6**Adding Texture and Dimension:** To make your thankful tree even more interesting, consider adding texture. You could glue small pieces of yarn onto the tree trunk for a bark-like effect, or use glitter glue to outline the leaves for a bit of sparkle. This can also be a great way to involve children in the decorating process.
- 7**Storytelling Through Art:** Encourage your child to talk about what they are drawing or writing on each leaf. This opens up conversations about gratitude and helps them articulate their feelings. You can even write down their verbal explanations next to their drawings for a more detailed keepsake.
- 8**Creating a Family Tree:** For a larger family or a recurring tradition, consider making a larger tree with multiple handprint turkeys, each representing a family member. You can also have each person contribute their own thankful leaves to a shared tree, creating a collaborative piece of art that symbolizes collective gratitude.
Related Activities You Might Enjoy
Frequently Asked Questions
What are good Thanksgiving crafts for preschoolers?
Preschoolers thrive on hands-on activities that engage their senses and creativity. Excellent Thanksgiving crafts for this age group include the Handprint Turkey Thankful Tree, which fosters gratitude and fine motor skills. Other popular options are paper plate turkeys, where they can glue on feathers and googly eyes, or pilgrim hat crafts using black construction paper and a buckle. Creating 'thankful placemats' by decorating paper with drawings of things they are thankful for is also a wonderful and functional activity. These crafts not only celebrate the holiday but also help develop essential skills like cutting, gluing, and creative expression in a fun, age-appropriate manner.
How can I make a simple Thanksgiving craft with my toddler?
For toddlers, the key is simplicity and focusing on sensory engagement. A fantastic Thanksgiving craft for this age is a simplified Handprint Turkey. You can do the tracing and cutting of the handprint yourself, and then let your toddler have the joy of applying glue to the handprint and sticking it onto a larger piece of paper. Offer pre-cut shapes like circles or ovals for them to glue on as 'feathers' or a 'head.' Fingerprint cornucopias are also incredibly easy and engaging; simply have them dip their fingers in paint and make prints in a cornucopia shape. Focus on the process and the tactile experience rather than a perfect end product.
What materials do I need for a handprint turkey craft?
To create a classic Handprint Turkey craft, you will primarily need brown construction paper for tracing and cutting out the handprint that forms the turkey's body. You'll also need a larger sheet of paper, such as white or cream construction paper, to serve as the background and for drawing the tree trunk. Essential tools include child-safe scissors for cutting and a glue stick or liquid school glue for assembly. To add color and detail, gather assorted scraps of construction paper in various colors (like red, orange, yellow, and green) for the turkey's features and the thankful leaves. A black marker or crayon is useful for drawing the tree trunk and writing thankful messages.
How do I adapt a handprint turkey for younger preschoolers?
Adapting the Handprint Turkey for younger preschoolers involves simplifying the steps and focusing on their strengths. The most effective adaptation is to pre-cut the brown handprint shape for them. This eliminates the need for them to handle scissors, which can be challenging. You can also pre-cut the small 'thankful' leaf shapes from colorful construction paper. This allows them to concentrate on the enjoyable and developmentally appropriate tasks of applying glue and sticking the pre-cut pieces onto the background paper and the handprint. This approach ensures they can participate fully and feel a sense of accomplishment without frustration.
What is the purpose of a Handprint Turkey Thankful Tree?
The Handprint Turkey Thankful Tree serves a dual purpose: it's a delightful craft activity and a meaningful way to cultivate gratitude. As children create the turkey and its 'thankful leaves,' they are encouraged to think about and express what they are thankful for. This process helps them develop an awareness of the positive aspects of their lives, fostering a sense of appreciation and contentment. Visually, the tree becomes a beautiful representation of their gratitude, serving as a constant reminder throughout the Thanksgiving season. It's a screen-free, hands-on project that promotes family connection and thoughtful reflection during a time of celebration.
Can I make the Handprint Turkey Thankful Tree a group activity?
Absolutely! The Handprint Turkey Thankful Tree is an excellent group activity, perfect for classrooms, playdates, or family gatherings. Each child can create their own handprint turkey, and then contribute their 'thankful leaves' to a larger, communal tree. This fosters a sense of shared gratitude and teamwork. For a classroom setting, you could have one large tree where each student adds their handprint turkey and then their individual thankful leaves. This creates a beautiful, collaborative display that celebrates everyone's contributions and the collective spirit of thankfulness. Ensure you have enough materials for each participant.
What Next?
Once your Handprint Turkey Thankful Tree is complete, find a special place to display it! Hang it on the refrigerator, a prominent wall, or even use it as a centerpiece for your Thanksgiving table. Consider adding more handprints each year to create a growing family tree of gratitude. For variations, you could use different colored papers for the turkey body or create a more elaborate tree with branches drawn on. This project is a wonderful springboard for discussions about what everyone is thankful for, making it a meaningful addition to your holiday celebrations.
Free: 10 Paper Crafts Anyone Can Make in 5 Minutes
Get our beginner guide + new craft ideas weekly.
No spam. Unsubscribe anytime.
Did you complete this activity?
Related
You might also like

Popsicle Stick Rainbow Sun Catchers

Bunny Tail Cotton Ball Garland

Paper Roll Bunny Buddies

Puzzle Piece Picture Frames

Toilet Paper Roll Rocket Ships